

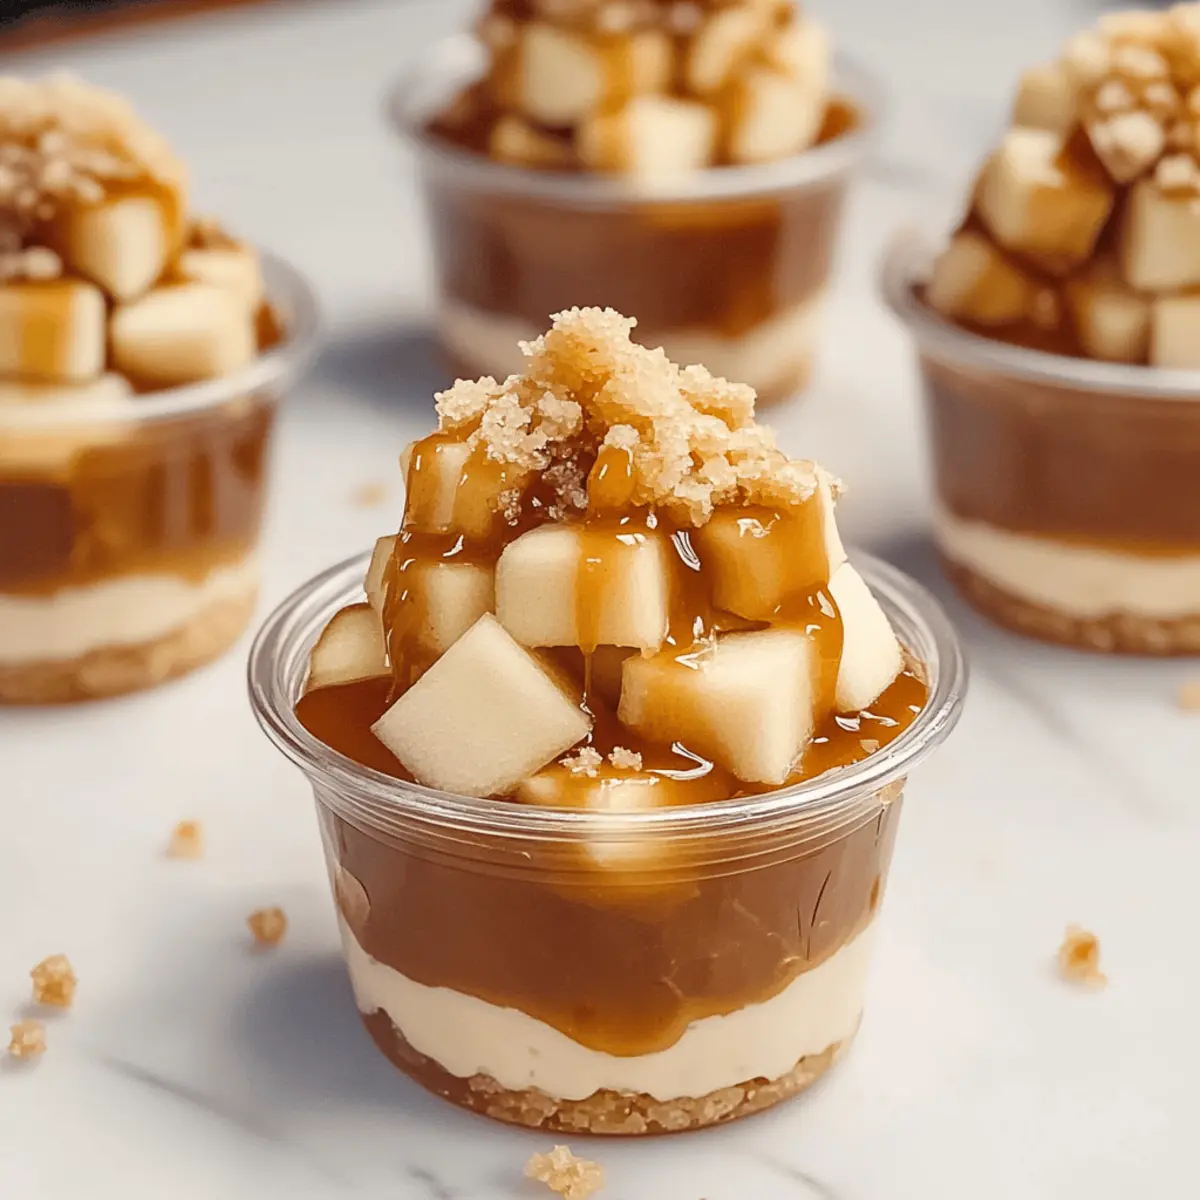
There’s something magical about the changing seasons, especially when it brings the warm, comforting aroma of spices wafting through the kitchen. These Mini Caramel Apple Dessert Cups capture all the essence of fall, showcasing the tartness of Granny Smith apples paired with the heavenly richness of salted caramel. This quick and simple dessert is a fantastic crowd-pleaser that’s not only no-bake but also perfect for making ahead of time, giving you more moments to savor with loved ones. Each layer offers a delightful crunch and creaminess, creating an irresistibly tempting treat that’s sure to brighten your dinner table. Ready to whip up a dessert that feels like a hug in a cup?

Why are these dessert cups a must-try?
Simplicity in Layers: This recipe is a breeze, offering a no-bake solution that requires minimal effort but delivers maximum flavor.
Crowd-Pleasing Delight: Ideal for gatherings, these Mini Caramel Apple Dessert Cups are sure to impress your guests with their beautiful presentation and delightful flavors.
Perfect for Fall: Embrace the autumn season with a dessert that highlights the tartness of Granny Smith apples combined with luscious salted caramel.
Make-Ahead Convenience: Prepare these cups in advance and store them in the fridge, making them perfect for busy days or spontaneous gets togethers.
Versatile Options: Feel free to play with ingredients—substitute vanilla wafers for gluten-free alternatives or add a scoop of ice cream for an extra treat—ensuring everyone can enjoy these delicious cups.
For more delicious fall-inspired desserts, check out our Oreo Cheesecake Dessert or try the refreshing Lemon Raspberry Dessert!
Mini Caramel Apple Dessert Cups Ingredients
For the Apple Filling
• Granny Smith apples – They provide a perfect tartness that balances the sweet caramel. Substitution: Use firm pears or peaches for a seasonal twist.
• Light brown sugar – Adds a rich depth and molasses flavor to the apples. Substitution: Dark brown sugar for a deeper flavor or coconut sugar for a healthier option.
• Salted butter – Creates creaminess in the apple mixture. Substitution: Unsalted butter if adjusting salt levels in the recipe.
• Ground cinnamon – Infuses warmth and sweetness. Optional: Nutmeg for an extra layer of flavor.
For the Crust
• Crushed vanilla wafers – This forms a sweet, crunchy base for the dessert cups. Substitution: Graham crackers for a different texture or gluten-free cookies for gluten-free adaptations.
• Salted butter – Binds the crumb mixture for a solid crust. Substitution: Unsalted butter for personal salt preference.
For the Pudding Layer
• Instant vanilla pudding mix – Creates a smooth, creamy texture that complements the layers. Substitution: Dairy-free pudding mix for a vegan option.
• Cold whole milk – Ensures the pudding is creamy and luscious. Substitution: Almond milk or soy milk for a dairy-free version.
• Cold heavy whipping cream – Whipped to add lightness and airiness. Substitution: Dairy-free whipped topping for a vegan dessert.
For the Topping
• Salted caramel sauce – Elevates the flavor and adds a sweet drizzle on top. Substitution: Homemade sauce for better control over sweetness.
• Extra caramel sauce – For generous drizzles over the dessert cups. Note: Ensure it complements the flavor without being overly sweet.
These Mini Caramel Apple Dessert Cups are not only a delicious showcase of fall flavors but also a treat everyone will adore!
Step‑by‑Step Instructions for Mini Caramel Apple Dessert Cups
Step 1: Prepare Apple Filling
In a large mixing bowl, combine diced Granny Smith apples with light brown sugar, 3 tablespoons of salted butter, and a dash of ground cinnamon. Toss until the apples are well-coated with the sugary mix. Let this sit for about 10–15 minutes, allowing the apples to soften slightly and absorb the sweet flavors, creating a fragrant filling to layer in your Mini Caramel Apple Dessert Cups.
Step 2: Make the Crust
In a separate bowl, mix the crushed vanilla wafers with melted salted butter until the mixture resembles wet sand. Use your fingers or a spatula to ensure the crumbs are fully coated. Let this buttery crumb mixture sit for about 5 minutes as it cools slightly; ensuring it holds together will give you a sturdy base for your dessert cups.
Step 3: Whisk Pudding
In another bowl, whisk together the instant vanilla pudding mix and cold whole milk until smooth and thickened, which should take about 2 minutes. The consistency should be creamy and free of lumps, forming the delightful layer that complements the crunchy crust and tart apple filling in your Mini Caramel Apple Dessert Cups.
Step 4: Whip Cream
In a chilled mixing bowl, pour in the cold heavy whipping cream. Using an electric mixer, whip the cream on medium speed until soft peaks form, about 2–3 minutes. Be cautious not to overwhip, as you want a light, airy texture that will beautifully fold into the pudding, enhancing the overall creaminess of the dessert layers.
Step 5: Combine Layers
Gently fold the whipped cream into the pudding mixture using a spatula until fully combined, and the mixture looks smooth and fluffy. This delicious whipped pudding will create a heavenly layer in your Mini Caramel Apple Dessert Cups, blending perfectly with the apple filling and the crunchy crust.
Step 6: Assemble Cups
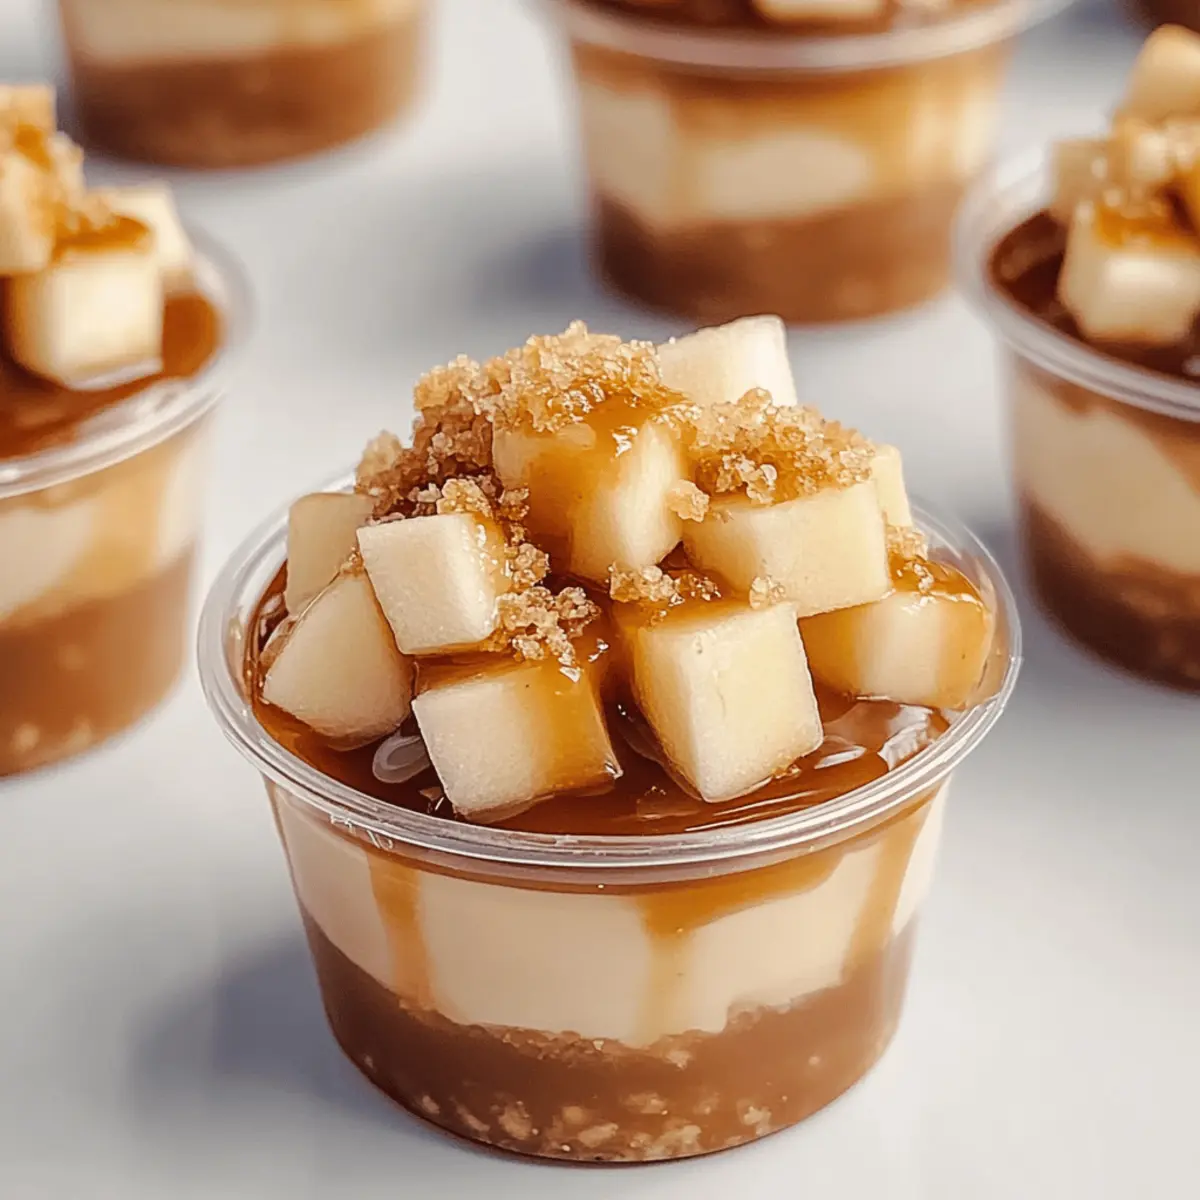
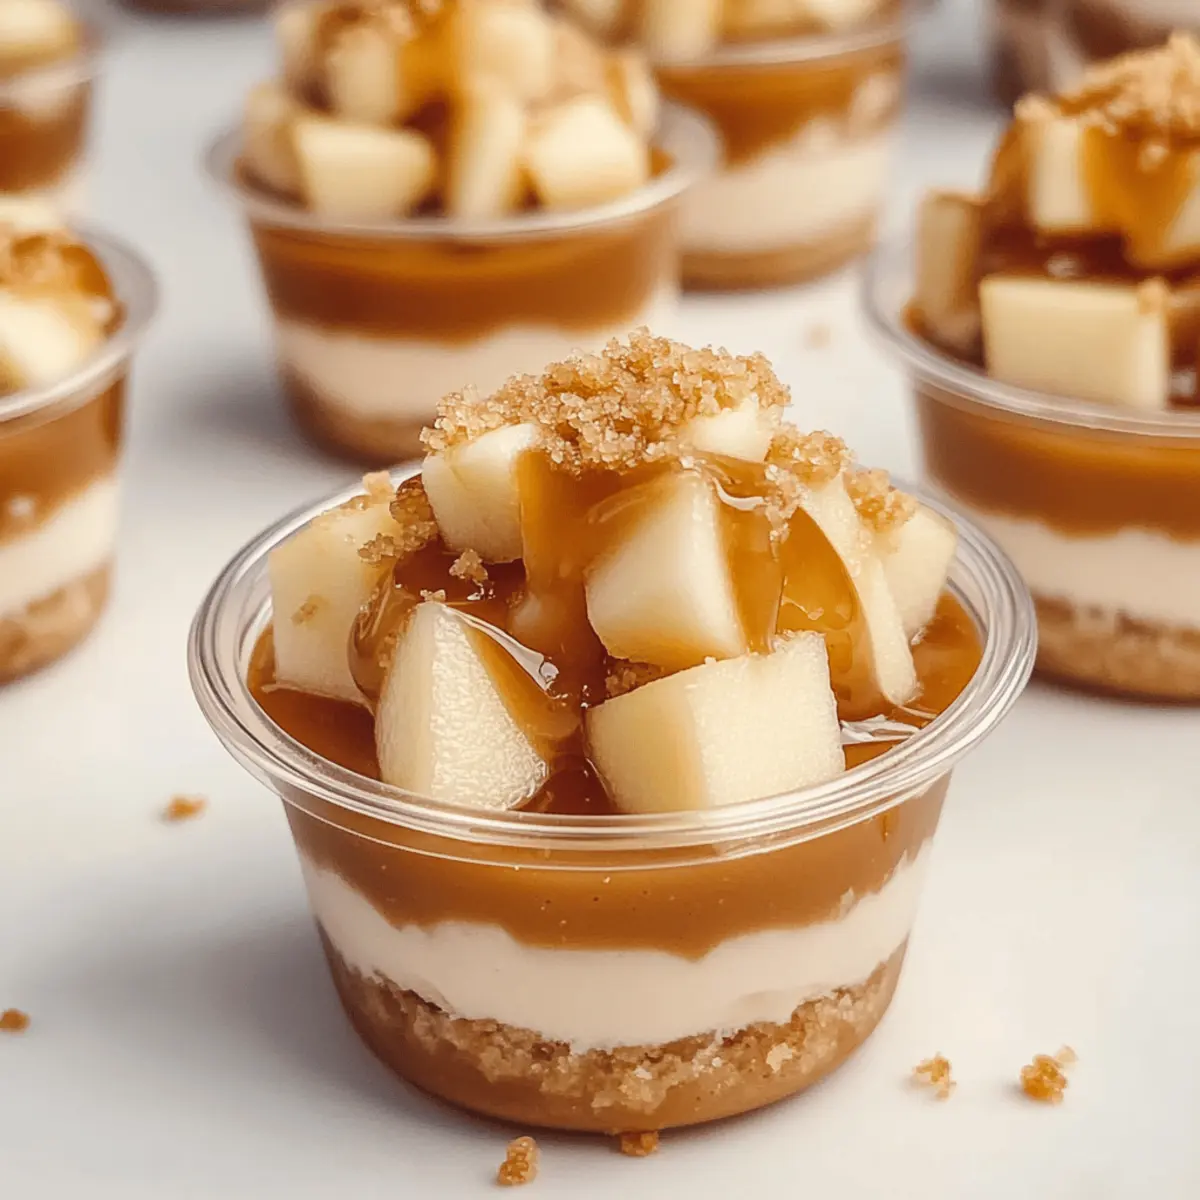
Start layering your dessert cups: spoon a generous amount of the apple filling at the bottom, followed by a layer of the crumb crust, then top with the creamy pudding. Repeat the layering until your cups are filled to the top, leaving a little space for extra caramel drizzle, adding a delicious touch to each Mini Caramel Apple Dessert Cup.
Step 7: Drizzle Caramel
Once the cups are assembled, generously drizzle salted caramel sauce over the top of each dessert cup for that extra touch of sweetness and richness. Cover the cups with plastic wrap and refrigerate for at least 1 hour. Chilling allows the flavors to meld wonderfully, making each bite of the Mini Caramel Apple Dessert Cups an invigorating experience.
How to Store and Freeze Mini Caramel Apple Dessert Cups
- Fridge: Keep assembled Mini Caramel Apple Dessert Cups in the refrigerator for up to 3 days. Ensure they are covered with plastic wrap to maintain freshness and prevent the crust from getting soggy.
- Freezer: For longer storage, freeze the apple filling and pudding layers separately in airtight containers. When ready to serve, thaw in the fridge overnight and assemble just before enjoying.
- Reheating: There’s no need to reheat these dessert cups, as they are best served chilled. If needed, allow them to sit at room temperature for a few minutes for easier eating.
- Make-Ahead Tip: Prepare individual components ahead of time and store them separately; this allows you to quickly assemble your Mini Caramel Apple Dessert Cups when it’s time to serve!
Expert Tips for Mini Caramel Apple Dessert Cups
-
Chill Time Matters: Refrigerate the dessert cups for at least 1 hour before serving. This allows flavors to meld and the layers to set beautifully.
-
Avoid Gummy Crust: Assemble the cups just before serving to keep the crust crunchy and prevent it from becoming soggy.
-
Gentle Whipping: Be cautious not to overwhip the cream. Stop when soft peaks form for the lightest, fluffiest pudding layer in your Mini Caramel Apple Dessert Cups.
-
Balance Sweetness: Adjust the sweetness by varying the amount of caramel sauce or choose sugar substitutes if desired. Taste as you go to achieve the perfect balance.
-
Layer Smartly: Use clear cups or jars to showcase the beautiful layers, making the presentation as delightful as the taste.
Mini Caramel Apple Dessert Cups Variations
Feel free to make these delightful dessert cups your own with these fun twists and substitutions!
-
Nut-Free: Use crushed Graham crackers instead of vanilla wafers for a deliciously crunchy base. It’s an easy change that accommodates nut allergies without sacrificing taste.
-
Dairy-Free: Substitute whole milk with coconut milk and use a dairy-free whipped topping for a vegan option. This way, everyone can enjoy a taste of fall without compromising their dietary choices.
-
Sugar-Free: Opt for sugar substitutes in place of brown sugar and caramel. Sweetener alternatives can keep your dessert deliciously indulgent while being mindful of sugar intake.
-
Flavor Twists: Add a splash of lemon juice or a pinch of cayenne for unexpected flavor notes. This creates a unique zing that reinforces the autumn vibes.
-
Seasonal Swaps: Instead of apples, swap in fresh summer peaches for a light and fruity twist. This variation gives a new season a shout-out while keeping the flavor profile fresh and exciting.
-
Chocolate Lovers: Mix in mini chocolate chips with the pudding layer. This little addition punctuates each cup with a delightful surprise of richness.
-
Extra Crunch: Top each cup with a sprinkle of toasted nuts or granola for added texture. This not only enhances the crunch, but it elevates the presentation beautifully, too!
For even more tempting dessert ideas, consider serving your Mini Caramel Apple Dessert Cups alongside a delightful Vanilla Bean Dessert for a classic touch or pair with our decadent Chocolate Lava Cakes Dessert for a truly sweet finale!
Make Ahead Options
These Mini Caramel Apple Dessert Cups are a fantastic choice for meal prep enthusiasts! You can prepare the apple filling and crust up to 24 hours in advance by storing them separately in the refrigerator. To maintain the quality, cover the apple mixture with plastic wrap to prevent browning and keep the crust sealed in an airtight container to retain its crunch. The creamy pudding layer can also be made ahead of time; simply refrigerate once prepared. When you’re ready to serve, layer the components together, drizzle with salted caramel, and chill for an additional hour before enjoying this delightful dessert. It’s the perfect way to save time and enjoy a cozy fall treat!
What to Serve with Mini Caramel Apple Dessert Cups?
Picture your cozy gathering enhanced with delectable flavors and textures that elevate your dessert experience, creating lasting memories.
-
Creamy Vanilla Ice Cream: A scoop of vanilla ice cream adds delightful creaminess and balances the sweetness of the dessert, making every bite irresistible.
-
Chopped Pecans: These crunchy nuts introduce an earthy flavor, enhancing the texture while complementing the caramel’s richness beautifully.
-
Warm Cinnamon Rolls: Soft and buttery cinnamon rolls provide a comforting warmth that pairs perfectly with the autumnal notes of the dessert cups.
-
Caramel Drizzle Coffee: A coffee solution drizzled with caramel adds a hint of sophistication, echoing the dessert’s flavors and boosting your cozy vibe.
-
Fresh Apple Slices: Serve with crisp apple slices sprinkled with a pinch of cinnamon for a refreshing contrast that highlights the apple flavor throughout.
-
Maple Pecan Oatmeal: This hearty breakfast option brings a wholesome touch while matching the sweet and nutty flavors of your dessert cups.
-
Ginger Ale: A bubbly ginger ale adds a refreshing sparkle to your meal, cutting through the sweetness and refreshing the palate between bites.
-
Pumpkin Pie: Embrace the fall spirit with a slice of pumpkin pie, offering spice and depth that harmonizes with the flavors of the Mini Caramel Apple Dessert Cups.
-
Chocolate Chip Cookies: Soft, chewy cookies provide a familiar comfort and texture contrast, tempting the dessert lovers in your group with their nostalgic charm.
Mini Caramel Apple Dessert Cups Recipe FAQs
How do I choose the right apples for this recipe?
Absolutely! For this recipe, Granny Smith apples are perfect because they provide a lovely tartness that beautifully balances the richness of caramel. If you can’t find them, firm pears or peaches can make a delightful seasonal twist while maintaining a similar texture.
How long can I store Mini Caramel Apple Dessert Cups in the fridge?
You can store assembled Mini Caramel Apple Dessert Cups in the refrigerator for up to 3 days. Make sure they are covered with plastic wrap or in an airtight container to keep them fresh and prevent the crust from becoming soggy.
Can I freeze the components of this dessert?
Yes, you can! To freeze, separate the components: place the apple filling and pudding layers in airtight containers. They can be frozen for up to 3 months. When you’re ready to serve, simply thaw them in the fridge overnight and assemble the cups right before enjoying.
What should I do if my whipped cream turns grainy?
Very good question! If your whipped cream turns grainy, it may be a sign that it was overwhipped. To prevent this, whip the cream at medium speed just until soft peaks form, which usually takes about 2 to 3 minutes. If it does become grainy, you can try to salvage it by gently folding in a little more cold whipped cream to lighten the texture.
Are there any allergy considerations for this recipe?
It’s essential to be mindful of allergies! This recipe contains dairy and gluten. To make it gluten-free, substitute vanilla wafers with gluten-free cookies, and for dairy-free options, use almond milk and a dairy-free whipped topping. Always check the labels of your ingredients to ensure they meet dietary needs.
Can I make these dessert cups ahead of time?
Absolutely! You can prepare the individual components like the apple filling, pudding, and crust layers a day in advance. Store them separately in the refrigerator, and when it’s time to serve, simply assemble the Mini Caramel Apple Dessert Cups right before your guests arrive for maximum freshness!
Mini Caramel Apple Dessert Cups for a Cozy Fall Treat
Ingredients
Equipment
Method
- In a large mixing bowl, combine diced Granny Smith apples with light brown sugar, 3 tablespoons of salted butter, and a dash of ground cinnamon. Toss until the apples are well-coated with the sugary mix. Let this sit for about 10–15 minutes.
- In a separate bowl, mix the crushed vanilla wafers with melted salted butter until the mixture resembles wet sand. Let this buttery crumb mixture sit for about 5 minutes as it cools slightly.
- In another bowl, whisk together the instant vanilla pudding mix and cold whole milk until smooth and thickened, which should take about 2 minutes.
- In a chilled mixing bowl, pour in the cold heavy whipping cream. Using an electric mixer, whip the cream on medium speed until soft peaks form, about 2–3 minutes.
- Gently fold the whipped cream into the pudding mixture using a spatula until fully combined.
- Start layering your dessert cups: spoon a generous amount of the apple filling at the bottom, followed by a layer of the crumb crust, then top with the creamy pudding.
- Once the cups are assembled, generously drizzle salted caramel sauce over the top of each dessert cup. Cover the cups with plastic wrap and refrigerate for at least 1 hour.