

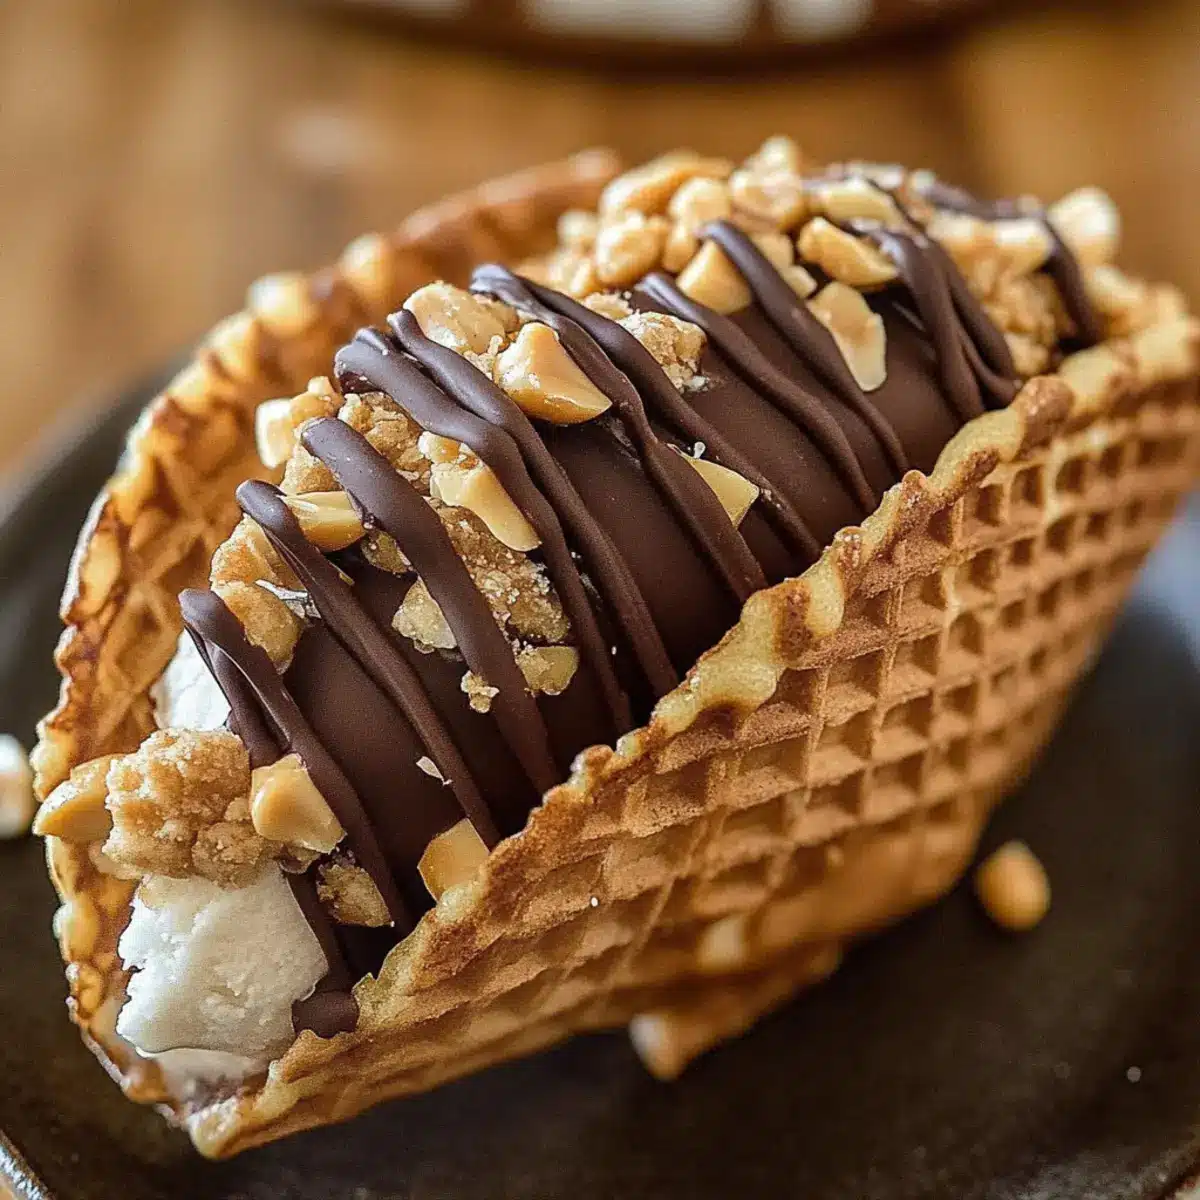
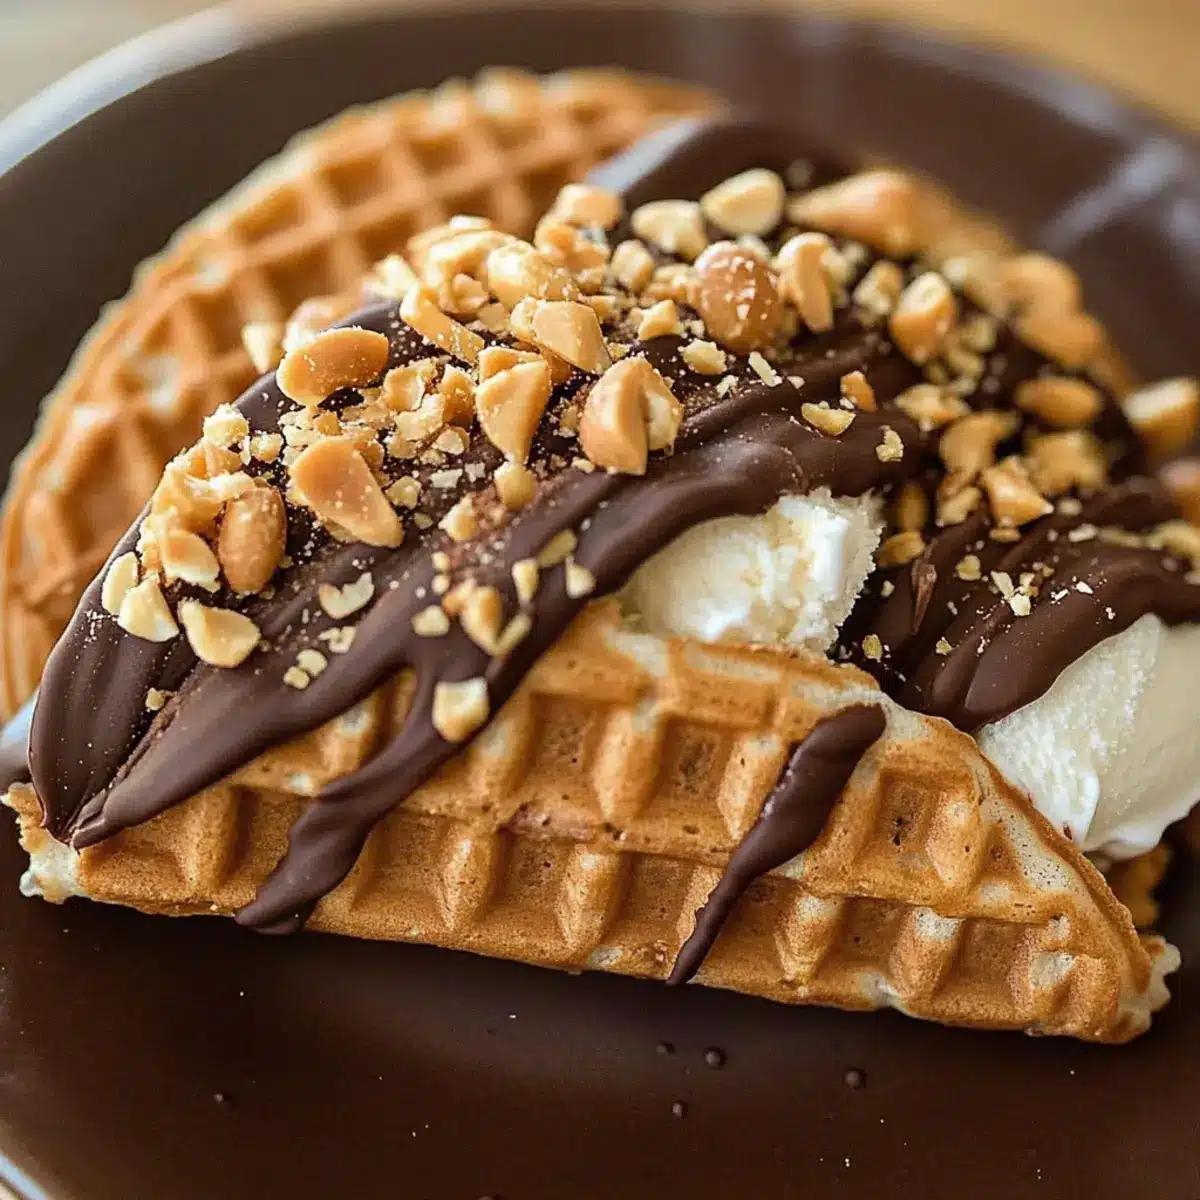
As I sat on the back porch with a scoop of vanilla ice cream, I had a sudden craving for those delightful summer treats I adored as a child—Homemade Choco Tacos. These scrumptious bites combine a crispy waffle shell with creamy ice cream, coated in rich chocolate and a sprinkle of crunchy peanuts. With their no-bake nature and quick prep time, you can whip up these nostalgic confections in no time! They’re perfect for cooling off on hot days or impressing friends at summer gatherings. So, are you ready to dive into a world of crispy, chocolatey goodness? Let’s make some delicious memories together!
Why Are Homemade Choco Tacos a Must-Try?
Nostalgic flavors come alive with every bite as these Homemade Choco Tacos transport you back to carefree summer days. Simplicity shines through, allowing anyone to create this no-bake dessert with ease. Customizable options cater to all tastes, whether you prefer classic vanilla or daring chocolate ice cream. Perfect for sharing, these tacos are sure to impress at any summer gathering, much like our delightful Soft Chewy Chocolate cookies. Crowd-pleasing and fun to prepare, you’ll find this treat perfect for cooling off or making memorable moments with friends and family!
Homemade Choco Tacos Ingredients
• Get ready to savor each layer of deliciousness with these Homemade Choco Tacos!
For the Taco Shell
- Waffle Cones – Build a perfect crispy shell; slightly dampen to mold effectively.
For the Filling
- Vanilla Ice Cream – Creamy goodness awaits inside; swap for dairy-free ice cream for a vegan treat.
For the Chocolate Coating
- Chocolate Chips – Melt for that luscious dip; dark chocolate offers a deeper flavor, while milk chocolate adds sweetness.
For the Topping
- Peanuts (or Sprinkles) – Crunchy bits for extra texture; feel free to use your favorite nuts or omit for nut-free options.
Step‑by‑Step Instructions for Homemade Choco Tacos
Step 1: Prepare Waffle Cones
Start by slightly dampening the waffle cones using a damp paper towel, making them pliable enough to mold. Carefully press the cones into a taco shape, ensuring they hold their form without cracking. Set them aside on a baking sheet lined with parchment paper as you get ready to fill them with luscious vanilla ice cream.
Step 2: Fill with Ice Cream
Scoop generous amounts of vanilla ice cream into each taco shell, pressing gently to ensure they’re filled to the brim without overflowing. Aim for a nice dome shape on top of your cones, as this gives the final homemade Choco Tacos a delightful and abundant appearance. You may need to work quickly to avoid the ice cream melting!
Step 3: Melt the Chocolate
In a microwave-safe bowl, combine chocolate chips and melt them in 30-second intervals at medium heat, stirring between each interval until smooth and fully melted. Take care not to overheat the chocolate; a velvety texture is key for coating the tacos evenly. If desired, add a teaspoon of coconut oil for a even creaminess.
Step 4: Dip in Chocolate
Once your chocolate is melted and silky, gently dip each filled taco shell into the chocolate, ensuring an even coating over the ice cream and cone. Lift the taco out with a fork, letting excess chocolate drip back into the bowl, then place it back on the parchment paper for the chocolate to set.
Step 5: Sprinkle with Toppings
While the chocolate is still warm, generously sprinkle crushed peanuts or colorful sprinkles onto the tacos. This not only adds texture but also enhances their visual appeal. Make sure to do this quickly, as the chocolate will set as it cools, making it harder for the toppings to stick.
Step 6: Freeze
Carefully transfer your assembled Homemade Choco Tacos to the freezer and allow them to set for at least 30-60 minutes. This will ensure the chocolate coating hardens fully, providing a delightful crunch, and the ice cream firms up, making each luscious bite a refreshing treat on a hot day.
Tips for the Best Homemade Choco Tacos
Perfect Shells: Ensure waffle cones are slightly damp before molding. This helps prevent cracking and makes shaping easier.
Ice Cream Choice: For a smoother filling, use slightly softened vanilla ice cream; it’ll fill the taco shell better without breaking apart.
Melted Chocolate: Achieve a silky coating by melting chocolate chips gently. Remember to stir well; overheating can ruin the texture, making it difficult to dip the tacos.
Timely Toppings: Sprinkle crushed peanuts or toppings while the chocolate is still warm. This ensures they adhere properly and enhances the overall crunch of your homemade Choco Tacos.
Storage Tips: Freeze any leftovers in an airtight container to keep them fresh and delicious for up to two weeks.
What to Serve with Homemade Choco Tacos?
Create the perfect summer dessert spread with these delightful combinations.
-
Creamy Milkshake: A rich vanilla or chocolate milkshake pairs beautifully, balancing the sweet crunch of the Choco Taco and enhancing dessert vibes.
-
Fresh Berries: Juicy strawberries or blueberries add a burst of color and freshness, cutting through the richness while adding a delightful tartness.
-
Chocolate Sauce Drizzle: A simple drizzle of warm chocolate sauce will elevate your taco experience; it’s a fun way to add extra chocolate love!
-
Homemade Whipped Cream: Fluffy whipped cream brings lightness to the dessert. Serve it on the side for a dipping option that kids and adults alike will enjoy.
-
Coconut Sorbet: This light and refreshing sorbet offers a tropical twist, perfect for cooling off on a hot day while complementing the Choco Taco’s flavors.
-
Chilled Lemonade: A zesty, refreshing lemonade serves as a perfect palate cleanser; its acidity beautifully balances the sweetness of the tacos.
-
Salted Caramel Sauce: Drizzling a bit of salted caramel adds a decadent touch—its sweet and salty contrast enhances your treat’s indulgence.
-
Nutty Trail Mix: A crunchy mix of nuts and dried fruits can serve as a fun and healthy sidekick, offering a texture contrast and snacking option for guests.
-
Chocolate Chip Cookies: For ultimate indulgence, serve your tacos alongside warm, gooey chocolate chip cookies; two desserts are better than one!
Make Ahead Options
These Homemade Choco Tacos are perfect for meal prep, allowing you to enjoy delicious treats with minimal effort on busy days! You can prepare the waffle cones and fill them with ice cream up to 24 hours in advance; simply mold the cones and fill them, then wrap each taco individually in plastic wrap to maintain freshness. If you’d like, you can also melt the chocolate and store it in an airtight container at room temperature for a quicker dipping process later. When you’re ready to serve, dip the filled tacos in the chocolate, add your desired toppings, and freeze for another 30-60 minutes until set. This strategy ensures your Homemade Choco Tacos remain just as delightful and fresh when it’s time to indulge!
Storage Tips for Homemade Choco Tacos
Freezer: Keep your Homemade Choco Tacos in an airtight container in the freezer for up to two weeks. This will preserve their crunchiness and creamy filling for a delightful treat anytime.
Wrap Individually: To prevent them from sticking together and maintain texture, wrap each taco individually in plastic wrap before freezing.
Thawing: When ready to enjoy, simply remove from the freezer and let them thaw at room temperature for about 5-10 minutes for easy biting.
Avoid Fridge Storage: It’s best not to store these in the fridge, as the moisture can make the waffle shells soggy and lose their delightful crunch.
Homemade Choco Tacos Variations & Substitutions
Feel free to explore these variations to make your Homemade Choco Tacos truly your own, adding delightful twists to each bite!
-
Dairy-Free: Use coconut or almond milk ice cream to keep it creamy without the dairy, perfect for vegan friends.
-
Extra Crunch: Swap out peanuts for crushed pretzels or granola for a salty-sweet contrast that adds exciting texture.
-
Flavored Ice Cream: Try swapping in strawberry or coffee ice cream for a delightful twist that can change the entire experience. Each flavor can make the tacos feel brand new!
-
Chocolate Mix: Experiment with white chocolate for a sweeter coating, or a mix of dark and milk chocolate for rich and sweet balance.
-
Colorful Sprinkles: For a festive touch, use holiday-themed sprinkles or chocobo dust instead! They not only look fun but also enhance the visual appeal.
-
Topping Variety: Replace crushed nuts with mini chocolate chips or toasted coconut for a deliciously different topping option.
-
Heat it Up: Add a dash of cinnamon or cayenne pepper to the melted chocolate for a little heat and eye-opening spiciness!
-
Caramel Drizzle: For those with a sweet tooth, consider drizzling warm caramel over the chocolate coating before it sets for a luscious layer of flavor.
These variations empower your creativity! And while you’re in the kitchen, why not pair your delectable tacos with a side of Chocolate Lava Cakes for an indulgent dessert spread at your next gathering?
Homemade Choco Tacos Recipe FAQs
How do I select the best waffle cones for my Homemade Choco Tacos?
When choosing waffle cones, look for ones that are intact with no cracks, as damaged cones can lead to a messy filling situation. I recommend selecting cones that feel sturdy and slightly dampen them before molding to prevent cracking while shaping them into tacos.
What is the best way to store Homemade Choco Tacos, and how long do they last?
Store your Homemade Choco Tacos in an airtight container in the freezer for up to two weeks. This helps preserve their crunch and creamy texture. To prevent them from sticking together, individually wrap each taco in plastic wrap before placing them in the container.
Can I freeze Homemade Choco Tacos? If so, how?
Absolutely! To freeze your Homemade Choco Tacos, first assemble them as per the recipe, ensuring they are completely cooled and the chocolate has set. Place them on a baking sheet lined with parchment paper and freeze them for about 30 minutes until firm. Once they’re frozen, wrap each taco in plastic wrap and transfer them to an airtight container for up to 3 months.
What should I do if my chocolate coating is not smooth?
If your chocolate coating isn’t smooth, it may have been overheated. To fix this, try adding a teaspoon of coconut oil while melting the chocolate, stirring until fully combined to achieve a shiny and smooth finish. If this does not help, consider remelting the chocolate on low heat, stirring continuously to regain that velvety texture.
Are Homemade Choco Tacos suitable for people with nut allergies?
Yes, you can easily make Homemade Choco Tacos nut-free! Simply omit the peanuts or any other nuts from the topping. You can replace them with crushed cookies, fruit pieces, or even colorful sprinkles for added fun without the nut allergens. Always double-check your ice cream and chocolate for any hidden allergens!
What’s a good ice cream substitute for a dairy-free option?
If you’re looking to make your Homemade Choco Tacos dairy-free, I recommend using almond, coconut, or oat milk-based ice creams. These alternatives provide similar creaminess and flavor without dairy. Just make sure to check the label for ingredients to avoid any unwanted allergens!
Homemade Choco Tacos: Your New Favorite Summer Treat
Ingredients
Equipment
Method
- Start by slightly dampening the waffle cones using a damp paper towel, making them pliable enough to mold. Carefully press the cones into a taco shape, ensuring they hold their form without cracking. Set them aside on a baking sheet lined with parchment paper as you get ready to fill them with luscious vanilla ice cream.
- Scoop generous amounts of vanilla ice cream into each taco shell, pressing gently to ensure they're filled to the brim without overflowing. Aim for a nice dome shape on top of your cones, as this gives the final homemade Choco Tacos a delightful and abundant appearance. You may need to work quickly to avoid the ice cream melting!
- In a microwave-safe bowl, combine chocolate chips and melt them in 30-second intervals at medium heat, stirring between each interval until smooth and fully melted. Take care not to overheat the chocolate; a velvety texture is key for coating the tacos evenly. If desired, add a teaspoon of coconut oil for an even creaminess.
- Once your chocolate is melted and silky, gently dip each filled taco shell into the chocolate, ensuring an even coating over the ice cream and cone. Lift the taco out with a fork, letting excess chocolate drip back into the bowl, then place it back on the parchment paper for the chocolate to set.
- While the chocolate is still warm, generously sprinkle crushed peanuts or colorful sprinkles onto the tacos. This not only adds texture but also enhances their visual appeal. Make sure to do this quickly, as the chocolate will set as it cools, making it harder for the toppings to stick.
- Carefully transfer your assembled Homemade Choco Tacos to the freezer and allow them to set for at least 30-60 minutes. This will ensure the chocolate coating hardens fully, providing a delightful crunch, and the ice cream firms up, making each luscious bite a refreshing treat on a hot day.