

As I sliced into the golden-brown katsu, the crunch resonated in the quiet kitchen, and I could barely contain my excitement—this was my crispy tofu katsu, and it was time to dig in! Inspired by traditional Japanese fare, this plant-based masterpiece brings the comfort and flavor of the beloved meat version right to your table. With versatile cooking methods like deep-frying, air-frying, and oven-baking, you can whip up this delicious dish in under an hour—perfect for those busy weeknights when you crave something hearty yet healthy. Not only does this recipe serve as a delightful high-protein meal, but it’s also a fabulous gateway for anyone looking to venture into vegan cooking. So, who’s ready to transform some simple tofu into a satisfying centerpiece? Let’s get started!
Why is Tofu Katsu a Must-Try?
Unique Twist: Tofu katsu transforms a simple ingredient into a gourmet meal that even non-vegans will love.
Versatile Cooking: Choose your favorite preparation method—deep-fried for crunch, air-fried for a healthier option, or oven-baked for convenience.
Flavor-Packed: The robust panko coating paired with tangy tonkatsu sauce creates a delicious flavor profile that’s sure to please your palate.
Quick to Prepare: Ready in under an hour, it’s the perfect solution for busy weeknights when you want a fulfilling dinner without the fuss.
Crowd-Pleaser: Whether you’re entertaining or cooking for a family, this dish invites everyone to the table with its inviting presentation and irresistible crunch. Be sure to explore my tips on making the perfect katsu sando or learn how to make a delightful vegan ramen featuring this crispy treat!
Tofu Katsu Ingredients
Here’s everything you need to whip up your own crispy tofu katsu masterpiece!
For the Coating
- Tofu – The main source of protein; opt for firm or extra-firm for the best texture.
- All-Purpose Flour – Essential for dredging and helping the coating stick; you can use gluten-free flour as a substitute.
- Potato Starch – Adds an extra crunch when frying; feel free to skip if desired crunchiness is not a priority.
- Aquafaba/Yogurt (as Egg Replacer) – Binds the panko to the tofu; choose aquafaba for a light touch or yogurt for a tangy flavor.
- Panko Breadcrumbs – Provides that signature crunch; go for authentic Japanese panko for optimal crispiness.
For Frying
- Oil – Choose a neutral oil with a high smoke point for the frying method; it’s key for that golden finish!
Now you’re ready to dive into the delightful world of tofu katsu! Whether you opt for deep-frying, air-frying, or oven-baking, each method produces a delectable dish that’s hard to resist.
Step‑by‑Step Instructions for Crispy Tofu Katsu
Step 1: Prepare the Tofu
Start by pressing the firm or extra-firm tofu to remove excess moisture, which is essential for achieving that crispy texture in your tofu katsu. Wrap the tofu in a clean kitchen towel and place a heavy object on top for about 15 minutes. This will help ensure it fries evenly and doesn’t splatter.
Step 2: Set Up Dredging Station
While the tofu is being pressed, set up three shallow dishes for your dredging station. Fill one dish with all-purpose flour, the second with aquafaba or yogurt, and the third with panko breadcrumbs. This triad of textures is crucial for creating a deliciously crispy coating that clings perfectly to your sliced tofu katsu.
Step 3: Dredge Tofu Slices
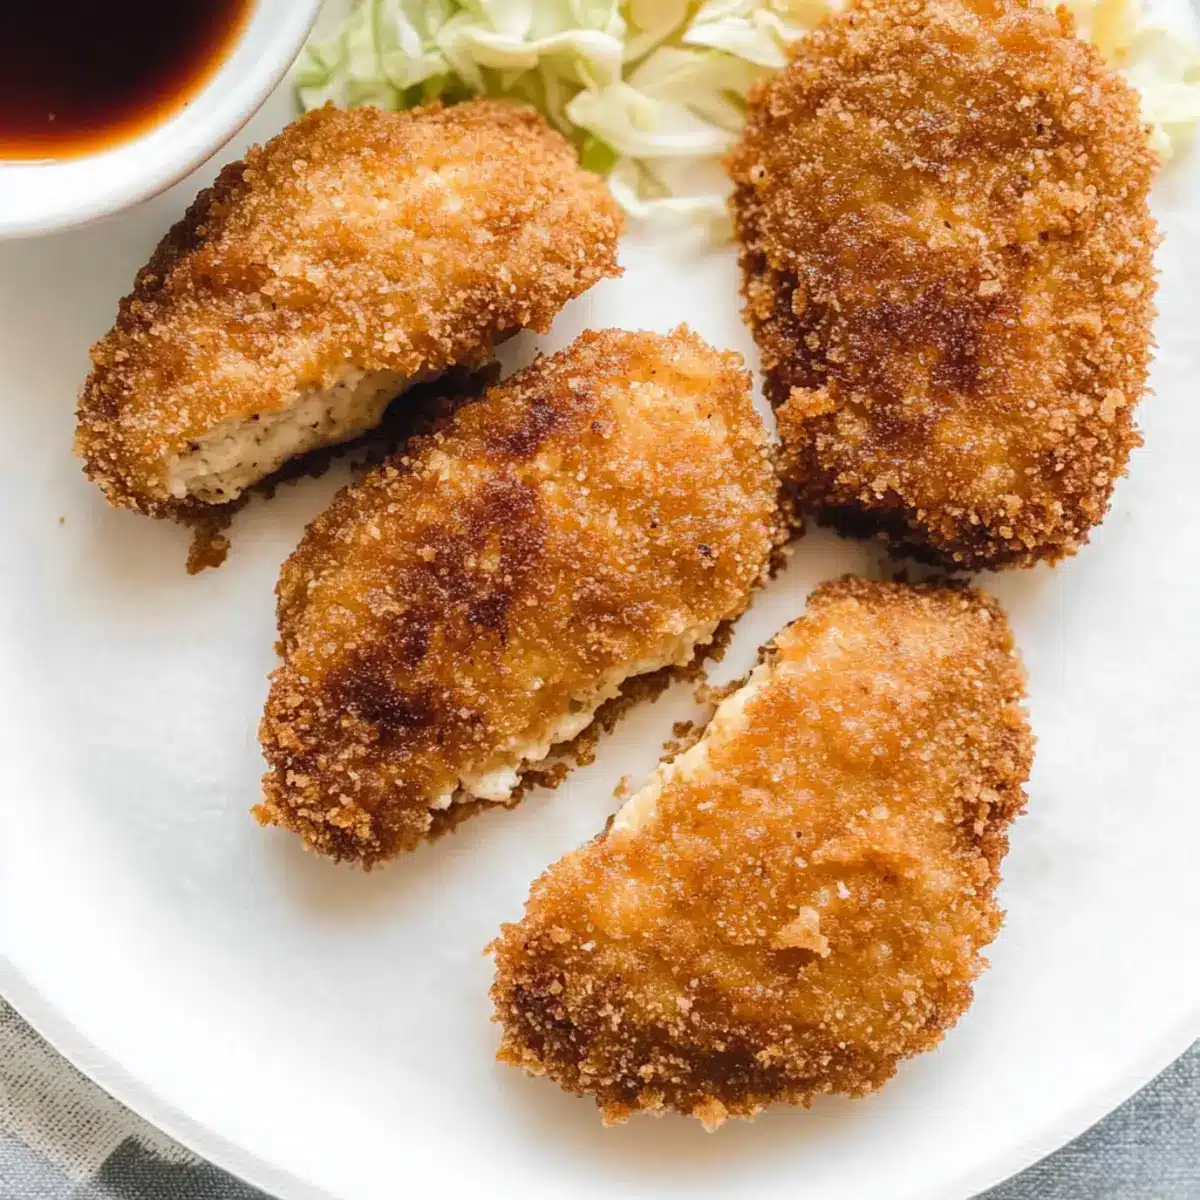
Once the tofu is pressed and drained, slice it into even pieces, about 1-inch thick. Coat each slice in flour, shaking off any excess, then dip it into the aquafaba or yogurt to ensure it’s fully covered. Finally, roll each piece in the panko breadcrumbs, pressing gently to adhere the coating. This layering is key to achieving that coveted crunch, so take your time!
Step 4: Choose Your Cooking Method
Now, decide on your cooking method for the tofu katsu. For deep-frying, heat a few inches of neutral oil in a pot over medium-high heat until it reaches 350°F (175°C). Alternatively, you can preheat your air fryer to 400°F (200°C) or your oven to 400°F (200°C) if you prefer a healthier option. Each method has its benefits, so pick what suits your cooking style!
Step 5: Cook the Tofu Katsu
If deep-frying, carefully add the breaded tofu slices to the hot oil, frying for about 3-5 minutes per side until golden brown and crispy. For air frying, place the coated tofu in the basket and cook for 10-12 minutes, flipping halfway through. If baking, arrange the tofu on a lined baking sheet and cook for 15-20 minutes, flipping once for even crispiness.
Step 6: Serve Your Tofu Katsu
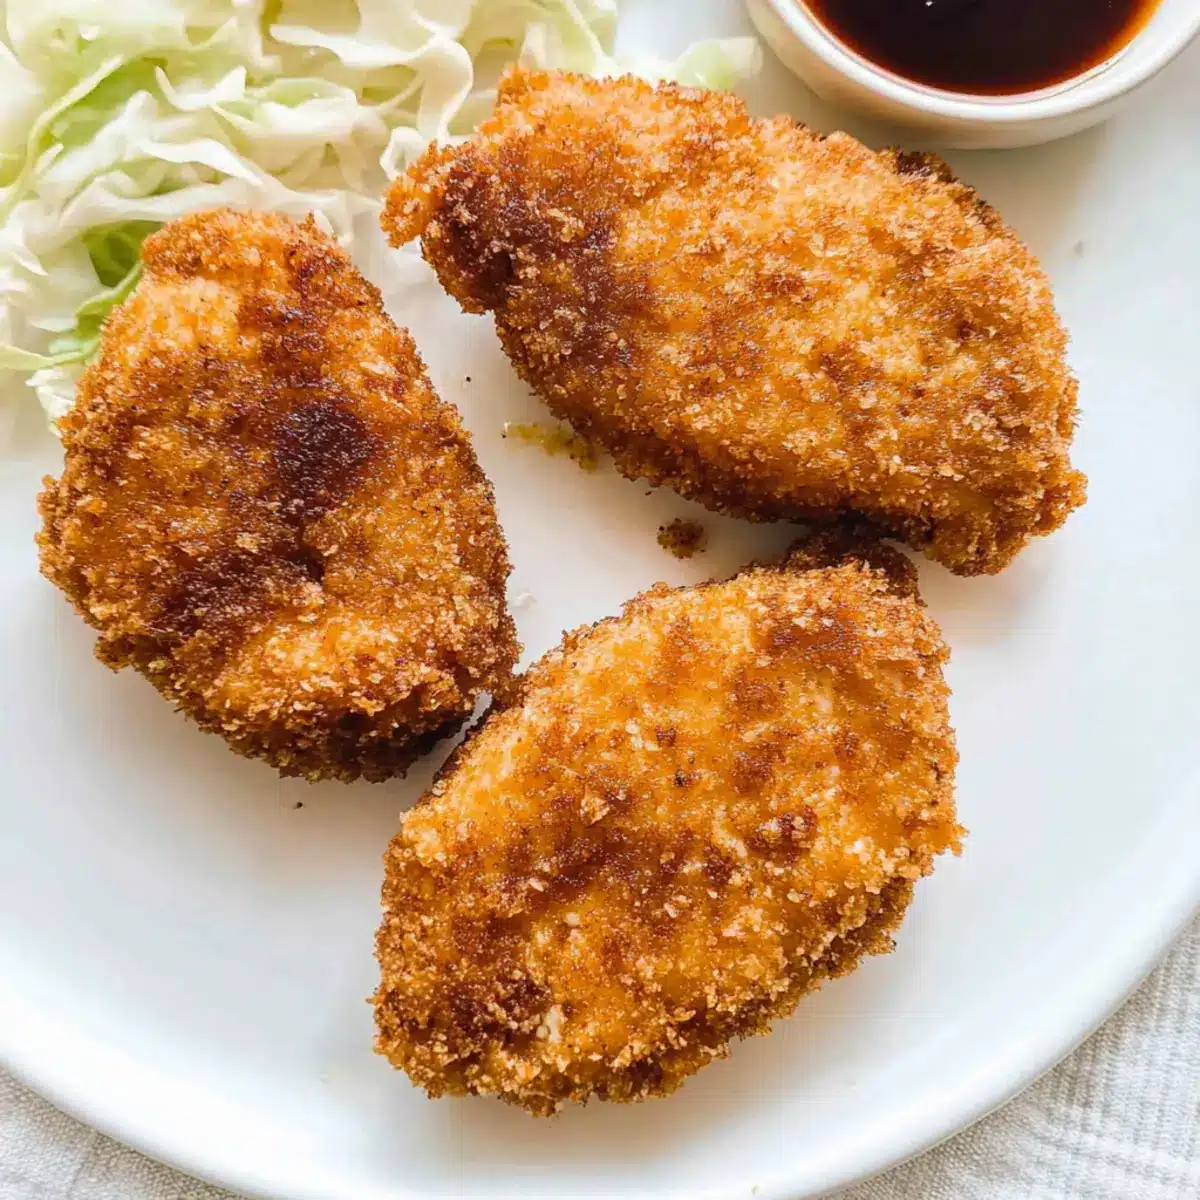
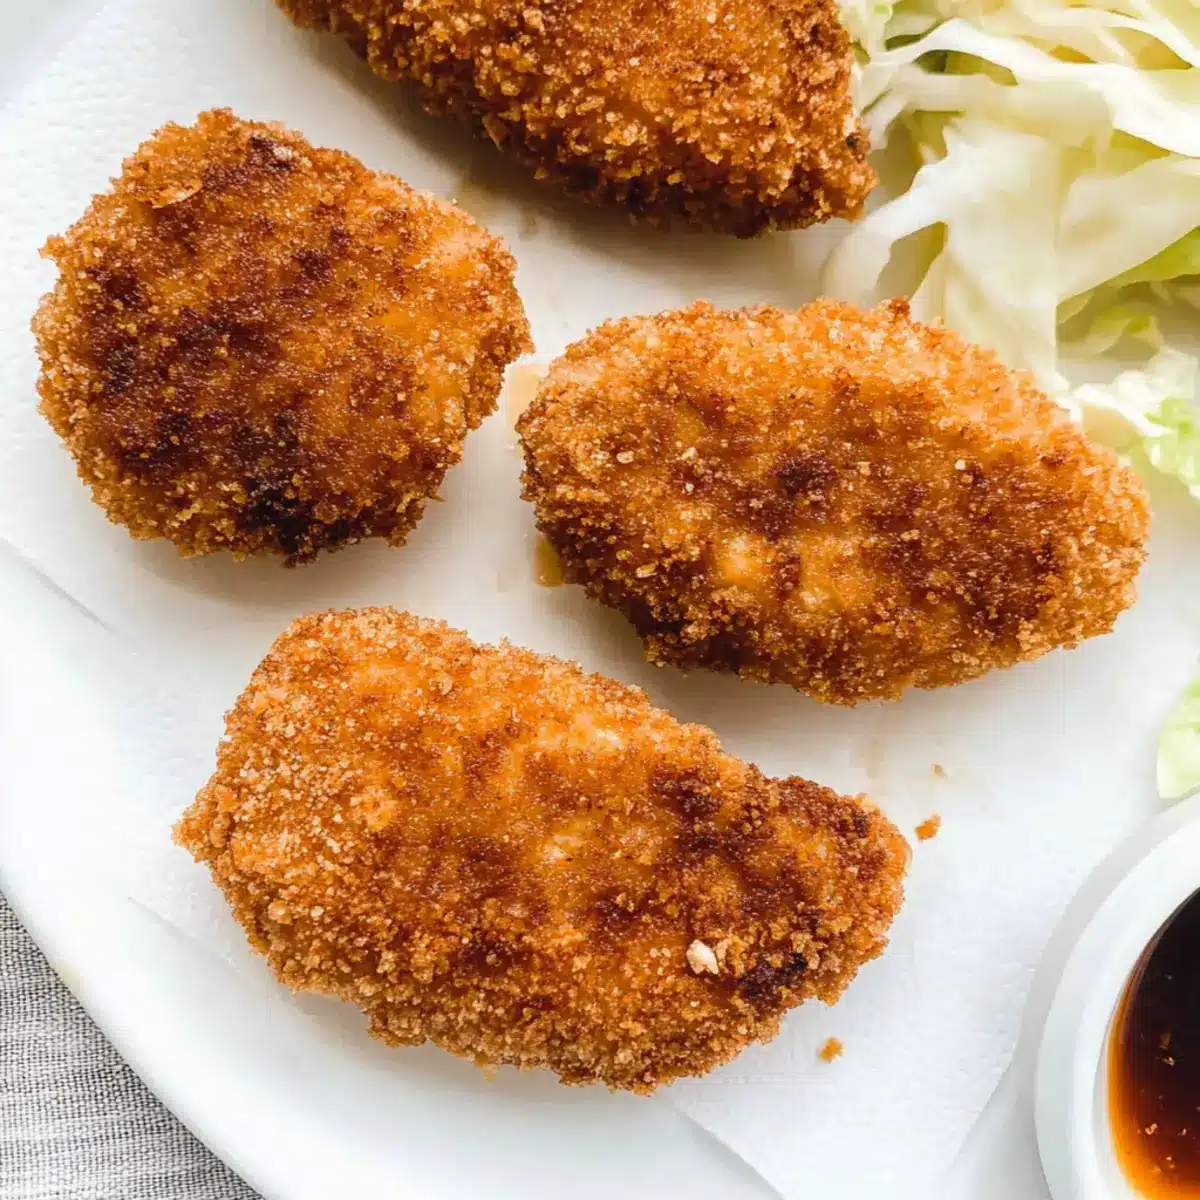
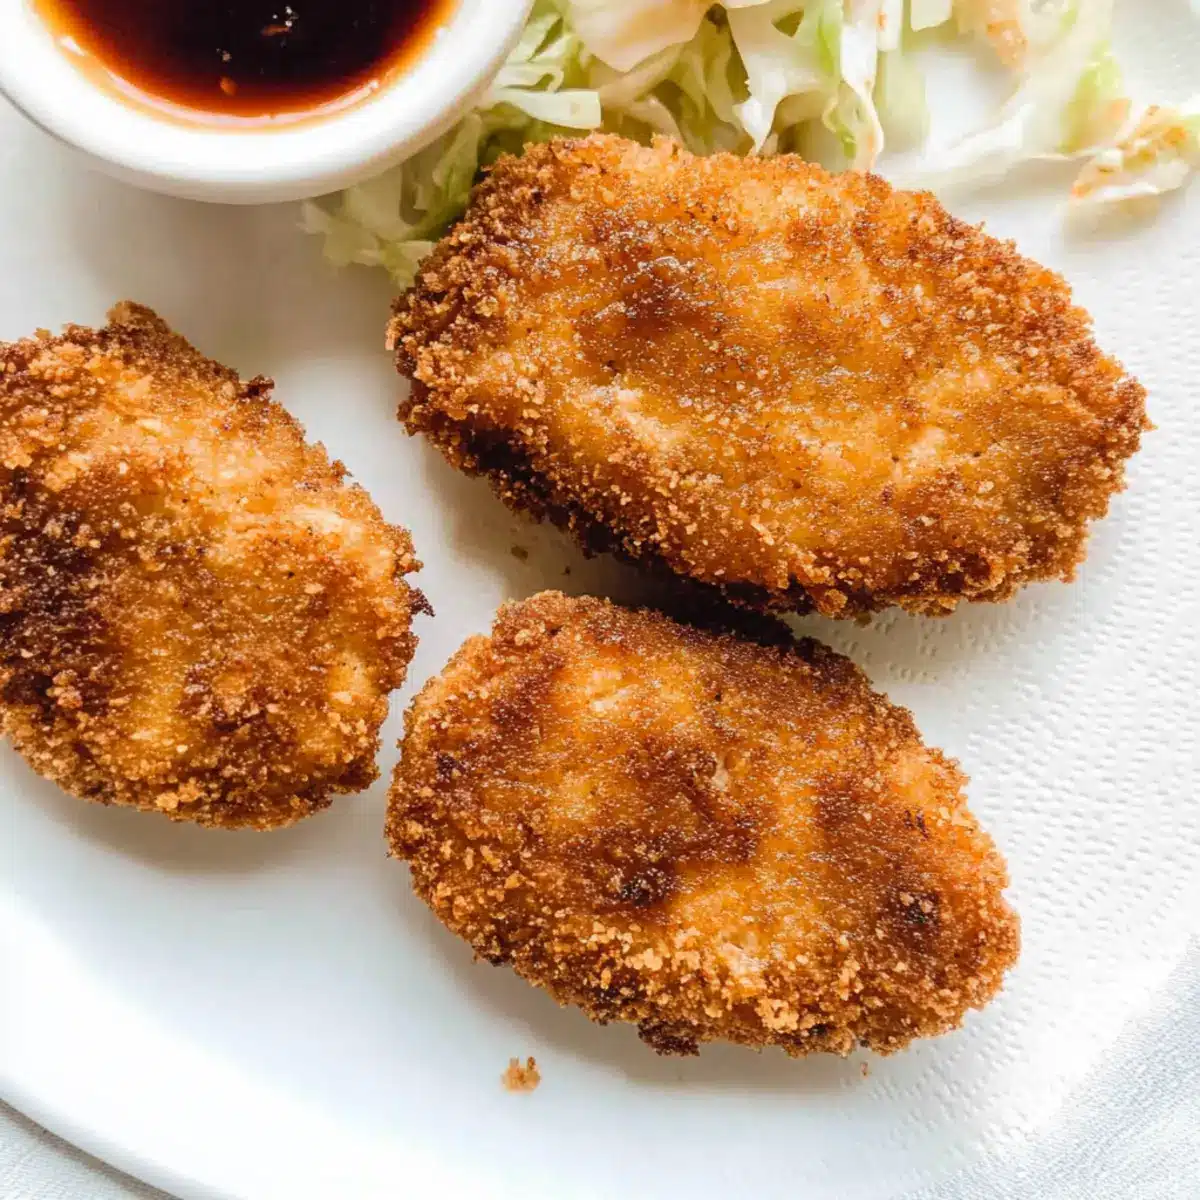
Once your tofu katsu is finished cooking, remove it from the heat and let it drain on a paper towel. Slice it neatly and plate it alongside steamed rice and shredded cabbage, then drizzle with tangy tonkatsu sauce. This vibrant presentation will make your crispy tofu katsu the star of the meal, ensuring it’s as delightful to look at as it is to enjoy!
Make Ahead Options
Crispy Tofu Katsu is perfect for meal prep, allowing you to enjoy a delicious dish even on your busiest nights! You can prepare the tofu by pressing and slicing it up to 24 hours in advance; simply store it in an airtight container in the refrigerator to maintain its freshness. The dredging station can also be prepped ahead by combining the flour, aquafaba or yogurt, and panko in their respective dishes, ensuring they’re ready to go when you are. When you’re ready to serve, just dredge and cook the tofu katsu using your preferred method. With these make-ahead steps, you can have a restaurant-quality meal at home with minimal effort!
Tips for the Best Tofu Katsu
-
Moisture Matters: Always press the tofu before cooking. Removing excess moisture is essential for achieving that coveted crispy texture and prevents oil splatters during frying.
-
Double Dredging: For an extra-thick and crispy coating, consider double dredging your tofu slices in flour and aquafaba/yogurt before coating with panko. This adds delightful crunch and texture.
-
Oil Temperature Check: Use a thermometer to ensure your frying oil is at 350°F (175°C) for perfect frying. If it’s not hot enough, the coating can become soggy instead of crunchy.
-
Gluten-Free Option: If gluten is a concern, simply swap all-purpose flour and panko for gluten-free alternatives. Your tofu katsu will still retain its delicious flavor and crispy goodness!
-
Storage Wisdom: Store any leftover tofu katsu in an airtight container in the fridge for up to 3 days. Reheat in the oven or air fryer to regain that fresh crunch.
Storage Tips for Tofu Katsu
Fridge: Store leftover tofu katsu in an airtight container for up to 3 days. This will help keep it fresh and retain its crispiness for your next meal.
Freezer: If you want to keep it longer, freeze the tofu katsu. Place it in a freezer-safe container or wrap each piece in plastic wrap before sealing in a bag. It can last for up to 2 months.
Reheating: To enjoy your crispy tofu katsu again, the best way is to reheat it in the oven or air fryer at 375°F (190°C) for about 10 minutes. This will help restore its delightful crunch!
Serving Suggestions: While the tofu katsu is delicious on its own, consider serving it with a side of tangy tonkatsu sauce and steamed rice for a well-rounded meal experience.
Tofu Katsu Variations & Substitutions
Feel free to unleash your creativity with these variations, allowing the crispy tofu katsu to fit your taste and dietary needs!
- Gluten-Free: Substitute panko with gluten-free breadcrumbs and use gluten-free all-purpose flour for a delightful allergy-friendly option.
- Spicy Kick: Add a sprinkle of chili powder or cayenne to the flour for a zesty twist that elevates the flavor profile. Feel free to adjust the heat level to your preference.
- Baked Option: If you prefer a healthier route, coat the tofu and bake it at 400°F (200°C) for around 20 minutes, flipping halfway. This method is just as satisfying!
- Herb-Infused: Mix dried herbs like thyme or oregano into the panko for a flavor boost that will surprise your taste buds. It’s a delightful twist that pairs wonderfully with tonkatsu sauce.
- Asian-Inspired Marinade: Marinate the tofu in soy sauce, ginger, and garlic before dredging for an umami kick, giving each bite a hearty depth. Pair it with a refreshing salad for a complete meal!
- Sando Style: Transform your tofu katsu into a katsu sandwich with fluffy bread, shredded cabbage, and a drizzle of tonkatsu sauce. This is an excellent option for a hearty lunch! You can even create a delicious tasty ramen with the katsu as a topping.
- Coconut Crunch: Swap out part of the panko for unsweetened coconut flakes to add a tropical twist to your katsu, giving it an irresistible crunch with a hint of sweetness.
- Sauce Swap: Instead of the traditional tonkatsu sauce, try serving with a homemade peanut sauce or a spicy sriracha mayo for a different flavor adventure.
With these tantalizing variations, each bite of tofu katsu can tell a new story! Make sure to explore these variations and find your perfect match.
What to Serve with Crispy Tofu Katsu
Complete your delightful tofu katsu experience with these complementary side dishes and pairings that harmonize perfectly with its crispy indulgence.
-
Steamed Jasmine Rice: The fluffy rice absorbs the tangy tonkatsu sauce, creating a satisfying balance with each bite. Pairing rice with tofu ensures a wholesome meal that fills and satisfies.
-
Shredded Cabbage Salad: A refreshing salad adds crunch and a splash of color to your plate. Toss cabbage with a light vinaigrette to contrast the rich, crispy texture of the katsu while enhancing its deliciousness.
-
Miso Soup: This warm, savory soup serves as a perfect starter, awakening your palate and offering a soothing contrast to the tofu’s crunch. A traditional Japanese pairing that honors the dish’s roots and enriches the dining experience.
-
Pickled Vegetables: Serve a side of tangy pickles to cleanse your palate between bites. The vibrant flavors brightens the meal, making every bite of tofu katsu even more enjoyable.
-
Edamame: Lightly salted edamame offers a delightful nibble that keeps you satisfied while you savor the main dish. These protein-packed soybeans make an excellent appetizer, adding wholesome nutrition and vibrant color to your table.
-
Chilled Sake or Green Tea: Elevate the meal with a refreshing glass of chilled sake or a cup of green tea. Both drinks enhance the umami flavors of the tofu katsu, rounding off the dining experience with warmth or refreshment.
Crispy Tofu Katsu Recipe FAQs
How do I choose the right tofu for this recipe?
Absolutely! For the best results, select firm or extra-firm tofu. This variety holds its shape well during cooking and provides a delightful texture. Avoid silken tofu, as it’s too delicate for frying. Press the tofu before cooking to remove excess moisture, which is essential for achieving that crispy texture.
What’s the best way to store leftovers?
Store any leftover tofu katsu in an airtight container in the refrigerator for up to 3 days. This helps keep it fresh and maintain some of its crispiness. If you want to keep it longer, freezing is a great option; just wrap each piece tightly in plastic wrap and then place it in a freezer bag. It can last for up to 2 months. Remember to reheat it in the oven or air fryer to regain that crunchy texture!
Can I freeze crispy tofu katsu? How do I do that?
Yes, you can freeze crispy tofu katsu! To do so, first, let it cool completely. Next, wrap each piece in plastic wrap to prevent freezer burn and then place them in a freezer-safe container or bag. They can be kept in the freezer for up to 2 months. When you’re ready to enjoy it again, simply reheat in the oven or air fryer at 375°F (190°C) for about 10 minutes, ensuring it regains that beloved crunch.
What should I do if my tofu katsu comes out soggy?
Very! If your tofu katsu turns out soggy, it may be due to not pressing the tofu enough to remove excess moisture, or the oil being too cool while frying. Make sure to thoroughly press and drain the tofu and use a thermometer to ensure your oil reaches 350°F (175°C) before frying. If you’re baking or air frying, ensure the slices are spaced well to allow hot air to circulate properly.
Are there any dietary considerations I should keep in mind for this recipe?
Absolutely! This crispy tofu katsu is vegan and free from any animal products, making it suitable for vegans and vegetarians. If you’re concerned about gluten, you can easily swap out the all-purpose flour and panko breadcrumbs for gluten-free alternatives. This way, everyone can enjoy this tasty dish without dietary worries!
Crispy Tofu Katsu: A Vegan Twist on Classic Comfort Food
Ingredients
Equipment
Method
- Press the tofu to remove excess moisture, which is crucial for achieving a crispy texture.
- Set up a dredging station with flour, aquafaba or yogurt, and panko breadcrumbs.
- Slice the pressed tofu into 1-inch thick pieces, dredge in flour, dip in aquafaba or yogurt, and then coat with panko breadcrumbs.
- Choose your cooking method: deep-fry, air-fry, or oven-bake the tofu katsu.
- Cook the tofu until golden brown and crispy, and let it drain on paper towels.
- Serve with steamed rice, shredded cabbage, and tonkatsu sauce.