

As I flipped through my favorite cookbook, a tantalizing scent wafted through the air, striking my senses. That’s when I stumbled upon the idea of Sushi Wonton Cones—a fun twist on traditional sushi that invites creativity into your kitchen. These handheld snacks bring together a crispy wonton wrapper and savory sushi fillings for an engaging and interactive dining experience. They’re not just visually stunning; they’re also customizable, making them perfect for everything from casual family dinners to festive gatherings. Plus, they come together quickly, so you can spend less time in the kitchen and more time enjoying good company. Why settle for ordinary when you can take sushi to new heights? Let’s dive into the delightful world of Sushi Wonton Cones!
Why Are Sushi Wonton Cones Amazing?
Versatile Fillings: These cones are canvas for your culinary creativity. Whether you prefer spicy tuna, shrimp, or a fresh veggie mix, the filling options are endless!
Interactive Dining: Guests will love assembling their cones, sparking conversation and fun at your gatherings. Quick Preparation: In just a few easy steps, you can whip up these crowd-pleasers without a hassle.
Dynamic Textures: The backdrop of crunchy wonton with creamy avocado and tender sushi rice creates a tasty experience that’s hard to resist. Perfect for Any Occasion: From game nights to potlucks, these handheld bites definitely steal the spotlight!
Don’t forget to check out more handheld snacks that complement these delightful cones to elevate your entertaining game!
Sushi Wonton Cones Ingredients
• Dive into a world of flavor!
For the Wontons
- Wonton wrappers – Provide the crispy vessel for the filling.
- Coconut oil (for frying) – Adds a crispy texture to the cones; feel free to use vegetable oil as a substitute.
For the Sushi Rice
- Sushi rice (short-grain, sticky) – Forms the base layer, providing substance; other short-grain rice can work with slight adjustments in cooking.
- Rice vinegar – Enhances the flavor of sushi rice; alternatively, apple cider vinegar can offer a mild substitute.
- Sugar – Balances out the vinegar’s acidity in the rice; substitute with honey for a natural option.
- Salt – Enhances the overall flavor profile of both the rice and filling.
For the Filling
- Avocado – Adds creaminess and healthy fats; swap with silken tofu for a vegan alternative.
- Tuna steak (sushi-grade) – Provides protein and flavor; try cooked shrimp or smoked salmon for an interesting twist.
- Kewpie mayonnaise – Offers a creamy, umami flavor; use regular mayonnaise if Kewpie’s not available.
- Tomato ketchup or sauce – Adds a hint of sweetness; sweet chili sauce can be a spicier option.
- Sriracha (optional) – Imparts heat; feel free to adjust quantity according to your spice preference.
- Lime zest – Brightens the filling with a citrus kick; lemon zest is a suitable substitute.
- Furikake or black sesame seeds – A garnish that adds flavor and visual appeal; toasted sesame seeds work if furikake is unavailable.
Don’t miss out on trying these Sushi Wonton Cones for a snack that’s delightful to both taste and creativity!
Step‑by‑Step Instructions for Sushi Wonton Cones
Step 1: Prepare Wonton Cones
Begin by preheating your oil in a deep frying pan. Meanwhile, take your wonton wrappers and gently wrap each around a cream horn mold, ensuring the edges overlap slightly and form a secure cone shape. This will create the crispy vessel for your delicious Sushi Wonton Cones; set them aside while you heat the oil.
Step 2: Fry Cones
Once your oil reaches a temperature of 175 °C (350 °F), carefully lower the prepared wonton cones into the hot oil. Fry them for about 2-3 minutes, turning occasionally until they are beautifully golden brown. Keep a close eye to prevent burning; this step is crucial for achieving that perfect crunch! After frying, drain the cones on paper towels to remove excess oil.
Step 3: Prepare Sushi Rice
Next, cook your sushi rice according to package instructions until it’s perfectly sticky. While the rice is still warm, transfer it to a mixing bowl and carefully fold in rice vinegar, sugar, and salt. This seasoning not only enhances the flavor of your rice but also contributes to the overall taste of your Sushi Wonton Cones. Let the rice cool to room temperature to ensure it keeps its structure.
Step 4: Make Filling
As your rice cools, prepare the filling by cubing or flaking the sushi-grade tuna into a mixing bowl. Combine it with Kewpie mayonnaise, a splash of tomato sauce, sriracha (if desired), and freshly grated lime zest. Mix gently until the ingredients are well combined, ensuring the tuna retains its texture while delivering a mouthwatering flavor to your bites.
Step 5: Assemble Cones
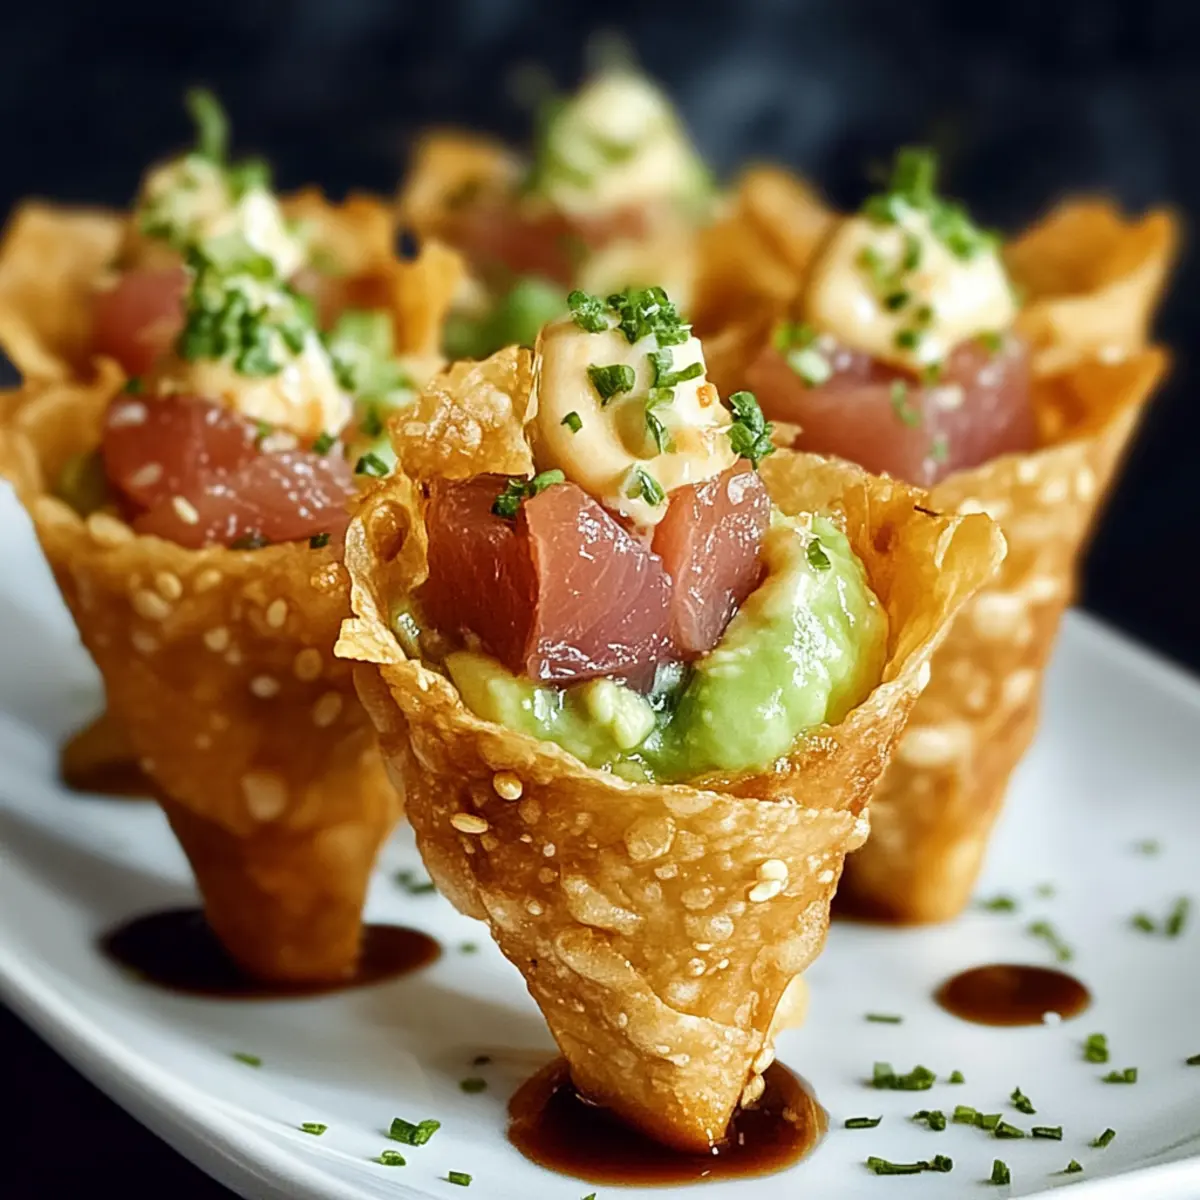
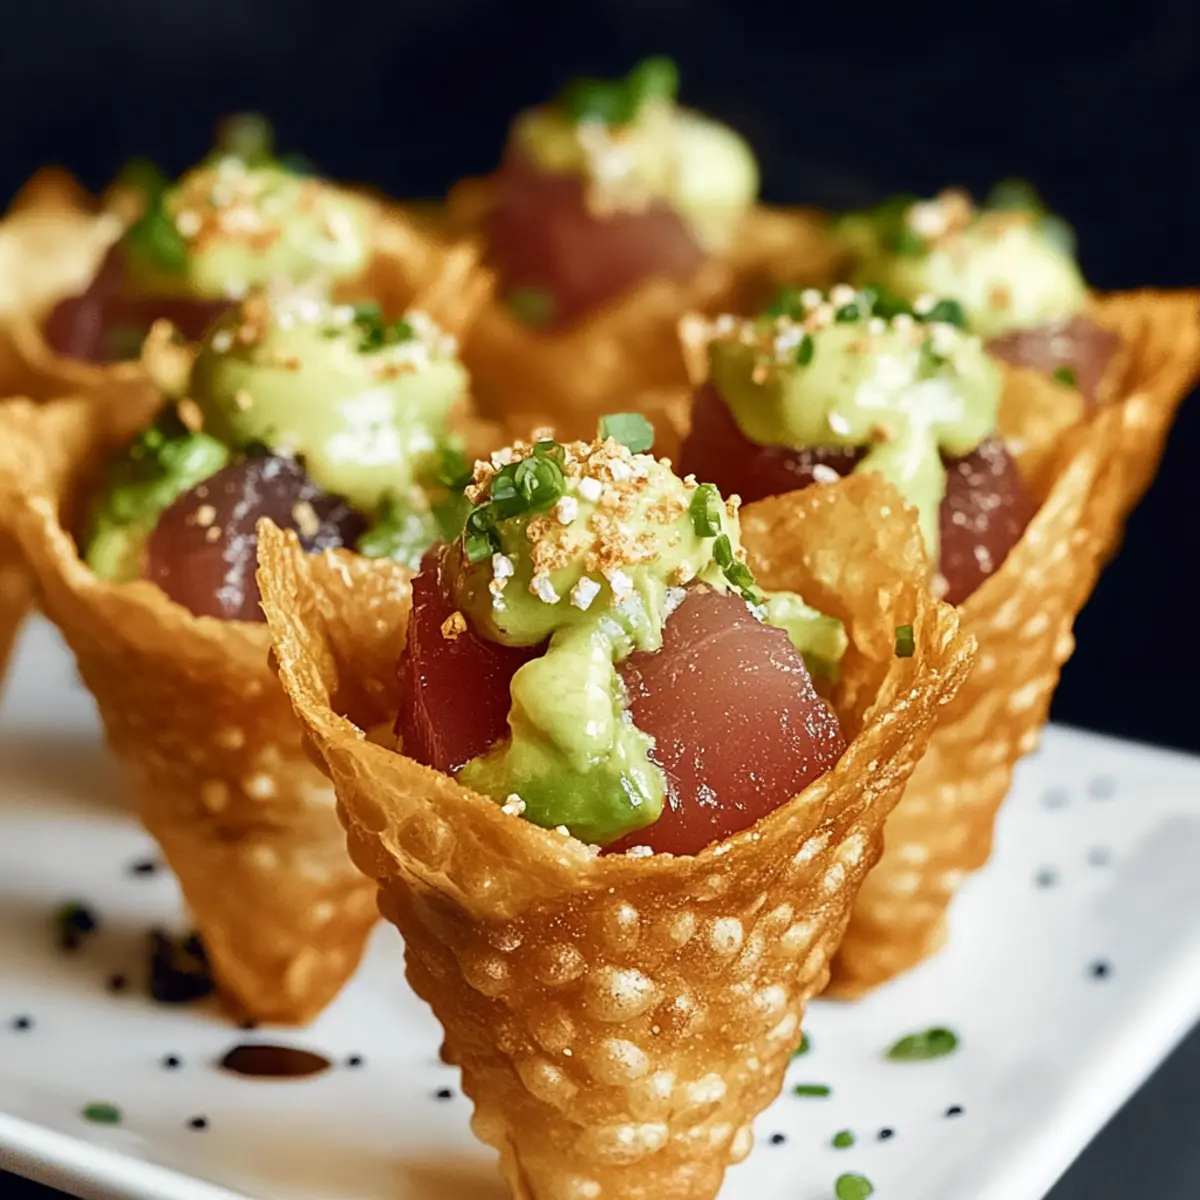
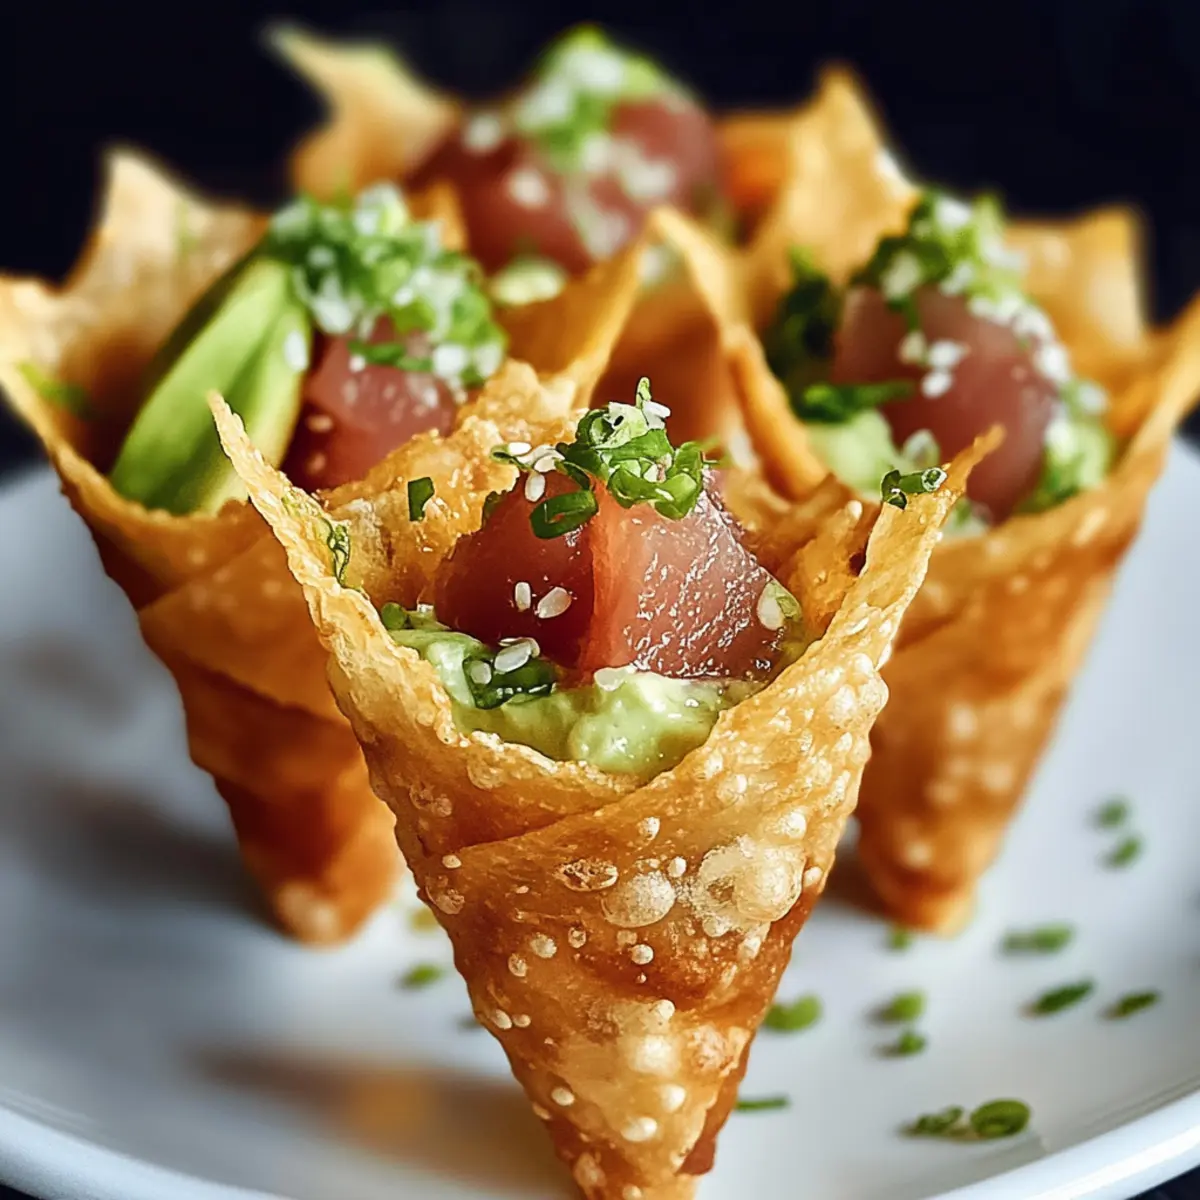
Now it’s time to assemble your Sushi Wonton Cones! Start by filling each cooled cone with a layer of sushi rice, pressing gently to fill the base. Follow with slices of creamy avocado, then top with your savory tuna mixture. The layers not only create delightful contrasts of texture but ensure each bite is bursting with flavor—every element of your Sushi Wonton Cones is crucial!
Step 6: Garnish
Finally, it’s time to add the finishing touch. Generously sprinkle furikake or black sesame seeds over the top of your assembled Sushi Wonton Cones. This garnish not only enhances the visual appeal but also adds an extra layer of flavor that complements the creamy and savory elements perfectly. Your Sushi Wonton Cones are now ready to impress your guests!
Sushi Wonton Cones Variations & Substitutions
Feel free to mix and match, creating your unique twist on these delightful cones that will excite your taste buds!
- Dairy-Free: Replace Kewpie mayonnaise with vegan mayo for a creamy texture without dairy.
- Seafood Swap: Use cooked crab or lobster for an indulgent filling, offering a taste of luxurious seafood.
- Vegetarian Delight: Substitute tuna with marinated tofu and add a sprinkle of seaweed for a delightful, plant-based option.
- Flavor Boost: Consider adding a splash of tamari or soy sauce to the filling mixture for extra umami flavor.
- Spicy Kick: Incorporate jalapeños or diced chili into your filling for a spicy twist that adds heat and flavor.
- Sweet Surprise: Try sweetening the cone with diced mango or pineapple chunks; the contrast adds brightness and freshness.
- Pickled Veggies: Add pickled ginger or radishes to the filling for a tangy crunch that cuts through the creaminess.
- Rice Variations: Swap sushi rice for quinoa or wild rice for a unique texture, offering a nutritious twist to your cones.
Don’t forget to explore other interactive dining ideas that can complement your Sushi Wonton Cones for your next gathering!
What to Serve with Sushi Wonton Cones
Satisfy your cravings with delightful accompaniments that elevate your handheld sushi experience.
- Crispy Vegetable Tempura: Adding a light, crunchy side, tempura pairs well with the creaminess of the cones while bringing colorful veggies to the table. This harmony makes every bite a treat!
- Miso Soup: The warm, savory broth balances the cold freshness of the sushi cones, offering a cozy experience that soothes the soul.
- Edamame: Lightly salted, these protein-packed pods offer a satisfying crunch and delicate flavor, making them an ideal counterpart to your flavorful cones.
- Seaweed Salad: Refreshing and slightly tangy, this salad introduces a great textural contrast without overwhelming the palate, enhancing your overall meal experience.
- Iced Green Tea: Refreshing and slightly grassy, this beverage cleanses the palate between bites, boosting the flavor of the sushi, making your meal feel light and invigorating.
- Sweet Chili Sauce: For a zesty kick, dipping your cones into this sauce introduces a hint of sweetness that complements the savory fillings perfectly!
- Chilled Sake: A traditional choice, this subtle alcoholic beverage enhances the flavors of sushi through its smooth finish, making for a great pairing.
- Chocolate Mochi: For dessert, these chewy and sweet treats wrap up your meal beautifully while keeping the Japanese theme alive.
- Cucumber-Mint Lemonade: A refreshing drink that bridges fresh flavors and provides cooling relief alongside the crispy cones, enhancing the dining experience.
Make Ahead Options
Sushi Wonton Cones are a fantastic choice for meal prep enthusiasts looking to save time on busy days! You can prepare the sushi rice and filling (made with sushi-grade tuna and Kewpie mayonnaise) up to 3 days in advance. Store the rice and filling separately in airtight containers in the refrigerator to maintain freshness. For best results, prepare the wonton wrappers and fry them just before serving, as this keeps them crispy. When you’re ready to impress your guests, simply fill each cone with sushi rice, avocado, and the tuna mixture, then garnish with furikake. You’ll have delicious, freshly assembled Sushi Wonton Cones ready to enjoy in no time!
Expert Tips for Sushi Wonton Cones
-
Frying Temperature: Ensure the oil is at 175 °C (350 °F) for crispy cones; too hot can burn while too cool may lead to sogginess.
-
Chill Ingredients: Use chilled avocado and other fillings to maintain the crispiness of the wrappers and freshness in your Sushi Wonton Cones.
-
Assemble Last Minute: Prepare the rice and filling in advance but assemble the cones just before serving to keep everything crisp and fresh.
-
Don’t Overfill: Avoid overstuffing the cones; it may lead to leaks. A balanced filling will keep each bite enjoyable and prevent mess.
-
Experiment Freely: Try different fillings like spicy crab or veggies for unique flavors. Sushi Wonton Cones are all about customization and creativity!
How to Store and Freeze Sushi Wonton Cones
Room Temperature: Sushi Wonton Cones are best enjoyed fresh, but if left out, they can stay at room temperature for up to 2 hours.
Fridge: If you have leftovers, store the components separately in the fridge. Keep the cones in an airtight container for up to 1 day, but fillings should be consumed within 2 days for optimal freshness.
Freezer: It’s not recommended to freeze assembled Sushi Wonton Cones, as the crispy texture will be lost. However, you can freeze the wonton wrappers and filling separately for up to 1 month.
Reheating: For the best results, reheat cones in the oven at 375°F (190°C) for about 10 minutes to regain some crispiness before serving.
Sushi Wonton Cones Recipe FAQs
What type of avocado should I use for Sushi Wonton Cones?
Absolutely! When selecting avocado, look for ones that are slightly soft but not mushy; ideal avocados should yield gently to pressure. Avoid ones with dark spots all over, as these indicate overripeness. Choosing ripe but firm avocados will enhance the texture of your cones beautifully.
How should I store leftover Sushi Wonton Cones?
Very! To maintain the crispy texture, store the components separately. Place the wonton cones in an airtight container and store in the fridge for up to 1 day. The fillings can be kept in their own airtight container for up to 2 days. This way, when you’re ready to enjoy them again, you can assemble them fresh!
Can I freeze the ingredients for Sushi Wonton Cones?
Yes, I often make a batch and freeze the ingredients! It’s best to freeze the wonton wrappers and filling separately. Place the uncooked wrappers in a resealable plastic bag with as much air removed as possible, and store for up to 1 month. For the filling, mix your tuna mixture in an airtight container, and it can also last for 1 month in the freezer. Just remember; avoid freezing the assembled cones as this will make them soggy upon thawing.
What do I do if my cones are soggy after frying?
Don’t worry! Soggy cones can be frustrating, but it’s often due to improper frying temperatures. For crispy results, ensure that the oil is hot enough (around 175 °C or 350 °F) before adding your wonton wrappers. If they are still soggy, consider briefly reheating the cones in a preheated oven at 375°F (190°C) for about 8–10 minutes to regain their crunch!
Are there any dietary considerations when making Sushi Wonton Cones?
Absolutely! If you’re making these cones for others, consider common allergies. Tuna may not be suitable for everyone, so providing a vegetarian option with silken tofu and fresh veggies is a great alternative. Additionally, double-check that your wonton wrappers are free from egg if accommodating a vegan diet. It’s always thoughtful to ask guests about allergies before serving!

Delicious Sushi Wonton Cones for Fun and Flavorful Snacking
Ingredients
Equipment
Method
- Preheat oil in a deep frying pan. Wrap wonton wrappers around cream horn molds and set aside.
- Fry the wonton cones in the hot oil at 175 °C (350 °F) for 2-3 minutes until golden brown. Drain on paper towels.
- Cook sushi rice according to package instructions, then fold in rice vinegar, sugar, and salt. Let cool.
- Prepare filling by mixing flaked tuna with mayonnaise, tomato sauce, sriracha, and lime zest.
- Assemble cones with rice, avocado slices, and tuna mixture.
- Garnish with furikake or sesame seeds and serve immediately.