

As I rummaged through my pantry the other day, I stumbled upon a bag of russet potatoes that were just begging to be transformed. That’s when the idea for these Homemade Baked Potato Chips sparked—crunchy, customizable, and surprisingly simple to whip up! With this recipe, you’ll not only embrace the joy of snacking but also enjoy a healthier alternative to those greasy store-bought chips. I love how you can play with different seasonings to create a flavor profile that speaks to your taste buds. Plus, they make great companions for sandwiches, soups, or your favorite dips! Curious about how to take your snacking to the next level? Let’s dive into this delightful recipe!

Why Are Homemade Baked Potato Chips So Great?
Simplicity: You’ll love how easy it is to create delightful chips in just minutes! With just a few ingredients, you can whip up this healthy snack.
Customizable Flavor: Each batch can be infused with your favorite seasonings, whether you prefer a zesty kick or a smoky flavor. Try adding garlic powder for a savory twist!
Healthier Choice: Baked instead of fried, these chips offer a guilt-free crunch that won’t sabotage your diet. Low in calories, they’re perfect for guilt-free snacking.
Versatile Pairing: Perfect for enjoying on their own or served alongside fresh dips like guacamole or hummus, these chips fit into any meal. Need some ideas? Pair them with a hearty sandwich or a warm bowl of soup!
Crowd-Pleaser: These baked potato chips are sure to impress family and friends during gatherings. Offer a variety of seasonings to keep everyone happy!
For more delicious potato recipes, check out our Cheesy Hamburger Potato and Sweet Potato Casserole.
Baked Potato Chips Ingredients
For the Chips
• Russet Potatoes – These are perfect for achieving that ideal starchy texture; consider using Yukon Gold or sweet potatoes for a unique flavor twist.
• Olive Oil – Adds richness and helps achieve a golden crisp; extra virgin is recommended, but avocado oil is a great substitute.
• Sea Salt – Essential for enhancing flavor; don’t skip this step!
• Black Pepper – Adds a touch of subtle heat; adjust to suit your taste.
• Paprika (optional) – A lovely option for a smoky flavor; swap with smoked paprika for a bolder taste.
These baked potato chips are all about personalizing your snack experience while keeping it healthy and simple!
Step‑by‑Step Instructions for Baked Potato Chips
Step 1: Preheat the Oven
Begin by preheating your oven to 400°F (200°C). While the oven heats, line two baking sheets with parchment paper to prevent the chips from sticking and to ensure even baking. This step is crucial for achieving perfectly crispy baked potato chips!
Step 2: Prepare the Potatoes
Wash the russet potatoes under cold running water to remove any dirt, then slice them into thin, even pieces, approximately 1/8 inch thick. You can peel them if you prefer a smoother texture, but leaving the skin adds extra flavor and nutrients. Uniform slices will ensure that your baked potato chips cook evenly.
Step 3: Soak the Potatoes
Once sliced, place the potato pieces in a large bowl and cover them with cold water. Let them soak for at least 30 minutes to remove excess starch; this is vital for achieving that golden crispness you’re after. While soaking, feel free to prep your baking sheets and other ingredients.
Step 4: Dry the Potatoes
After soaking, drain the potato slices and pat them dry with a clean kitchen towel or paper towels. Eliminating moisture is key to getting crispy baked potato chips, so make sure you take your time with this step for the best results.
Step 5: Season and Coat
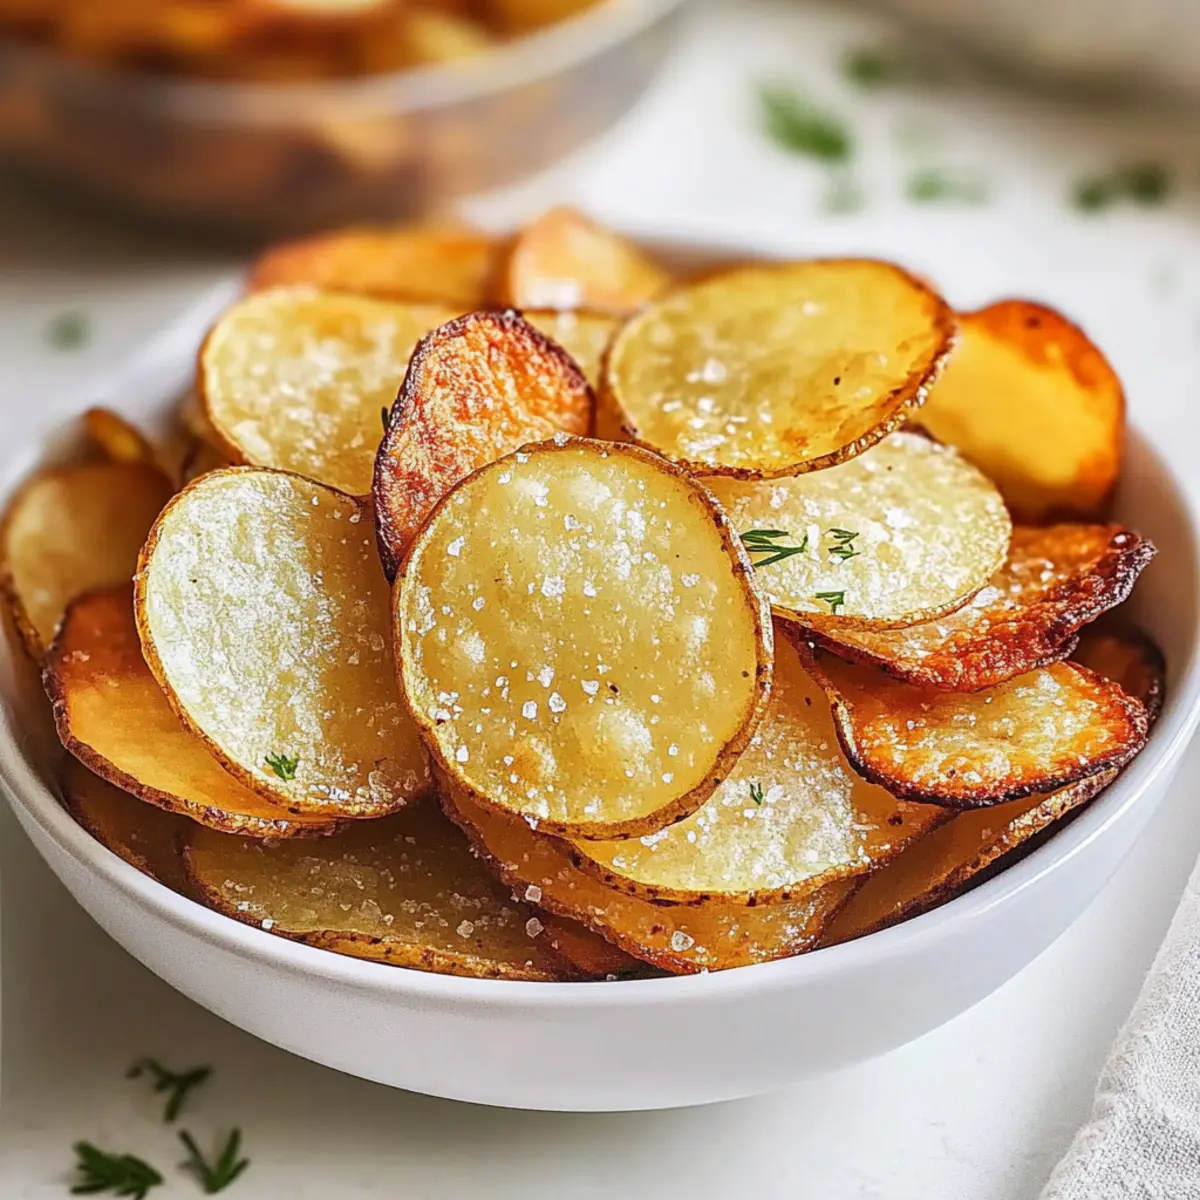
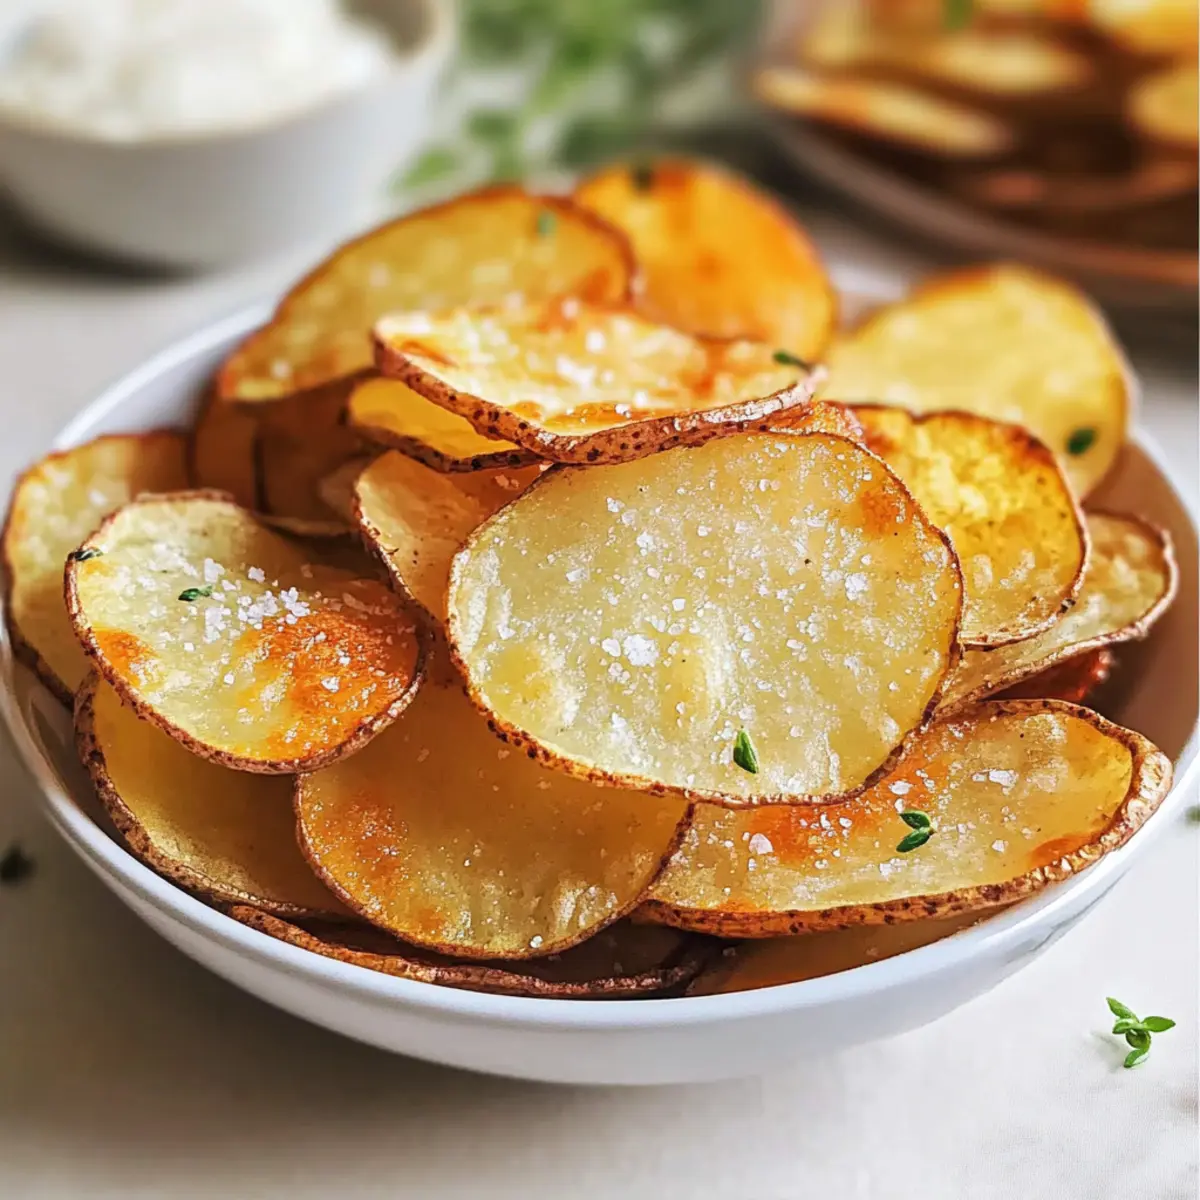
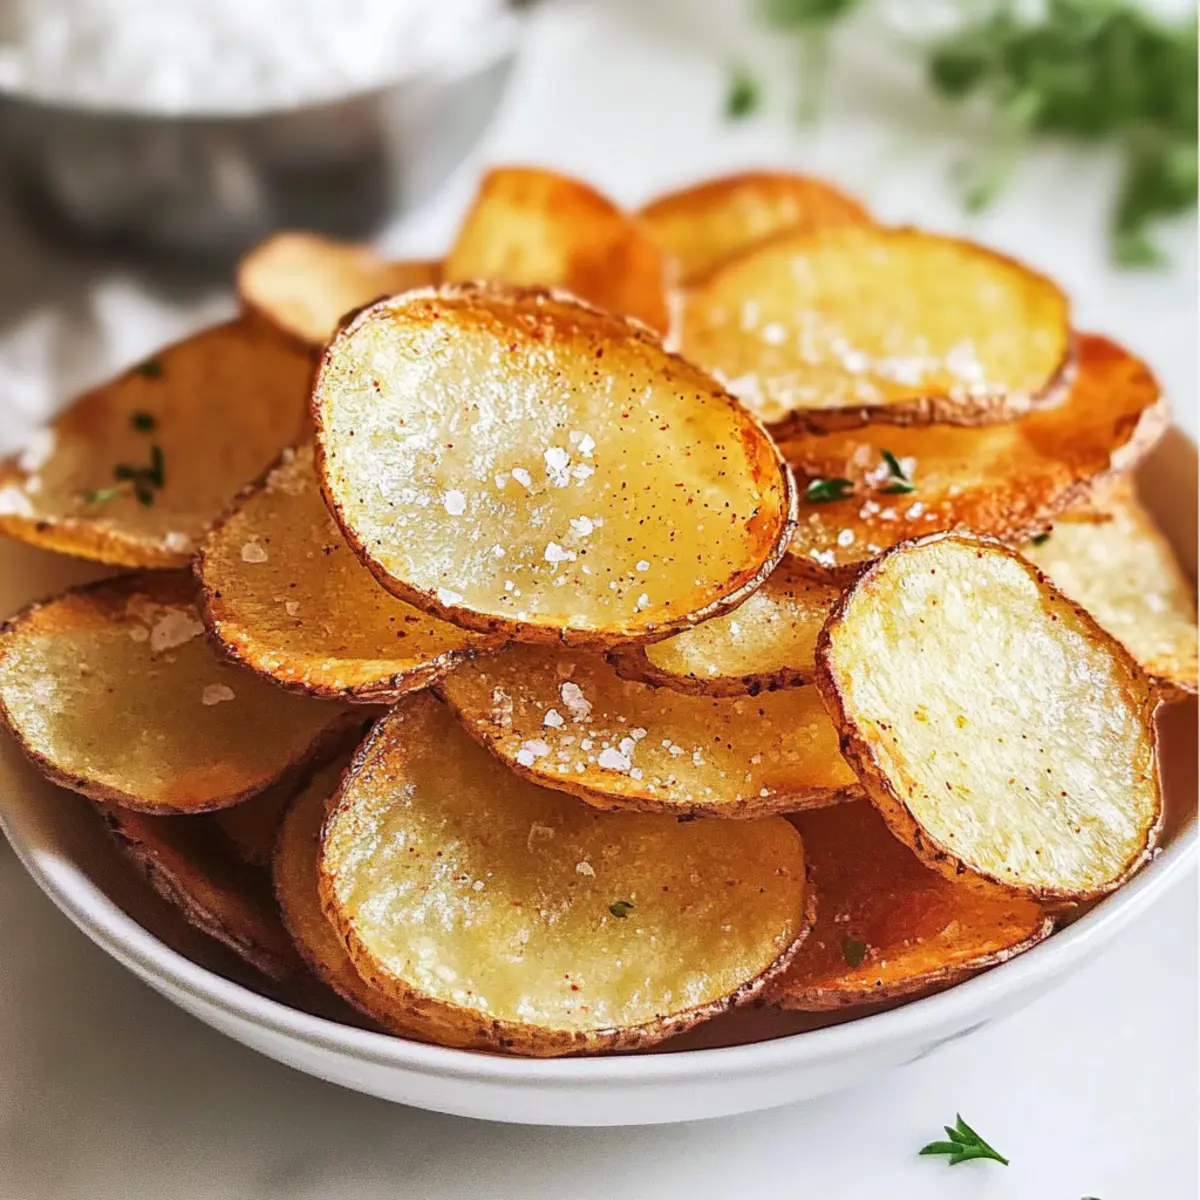
In a large bowl, toss the dried potato slices with a drizzle of olive oil, ensuring each piece is evenly coated. Then, arrange them in a single layer on the prepared baking sheets. Sprinkle generously with sea salt, black pepper, and any optional seasonings like paprika for that extra flavor kick.
Step 6: Bake
Place the baking sheets in your preheated oven and bake the potato chips for 15-20 minutes. Keep a close eye on them, flipping halfway through to ensure even browning. You’ll know they’re ready when they’re golden brown and crispy. Just be careful not to let them burn as they can go from perfect to overdone quickly!
Step 7: Cool and Serve
Once your baked potato chips are out of the oven, transfer them to a wire rack to cool for a few minutes. This cooling step is essential for enhancing their crispiness. Once cooled, serve your delicious homemade baked potato chips alongside your favorite dips, sandwiches, or enjoy them on their own!
Make Ahead Options
These Homemade Baked Potato Chips are perfect for meal prep enthusiasts! You can slice and soak the potatoes up to 24 hours in advance. Just place them in cold water to remove excess starch, which is crucial for that desired crispiness. When you’re ready to enjoy your chips, simply drain, pat them dry, and follow the seasoning and baking steps as instructed. Storing prepped potato slices in the refrigerator will help maintain their quality, ensuring they come out just as delicious as freshly made. Enjoy the time-saving benefits of having these tasty snacks ready to go for busy weeknights!
Baked Potato Chips Variations
Feel free to let your creativity shine with these delightful twists on baked potato chips!
-
Sweet Potato Swaps: Use sweet potatoes instead of russets for a slightly sweeter and vibrant chip experience. The unique flavor pairs beautifully with cinnamon!
-
Herb Infused: Toss your chips with dried herbs like rosemary or thyme for an aromatic touch that elevates the chip’s flavor.
-
Spicy Kick: Add cayenne pepper or chili powder to the mix for an extra heat level that will leave you craving more!
-
Cheesy Flavor: Sprinkle nutritional yeast or grated parmesan cheese over your chips before baking for a cheesy vibe without the guilt.
-
Garlic Lovers: Mix garlic powder into the olive oil before coating your potato slices. This adds a savory touch sure to delight garlic fans.
-
Vinegar Zing: After baking, drizzle your chips with a bit of malt vinegar for that deliciously tangy flavor reminiscent of classic fish and chips!
-
BBQ Blast: Create a sweet and smoky experience with BBQ seasoning, giving your chips a taste of summer grilling all year round.
-
Cooling Dip: Try pairing these chips with a homemade creamy ranch dip for the ultimate snacking experience resembling crunchy versions of classics like the Bacon Potato Egg and Twice Baked Potato dishes!
So many delicious variations await—turn this basic recipe into your own signature snack that reflects your palate!
Storage Tips for Baked Potato Chips
-
Room Temperature: Store leftover baked potato chips in an airtight container for up to 3 days. This keeps them fresh while maintaining their delightful crunch.
-
Fridge: If you plan on saving them longer, consider refrigerating any uneaten chips. Place them in a sealed container for up to 5 days, although they may lose some crispiness.
-
Reheating: To restore that wonderful crunch, reheat the chips in a 350°F (175°C) oven for a few minutes before serving. Enjoy your homemade baked potato chips warm and crispy!
-
Make-Ahead Option: You can slice and soak the potatoes up to 24 hours in advance. Just keep them in the refrigerator until you’re ready to bake for an easy snack night!
Expert Tips for Baked Potato Chips
Thin Slices Matter: Ensure potato slices are as thin as possible, ideally 1/8 inch, for that perfect crispy texture.
Soak for Crispiness: Don’t skip soaking the potato slices in cold water for at least 30 minutes; this step removes excess starch, ensuring your baked potato chips are crisp rather than chewy.
Pat Dry Carefully: After soaking, make sure to thoroughly dry the slices; any moisture can lead to soggy chips.
Avoid Overcrowding: Spread the potato slices evenly on the baking sheet without overlapping. This allows for proper air circulation, which is key for crispiness.
Use a Cooling Rack: For extra crunch, consider placing your baking sheet on a cooling rack while baking. This elevates the chips, allowing heat to circulate more evenly.
Watch Closely: Keep an eye on the chips as they’re baking. They can quickly go from golden to burnt, so flip halfway through and check regularly for that perfect golden finish!
What to Serve with Homemade Baked Potato Chips
In the quest to elevate your snacking experience, consider these delightful pairings that harmonize beautifully with your crispy chips.
- Creamy Dip: A classic ranch dip brings a cool, tangy flavor that perfectly complements the crunchy texture.
- Guacamole: This fresh avocado dip adds a creamy richness, balancing the saltiness of the baked potato chips.
- Salsa: Bright and zesty, salsa adds a refreshing burst of flavor, perfect for dipping and enhancing each crunch.
- Hummus: Smooth and nutty, hummus offers a healthy twist that pairs excellently with the crispiness of the chips. Enjoy it with a sprinkle of paprika for an added kick!
- Cheesy Sandwich: A warm grilled cheese sandwich makes for a hearty and comforting meal alongside your homemade chips.
- Chili: A warm bowl of chili provides a spicy, flavorsome option that complements the baked potato chips beautifully.
- Crisp Green Salad: Fresh greens with a light vinaigrette bring balance to your meal and a refreshing contrast to the chips’ crunch.
- Iced Tea: A glass of chilled iced tea pairs well with the salty crunch, making for a perfect afternoon snack combo.
- Dark Chocolate: For a sweet finish, consider serving with dark chocolate; the bitterness beautifully contrasts with the savory chips.
Let your taste buds dance with joy as you mix and match these delightful combinations!
Baked Potato Chips Recipe FAQs
How do I choose the best potatoes for baked potato chips?
Absolutely! Opt for russet potatoes for their starchiness, which helps achieve the ideal crispiness. You can also try Yukon Gold for a creamier texture or sweet potatoes if you want a hint of sweetness in your chips.
What’s the best way to store leftover baked potato chips?
To keep your baked potato chips fresh, store them in an airtight container at room temperature for up to 3 days. If you notice they lose their crunch, simply reheat them in a 350°F (175°C) oven for about 5 minutes to bring back that delightful crispiness.
Can I freeze baked potato chips?
I wouldn’t recommend freezing baked potato chips, as the texture can become soggy upon thawing. However, if you want to prep ahead, you can slice and soak the potatoes for up to 24 hours in the refrigerator, then bake them fresh when you’re ready.
Why are my baked potato chips not crispy?
Very common! If your chips aren’t crispy, it could be due to three main reasons:
- The potato slices may be too thick; ensure they are sliced to about 1/8 inch for optimal crispness.
- Make sure to soak them for at least 30 minutes to remove excess starch, which can help with dryness.
- Pat the slices thoroughly dry before baking to eliminate moisture, which is crucial for achieving that perfect crunch!
Are baked potato chips safe for people with allergies?
Yes, but always check your seasonings, as some pre-packaged spices may contain allergens. The base recipe is typically safe for most diets, but if you’re cooking for someone with specific allergies, it’s best to make your own seasonings from scratch and confirm they’re allergen-free.
Can I use other oils instead of olive oil for baked potato chips?
Certainly! You can substitute olive oil with avocado oil or vegetable oil if you prefer. They all work well, but I personally love the flavor that extra virgin olive oil brings to the table!
Crispy Baked Potato Chips You'll Love in Just Minutes
Ingredients
Equipment
Method
- Preheat your oven to 400°F (200°C) and line two baking sheets with parchment paper.
- Wash the russet potatoes under cold water and slice them into thin, even pieces, about 1/8 inch thick.
- Soak the potato slices in a bowl of cold water for at least 30 minutes to remove excess starch.
- Drain and pat the potato slices dry with a towel.
- Toss the dried slices in a bowl with olive oil, then arrange them on baking sheets and season with salt, pepper, and paprika.
- Bake for 15-20 minutes, flipping halfway, until the chips are golden and crispy.
- Transfer to a cooling rack for a few minutes before serving.