

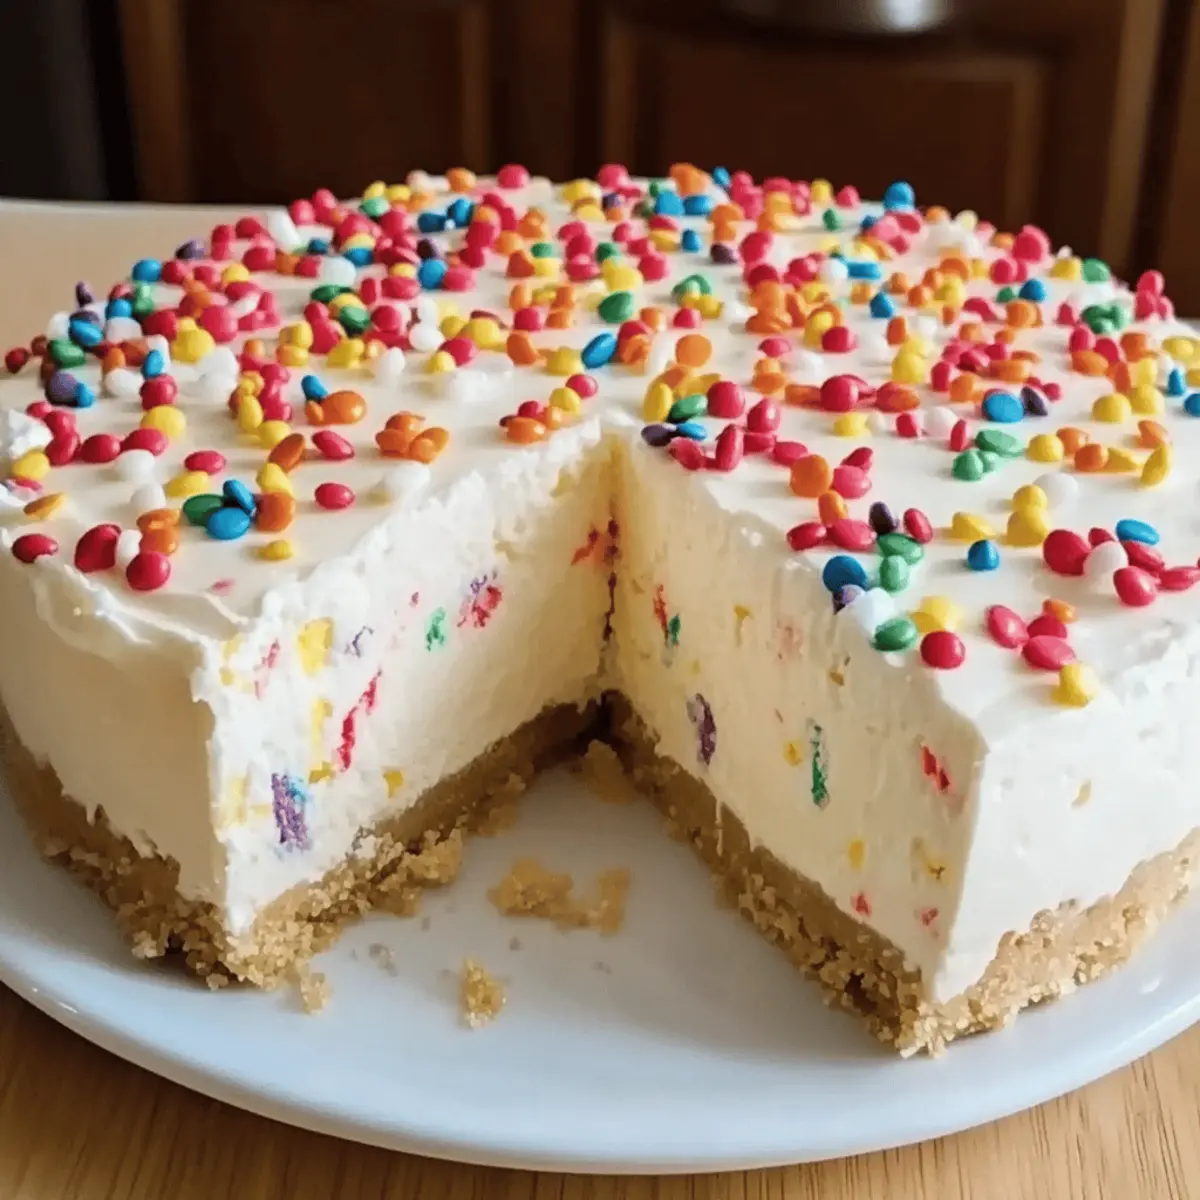
The aroma of a baking cheesecake wafting through the kitchen is enough to make anyone feel like a true culinary magician. This Creamy Birthday Cheesecake is your ticket to turning routine celebrations into delightful memories. With its rich & creamy cheesecake filling nestled atop a crunchy graham cracker crust, it’s the perfect indulgence for both special occasions and everyday treats. What I love most about this recipe is its versatility; whether you’re in the mood for a gluten-free version or fancy a chocolate twist, it caters to everyone’s sweet tooth. Plus, it’s deceptively easy to whip up, making it ideal even for beginner bakers. Ready to impress your guests and bring a smile to their faces? Let’s dive into the joyful world of cheesecake-making together—your taste buds are in for a real treat!

Why is this cheesecake a must-try?
Versatile options make this cheesecake a hit everywhere! Whether you prefer it gluten-free, dairy-free, or loaded with chocolate, there’s a version for every palate. Effortlessly easy to create, even beginner bakers can shine with minimal fuss. Crowd-pleasing flavors mean this dessert excites taste buds at every gathering. Don’t forget the rich and creamy texture that melts in your mouth, making it the ultimate indulgence. For more delicious twists, check out my Caramel Swirl Cheesecake or Tiramisu Cheesecake Dessert.
Rich & Creamy Cheesecake Ingredients
For the Crust
- Graham Cracker Crumbs – Provides structure and crunch; swap for crushed Oreos for a unique flavor twist.
- Granulated Sugar – Sweetens the crust; try coconut sugar for a deeper taste profile.
- Unsalted Butter – Binds the crust ingredients; coconut oil is a great dairy-free alternative.
For the Filling
- Cream Cheese – The star ingredient for a rich and creamy texture; ensure it’s softened before blending.
- Granulated Sugar (for filling) – Adds sweetness to the cheesecake; adjust to taste if your palate prefers less sweetness.
- Sour Cream – Introduces tanginess and creaminess for balance.
- Vanilla Extract – Elevates the overall flavor profile; choose pure vanilla for the best taste.
- Eggs – Provide structure; bring them to room temperature for easiest incorporation.
For the Topping
- Rainbow Jimmies – Adds a festive finish; feel free to use different sprinkles or omit for a classic presentation.
- Whipped Cream – Light and fluffy, perfect for topping; optional but highly recommended for extra indulgence.
Embrace the joyous moments with this rich & creamy cheesecake that speaks to the heart of every celebration!
Step‑by‑Step Instructions for Creamy Birthday Cheesecake with Rainbow Jimmies
Step 1: Preheat Your Oven
Begin by preheating your oven to 350°F (175°C). This ensures that it reaches the right temperature for our creamy birthday cheesecake, which helps achieve a perfectly baked filling. While the oven warms, prepare your graham cracker crust for a seamless transition into the baking process.
Step 2: Prepare the Crust
In a mixing bowl, combine graham cracker crumbs with granulated sugar and melted unsalted butter. Stir until everything is well combined and resembles wet sand. Press this mixture firmly into the bottom of a 9-inch springform pan, making sure to create an even layer. This sturdy crust will hold the rich & creamy cheesecake filling beautifully.
Step 3: Wrap the Springform Pan
To prevent any moisture from seeping into your cheesecake, wrap the exterior of the springform pan with aluminum foil. Be sure to cover it well, especially around the base, as this will ensure that our creamy birthday cheesecake stays moist during baking. A successful wrap protects your delightful dessert from water bath mishaps.
Step 4: Beat the Cream Cheese
In a stand mixer, place your softened cream cheese and blend on medium speed until smooth and creamy, about 2-3 minutes. Gradually add granulated sugar to the cream cheese, continuing to mix until fully combined. This base creates the deliciously rich texture central to our creamy birthday cheesecake.
Step 5: Add Sour Cream & Vanilla
Once the cream cheese and sugar are blended, incorporate the sour cream and vanilla extract into the mixture. Beat until everything is smooth and creamy, which takes about another 1-2 minutes. This step adds depth of flavor and a tanginess that balances the sweetness of our cheesecake filling.
Step 6: Incorporate the Eggs
With the mixer set to low speed, add eggs one at a time, ensuring each is fully incorporated before adding the next. This careful mixing avoids overworking the batter, which could lead to cracks during baking. Our goal is a smooth and stable filling for the creamy birthday cheesecake.
Step 7: Fold in the Jimmies
Gently fold in rainbow jimmies with a spatula, distributing them evenly throughout the cheesecake batter. Take care not to overmix; you want those colorful sprinkles to remain intact, adding a festive flair to your rich & creamy cheesecake.
Step 8: Bake in a Water Bath
Pour the cheesecake filling into your prepared crust within the wrapped springform pan. Place the pan into a larger baking dish filled with boiling water, creating a water bath. Bake for 60-70 minutes, or until the edges are set but the center still has a slight jiggle. This method keeps the cheesecake moist while baking.
Step 9: Cool & Refrigerate
Once baking is complete, turn off the oven and let the cheesecake cool in the water bath for about an hour. Then, transfer it to the countertop until it reaches room temperature. Finally, refrigerate for at least 4 hours, or overnight, to allow the flavors to fully develop and achieve that signature creamy texture.
Step 10: Serve and Enjoy
When you’re ready to serve your creamy birthday cheesecake, carefully remove it from the springform pan. Top with a generous dollop of whipped cream and an additional sprinkle of rainbow jimmies for a fun presentation. This vibrant masterpiece is sure to delight anyone celebrating a special occasion!
What to Serve with Creamy Birthday Cheesecake
Indulging in a slice of this creamy delight is only the beginning of your dessert experience; let’s elevate it further!
-
Fresh Berries: Juicy strawberries, blueberries, or raspberries bring a burst of freshness that beautifully contrasts the rich and creamy cheesecake.
-
Chocolate Sauce: A drizzle of warm chocolate sauce adds a decadent touch, enhancing the flavor while providing a touch of elegance.
-
Coffee: A cup of your favorite brew balances the sweetness and makes each bite of cheesecake even more satisfying, perfect for a post-celebration treat.
-
Whipped Cream: Keep it classic with an extra dollop of whipped cream. Its light texture complements the dense cheesecake, offering a lovely contrast.
-
Fruit Purée: A vibrant berry or mango purée adds a sweetly tart layer that brightens each bite, appealing to those who enjoy a colorful plate.
-
Ice Cream: Vanilla or chocolate ice cream provides a delightful creaminess that pairs with the cheesecake, turning a simple dessert into an extravagant dessert experience.
For an unforgettable touch, consider serving this rich and creamy cheesecake with a side of fruit compote, combining textures and flavors in a symphony of sweetness.
Creamy Birthday Cheesecake Variations
Feeling creative in the kitchen? Let’s explore delightful variations that will elevate your cheesecake experience!
- Gluten-Free: Swap graham cracker crumbs for gluten-free alternatives, like almond flour, to keep it safe and delicious for everyone.
- Dairy-Free: Use dairy-free cream cheese and coconut yogurt, creating a rich and creamy vegan version everyone can enjoy.
- Chocolate Lovers: Blend in chocolate cream cheese for a decadent twist that satisfies even the most serious chocolate cravings.
- Fruit-Infused: Add fresh fruit puree, like strawberries or raspberries, to the batter for a refreshing and zesty cheesecake flavor.
- Nutty Crunch: Fold crushed nuts, like pecans or walnuts, into the crust for a delightful crunch and added depth to every bite.
- Swirled Goodness: Create a marbled effect by swirling in fruit preserves or chocolate sauce before baking, making each slice visually stunning.
- Spice It Up: Include a pinch of cinnamon or nutmeg to warm up flavors, giving your cheesecake a seasonal feel perfect for fall celebrations.
Whichever variation you choose, each promises a delightful twist that brings warmth and joy to your gatherings! And if you’re craving more inspiration, don’t miss my Creamy Butternut Squash Apple Soup or indulge in a No-Bake Oreo Cheesecake for a sweet finish.
Expert Tips for Rich & Creamy Cheesecake
-
Room Temperature Ingredients: Ensure all ingredients, especially cream cheese and eggs, are at room temperature. This promotes a smoother batter and avoids lumps in your rich & creamy cheesecake.
-
Don’t Overmix: When incorporating eggs and folding in jimmies, mix just until combined. Overmixing can lead to undesirable cracks in the cheesecake.
-
Water Bath Importance: Always use a water bath during baking. It maintains moisture and helps achieve that luscious, creamy texture while preventing the cheesecake from cracking.
-
Cooling Gradually: Allow the cheesecake to cool in the oven with the door ajar after baking. This gradual cooling prevents sudden temperature changes that can cause cracks.
-
Chill Before Serving: Refrigerate your cheesecake for at least 4 hours, preferably overnight. This resting time enhances the flavors and texture, making every slice perfectly rich and creamy.
Make Ahead Options
These Creamy Birthday Cheesecake options are a lifesaver for busy home cooks! You can prepare the graham cracker crust up to 24 hours in advance; just store it in an airtight container at room temperature to maintain its crunch. The cheesecake filling can also be mixed ahead of time and refrigerated for up to 3 days; simply cover it tightly with plastic wrap to retain its flavor. When you’re ready to serve, bake the cheesecake directly from the fridge; just add an extra 10 minutes to the baking time if it feels too cold. This way, you enjoy delicious, freshly baked cheesecake with minimal effort on special occasions!
How to Store and Freeze Creamy Birthday Cheesecake
- Fridge: Store leftover creamy birthday cheesecake in an airtight container for up to 3 days. This keeps it fresh and flavorful, ready for your next sweet craving.
- Freezer: For longer storage, wrap slices tightly in plastic wrap, then place in a freezer-safe container. They can be frozen for up to 1 month.
- Thawing: To enjoy frozen cheesecake, transfer slices to the fridge for several hours or overnight to thaw before serving. This gently restores its rich, creamy texture.
- Reheating: While typically served cold, if you prefer a warm dessert, gently microwave individual slices for about 10-15 seconds, just until warmed through, ensuring it maintains the delightful flavors of the cheesecake.
Creamy Birthday Cheesecake Recipe FAQs
How do I select the right cream cheese for this cheesecake?
Absolutely! Look for a full-fat, block-style cream cheese for the best texture and flavor. Avoid spreadable varieties, as they often contain stabilizers that can alter the creamy texture of your cheesecake. Make sure it’s at room temperature before blending—that way, it will mix smoothly and lead to a luscious filling!
How should I store leftover cheesecake?
To keep your creamy birthday cheesecake fresh, store any leftovers in an airtight container in the refrigerator for up to 3 days. You want it to stay delightful and ready for another indulgent treat. If you don’t finish it within that time, pop the leftovers in the freezer!
Can I freeze slices of cheesecake?
Absolutely! To freeze, wrap individual slices tightly in plastic wrap and then place them in a freezer-safe container or bag. They can be frozen for up to 1 month. When you’re ready to enjoy, simply transfer the slices to the refrigerator for several hours or overnight to thaw. This process helps preserve that rich and creamy texture that we all love.
What should I do if my cheesecake cracks while baking?
Very! If your cheesecake cracks, don’t worry; it still tastes delicious! To help prevent this in the future, ensure you’re using a water bath during baking since it provides moisture and regulates temperature. Additionally, avoid overmixing the eggs, and remember to cool the cheesecake gradually in the oven with the door ajar to reduce sudden temperature changes.
Are there any allergies I should consider when making this cheesecake?
Yes! This creamy birthday cheesecake contains cream cheese, eggs, and butter, which could pose issues for those with dairy or egg allergies. For a dairy-free version, substitute dairy-free cream cheese and use egg replacer options like flaxseed meal or applesauce. Also, be mindful of any gluten issues—opt for gluten-free graham cracker crumbs or almond flour to keep it accessible for all your guests.
What are some ingredient substitutions I can make for dietary needs?
For a gluten-free cheesecake, use gluten-free graham cracker crumbs or almond flour in your crust. If you’re aiming for a dairy-free option, incorporate dairy-free cream cheese and coconut yogurt instead of sour cream, resulting in a creamy texture without dairy products. Meanwhile, chocolate lovers might enjoy blending in chocolate cream cheese for an indulgent twist!
Rich & Creamy Cheesecake That's Perfect for Any Celebration
Ingredients
Equipment
Method
- Preheat your oven to 350°F (175°C).
- Combine graham cracker crumbs with granulated sugar and melted unsalted butter. Press into a 9-inch springform pan.
- Wrap the exterior of the springform pan with aluminum foil to prevent moisture.
- Beat softened cream cheese in a stand mixer until smooth. Gradually add granulated sugar and mix until fully combined.
- Incorporate sour cream and vanilla extract, beating until smooth.
- Add eggs one at a time while mixing on low speed.
- Fold in rainbow jimmies gently with a spatula.
- Pour the filling into the prepared crust and bake in a water bath for 60-70 minutes.
- Cool in the water bath for about an hour, then refrigerate for at least 4 hours.
- Serve topped with whipped cream and rainbow jimmies.