

You won’t believe how easy it is to create a satisfying treat that checks all the boxes for health-conscious snackers! These High-Protein No-Bake Oreo Protein Balls are the ultimate guilt-free indulgence. With a delightful crunch from Oreo cookie pieces and a luscious creamy texture, they make for an energizing boost that’s perfect for post-workout cravings or a mid-afternoon pick-me-up. And the best part? You can whip them up in just ten minutes with only six gluten-free ingredients. So, whether you’re a culinary whiz or just starting out, you’ll find joy in making these little bites of goodness. Curious how to transform your favorite cookie into a protein-packed powerhouse? Let’s dive in!
Why are Oreo Protein Balls a must-try?
Quick and Easy: These delicious Oreo Protein Balls come together in just ten minutes, making them an ideal option for busy lives. High in Protein: Packed with protein, they enhance muscle recovery while satisfying cravings without guilt. Gluten-Free Goodness: They cater to various diets, ensuring everyone can enjoy them. Creamy and Crunchy: The blend of cream cheese and Oreo bits offers a unique texture combo. If you’re looking for more delightful options, check out these Savory Baked Meatballs or indulge in a sweet treat with our Bake Oreo Cheesecake. Versatile Variations: Customize these bites to suit your flavor preferences for endless snacking delight!
Oreo Protein Balls Ingredients
For the Batter
• Vanilla Protein Powder – Provides a high protein boost for muscle recovery; swap with chocolate for a flavor twist.
• Coconut Flour – Acts as a binding agent for the mixture; almond flour is a great gluten-free alternative if you prefer a softer texture.
• Monk Fruit Sweetener – Offers a guilt-free sweetness; regular sugar or erythritol can be used if desired.
• Cream Cheese – Adds a creamy, rich texture; use low-fat or vegan options if you prefer.
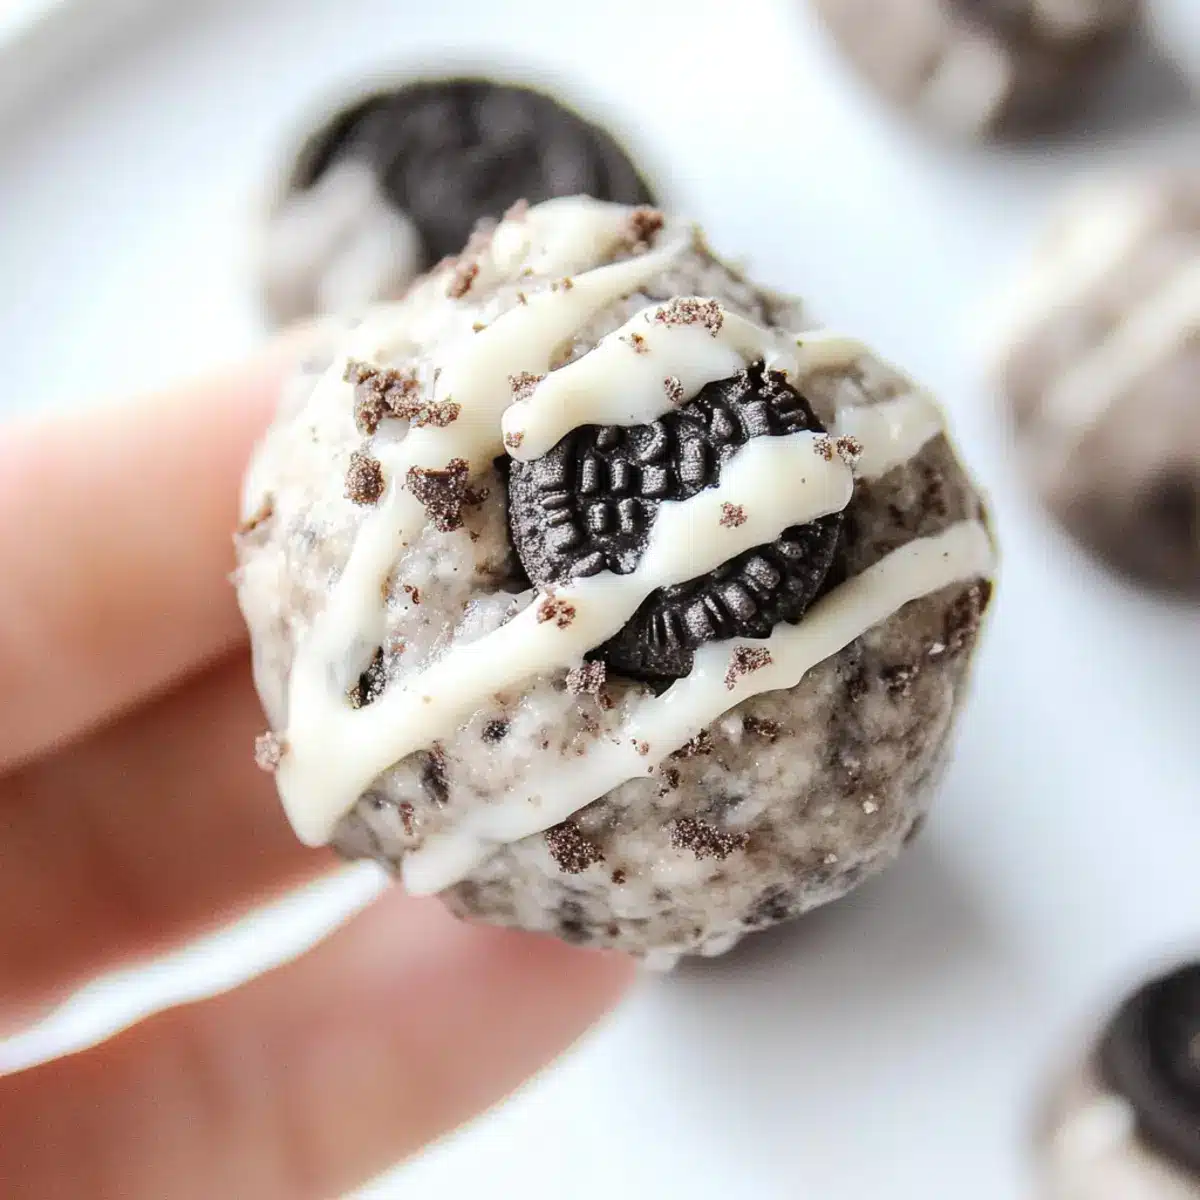
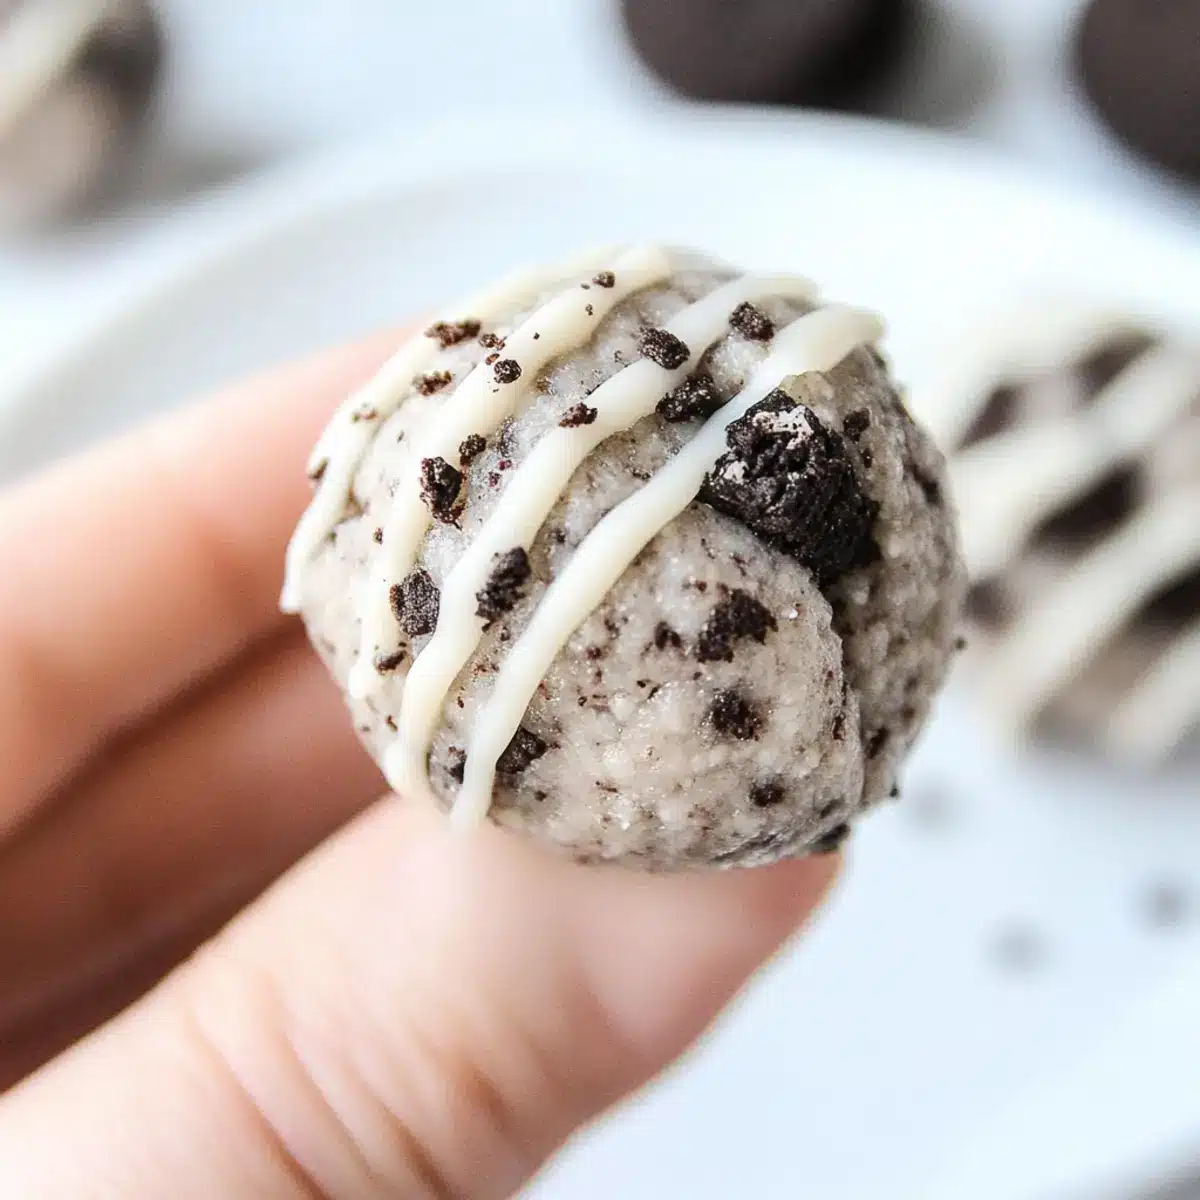
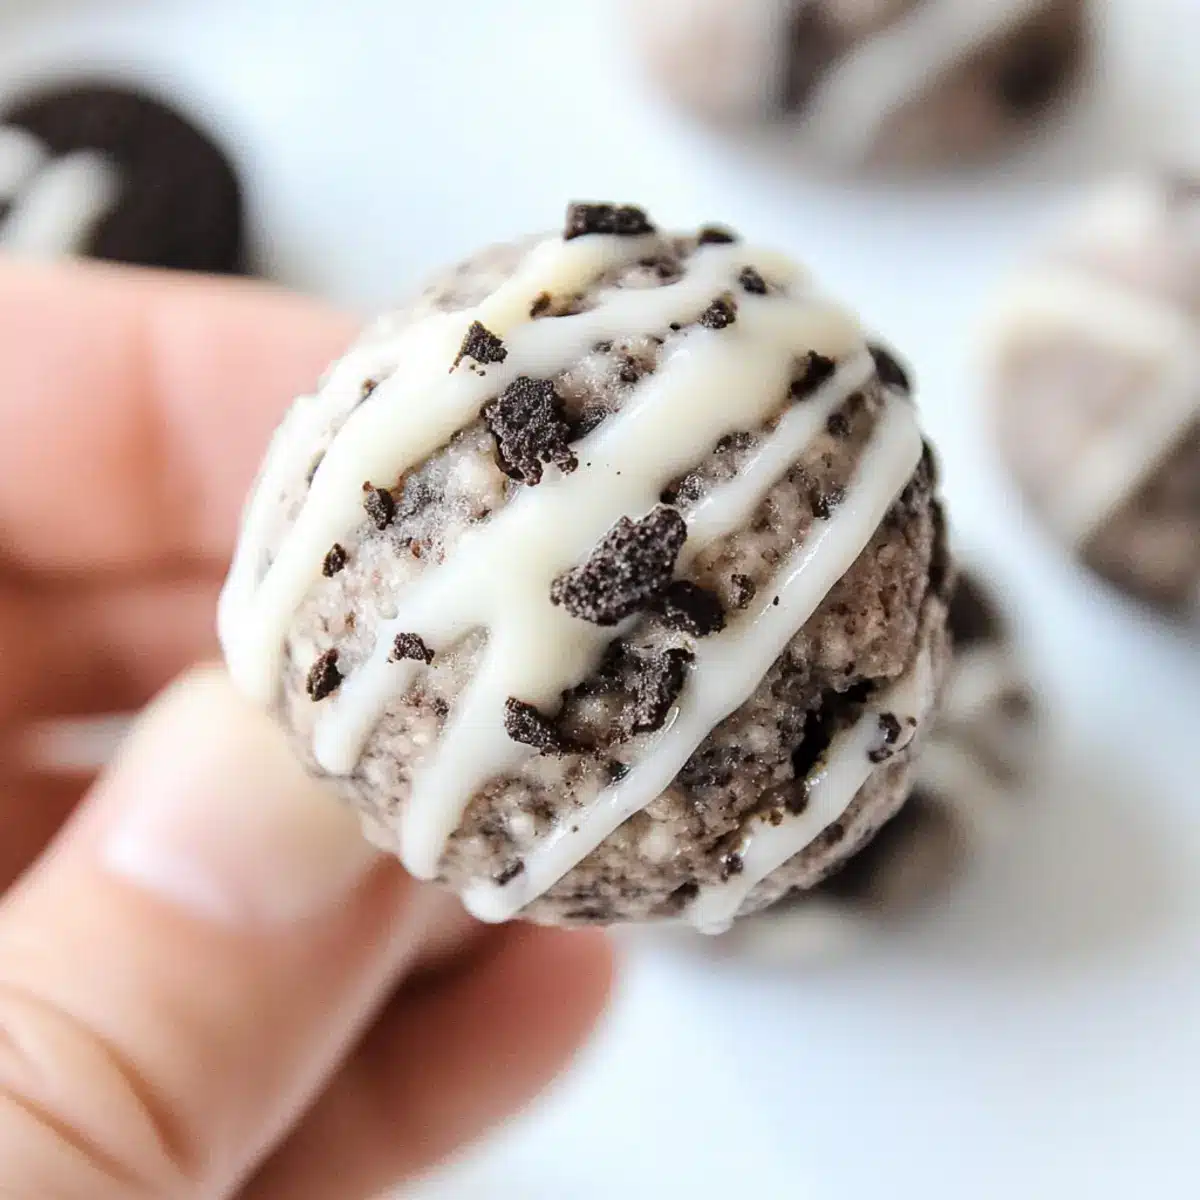
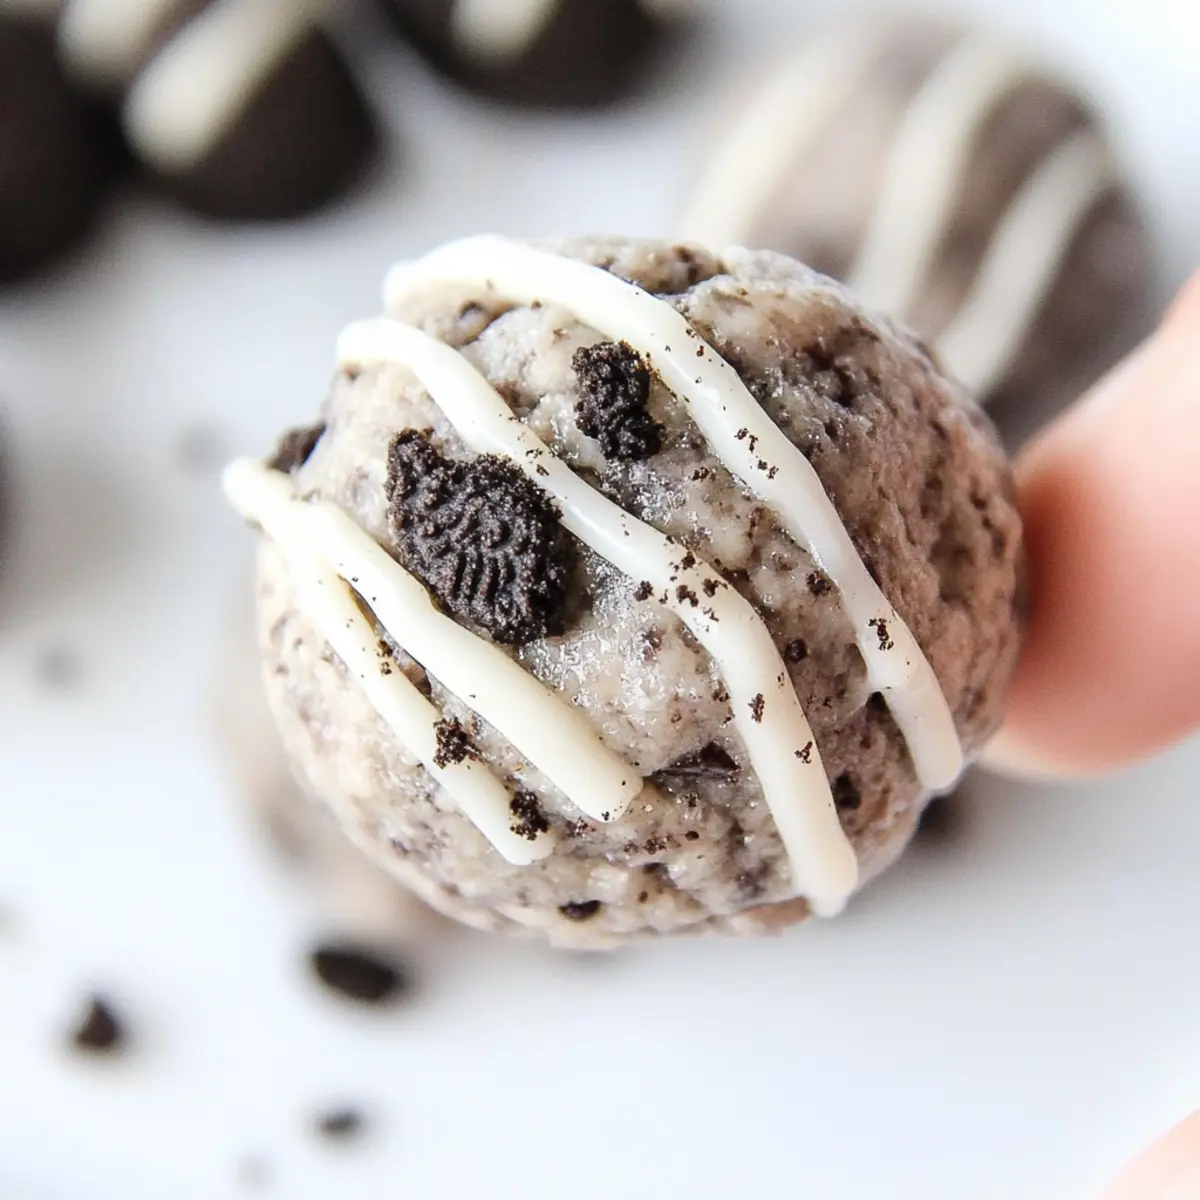
• Oreo Cookies – Brings that beloved Oreo crunch and flavor; opt for gluten-free Oreos for a diet-friendly treat.
• White Chocolate Chips – An optional drizzling delight for added sweetness and presentation.
Enjoy creating these delightful Oreo Protein Balls that bring both taste and nutrition together!
Step‑by‑Step Instructions for Oreo Protein Balls
Step 1: Crush the Oreos
Begin by placing your Oreo cookies into a food processor. Pulse them until finely crushed, leaving a few larger pieces for added texture. This process should take about 30 seconds. The crumbles should resemble sand but still have some chunks for that delightful crunch in your Oreo Protein Balls.
Step 2: Mix the Dry Ingredients
In a large mixing bowl, combine your vanilla protein powder, coconut flour, and monk fruit sweetener. Whisk these ingredients together thoroughly for about one minute to ensure even distribution. This base will provide the necessary protein and binding properties for your delicious Oreo Protein Balls.
Step 3: Combine Wet and Dry Mixtures
Add the softened cream cheese and the crushed Oreo cookie mixture to your dry ingredient bowl. Use a spatula or your hands to mix everything together until well combined, which should take about two minutes. The blend should be thick and slightly sticky, forming a cohesive dough.
Step 4: Adjust Consistency
Check the consistency of your mixture; if it feels too sticky, gradually add more coconut flour, one tablespoon at a time, mixing well after each addition. If the dough is too dry, you can add a splash of almond milk. The goal is to achieve a firm, moldable texture for your Oreo Protein Balls.
Step 5: Form the Protein Balls
Using a tablespoon, scoop out the mixture and roll it into balls about the size of a golf ball. This should yield around 10 to 12 balls. Ensure each ball is tightly packed and smooth on the outside for that perfect bite-sized treat packed with Oreo goodness.
Step 6: Refrigerate to Set
Place the formed Oreo Protein Balls on a parchment-lined tray and refrigerate them for at least 15 minutes. This will help them firm up and hold their shape better, allowing you to enjoy their creamy and crunchy textures without them falling apart.
Step 7: (Optional) Drizzle with White Chocolate
For an extra touch of sweetness, melt white chocolate chips in a microwave-safe bowl for about 30 seconds, stirring until smooth. Drizzle the melted chocolate over the chilled Oreo Protein Balls using a fork. Let the chocolate set for a few minutes before savoring your delectable treats.
What to Serve with High-Protein No-Bake Oreo Protein Balls
Imagine enjoying a sweet treat that not only satisfies your cravings but also fuels your body—these delightful bites are perfect for pairing with various accompaniments that enhance their blissful flavors.
- Creamy Greek Yogurt: A dollop of Greek yogurt pairs perfectly, adding creaminess and a tangy twist that complements the sweetness of the Oreo Protein Balls.
- Fresh Berries: Juicy strawberries or raspberries provide a fresh and vibrant contrast, balancing the richness of the protein balls while adding a burst of color to your plate.
- Nut Mix: A handful of mixed nuts gives a crunchy texture and nutty flavor that elevates the experience while offering healthy fats.
- Smoothies: A refreshing banana or berry smoothie creates a lovely pairing, making it a satisfying post-workout snack that nourishes and delights in every sip.
- Coffee or Tea: A warm cup of coffee or herbal tea can enhance your snacking experience, providing a cozy element that perfectly accompanies the creamy sweetness of each bite.
- Chocolate Drizzle: Add an extra touch of indulgence by drizzling melted dark chocolate over the protein balls for a decadent touch that intensifies their richness.
No matter how you choose to enjoy your Oreo Protein Balls, these pairings promise to enhance your snacking adventure!
Expert Tips for Oreo Protein Balls
-
Use a Food Processor: This will ensure a quick and even blend of ingredients, making the mixing process smoother and more efficient.
-
Soften Cream Cheese: Make sure your cream cheese is at room temperature for easier mixing, preventing lumps in your Oreo Protein Balls.
-
Adjust Consistency Gradually: If your mixture is too soft, add coconut flour slowly. If it’s too dry, incorporate almond milk a little at a time.
-
Store Properly: Keep your Oreo Protein Balls in an airtight container in the fridge for up to 5-7 days for maximum freshness and flavor.
-
Chill Before Serving: Refrigerate the balls for at least 15 minutes to ensure they firm up and hold their shape nicely.
Make Ahead Options
These Oreo Protein Balls are a fantastic choice for meal prep, allowing you to satisfy your sweet cravings without the last-minute rush! You can prepare the mixture up to 24 hours in advance; just mix all the ingredients and form the balls, then refrigerate them to set. If you’re looking to prep even further ahead, you can store the formed balls in an airtight container in the fridge for up to 5-7 days. To maintain their delightful texture, ensure they’re well-covered to prevent drying out. When you’re ready to enjoy, simply drizzle with melted white chocolate right before serving for that perfect finishing touch!
Storage Tips for Oreo Protein Balls
Fridge: Keep your Oreo Protein Balls in an airtight container; they will stay fresh for up to 5-7 days, ready for a quick snack anytime.
Freezer: For longer storage, place the balls in a single layer in a freezer-safe container. They can be frozen for up to 3 months.
Thawing: When you’re ready to enjoy, simply take out the desired amount and let them thaw in the fridge for a couple of hours or at room temperature for about 30 minutes.
Reheating: These protein balls are best enjoyed cold or at room temperature; however, you can slightly warm them in the microwave for about 10 seconds if you prefer a softer texture.
Oreo Protein Balls Variations & Substitutions
Invite your taste buds on a delightful journey by customizing your Oreo Protein Balls just the way you like them!
- Flavored Protein Powder: Swap vanilla for chocolate or cookies and cream for a unique twist on flavor.
- Nutty Crunch: Toss in your favorite chopped nuts or seeds to enhance the texture and add extra protein.
- Dairy-Free Option: Use vegan cream cheese and nut butter for a completely dairy-free version of these tasty bites.
- Cookie Swap: Replace Oreos with your preferred cookie or gluten-free alternatives for a new flavor profile.
- Add a Spice: Incorporate a dash of cinnamon or a sprinkle of sea salt to elevate the sweetness and add warm undertones.
- Fruit Boost: Mix in dried cranberries or chopped dates for a burst of sweetness and chewy texture that’s irresistible.
- Chocolate Coating: Instead of drizzling with white chocolate, submerge them in dark chocolate for a rich, indulgent finish.
- Heat It Up: Add a pinch of cayenne or chili powder to the mixture for a surprising kick that complement the sweetness effortlessly.
For more mouth-watering recipes, don’t miss our savory Chicken Piccata Meatballs or delight in a smooth slice of our rich Bake Oreo Cheesecake. Happy snacking!
Oreo Protein Balls Recipe FAQs
What type of Oreo cookies should I use?
Absolutely! Regular Oreos lend that classic flavor to your protein balls. If you’re following a gluten-free diet, I recommend using gluten-free Oreos. They have a very similar taste and texture, ensuring that everyone can indulge in this delightful snack.
How long can I store my Oreo Protein Balls?
You can keep your Oreo Protein Balls in an airtight container in the fridge for up to 5-7 days. They make a great quick snack when you need a boost of energy during the week, and I often make a batch to have on hand for busy days!
Can I freeze the Oreo Protein Balls?
Very! For longer storage, arrange the balls in a single layer in a freezer-safe container, separating layers with parchment paper. They’ll stay fresh for up to 3 months. When you’re ready to enjoy, simply pull out the desired amount and let them thaw in the fridge for a couple of hours or at room temperature for about 30 minutes.
What if the mixture is too sticky?
If you find your mixture sticking to your hands or bowl, don’t worry! Gradually mix in additional coconut flour, about one tablespoon at a time. This should help achieve a firmer consistency. Alternatively, you can coat your hands with a little coconut flour while rolling them, which also helps!
Are there any dietary considerations I should know about?
Absolutely! If you’re catering to specific dietary needs, you can substitute low-fat cream cheese for regular cream cheese or opt for a vegan option. Additionally, be mindful of any allergies related to the ingredients you choose, like gluten in regular Oreos or dairy in cream cheese alternatives. Always double-check labels!
Can I modify the recipe for different flavors?
Of course! This recipe is very flexible. You might try using chocolate protein powder for a richer flavor or swap Oreos for another cookie you love. Mixing in nuts or seeds can add a delightful crunch and more nutrients, too! The more the merrier when it comes to flavor exploration!
Decadent Oreo Protein Balls for Guilt-Free Snacking
Ingredients
Equipment
Method
- Crush the Oreos in a food processor until finely crushed, leaving some larger pieces.
- In a mixing bowl, combine the vanilla protein powder, coconut flour, and monk fruit sweetener. Whisk thoroughly.
- Add the softened cream cheese and crushed Oreos to the dry ingredients. Mix well until combined.
- Adjust the consistency by adding more coconut flour if too sticky or a splash of almond milk if too dry.
- Scoop out the mixture and roll it into golf ball-sized balls, about 10 to 12 in total.
- Refrigerate the balls on a parchment-lined tray for at least 15 minutes to firm up.
- Melt white chocolate chips and drizzle over the chilled protein balls, letting set before enjoying.