

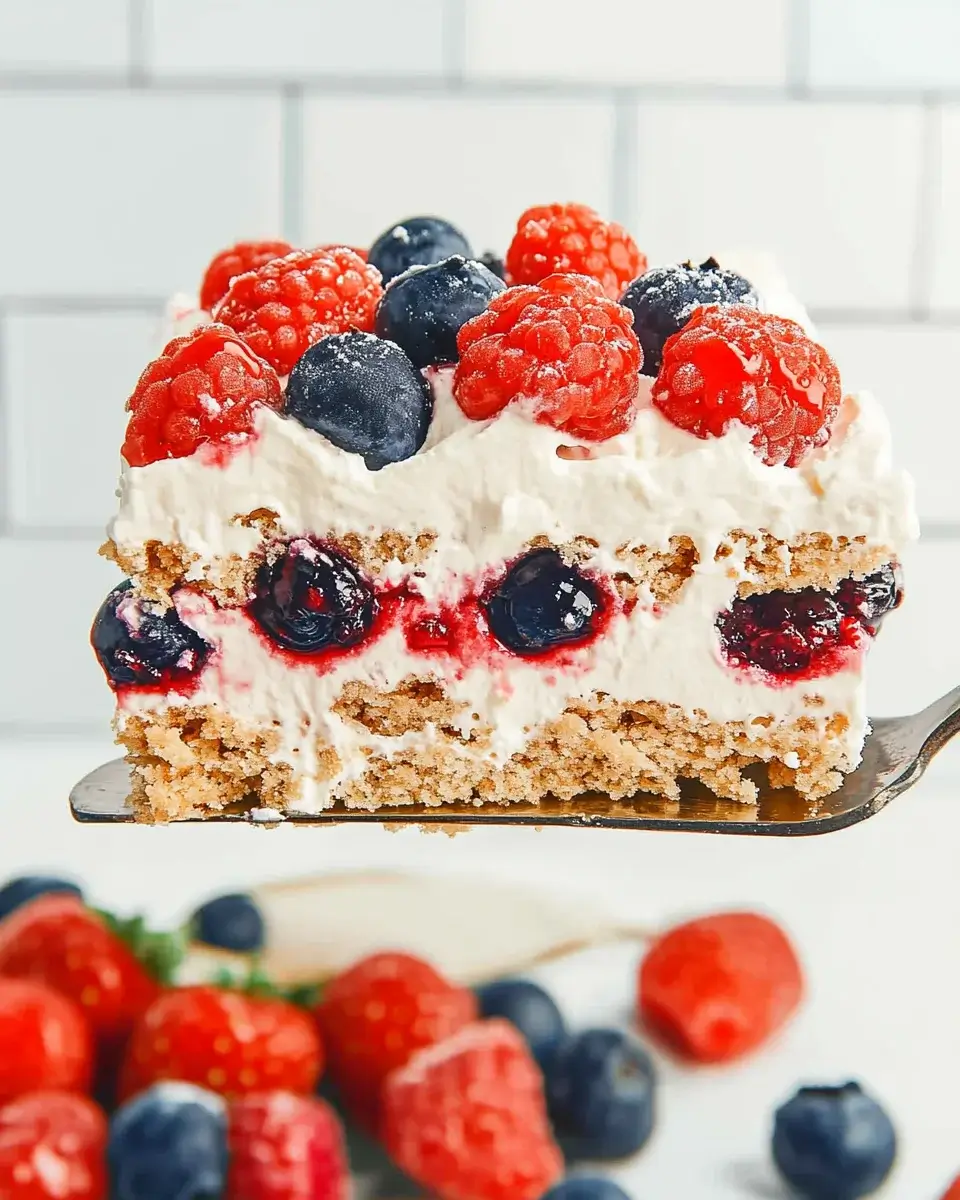
Mixed Berry Icebox Cake
There’s something magical about a dessert that requires no baking, especially when it’s as delightful as a Mixed Berry Icebox Cake.
I remember the first time I made this treat; it was a hot summer day, and the last thing I wanted was to heat up the kitchen.
This no-bake dessert is perfect for those busy days when you want to impress your loved ones without spending hours in the kitchen.
With layers of whipped cream, graham crackers, and fresh berries, it’s a refreshing way to satisfy your sweet tooth while keeping things simple and delicious.
Why You’ll Love This Mixed Berry Icebox Cake
This Mixed Berry Icebox Cake is a game-changer for dessert lovers.
It’s incredibly easy to whip up, taking just 20 minutes of your time.
The best part? You can prepare it ahead of time, making it a stress-free option for gatherings.
With its vibrant colors and fresh flavors, it’s not just a treat for the taste buds but also a feast for the eyes.
Trust me, your friends and family will be asking for seconds!
Ingredients for Mixed Berry Icebox Cake
Creating a Mixed Berry Icebox Cake is all about using fresh, quality ingredients that come together in a delightful way.
Here’s what you’ll need:
- Heavy whipping cream: This is the star of the show, providing that rich, creamy texture we all love.
- Powdered sugar: A touch of sweetness that blends perfectly into the whipped cream.
- Vanilla extract: Adds a warm, aromatic flavor that enhances the overall taste.
- Mixed berries: A colorful mix of strawberries, blueberries, and raspberries brings freshness and a burst of flavor.
- Graham crackers: These create the cake’s structure, adding a delightful crunch that contrasts beautifully with the cream.
- Fresh mint leaves (optional): A lovely garnish that adds a pop of color and a refreshing hint of flavor.
Feel free to get creative!
For a chocolate twist, consider using chocolate graham crackers or adding cocoa powder to the whipped cream.
If you’re looking for a healthier option, substituting Greek yogurt for half of the heavy cream can lighten things up without sacrificing taste.
Exact quantities for each ingredient can be found at the bottom of the article, ready for you to print and take to the kitchen!
How to Make Mixed Berry Icebox Cake
Making a Mixed Berry Icebox Cake is a breeze, and I’m here to guide you through each step.
Let’s dive into the process, ensuring you create a dessert that’s as delicious as it is beautiful.
Step 1: Whip the Cream
Start by pouring the heavy whipping cream into a large mixing bowl.
Using an electric mixer, whip it on medium speed until it begins to thicken.
This is where the magic happens!
Gradually add the powdered sugar and vanilla extract.
Keep whipping until you see stiff peaks form.
This fluffy cloud of cream is the heart of your cake.
Step 2: Prepare the Baking Dish
Grab a 9×13 inch baking dish.
Spread a thin layer of that luscious whipped cream on the bottom.
This acts as a glue, holding everything together.
Make sure it’s even; it sets the stage for the layers to come.
Step 3: Layer the Ingredients
Now, it’s time to build your masterpiece!
Place a layer of graham crackers over the whipped cream.
Don’t worry if they don’t fit perfectly; break them as needed.
Next, spread half of the remaining whipped cream over the crackers.
Then, layer half of your mixed berries on top.
Repeat this process with another set of graham crackers, the rest of the whipped cream, and the remaining berries.
Each layer adds texture and flavor, creating a delightful experience.
Step 4: Refrigerate
Cover your dish with plastic wrap and pop it in the fridge.
Let it chill for at least 4 hours, or even overnight if you can wait.
This step is crucial!
It allows the flavors to meld and the graham crackers to soften, creating that cake-like texture.
Step 5: Garnish and Serve
When you’re ready to serve, take it out of the fridge.
If you like, garnish with fresh mint leaves for a pop of color and flavor.
Slice it up and watch as everyone’s eyes light up.
This Mixed Berry Icebox Cake is not just a dessert; it’s a celebration of summer in every bite!
Tips for Success
- Use chilled mixing bowls and beaters for whipping cream; it helps achieve better volume.
- Don’t rush the refrigeration; letting it sit overnight enhances the flavors.
- Experiment with different berries based on what’s in season for the freshest taste.
- For a fun twist, add a layer of lemon curd or chocolate sauce between the layers.
- Keep leftovers covered in the fridge for up to three days for the best texture.
Equipment Needed
- Mixing bowl: A large bowl is essential for whipping cream. A glass or stainless steel bowl works best.
- Electric mixer: A hand mixer is perfect, but a stand mixer can save time.
- Baking dish: A 9×13 inch dish is ideal, but any similar-sized dish will do.
- Plastic wrap: Use this to cover the dish while it chills in the fridge.
Variations
- Chocolate Delight: Swap out regular graham crackers for chocolate graham crackers and add cocoa powder to the whipped cream for a rich twist.
- Fruit Fusion: Experiment with different berries like blackberries or peaches, or even mix in some tropical fruits like mango for a unique flavor.
- Nutty Crunch: Add a layer of crushed nuts, such as almonds or pecans, between the layers for an extra crunch and flavor boost.
- Vegan Option: Use coconut cream instead of heavy whipping cream and maple syrup in place of powdered sugar for a dairy-free version.
- Low-Sugar Version: Substitute the powdered sugar with a sugar alternative like stevia or erythritol to reduce the sweetness and calories.
Serving Suggestions
- Pair your Mixed Berry Icebox Cake with a scoop of vanilla ice cream for an indulgent treat.
- Serve alongside a refreshing glass of iced tea or lemonade to complement the flavors.
- For a beautiful presentation, garnish each slice with additional berries and a sprig of mint.
FAQs about Mixed Berry Icebox Cake
Can I make Mixed Berry Icebox Cake ahead of time?
Absolutely! This no-bake dessert is perfect for making ahead. In fact, it tastes even better after sitting in the fridge overnight, allowing the flavors to meld beautifully.
What type of berries work best for this recipe?
While strawberries, blueberries, and raspberries are classic choices, feel free to mix in blackberries or even peaches for a fun twist. Just make sure they’re fresh for the best flavor!
How long can I store leftovers?
You can keep any leftovers covered in the fridge for up to three days. However, the texture is best enjoyed within the first couple of days.
Can I use a different type of cream?
Yes! If you want a lighter option, you can substitute half of the heavy cream with Greek yogurt. It adds a nice tang while keeping the dessert creamy.
Is this dessert suitable for special diets?
Definitely! You can easily adapt this Mixed Berry Icebox Cake to fit various dietary needs. Consider using coconut cream for a vegan version or a sugar alternative for a low-sugar option.
Final Thoughts
Creating a Mixed Berry Icebox Cake is more than just whipping up a dessert; it’s about crafting memories.
Each layer tells a story, from the first dollop of whipped cream to the vibrant burst of berries.
This no-bake treat is perfect for summer gatherings, family barbecues, or simply a sweet escape on a warm evening.
As you slice into this colorful delight, you’ll see smiles all around.
It’s a reminder that sometimes, the simplest recipes bring the most joy.
So, gather your loved ones, share a slice, and savor the sweet moments together!
Mixed Berry Icebox Cake: A Delightful No-Bake Treat!
Ingredients
Method
- In a large mixing bowl, whip the heavy cream with an electric mixer on medium speed until it begins to thicken.
- Gradually add the powdered sugar and vanilla extract, continuing to whip until stiff peaks form.
- In a 9x13 inch baking dish, spread a thin layer of whipped cream on the bottom.
- Place a layer of graham crackers over the whipped cream, breaking them as needed to fit.
- Spread half of the remaining whipped cream over the graham crackers, then layer half of the mixed berries on top.
- Repeat the layers with another set of graham crackers, the remaining whipped cream, and the rest of the mixed berries.
- Cover the dish with plastic wrap and refrigerate for at least 4 hours or overnight to allow the flavors to meld and the graham crackers to soften.
- Before serving, garnish with fresh mint leaves if desired.
Nutrition
Notes
- For a chocolate twist, add cocoa powder to the whipped cream or use chocolate graham crackers.
- To make it a bit healthier, substitute Greek yogurt for half of the heavy cream.