

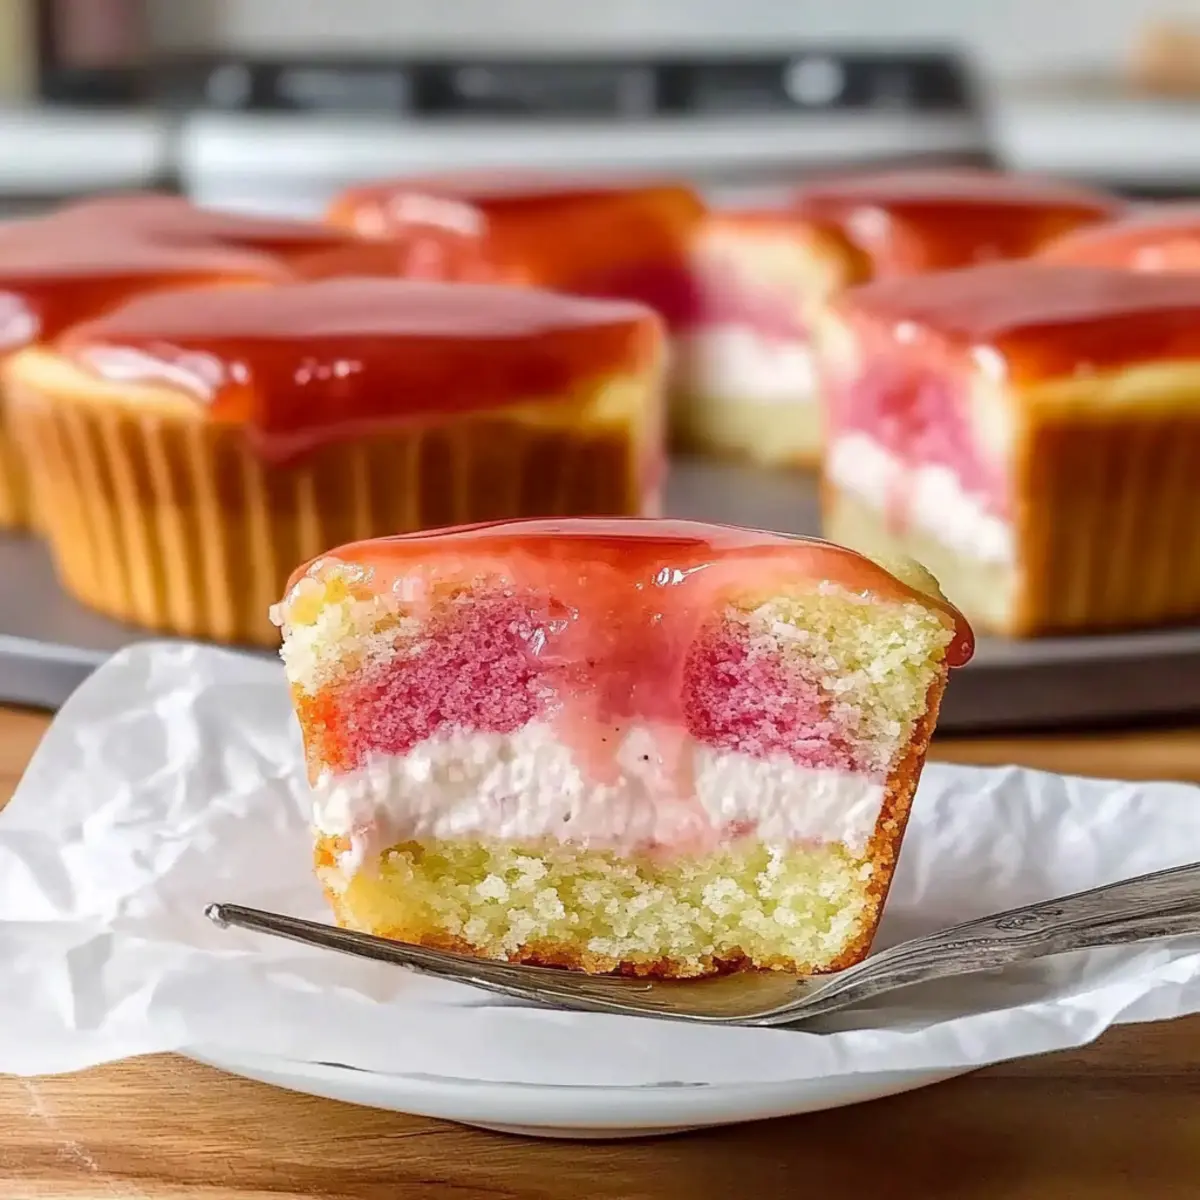
As I wandered through a local farmer’s market, the sweet scent of fresh guavas caught my attention, transporting me straight to the sun-kissed beaches of Hawaii. That moment inspired me to whip up a delightful batch of Hawaiian Mini Guava Cakes, a treat that perfectly encapsulates tropical bliss. With a light and fluffy texture from strawberry cake mix and a touch of luscious guava juice, these mini desserts are topped with a creamy layer that’s simply irresistible. Not only are they an absolute crowd-pleaser, but they’re also adaptable for dietary needs—think gluten-free and vegan options! Whether you’re hosting a summer get-together or just in need of a culinary escape, this recipe is sure to become a favorite. Ready to bring a slice of paradise to your kitchen? Let’s dive in!
Why are Hawaiian Mini Guava Cakes irresistible?
Tropical Escape: Indulge in the vibrant flavors of the tropics right at home! Versatility at Its Finest: Easily modify this recipe to suit dietary preferences, whether gluten-free or vegan. Simplicity in Preparation: With just a handful of ingredients, creating these mini delights is a breeze. Crowd-Pleasing Favorite: Perfect for gatherings or family treats, they’re sure to impress. And if you love breakfast indulgence, try pairing them with Buttermilk Pancakes Breakfast for a tropical-inspired brunch!
Hawaiian Mini Guava Cakes Ingredients
For the Cake
• Strawberry Cake Mix – A fluffy base that brings sweetness; try vanilla or white cake mix for a different flavor.
• Guava Juice – Infuses the cake with tropical sweetness and moisture; opt for pure nectar for best results or use pureed fresh guava.
• Eggs – Essential for structure and moisture; substitute with flax eggs for a vegan version.
• Coconut Oil – Adds moisture and a hint of coconut flavor; melted butter or vegetable oil works well too.
For the Topping
• Cream Cheese – Creates a smooth, creamy topping; ensure it’s softened to mix well, or use vegan cream cheese for a plant-based option.
• Sugar – Sweetens the cream cheese layer; adjust based on personal taste preferences.
• Cool Whip – Lightens the cream cheese mixture, providing a fluffy texture; opt for dairy-free whipped topping if desired.
For the Glaze
• Cornstarch – Thickens the guava glaze for a beautiful sheen; consider arrowroot powder as an alternative.
• Guava Juice – Amplifies the fruity flavor of the glaze; use pure guava juice for the best taste.
• Water – Helps create a cornstarch slurry, ensuring a smooth glaze consistency.
Get ready to bake these delightful Hawaiian Mini Guava Cakes, and let the tropical flavors whisk you away!
Step‑by‑Step Instructions for Hawaiian Mini Guava Cakes
Step 1: Preheat the Oven
Begin by preheating your oven to 350°F (175°C). While the oven warms up, line your cupcake pans with paper liners, ensuring each compartment is ready to hold the delicious batter. This preparation sets the stage for your Hawaiian Mini Guava Cakes, helping them bake evenly and pop out easily once done.
Step 2: Mix the Batter
In a large mixing bowl, combine the strawberry cake mix, guava juice, eggs, and melted coconut oil. Using an electric mixer, mix on low speed for about 30 seconds to combine the ingredients, then increase to medium speed for 2 full minutes until the batter is smooth and fluffy. This step is crucial for achieving the light texture characteristic of Hawaiian Mini Guava Cakes.
Step 3: Fill the Cupcake Liners
Carefully fill each cupcake liner about one-third full with the cake batter using a small ladle or a piping bag. This portion helps the cakes rise beautifully without overflowing. Once filled, place the pans in the preheated oven and bake for 19 to 22 minutes. You’ll know they’re ready when they turn golden brown and a toothpick inserted in the center comes out clean.
Step 4: Cool the Cakes
Once baked, remove the mini guava cakes from the oven and let them cool in the pans for about 5 minutes. Then, transfer them to a cooling rack to cool completely. Ensuring they cool properly is important, as it will allow for a smooth cream cheese topping in the next step.
Step 5: Prepare the Guava Glaze
In a small saucepan over medium heat, combine guava juice and granulated sugar. Bring the mixture to a gentle boil, stirring occasionally. Meanwhile, mix cornstarch with a bit of water to create a slurry. Once the guava mixture is boiling, whisk in the cornstarch slurry, and return to heat, stirring consistently until it thickens, about 2-3 minutes. Set aside to cool.
Step 6: Make the Cream Cheese Topping
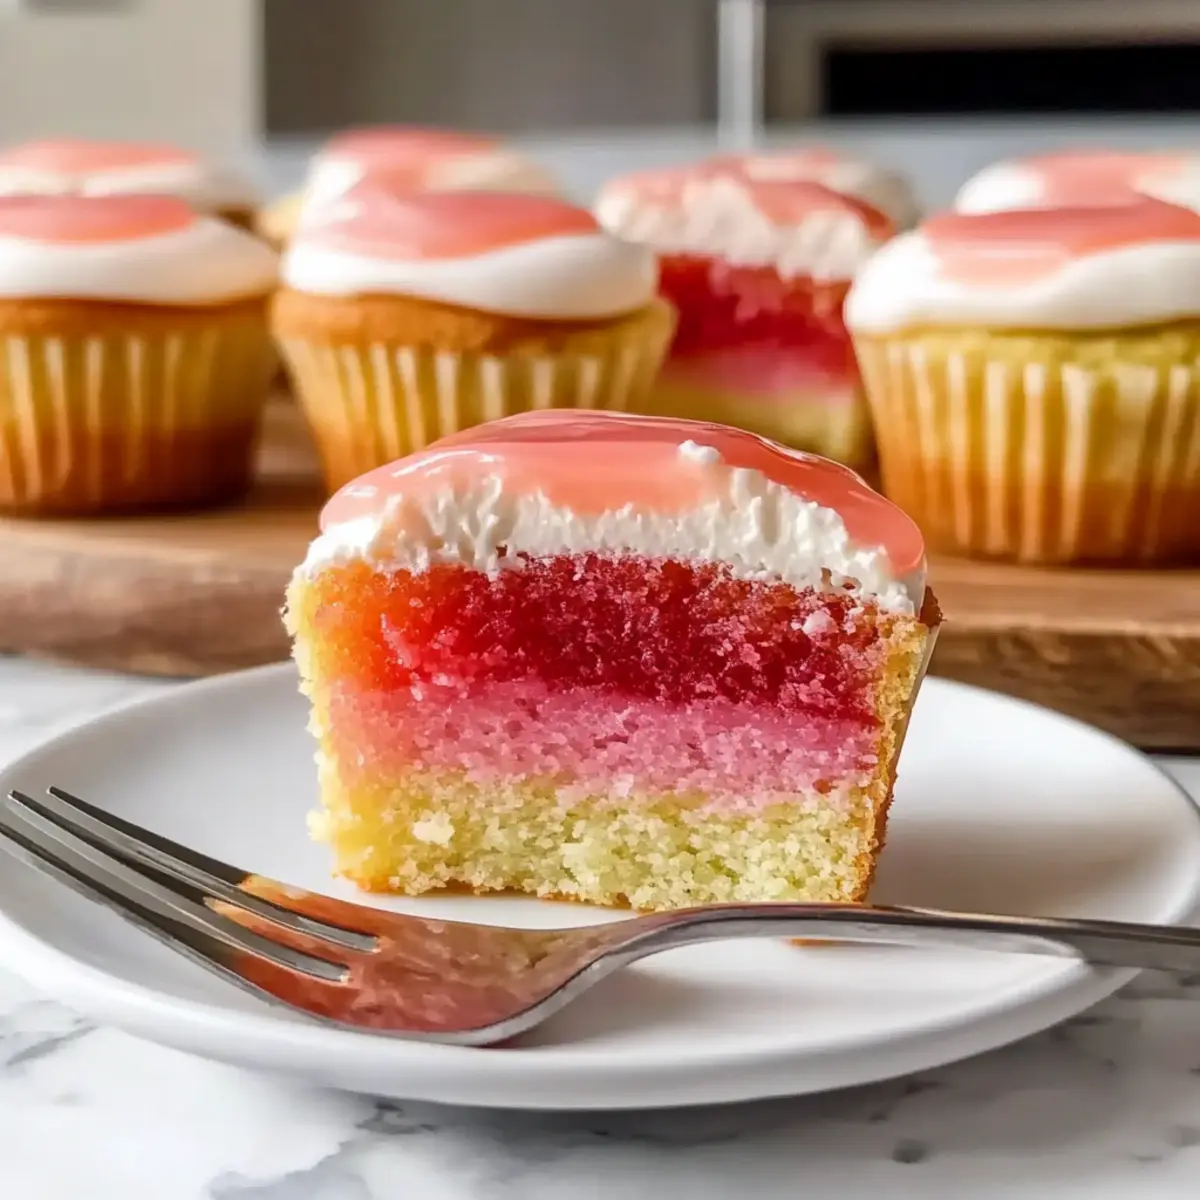
In a mixing bowl, beat softened cream cheese together with sugar and a splash of vanilla extract until well-combined and creamy. Gently fold in the Cool Whip until the mixture is light and fluffy. This cream cheese topping adds a rich layer to your Hawaiian Mini Guava Cakes, creating that indulgent finish everyone craves.
Step 7: Frost the Mini Cakes
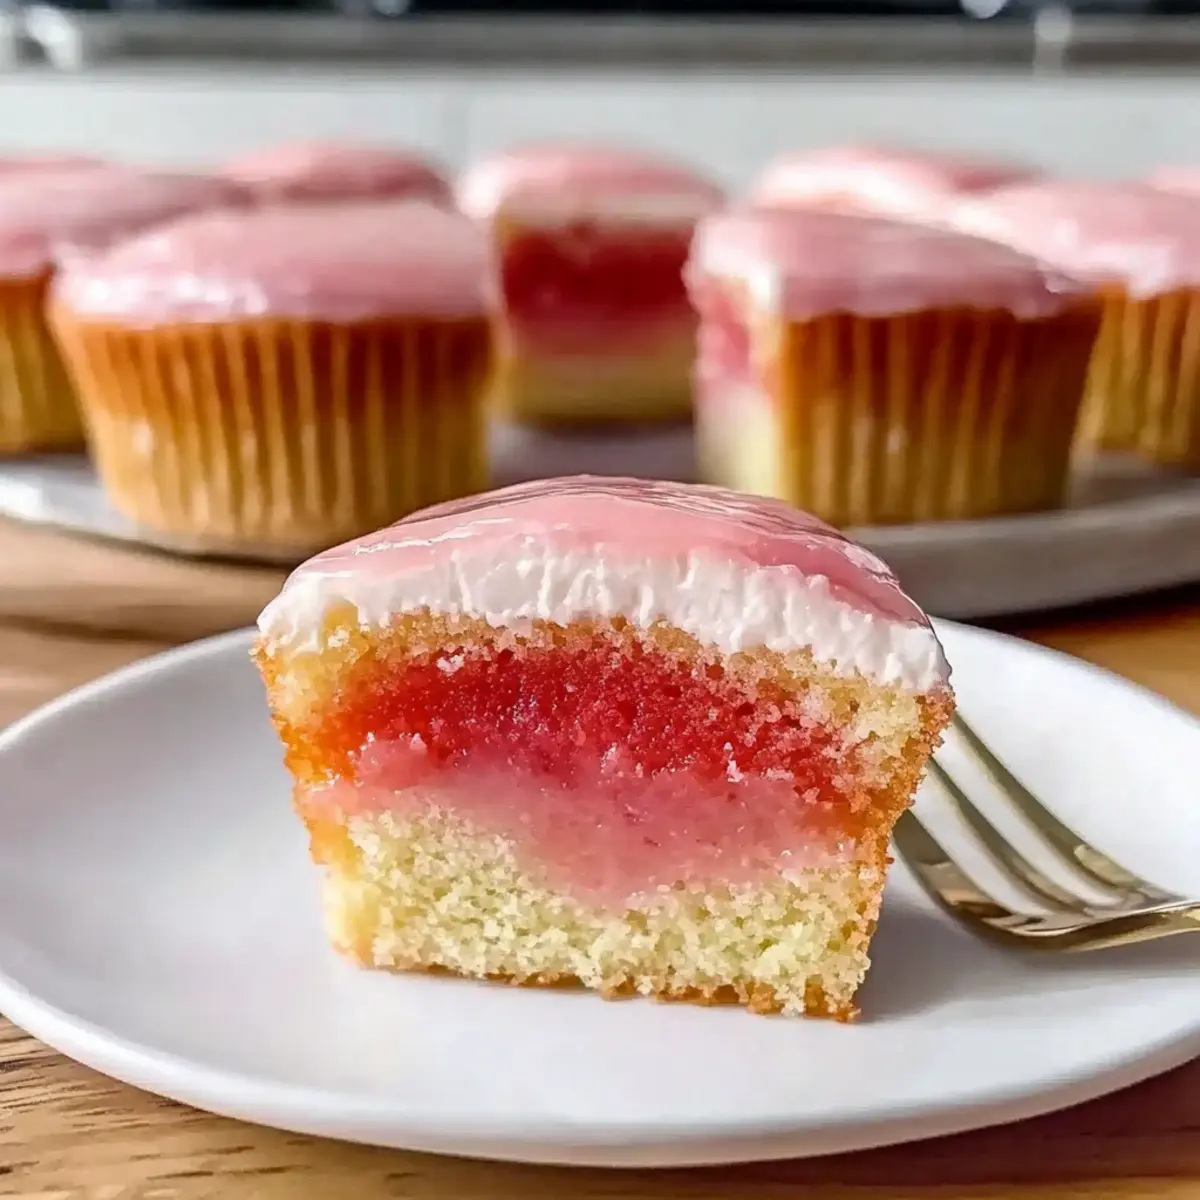
Once the mini cakes have completely cooled, spread a generous layer of the cream cheese topping over each one using a spatula or a butter knife. Ensure each cake is well-covered, as this layer will beautifully complement the flavors of the cake and glaze. After frosting, refrigerate the cakes for about 30 minutes to firm up the topping.
Step 8: Glaze the Cakes
Finally, take the cooled guava glaze and drizzle it over each frosted mini cake, allowing it to cascade beautifully down the sides. The glaze adds a vibrant, fruity finish that enhances both the appearance and flavor of your Hawaiian Mini Guava Cakes. Serve immediately, or store them in the refrigerator until ready to enjoy!

Hawaiian Mini Guava Cakes Variations
Feel free to personalize these Hawaiian Mini Guava Cakes and explore different flavors that tickle your taste buds!
- Gluten-Free: Use a gluten-free cake mix to cater to dietary needs while still enjoying a tropical treat. These cakes remain just as delightful!
- Vegan: Swap the eggs for flax eggs and use a dairy-free cream cheese alternative for a completely plant-based version. It’s amazing how versatile these can be!
- Different Cake Mixes: Trade the strawberry cake mix for vanilla or white cake mix for a simpler flavor profile to let the guava shine. The possibilities are endless!
- Enhanced Flavor: Add fresh guava puree into the glaze for an irresistible fruity layer. It deepens the tropical experience with every bite!
- Coconut Cream Delight: For added coconut flavor, mix in shredded coconut into the batter. It gives each cake a chewy surprise!
- Citrus Twist: Incorporate a splash of freshly squeezed lime juice into the batter to enhance the sweetness of the guava. This zesty surprise will wake up your senses!
- Heat Factor: To add a kick, mix in a pinch of cayenne pepper or finely chopped fresh jalapeño to the glaze. The heat beautifully contrasts the sweetness!
- Nutty Surprise: Stir in some chopped macadamia nuts into the batter for added crunch. They’re a perfect nod to Hawaiian flavors!
As you explore these delightful variations, don’t forget about the charm of pairing them with refreshing bites like Chocolate Lava Cakes or treating yourself to Buttermilk Pancakes Breakfast! Each twist will surely bring a smile to your table!
Storage Tips for Hawaiian Mini Guava Cakes
Room Temperature: Keep freshly baked Hawaiian Mini Guava Cakes covered at room temperature for up to 1 day, ideally in a cake dome or covered with plastic wrap to retain moisture.
Fridge: Store any leftover cakes in an airtight container in the refrigerator for 3–4 days. This keeps them fresh and ready to enjoy whenever you crave a tropical treat!
Freezer: For longer storage, freeze unglazed mini cakes in a single layer on a baking sheet before transferring them to airtight containers or freezer bags. They can be stored for up to 2 months.
Reheating: To enjoy, simply thaw the cakes in the fridge overnight and apply the glaze right before serving for that fresh, vibrant flavor.
Expert Tips for Hawaiian Mini Guava Cakes
- Watch the Baking Time: Keep an eye on your cakes as they bake; don’t open the oven too early to prevent sinking. Aim for a golden top.
- Mixing Method Matters: While an electric mixer is great, mixing by hand works too. Just ensure you blend well to avoid lumps in the batter for your Hawaiian Mini Guava Cakes.
- Cool Completely: Allow cakes to cool fully before frosting and glazing. A warm cake can melt the cream cheese topping, leading to a messy finish.
- Glaze Consistency: If your guava glaze is too thick, add a splash of water; if too thin, return to heat with a little more cornstarch. Achieving the right texture is key!
- Make Ahead: Prepare the cream cheese topping a day in advance for extra convenience. Just store it in the fridge until you’re ready to frost your cakes.
Make Ahead Options
These Hawaiian Mini Guava Cakes are perfect for meal prep enthusiasts! You can prepare the cream cheese topping up to 3 days in advance and store it in the refrigerator; just be sure to use a tightly sealed container to maintain its creamy texture. The mini cakes themselves can be baked up to 24 hours ahead of time—just allow them to cool completely and refrigerate them in an airtight container. When you’re ready to enjoy, frost the cakes with the cream cheese topping and add the guava glaze right before serving to ensure they remain as delicious and fresh as when first made. This planning allows you to savor the tropical goodness with minimal effort on the day of serving!
What to Serve with Hawaiian Mini Guava Cakes?
Treat your taste buds to a tropical feast that will leave you yearning for more!
- Light Green Tea: The subtle flavors of green tea refresh the palate, balancing the sweetness of the cakes perfectly.
- Tropical Punch: A fruity punch adds an extra burst of tropical flavor and makes your dessert table pop with color.
- Vanilla Ice Cream: The creaminess of vanilla ice cream provides a delightful contrast to the soft guava cakes, enhancing their richness.
- Coconut Flakes: Toasted coconut adds a chewy texture and a nutty flavor that pairs beautifully with the tropical essence of guava.
- Fresh Guava Slices: Garnishing with fresh guava slices elevates the presentation and amplifies the fruity notes of the cakes. The freshness of the guava slices offers that delightful crunch!
- Mango Sorbet: The bright sweetness of mango sorbet complements the guava flavor while providing a refreshing, cold treat on a warm day.
- Sparkling Water with Lime: A cool, fizzy drink adds a refreshing element that cleanses the palate for the next bite of cake.
- Pineapple Upside Down Cake: Serve these mini guava cakes alongside a slice of pineapple upside-down cake for a delightful tropical duo that will transport you to paradise!
Hawaiian Mini Guava Cakes Recipe FAQs
How do I choose ripe guavas for my cakes?
Absolutely! Look for guavas that are slightly soft to the touch with a fragrant aroma. Avoid any that have dark spots all over, as this may indicate overripeness. If you can find fresh guavas, they can be pureed and used as a substitute for guava juice for an even richer flavor.
What is the best way to store leftover Hawaiian Mini Guava Cakes?
For optimal freshness, store leftover cakes in an airtight container in the refrigerator for 3–4 days. It’s essential to keep them covered to maintain moisture. If you’d like to enjoy them later, you can freeze unglazed cakes for up to 2 months. Just make sure to thaw them in the fridge overnight before adding the glaze.
Can I freeze Hawaiian Mini Guava Cakes?
Yes, you can! To freeze, first allow the cakes to cool completely. Then, lay them in a single layer on a baking sheet to prevent sticking. Once frozen, transfer them to airtight containers or freezer bags. When ready to enjoy, simply thaw them in the refrigerator before frosting and glazing for the best texture and flavor.
What should I do if my guava glaze is too thick?
Very! If your guava glaze turns out too thick, don’t worry! Just whisk in a splash of water over low heat until you achieve the desired consistency. Alternatively, if it’s too thin, mix a little cornstarch with water to create a slurry, return it to heat, and stir until thickened to your liking.
Are there any dietary considerations I should be aware of?
Yes, definitely consider any allergies or dietary restrictions! For a gluten-free variation, use a certified gluten-free cake mix. For a vegan twist, replace the eggs with flax eggs (1 tablespoon ground flaxseed + 2.5 tablespoons water = 1 egg) and choose vegan cream cheese and whipped topping. Always double-check labels to avoid any hidden allergens.
How can I enhance the tropical flavor of my cakes?
To elevate the tropical essence, try incorporating fresh guava puree into the glaze for added flavor, or sprinkle toasted coconut flakes on top before serving. Both options bring a deliciously vibrant touch that makes your Hawaiian Mini Guava Cakes even more delightful and festive!
Delightful Hawaiian Mini Guava Cakes for a Tropical Escape
Ingredients
Equipment
Method
- Preheat your oven to 350°F (175°C) and line your cupcake pans with paper liners.
- In a large bowl, mix the strawberry cake mix, guava juice, eggs, and melted coconut oil.
- Fill each cupcake liner about one-third full with the batter and bake for 19-22 minutes.
- Once baked, cool the cakes in the pans for about 5 minutes, then transfer to a cooling rack.
- In a saucepan, combine guava juice and sugar, bring to a boil, then mix in cornstarch slurry and thicken.
- Beat cream cheese, sugar, and vanilla extract until creamy, then fold in Cool Whip.
- Frost cooled cakes with the cream cheese topping and refrigerate for 30 minutes.
- Drizzle cooled guava glaze over each frosted mini cake before serving.