

As I watched my little ones giggle in delight, it hit me—Easter is not just a holiday; it’s a creative playground! This year, we are diving into a whimsical world of sweetness with our Bunny Dirt Cups Recipe. These adorable treats combine smooth chocolate pudding and a crunchy cookie “dirt” topping, making them not only simple to whip up but also a joy to assemble with the kids. The best part? They’re totally kid-friendly and perfect for any spring gathering, ensuring smiles all around. Dive in with me as we explore this easy and fun no-bake dessert that will bring a touch of magic to your Easter celebrations. Ready to get your hands dirty in the best possible way? Let’s hop to it!
Why Are Bunny Dirt Cups So Fun?
Adorable Bunny Dirt Cups are the ultimate crowd-pleaser! Their playful presentation and delicious taste make them an instant hit at any gathering. Easy to make, you can whip these up in no time, perfect for busy cooks. Kid-friendly fun ensures everyone can join in the assembly, allowing for creative variations. Don’t forget, these treats are a versatile base—substitute Oreos for a classic kick or even try homemade pudding for a fresh twist. For even more delightful ideas, check out my Cheesy Bacon Breakfast Strata or our cozy Creamy Tortellini Soup for family favorites that will wow your loved ones!
Bunny Dirt Cups Recipe Ingredients
• Delight in the simple goodness of this Bunny Dirt Cups recipe!
-
For the Dirt Mixture
-
Chocolate Graham Crackers – Provides the crumbly “dirt” texture; can be substituted with Oreos or any chocolate cookie.
-
Chocolate Pudding Snack Packs (2 x 3.25 oz) – Offers a rich, creamy chocolate flavor; instant pudding or homemade alternatives work beautifully too.
-
Vanilla (1 tsp) – Enhances the flavor of the pudding; optional but highly recommended for depth of taste.
-
For the Icing
-
Salted Butter (1 stick) – Creates a rich, creamy icing that elevates the dessert.
-
Powdered Sugar (1¾ cup) – Adds sweetness and thickens the icing; essential for that delightful frosting texture.
-
Half and Half (3 tbsp) – Used to adjust the icing’s consistency and creaminess; feel free to substitute with milk for a lighter option.
-
Green Food Coloring (3-4 drops) – Colors the icing to mimic fresh “grass”; get creative with different shades!
-
For the Topping
-
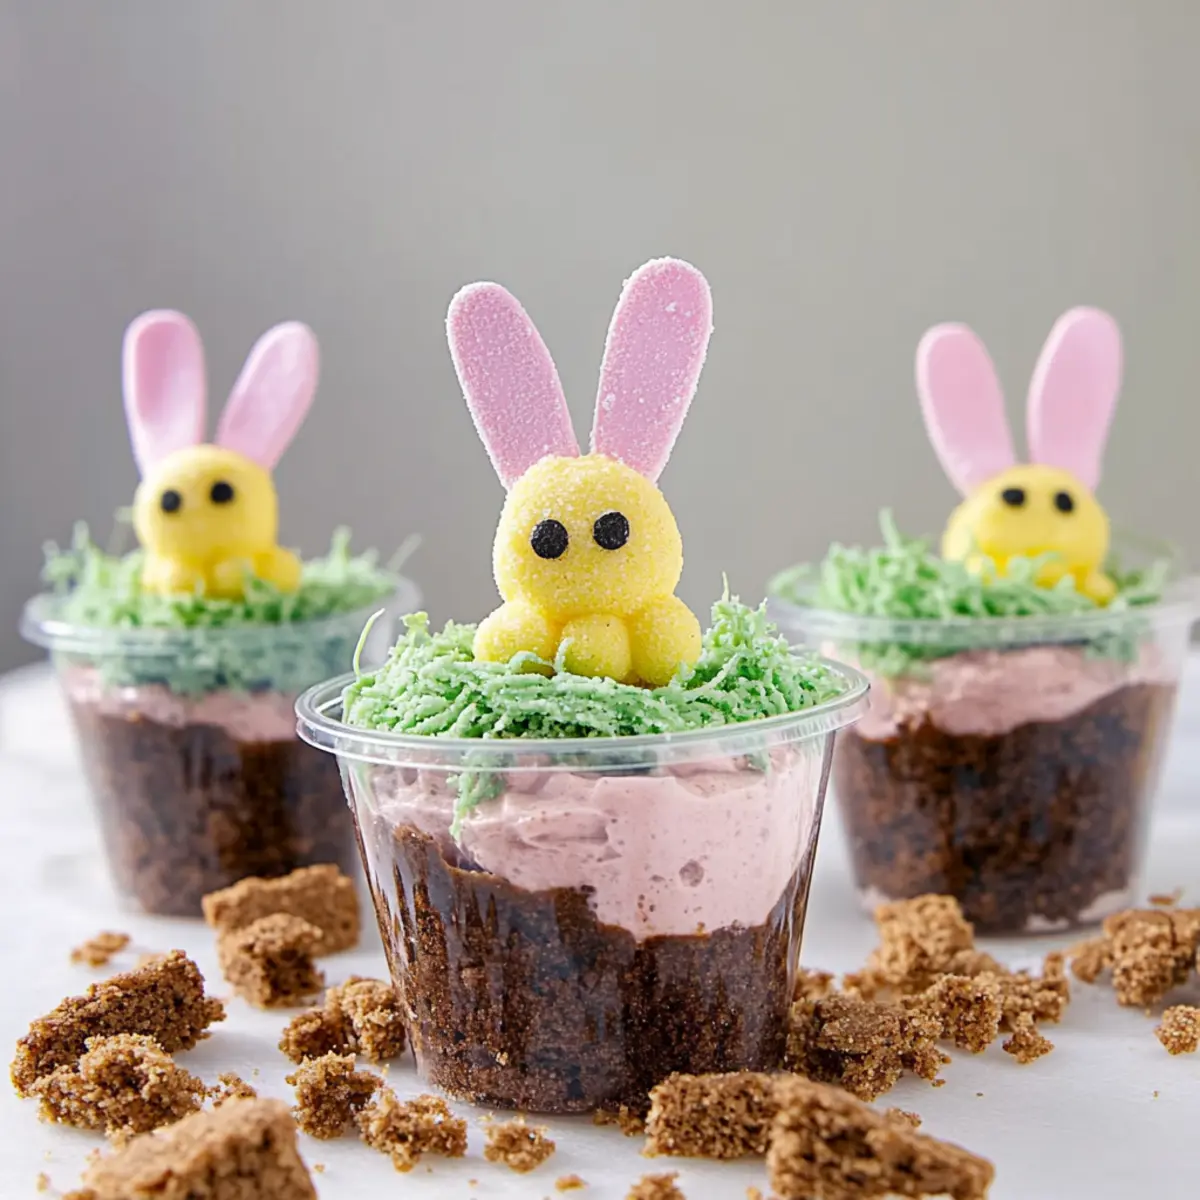
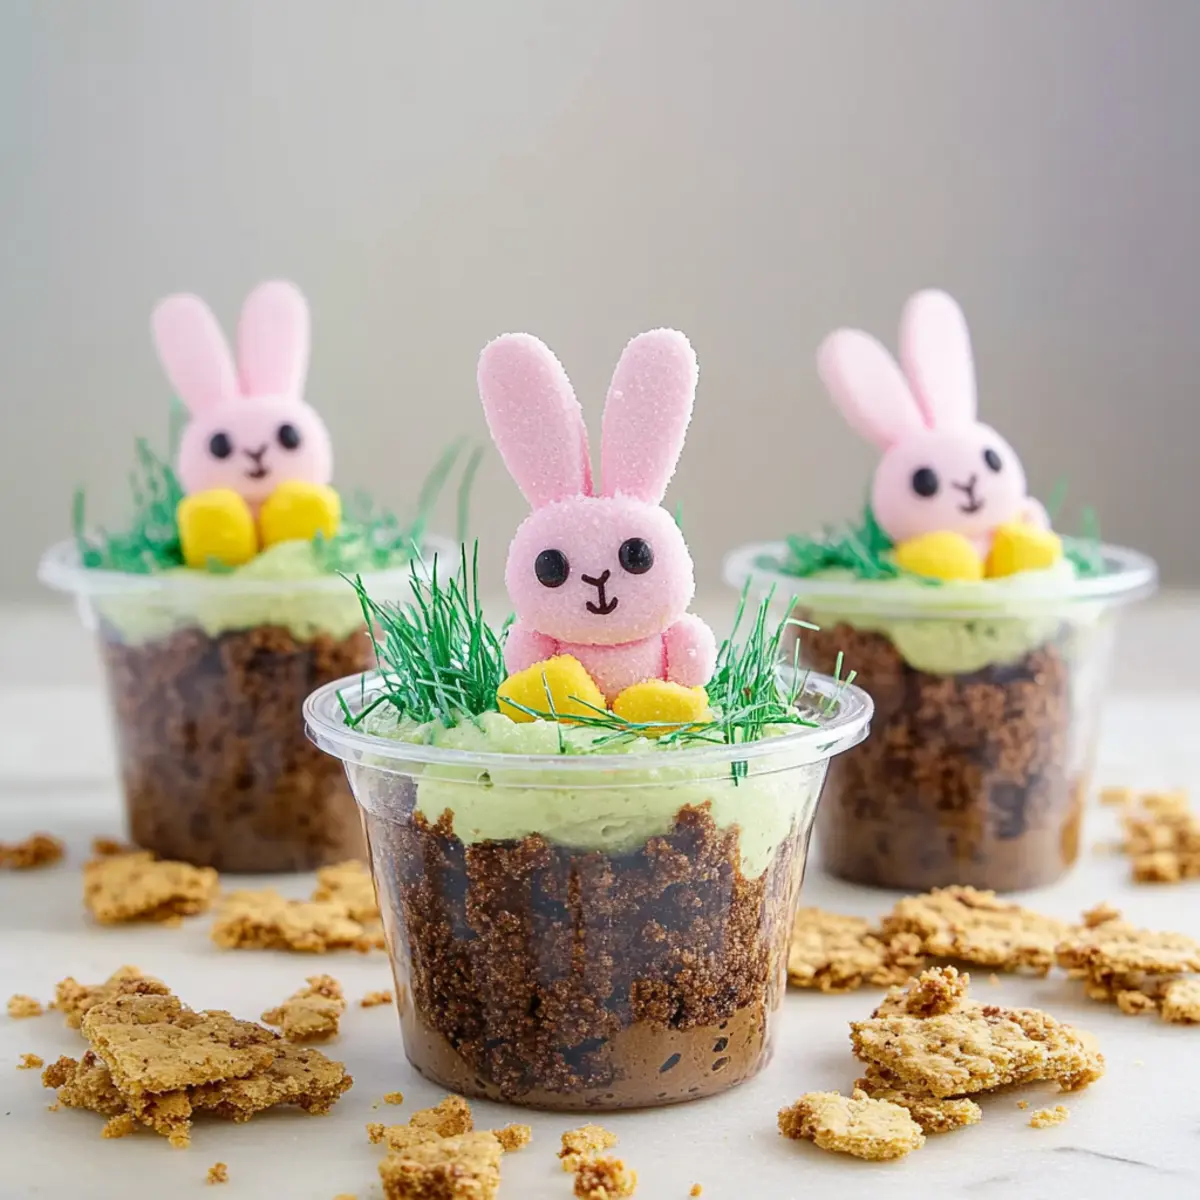
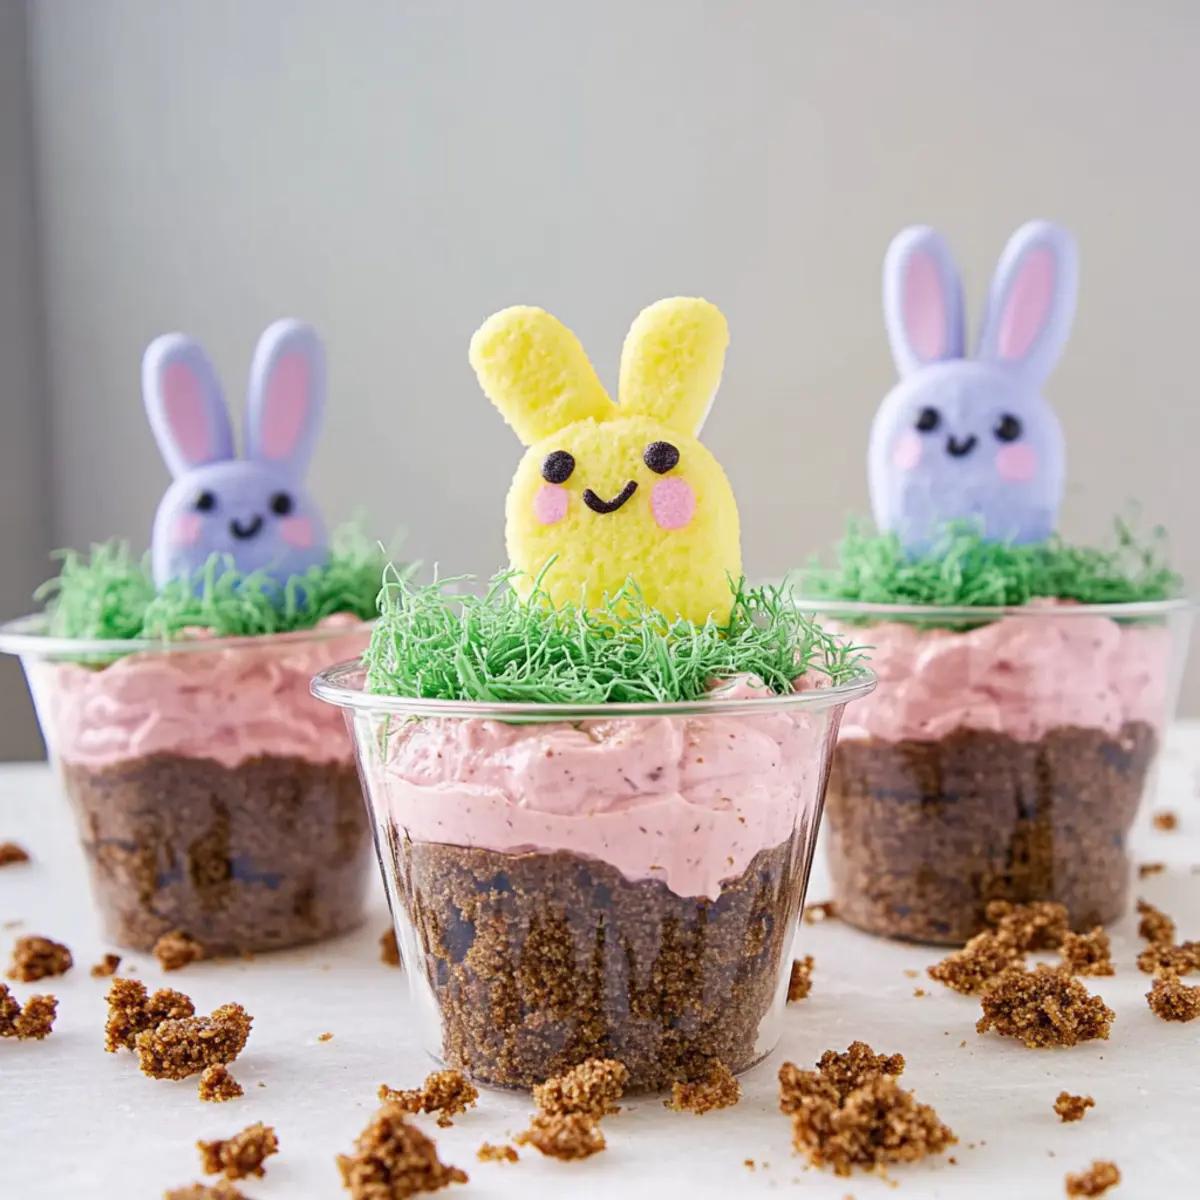
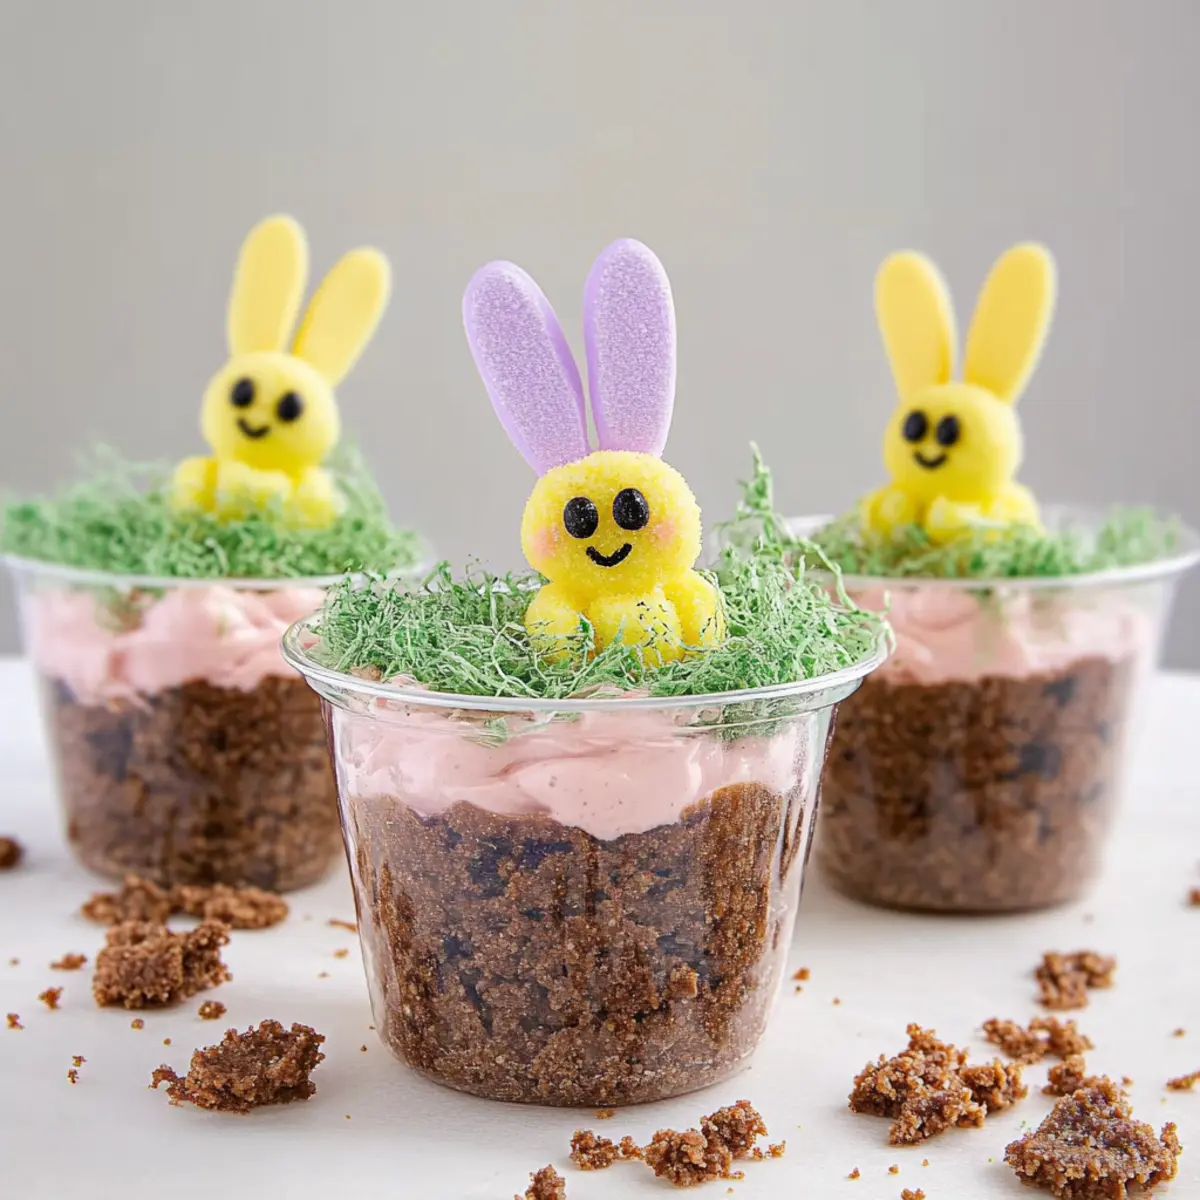
Bunny Peeps (4) – Cute decorations to enhance the Easter theme and add a fun pop of color; perfect for capturing the kids’ attention!
Enjoy assembling these delightful Bunny Dirt Cups with your loved ones, and take a moment to appreciate the joyous fun of creating something delicious together!
Step‑by‑Step Instructions for Bunny Dirt Cups Recipe
Step 1: Prepare the Dirt Mixture
Begin by placing the chocolate graham crackers into a food processor and pulse until they become fine crumbs, resembling dirt. This should take about 30 seconds. In a bowl, mix the chocolate crumbs with chocolate pudding snack packs and vanilla until everything is thoroughly incorporated and smooth. Set this mixture aside, as it forms the base of your Bunny Dirt Cups.
Step 2: Assemble the Cups
Grab small cocktail cups or jars and start to pour the chocolate dirt mixture into each, filling them about halfway. Use a spatula to help layer it gracefully, ensuring a neat presentation. Once filled, gently tap the cups on the counter to settle the mixture down. This will create a solid base for your delightful Bunny Dirt Cups and make the next steps easier.
Step 3: Make the Icing
In a mixing bowl, beat together the salted butter, powdered sugar, half and half, and vanilla until the mixture is creamy and smooth—about 2-3 minutes. Add in a few drops of green food coloring to give it a vibrant grass hue, mixing until fully combined. This icing will be your fun topping, adding texture and flair to your Bunny Dirt Cups.
Step 4: Decorate the Cups
Transfer the green icing into an icing bag fitted with a Wilton tip 233 for a grass-like effect. Carefully pipe the icing on top of each cup, creating little tufts that resemble fresh grass over the chocolate “dirt.” Don’t forget to place a cute bunny Peep on top of each cup for that whimsical Easter look—this will bring extra smiles to everyone around.
Step 5: Chill and Serve
Once your Bunny Dirt Cups are fully decorated, place them in the refrigerator for about 30 minutes to set the icing and keep everything cool. This chilling time not only enhances the flavors but also ensures that your dessert is refreshingly cool when served. Once ready, gather your friends and family, and enjoy this delightful and playful treat together!
What to Serve with Bunny Dirt Cups
Get ready to create a delightful spread that will complement the whimsy of your Bunny Dirt Cups beautifully!
-
Fresh Fruit Skewers: A colorful assortment of fresh fruits brings a refreshing contrast to the rich chocolate, and children love to eat food on a stick.
-
Mini Veggie Cups: Crisp vegetables with a dip not only provide a crunchy texture but also add a healthy component to balance the sweetness of dessert.
-
Charming Cupcakes: Light and fluffy cupcakes, perhaps with a hint of spring flavor like lemon or vanilla, will elevate the festive atmosphere and keep the sweet tooth satisfied.
-
Chocolate Milkshake: Creamy and thick, a chocolate milkshake creates a nostalgic treat that pairs perfectly with the decadent nature of Bunny Dirt Cups, making it a favorite for kids and adults.
-
Easter-Themed Cookies: Sugar cookies decorated in vibrant spring colors add a playful note to your dessert spread, echoing the festive spirit.
-
Sparkling Lemonade: A fizzy, citrusy beverage refreshes the palate and adds a touch of celebration, making your gathering feel extra special.
-
Whipped Cream Topping: Offer a side of whipped cream for those who crave an extra layer of creaminess to their Bunny Dirt Cups, enhancing the overall dessert experience.
-
Chocolate-Covered Pretzels: Salty yet sweet, these crunchy bites provide a wonderful textural contrast and an additional chocolatey flair that pairs well with the dessert.
Expert Tips for Bunny Dirt Cups
-
Chill Before Serving: Let your Bunny Dirt Cups chill for at least 30 minutes. This enhances flavors and keeps the dessert refreshingly cool.
-
Avoid Soggy Dirt: To prevent the chocolate dirt from becoming too soft, enjoy the cups within a few hours of assembly. Serve it fresh for the best texture!
-
Creative Decorations: Mix it up by adding colorful sprinkles or edible flowers for added visual appeal on your Bunny Dirt Cups. It’s a fun way to personalize each dessert!
-
Make-Ahead Options: Prep the dirt mixture and icing a day in advance. Store them separately in airtight containers in the fridge, and assemble just before serving.
-
Consistency Matters: If your icing is too thick, add a splash of milk to achieve the perfect spreading consistency for that grassy look.
How to Store and Freeze Bunny Dirt Cups
Fridge: Store assembled Bunny Dirt Cups in the refrigerator for up to 3 hours before serving. This keeps them fresh and maintains the delightful texture.
Make-Ahead: You can prepare the dirt mixture and icing a day in advance. Store them in airtight containers in the fridge to keep them fresh.
Freezer: If you’ve made a large batch, you can freeze the dirt mixture for up to 1 month in an airtight container. Thaw in the fridge overnight before assembling.
Serving Tips: Once assembled, enjoy the cups within a few hours for the best experience. The chocolate dirt can soften over time, so serve fresh!
Bunny Dirt Cups Recipe Variations
Feel free to let your creativity shine while making these delightful Bunny Dirt Cups!
- Oreo Substitute: Swap chocolate graham crackers for crushed Oreos for a classic, rich twist.
- Nutella Delight: Use Nutella instead of chocolate pudding for an extra decadent, hazelnut-y flavor. Trust me, this will elevate your cups!
- Coconut Grass: Replace the green icing with shredded coconut tinted green for a fun, tropical vibe that kids will love.
- Add Some Crunch: Mix in chopped nuts or chocolate chips into the dirt mixture for an unexpected texture. The added crunch will surprise and delight your taste buds.
- Dye-Free Option: For a more natural look, substitute food coloring with matcha powder for an earthy tone in your icing. It’s a fun flavor and a healthier option!
- Flavor Infusion: Incorporate a hint of peppermint extract into the icing for a fresh twist that pairs perfectly with chocolate. This adds a delightful surprise in every bite!
- Wear Your Cake Hat: Use mini chocolate cakes as the base instead of a dirt mix for those who love a layered dessert experience. A layer of cake topped with dirt is a showstopper!
- Spice It Up: For a touch of warmth, add a pinch of cinnamon to the pudding mixture. It brings an unexpected but delightful flavor that pairs beautifully with chocolate.
Ready for more fun in the kitchen? Don’t miss out on my irresistible Brown Butter Pecan Cookies that pair perfectly with your Bunny Dirt Cups! Get creative and enjoy the process.
Make Ahead Options
These Bunny Dirt Cups are ideal for busy home cooks looking to simplify their meal prep! You can prepare the dirt mixture—mixing the chocolate graham crumbs with chocolate pudding and vanilla—up to 24 hours in advance and store it in an airtight container in the refrigerator. Just keep in mind that the longer it sits, the softer the texture may become, so try to assemble no more than a few hours before serving. When it’s time to enjoy, simply assemble your cups and pipe on the green icing topped with Bunny Peeps for that delightful final touch. This way, you’ll have an adorable dessert with minimal effort, perfect for any Easter gathering!
Bunny Dirt Cups Recipe FAQs
What type of chocolate graham crackers should I use?
Absolutely! Chocolate graham crackers are perfect for that crumbly “dirt” texture. I often recommend using store-brand chocolate graham crackers for a budget-friendly option. If you don’t have those on hand, Oreos or any chocolate cookies work just as well!
How long can I store the Bunny Dirt Cups in the refrigerator?
You can store the assembled Bunny Dirt Cups in the refrigerator for up to 3 hours before serving. This ensures they remain fresh and maintain their delightful texture. If you’re making them ahead of time, try to assemble them no more than a few hours in advance for the best results.
Can I freeze the Bunny Dirt Cups?
While I don’t recommend freezing the assembled Bunny Dirt Cups, you can freeze the dirt mixture for up to 1 month in an airtight container. When you’re ready to use it, thaw the mixture in the fridge overnight. Just remember to assemble the cups fresh right before serving, as the texture of the pudding and icing is best enjoyed when freshly made!
What should I do if my icing is too thick?
If you find your icing a bit too thick to pipe, simply add a splash of milk or half and half to thin it out a bit. Mix thoroughly until you achieve a smooth consistency for creating that gorgeous grassy look on your Bunny Dirt Cups.
Are Bunny Dirt Cups safe for kids with allergies?
For children with allergies, be sure to review each ingredient carefully. The main concerns might be gluten in the cookies or dairy in the pudding and butter. If you need alternatives, look for gluten-free cookies and dairy-free pudding options to make this Bunny Dirt Cups Recipe inclusive and enjoyable for everyone!
How can I prevent the dirt from getting soggy?
To prevent the dirt from becoming soft too quickly, enjoy the assembled Bunny Dirt Cups within a few hours of preparation. If you need to prepare them ahead of time, you can make the dirt and pudding mixture separately and assemble only when you’re ready to serve, keeping everything crunchy and delightful!
Bunny Dirt Cups Recipe: A Fun Easter Treat for All Ages
Ingredients
Equipment
Method
- Prepare the Dirt Mixture: Place the chocolate graham crackers in a food processor and pulse until fine crumbs. Mix with chocolate pudding snack packs and vanilla until smooth.
- Assemble the Cups: Pour the chocolate dirt mixture into small cups, filling them halfway and tapping to settle the mixture.
- Make the Icing: Beat together the salted butter, powdered sugar, half and half, and vanilla until creamy. Add green food coloring and mix until combined.
- Decorate the Cups: Pipe the green icing on top of each cup to create grass-like tufts, and place a Bunny Peep on top.
- Chill and Serve: Refrigerate the cups for 30 minutes. Enjoy your delightful Bunny Dirt Cups with family and friends!