

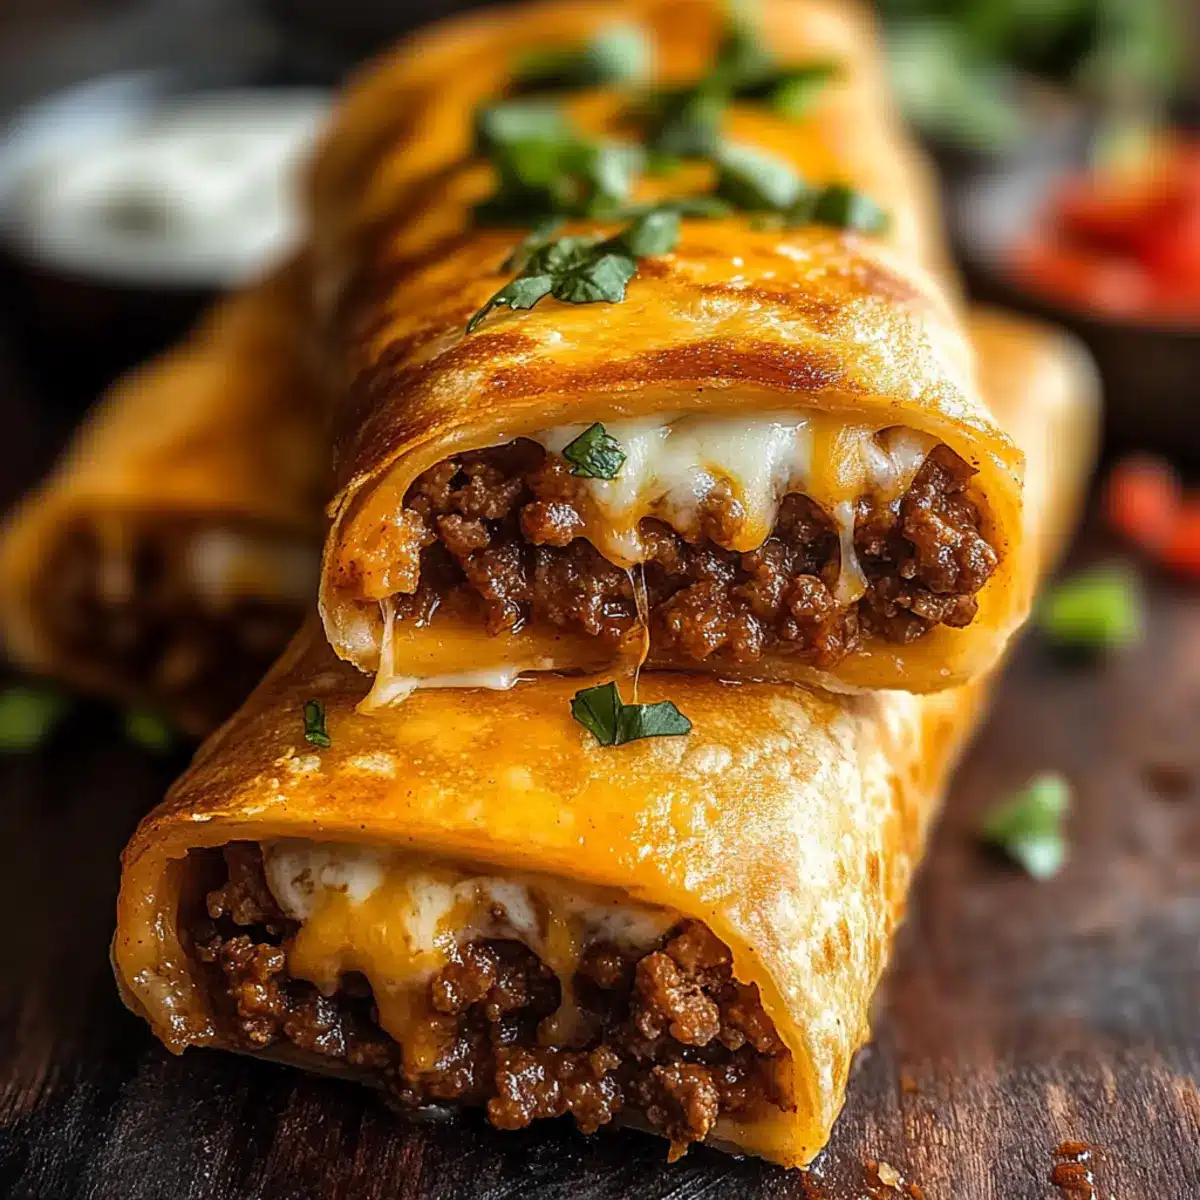
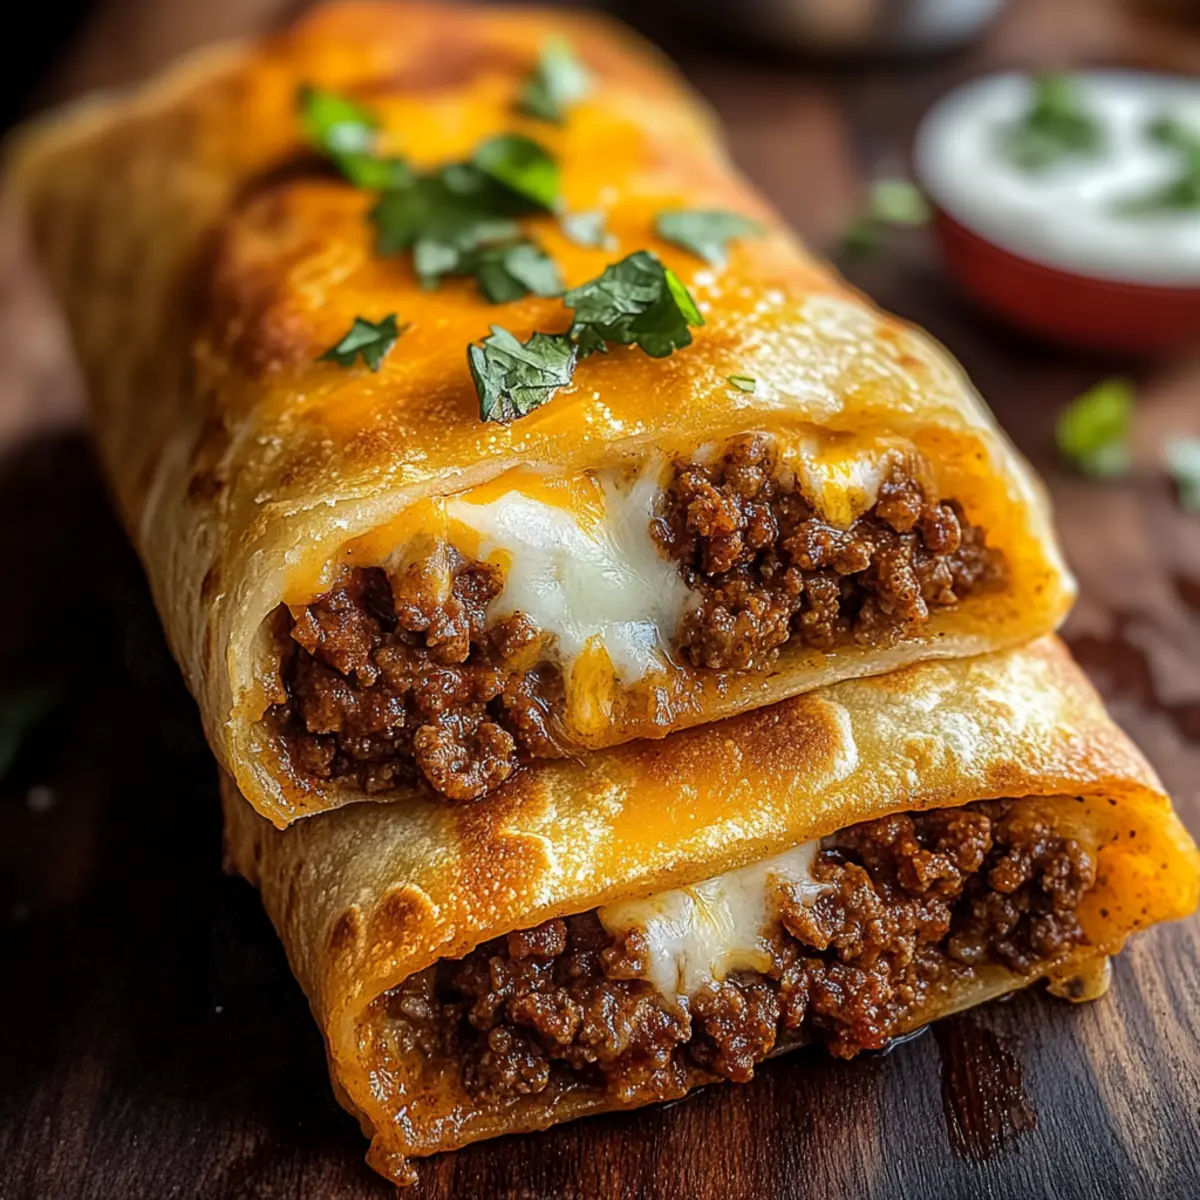
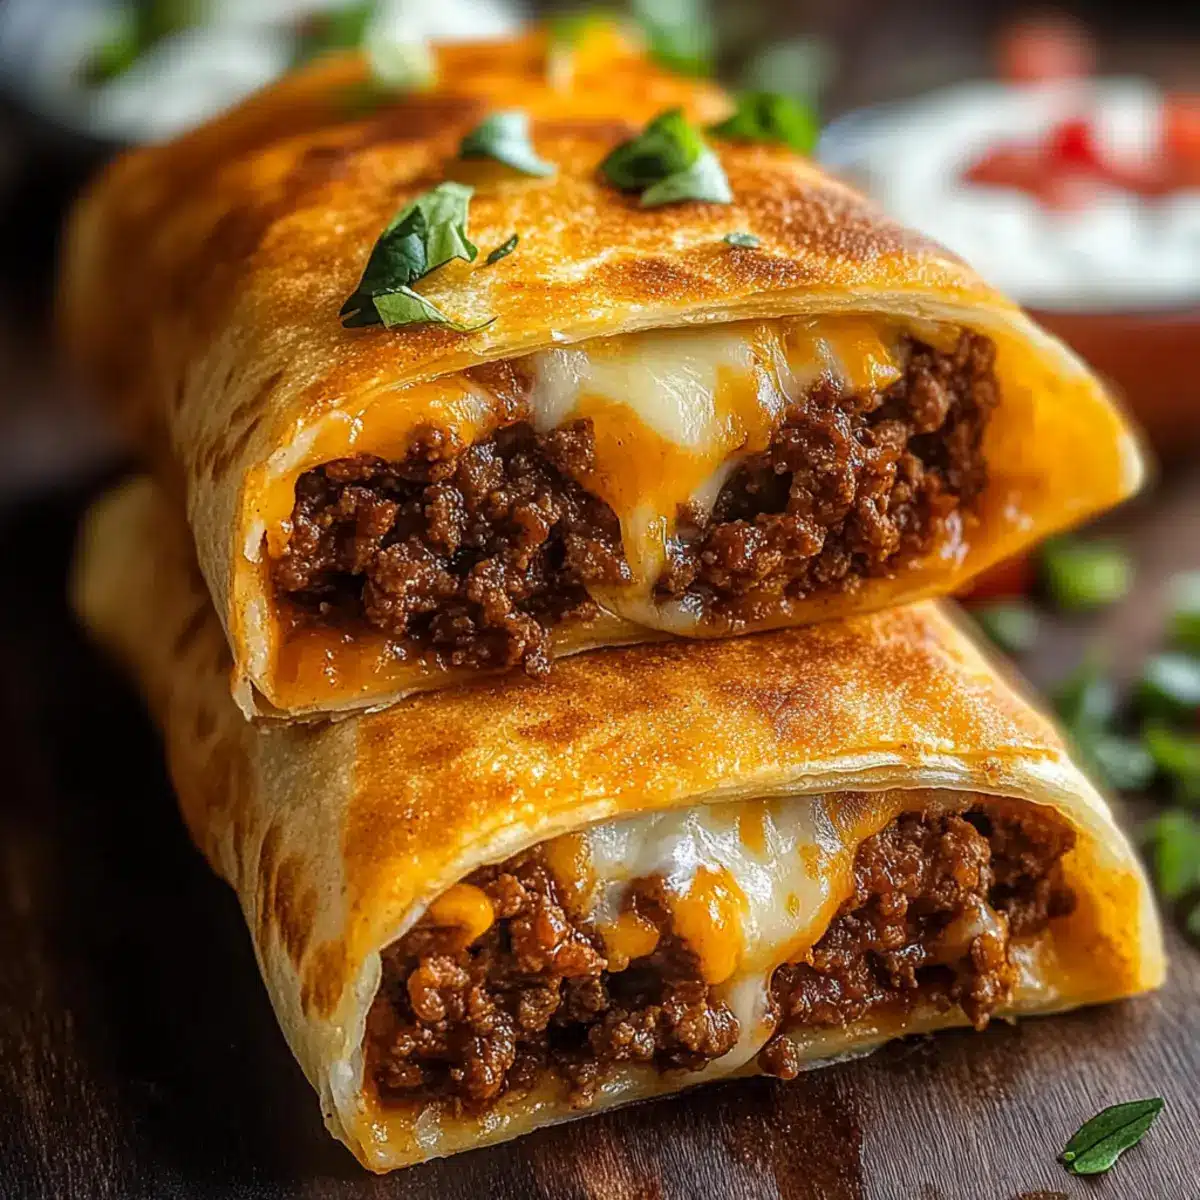
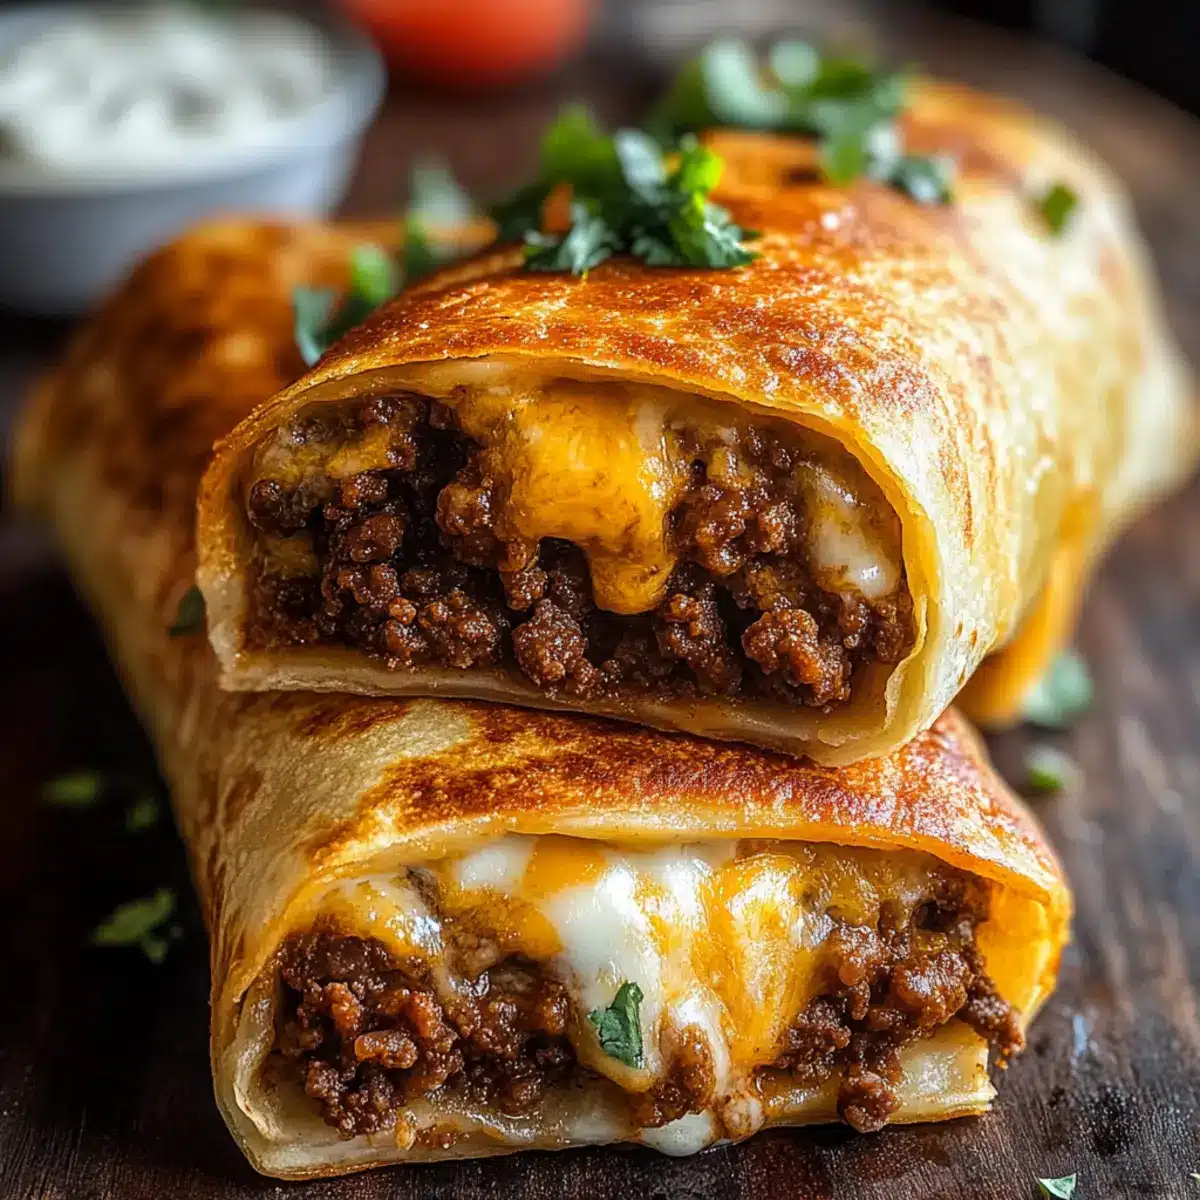
As I flipped through my collection of cherished recipes, a flash of nostalgia washed over me, reminding me of evenings spent with family, laughter echoing through the kitchen. That’s when I stumbled upon my go-to dish: Beef and Cheese Chimichangas. These crispy delights wrapped in golden tortillas are not just a meal; they’re an invitation to gather around the table. What I love most about this Tex-Mex treasure is its incredible adaptability—whether you’re sticking to the classic filling or experimenting with spicy, vegetarian, or even breakfast variations, these chimichangas are perfect for weeknight dinners or impressing guests on the weekends. Plus, they’re quick to prepare and freezer-friendly, making them a lifesaver for busy days. So, are you ready to dive into a recipe that will have everyone clamoring for seconds? Let’s get cooking!
What makes these chimichangas irresistible?
Crispy, golden exterior: Each chimichanga boasts a satisfying crunch that gives way to a melty interior. Family-friendly and versatile: Whether you’re using beef or trying a vegetarian twist, there’s a taste for everyone! Quick and easy: Perfect for busy weeknights, you can whip these up in no time. Make-ahead and freezer-friendly: Prep them in advance, so dinner is ready when you are. Enhance your meals by pairing these with a side of rice or beans for a complete feast! Don’t forget to check out my other favorites like Hearty Beef Barley for more comforting options.
Beef and Cheese Chimichanga Ingredients
• To create these delightful Beef and Cheese Chimichangas, gather the following ingredients for a meal that’s loved by the whole family!
For the Filling
- Ground Beef – This primary protein component brings rich flavor; substitute with ground turkey or pulled pork for a twist.
- Onion – Adds depth to the filling; shallots or green onions work in a pinch.
- Garlic – Enhances the dish’s overall taste; garlic powder can be used if fresh isn’t handy.
- Taco Seasoning – Provides essential Tex-Mex flavor; consider using homemade seasoning for a personal touch.
- Salsa – Keeps the filling moist while adding flavor; opt for tomato sauce for a milder profile.
- Refried Beans – Adds creaminess to the filling; omit this for a lighter version or switch to black beans.
- Shredded Cheese – Creates that gooey texture; cheddar or Monterey Jack cheese melts beautifully!
For the Wrapping
- Flour Tortillas – Large (10-inch) tortillas are best for easy wrapping; corn tortillas are a gluten-free alternative.
For Cooking
- Vegetable Oil – Used for frying or brushing to achieve crispiness; can replace with olive oil or melted butter if desired.
Feel free to customize these Beef and Cheese Chimichangas to suit your family’s tastes!
Step‑by‑Step Instructions for Beef and Cheese Chimichangas
Step 1: Prepare the Filling
In a large skillet over medium heat, brown 1 pound of ground beef along with 1 diced onion, stirring occasionally for about 5-7 minutes until cooked through. Drain any excess grease, then add 2 cloves of minced garlic, 1 packet of taco seasoning, and 1 cup of salsa. Simmer this flavorful mixture for 2-3 minutes, allowing the spices to meld beautifully.
Step 2: Assemble the Chimichangas
Lay out four 10-inch flour tortillas on a clean surface. Spread a couple of tablespoons of refried beans on each tortilla, followed by a generous scoop of the seasoned beef mixture and a handful of shredded cheese. Fold in the sides and roll the tortilla tightly like a burrito, ensuring the filling is completely enclosed for a perfect Beef and Cheese Chimichanga.
Step 3: Choose Your Cooking Method
For frying, heat about ½ inch of vegetable oil in a skillet over medium-high heat until it reaches 350°F. Carefully place the chimichangas seam-side down in the hot oil, frying for 2-3 minutes on each side until golden brown and crispy. Alternatively, for a healthier option, preheat your oven to 400°F and brush the assembled chimichangas lightly with oil before baking them on a greased sheet for 20-25 minutes until they’re crisp and golden.
Step 4: Serve and Enjoy
Once cooked, allow the chimichangas to cool slightly for easy handling. Serve them warm with optional toppings like sour cream, guacamole, or fresh salsa on the side. These Beef and Cheese Chimichangas make a delightful meal that invites everyone to dig in and enjoy the satisfying crunch and rich, cheesy filling!
Beef and Cheese Chimichangas Variations
Feel free to get creative with these Beef and Cheese Chimichangas, adding your own twist to suit your taste buds!
-
Bean & Beef: Mix in refried beans with the meat for a creamy texture. The beans provide additional heartiness while keeping it satisfying.
-
Spicy: Add diced jalapeños or use pepper jack cheese for a zesty kick. These little heat bombs will elevate your chimichangas from ordinary to extraordinary.
-
Breakfast: Swap out beef for scrambled eggs, crispy bacon, and cheese for a delightful morning treat. Perfect with a side of fresh salsa for breakfast lovers!
-
Vegetarian: Replace the beef with sautéed vegetables like bell peppers and zucchini along with black beans. Enjoy a fresh, vibrant flavor without sacrificing warmth and heartiness.
-
Sauced: Top your cooked chimichangas with queso dip, enchilada sauce, or salsa verde for a deliciously smothered version. This will add a delightful layer of flavor.
-
Extra Crunch: Try adding crushed tortilla chips inside the filling for added texture. It’s a fun twist that brings a satisfying crunch to every bite!
-
Herbed Cheese: Incorporate cream cheese mixed with herbs in place of shredded cheese for a creamy, herby twist. It’s like a cheese spread that transforms your chimichangas!
-
Sweet Heat: For an unexpected flavor profile, mix some diced peaches or pineapple with jalapeños in the filling. The sweetness coupled with heat is a match made in heaven!
And if you’re looking for more hearty meals to enjoy, don’t forget to check out this Chunky Beef Cabbage soup or try a delicious Ground Beef Bowtie for your next family dinner!
Make Ahead Options
These Beef and Cheese Chimichangas are a fantastic option for meal prep! You can assemble them up to 24 hours in advance. Simply prepare the filling and roll the chimichangas as instructed, then wrap them tightly in plastic wrap and refrigerate. If you prefer to freeze them, place the wrapped chimichangas in a freezer-safe bag and they can last up to 2 months. When you’re ready to enjoy them, cook directly from the freezer—just adjust the cooking time by a few minutes. To maintain their crispy texture, remember to heat them properly whether frying or baking. This makes it hassle-free to have a delicious, home-cooked meal ready in no time!
Expert Tips for Beef and Cheese Chimichangas
- Seal It Right: To prevent chimichangas from opening during frying, seal the seam with a toothpick and always fry seam-side down first.
- Warm Tortillas: Keep tortillas warm before filling them; this makes rolling easier and prevents tearing. Cold tortillas are more likely to crack.
- Healthy Swap: For a lighter version of Beef and Cheese Chimichangas, switch to baking instead of frying and use leaner proteins like ground turkey or chicken.
- Fill Smartly: Don’t overfill the chimichangas; this can cause them to burst during cooking. A small, even amount of filling works best.
- Check Crispness: Ensure chimichangas are golden brown and crispy before removing them from the oil or oven for that perfect texture.
Enjoy making these Beef and Cheese Chimichangas with confidence!
What to Serve with Beef and Cheese Chimichangas
Transform your meal into a flavorful fiesta with these delightful side suggestions that perfectly complement the crunch of your chimichangas.
-
Spanish Rice: Perfectly seasoned with spices and a hint of tomato, it adds a savory component to your dish while offering a fluffy texture.
-
Refried Beans: Creamy and comforting, these beans enhance the Tex-Mex goodness and provide a hearty base for your meal. A classic pairing!
-
Fresh Guacamole: Creamy, avocado-based guacamole adds richness and a refreshing contrast to the crispy chimichangas. Don’t forget the lime for an extra zing!
-
Zesty Coleslaw: Crunchy, tangy slaw made with cabbage and carrots adds a vibrant color and texture, providing a delightful crunch alongside the chimichangas.
-
Grilled Corn on the Cob: Sweet and smoky grilled corn provides a refreshing touch to the meal, balancing the savory flavors of the chimichangas beautifully.
-
Cilantro Lime Rice: Fluffy rice with zesty lime and fresh cilantro adds brightness, making every bite of chimichanga even more enjoyable.
-
Pico de Gallo: This fresh salsa made with tomatoes, onions, and cilantro adds a vibrant freshness and a zesty kick that enhances each chimichanga bite.
-
Classic Margarita: A chilled margarita complements the Tex-Mex flavors perfectly, adding a splash of festivity to your meal.
-
Chocolate Flan: For dessert, this creamy, caramel-topped flan offers a luscious conclusion that adds just the right touch of sweetness after the savory chimichangas.
Storage Tips for Beef and Cheese Chimichangas
- Room Temperature: Store cooked chimichangas at room temperature for up to 2 hours. After that, they should be refrigerated to maintain freshness and safety.
- Fridge: Keep leftover beef and cheese chimichangas sealed in an airtight container in the refrigerator for up to 3 days to preserve their flavor and texture.
- Freezer: You can freeze assembled chimichangas for up to 2 months. Wrap each with plastic wrap and then foil to prevent freezer burn.
- Reheating: For best results, reheat in the oven at 375°F for 15-20 minutes until warm and crispy. Alternatively, microwave on medium heat, wrapped in a damp paper towel, for about 1-2 minutes.
Beef and Cheese Chimichangas Recipe FAQs
What type of ground beef should I use for chimichangas?
Absolutely! The best choice for Beef and Cheese Chimichangas is ground beef with a good fat content, such as 80/20. This ensures the filling remains flavorful and juicy. If you’re looking for a leaner option, ground turkey or chicken can also work beautifully, offering a lighter taste while still being satisfying.
How should I store leftover chimichangas?
Very! After enjoying your chimichangas, allow them to cool completely, then place them in an airtight container in the refrigerator. They can stay fresh for up to 3 days. Just make sure not to leave them out at room temperature for more than 2 hours to keep everything safe and tasty!
Can I freeze the chimichangas?
Absolutely! To freeze your Beef and Cheese Chimichangas, wrap each one tightly in plastic wrap, then in aluminum foil to prevent freezer burn. They can be stored in the freezer for up to 2 months. When you’re ready to enjoy, simply bake them from frozen at 400°F for about 25-30 minutes, or until heated through and crispy on the outside.
What if my chimichangas burst open while cooking?
Don’t worry, this can happen! To prevent it next time, make sure not to overfill them and seal the seam tightly, possibly using a toothpick to hold it down during frying. Fry them seam-side down first to help keep the closure intact. If they do spill, scoop out the filling and enjoy it on a plate—still delicious!
Are there any dietary considerations I should keep in mind?
Very much so! If you’re cooking for someone with dietary restrictions, consider substituting the ground beef with sautéed vegetables and black beans for a vegetarian option. Additionally, you can easily use gluten-free corn tortillas instead of flour to accommodate those with gluten sensitivities. Always check labels for any possible allergens in the taco seasoning and other packaged ingredients used.
How can I tell when the chimichangas are done cooking?
To ensure your chimichangas achieve that perfect golden color, look for a crispy exterior that’s deep golden brown. If frying, it typically takes about 2-3 minutes on each side in hot oil. For baking, they should take about 20-25 minutes at 400°F, and you can give them a gentle shake; if they’re crisp and sound hollow, they’re ready to delight!
Crispy Beef and Cheese Chimichangas for Cozy Family Nights
Ingredients
Equipment
Method
- In a large skillet over medium heat, brown the ground beef along with the diced onion for about 5-7 minutes until cooked through. Drain excess grease, add minced garlic, taco seasoning, and salsa. Simmer for 2-3 minutes.
- Lay out four flour tortillas on a clean surface. Spread a couple of tablespoons of refried beans on each, followed by seasoned beef mixture and shredded cheese. Fold sides and roll tightly.
- For frying, heat vegetable oil in a skillet until it reaches 350°F. Fry chimichangas seam-side down for 2-3 minutes each side until golden brown. For baking, brush with oil and bake at 400°F for 20-25 minutes.
- Allow chimichangas to cool slightly, then serve warm with optional toppings like sour cream, guacamole, or fresh salsa.