

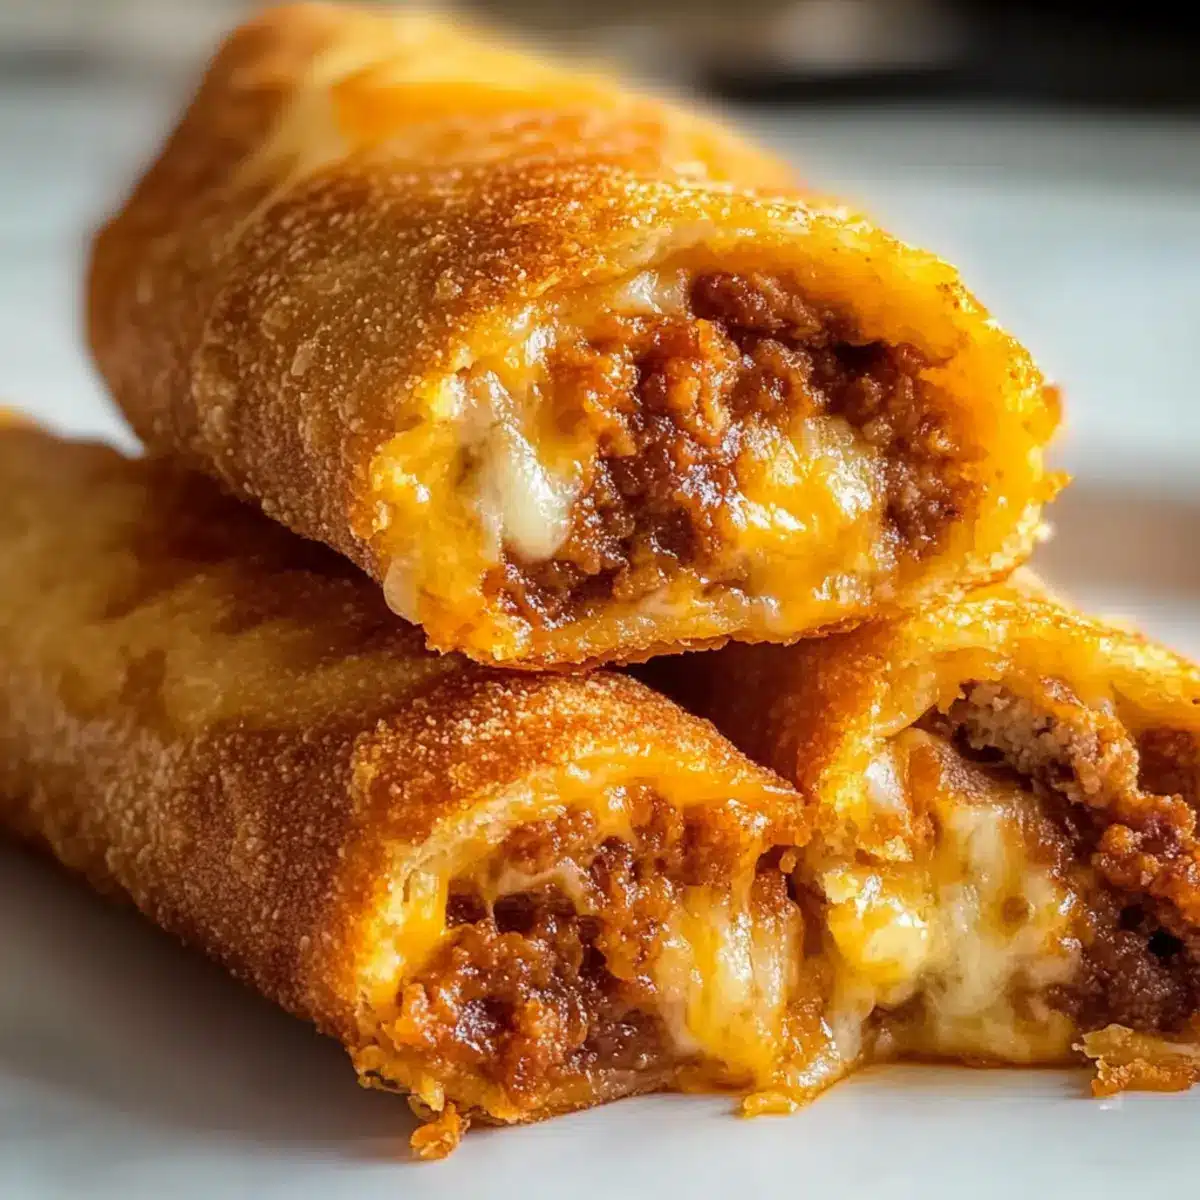
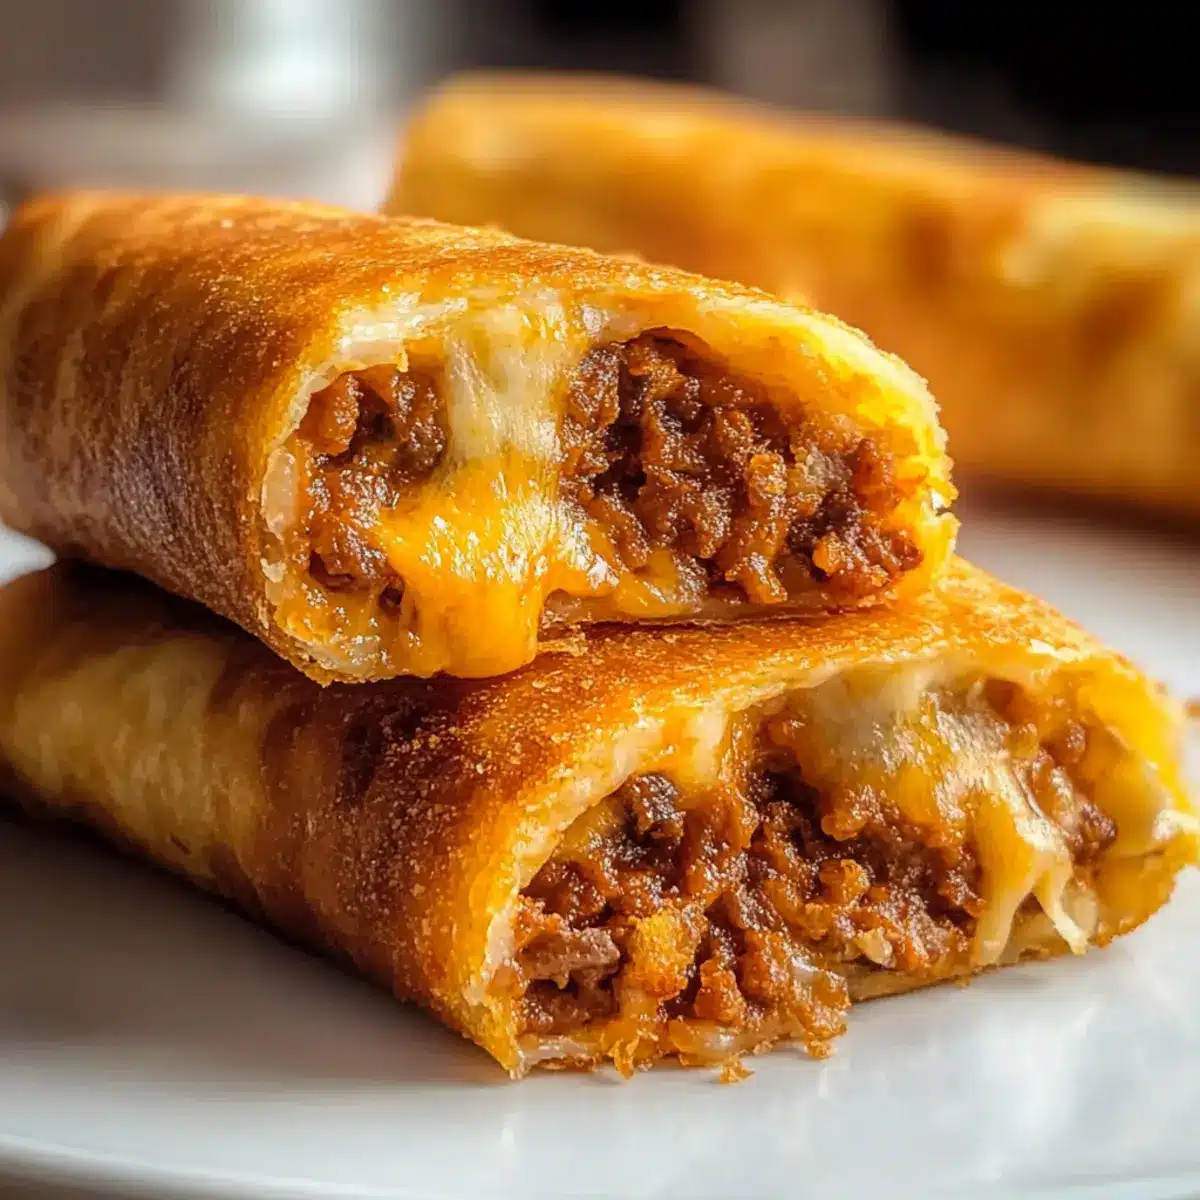
As I rummaged through the fridge one hectic afternoon, I stumbled upon a little treasure trove: ground beef, melted cheese, and some leftover refrigerated pizza dough. Suddenly, inspiration struck—why not whip up some Cheesy Taco Sticks? These fun, flavor-packed handheld treats are not just easy to make, but they’re also completely customizable, making them a hit with both kids and adults alike. Perfect for busy weeknights or game-day gatherings, the dippable nature of these scrumptious sticks will turn any ordinary meal into a fiesta. Plus, with a variety of options, including spicy, vegetarian, and breakfast versions, there’s something for everyone. Curious how to bring this cheesy goodness to your table? Let’s dive into the recipe!

Why You’ll Love These Cheesy Taco Sticks
Simplicity at its Best: With just a few ingredients and easy steps, you’ll have delicious Cheesy Taco Sticks ready in no time.
Customizable Options: Whether you prefer spicy, chicken, or even vegetarian, these sticks can adapt to your craving and dietary preferences.
Kid-Friendly Appeal: Kids love the dippable nature and cheesy goodness, making these a go-to option for family dinners or parties. Serve them alongside some tasty salsa or guacamole for the ultimate snack experience!
Perfect for Any Occasion: From weeknight meals to game-day gatherings, Cheesy Taco Sticks are excellent appetizers that will impress your guests and keep everyone satisfied.
Make-Ahead Convenience: You can prepare these sticks in advance, whether for a quick weeknight dinner or a party spread, ensuring that deliciousness is just a bake away!
Explore more delightful recipes like Cheesy Beef Burritos for more fun family meals!
Cheesy Taco Sticks Ingredients
• Get ready to whip up these delightful treats!
For the Filling
- Ground Beef – Use lean ground beef for a healthier option; turkey or chicken also work beautifully.
- Taco Seasoning – The key to authentic flavor; opt for homemade mixes to control spices.
- Shredded Cheese – Cheddar or Mexican blend gives fantastic melt; mix in mozzarella for extra stretch.
- Cream Cheese (optional) – Adds creaminess to the filling for a richer taste.
For the Dough
- Refrigerated Pizza Dough – Chewy and convenient; crescent dough offers a softer, flakier alternative.
For the Egg Wash
- Egg – A simple whisked egg ensures a golden, glossy finish for your sticks.
For Optional Toppings
- Sesame Seeds – Adds a delightful crunch and flavor.
- Extra Taco Seasoning – Enhance flavor with a sprinkle before baking.
Whip these ingredients together for some scrumptious Cheesy Taco Sticks that the whole family will love!
Step‑by‑Step Instructions for Cheesy Taco Sticks
Step 1: Cook the Filling
Begin by heating a skillet over medium heat and adding a splash of olive oil. Sauté finely chopped onion for about 2–3 minutes until it becomes translucent, then add minced garlic for an additional minute until fragrant. This fragrant base sets the stage for your delicious filling in the Cheesy Taco Sticks.
Step 2: Brown the Beef
Add the ground beef to your skillet, using a wooden spoon to break it into small crumbles. Cook the meat for approximately 5–7 minutes, or until it’s browned and cooked through. If there’s excess fat, feel free to drain it off, preserving a flavorful and lean filling for your Cheesy Taco Sticks.
Step 3: Season
Stir in taco seasoning, along with chili powder, cumin, and smoked paprika, mixing thoroughly to coat the beef evenly. Pour in a splash of water and allow it to simmer for 2–3 minutes until the mixture thickens, creating a rich and savory blend that fills your kitchen with a mouthwatering aroma.
Step 4: Add Cheese
Remove the skillet from heat and add the shredded cheese mix into the warm filling. Stir until the cheese melts and creates a gooey, creamy texture that binds the seasoned beef beautifully. This cheesy mixture will elevate the flavor profile in your Cheesy Taco Sticks, making them irresistible.
Step 5: Prepare Dough
On a lightly floured surface, roll out the refrigerated pizza dough to about ¼ inch thick. Cut the dough into strips measuring roughly 4 inches wide, ensuring you have enough for each Cheesy Taco Stick. This simple step is essential in creating the perfect crust for your delightful snacks.
Step 6: Assemble Sticks
Place a generous spoonful of the cheesy beef filling down the center of each dough strip. Carefully fold the edges over the filling, pressing them to seal tightly. Use a fork to crimp and ensure the filling doesn’t escape during baking. Your Cheesy Taco Sticks are now ready to be baked!
Step 7: Brush & Bake
Preheat your oven to 375°F (190°C) and line a baking sheet with parchment paper. Arrange the assembled sticks on the sheet, then brush each one with an egg wash to achieve a glossy, golden finish. Bake for 12–15 minutes, or until the tops are golden brown and the aroma fills your home.
Step 8: Cool & Serve
Once baked, let the Cheesy Taco Sticks cool on a wire rack for a few minutes before serving. This rest allows the cheese to set slightly, making them easier to handle. Serve warm with a selection of dipping sauces like salsa, sour cream, or guacamole for a delightful snack or meal!

Cheesy Taco Sticks Variations & Substitutions
Feel free to get creative! This recipe is perfect for customizing to suit your taste buds and preferences.
- Spicy Taco Sticks: Add diced jalapeños or hot sauce to the filling for a kick that wakes up the taste buds.
- Chicken Versions: Swap ground beef for shredded or ground chicken. It’s a lighter and equally delicious option!
- Vegetarian Delight: Use seasoned black beans or lentils instead of meat, making these sticks just as hearty with a veggie twist.
- Breakfast Taco Sticks: Mix in scrambled eggs and cooked breakfast sausage for a fantastic morning treat that’s full of cheesy goodness.
- Extra Cheesy: Double the amount of cheese or introduce additional varieties like pepper jack for a flavor twist and extra gooeyness!
- Gluten-Free Dough: Opt for gluten-free pizza dough or use almond flour dough for a delightful alternative that keeps all the cheesy flavors intact.
- Herbed Flavor Boost: Mix in fresh herbs (like cilantro or parsley) into the filling for a fresher taste that brightens each bite.
- Cornmeal Crunch: Sprinkle a bit of cornmeal on the baking sheet before placing the sticks on top—it adds an extra crunch to each bite!
Explore even more deliciousness in recipes like Cheesy Bacon Breakfast or Taco Spaghetti Weeknight for a festive family feast!
What to Serve with Cheesy Taco Sticks
Serving up Cheesy Taco Sticks opens up a world of delectable pairings to enhance your meal!
- Creamy Guacamole: A rich, creamy dip that adds a refreshing contrast to the cheesy, savory sticks and brings that classic taco feel.
- Spicy Salsa: This zesty condiment provides a kick that balances the richness of the cheesy filling, delivering flavor and excitement to every bite.
- Crisp Side Salad: A fresh salad with mixed greens, tomatoes, and cucumbers adds a refreshing crunch and lightens the overall meal. Toss in a light vinaigrette for extra zing!
- Loaded Nachos: Bring the party with crispy tortilla chips topped with melted cheese, jalapeños, and salsa. This classic snack enhances the taco vibe and makes for an exciting spread!
- Baja-Style Slaw: A tangy, crunchy slaw with lime juice and cilantro complements the sticks’ texture and flavor, adding a refreshing twist.
- Chilled Lemonade: Cool, refreshing lemonade counters the savory richness of the taco sticks and makes every bite feel like a summer celebration!
- Baked Sweet Potato Fries: A sweet and savory side that offers a healthier alternative to traditional fries, enhancing the meal with that touch of sweetness.
- Mexican Street Corn: Elote brings a creamy, flavorful corn dish to your table, enriching the experience with its unique blend of spices and cheese.
- Dark Beer or Horchata: Complement the rich flavors of the taco sticks with a dark beer for a robust pairing, or indulge in a sweet horchata for a creamy contrast.
Make Ahead Options
These Cheesy Taco Sticks are perfect for meal prep enthusiasts looking to save time on busy weeknights! You can assemble the sticks and refrigerate them for up to 24 hours before baking. Simply prepare the filling and fill the dough strips as instructed, then cover tightly with plastic wrap to keep them fresh and prevent dryness. If you want to prepare them further in advance, you can freeze unbaked Cheesy Taco Sticks for up to 3 months. To cook from frozen, bake directly from the freezer, adding a few extra minutes to the baking time. This way, you’ll have delicious homemade snacks ready with minimal effort whenever cravings hit!
How to Store and Freeze Cheesy Taco Sticks
Fridge: Store leftover Cheesy Taco Sticks in an airtight container for up to 3 days. Reheat them in the oven at 350°F (175°C) for about 10 minutes to restore crispness.
Freezer: For longer storage, freeze unbaked Cheesy Taco Sticks on a baking sheet until firm, then transfer them to a freezer-safe bag. They can be frozen for up to 3 months.
Reheating: Bake frozen Cheesy Taco Sticks directly from the freezer at 375°F (190°C) for 15-20 minutes until heated through and golden brown.
Make-Ahead: You can assemble these delightful sticks ahead of time and refrigerate them until you’re ready to bake—perfect for impromptu gatherings or busy weeknights!
Expert Tips for Cheesy Taco Sticks
Perfectly Browned Beef: Ensure the ground beef is well-browned to enhance flavor and prevent a soggy filling.
Avoid Overfilling: Be cautious not to overstuff the dough; a generous spoonful is perfect to prevent leaks during baking.
Optimal Cooling Time: Let the Cheesy Taco Sticks cool briefly after baking to help the cheese set, making them easier to handle and serve.
Experiment with Heat: For spicy Cheesy Taco Sticks, mix in diced jalapeños or a splash of hot sauce for an exciting kick.
Dough Variety: Choose between pizza or crescent dough; pizza will yield a chewier stick while crescent dough offers a softer bite.
Customize Cheese Choices: Mix different cheeses like cheddar, Monterey Jack, or mozzarella for varied melt and flavor—this versatility enhances the overall experience!
Cheesy Taco Sticks Recipe FAQs
How do I select the best ground beef for my Cheesy Taco Sticks?
Absolutely! Look for lean ground beef (about 80/20 or 90/10) to reduce grease while still ensuring a flavorful filling. If you’re seeking lighter options, ground turkey or chicken works beautifully as alternatives.
How should I store any leftovers of Cheesy Taco Sticks?
I recommend placing leftover Cheesy Taco Sticks in an airtight container in the fridge, where they’ll stay fresh for up to 3 days. To reheat, pop them in the oven at 350°F (175°C) for about 10 minutes to regain some of that crispiness!
Can I freeze Cheesy Taco Sticks?
Yes, indeed! To freeze, lay unbaked Cheesy Taco Sticks on a baking sheet and freeze until firm. Transfer them to a freezer-safe bag and they can last up to 3 months. When you’re ready to enjoy, bake them directly from frozen at 375°F (190°C) for about 15-20 minutes.
What do I do if my dough is difficult to work with?
Very! If you’re struggling with your dough, it might be too warm or sticky. Dust your work surface and the dough with a little flour to make it easier to handle. Also, consider chilling the dough in the fridge for about 15 minutes; this can help firm it up for easier rolling and cutting.
Are there any allergens I should consider with this recipe?
Definitely! Common allergens include gluten (from the dough) and dairy (from the cheese). For a gluten-free option, look for gluten-free pizza dough. If you have cheese allergies, try using dairy-free cheese alternatives that melt well.
Can I make Cheesy Taco Sticks ahead of time?
Absolutely! You can assemble your Cheesy Taco Sticks ahead of time and keep them in the fridge until you’re ready to bake. Just make sure to cover them tightly to keep the dough from drying out. When you’re ready, simply bake them as per the instructions, and you’ll have a tasty treat ready to go in no time!
Cheesy Taco Sticks: Your New Go-To Dinner Delight
Ingredients
Equipment
Method
- Heat a skillet over medium heat and sauté finely chopped onion for 2-3 minutes until translucent. Add minced garlic and cook for 1 minute more.
- Add ground beef and break into small crumbles, cooking for 5-7 minutes until browned. Drain excess fat if needed.
- Stir in taco seasoning, chili powder, cumin, and smoked paprika. Add a splash of water and simmer for 2-3 minutes until thickened.
- Remove from heat and stir in shredded cheese until melted.
- Roll out refrigerated dough to ¼ inch thick, cut into strips measuring 4 inches wide.
- Place filling down the center of each strip, fold edges over and seal tightly, crimping with a fork.
- Preheat oven to 375°F (190°C), line baking sheet with parchment, place sticks on sheet and brush with egg wash.
- Bake for 12-15 minutes until golden brown, then let cool before serving.