

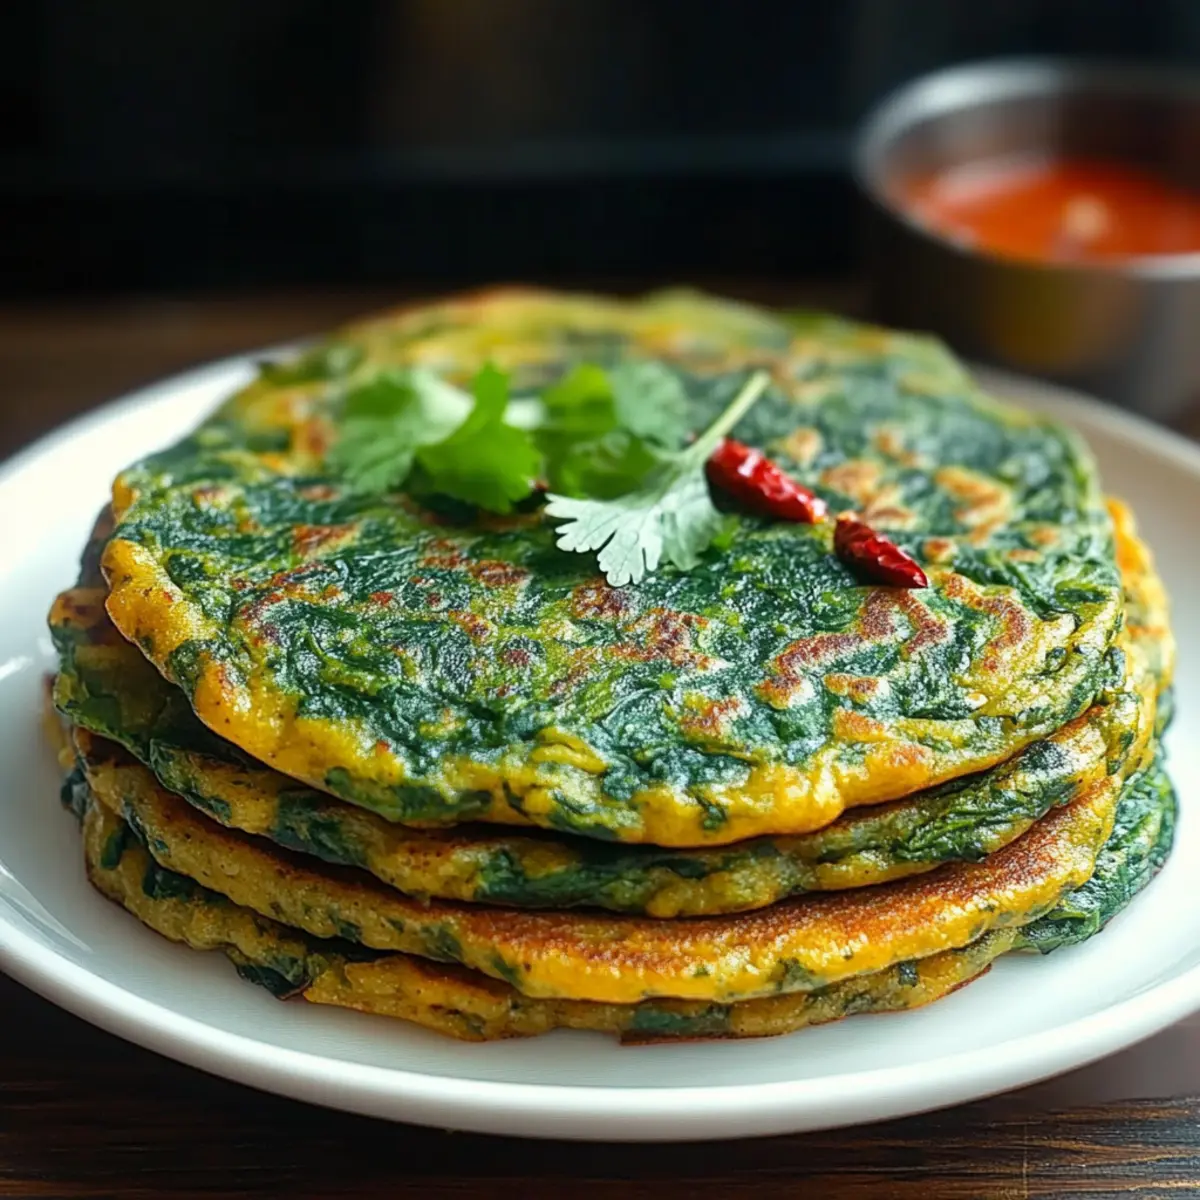
The sizzling sound of batter hitting the hot pan transports me to bustling Indian kitchens, where comfort food comes alive. Today, I’m excited to share my take on Spinach Puda, a gluten-free savory Indian pancake that’s as vibrant as it is delicious. This recipe not only makes for a quick and satisfying dish but is also packed with high-quality protein and essential nutrients, making it a fantastic addition to any meal. These delightful pancakes are perfect for breakfast, lunch, or a light dinner, and their crispy edges paired with a tender center create a texture that’s simply irresistible. Ready to discover how simple it is to whip up this nutritious gem in your own kitchen? Let’s dive into the details!
Why is Spinach Puda a Must-Try?
Unique Flavor: The earthy taste of fresh spinach combined with aromatic spices creates a tantalizing flavor explosion that’s both comforting and satisfying.
Quick & Easy: This recipe is super simple, making it ideal for those busy mornings or spontaneous meals, requiring only a few common ingredients.
Nutrient-Packed: Enjoy a wholesome dish that’s rich in protein and loaded with vitamins from spinach, making it a nutritious choice for everyone in the family.
Versatile Delight: Spinach Puda can be enjoyed on its own or paired with various sides like yogurt or mint chutney, allowing for endless customization based on your taste preferences.
Crowd-Pleaser: Whether you’re hosting a brunch or looking for a family dinner option, these pancakes are sure to impress everyone, introducing a delightful twist to traditional meals.
Elevate your cooking game with this vibrant dish, and if you’re looking for other tasty gluten-free options, don’t miss our Best Gluten-Free Recipes and High-Protein Vegetarian Meals!
Spinach Puda Ingredients
For the Batter
• Gram Flour (Besan) – This provides nuttiness and high protein; ensure to use gluten-free flour for a similar texture.
• Fresh Spinach Leaves – Adds vibrant color and essential nutrients; avoid frozen spinach to prevent sogginess.
• Onion – Introduces a slight sweetness and crunch; shallots or green onions are great substitutes.
• Green Chili – Imparts a touch of heat; adjust based on your spice preference or omit for milder flavor.
• Garlic – Enhances overall depth; if you can’t find fresh, garlic powder works well too.
• Cumin Seeds – Adds warmth and a smoky aroma; no direct substitution needed.
• Turmeric Powder – Provides an earthy flavor and bright color; can be omitted if you don’t have any.
• Salt – Essential for flavor enhancement, adjust according to taste.
• Water – Helps achieve the right batter consistency for your Spinach Puda.
• Oil – Necessary for pan-frying to achieve that delightful golden crisp finish.
Elevate your dishes with these delightful ingredients, and enjoy the incredible taste of this easy, nutritious treat!
Step‑by‑Step Instructions for Spinach Puda
Step 1: Prepare the Batter
In a mixing bowl, whisk together 1 cup of gram flour with 3/4 to 1 cup of water until you achieve a smooth and slightly thick consistency. Make sure there are no lumps. The batter should be pourable yet hold its shape. Set this aside for a few minutes while you prepare the other ingredients for the Spinach Puda.
Step 2: Add Fresh Ingredients
Fold in 1 cup of finely chopped fresh spinach, 1/4 cup chopped onions, 1 minced green chili, 2 cloves of minced garlic, 1/2 teaspoon cumin seeds, 1/4 teaspoon turmeric powder, and salt to taste into the batter. Mix thoroughly until all ingredients are well incorporated, creating a vibrant green mixture that sings of flavors.
Step 3: Heat the Skillet
Place a non-stick or cast-iron skillet on the stove over medium heat and add a drizzle of oil to coat the surface. Allow the oil to heat until it shimmers, signaling it’s ready for cooking. This step is crucial to ensure your Spinach Puda gets that golden crisp texture on the outside while remaining tender on the inside.
Step 4: Cook the Pancakes
Pour a ladleful of the batter onto the skillet, gently spreading it out into a round shape approximately 5-6 inches in diameter. Cook for about 2-3 minutes, or until the edges start to firm up and the bottom is a beautiful golden brown. You’ll see the edges pulling away slightly, indicating it’s ready to flip.
Step 5: Flip and Finish Cooking
With a flat spatula, carefully flip the pancake to cook the other side. Let it cook for another 2-3 minutes until it becomes crisp and golden. Keep an eye on it to avoid burning. The aroma filling your kitchen will hint at the deliciousness of your Spinach Puda ready to be enjoyed!
Step 6: Repeat and Serve
Repeat the process with the remaining batter, adding more oil to the skillet as required to achieve that golden crisp finish for each pancake. As each Spinach Puda finishes cooking, stack them on a plate. Serve hot, paired with mint chutney or yogurt for an irresistible meal everyone will love.
Storage Tips for Spinach Puda
Fridge: Store leftover Spinach Puda in an airtight container for up to 3 days. Layer the pancakes with parchment paper to prevent sticking and maintain their texture.
Freezer: For longer storage, freeze cooled Spinach Puda in a single layer. Once frozen, transfer to a freezer-safe bag, where they can last for up to 2 months.
Reheating: To enjoy crispy leftovers, reheat in a skillet over medium heat, adding a touch of oil if needed. This will restore the crunch and warmth. Avoid microwaving, which can make them soggy.
Serving Fresh: For the best flavor and texture, aim to serve the Spinach Puda immediately after cooking, ensuring that golden crispness you’ll love!
Make Ahead Options
These Spinach Puda are perfect for meal prep enthusiasts looking to save time during busy weekdays! You can prepare the batter up to 24 hours in advance by mixing the gram flour with water, spices, and fresh ingredients, then refrigerating it in an airtight container. This way, the flavors meld beautifully, and the batter stays fresh. When you’re ready to cook, simply give the mixture a quick stir to ensure everything is well combined, then pour a ladleful onto a hot skillet. For leftovers, cool completely before refrigerating for up to 3 days; stack with parchment paper to prevent sticking. When reheating, a quick crisp in a skillet brings them back to their golden glory, making your Spinach Puda just as delicious as when freshly made!
What to Serve with Spinach Puda
Savoring these flavorful pancakes opens up a world of delicious pairings that enhance your meal experience.
-
Mint Chutney: This refreshing condiment adds a burst of flavor and a cooling effect, elevating the savory notes of the puda.
-
Plain Yogurt: A dollop of creamy yogurt balances the spices beautifully, offering a rich and smooth texture that complements the dish.
-
Spiced Indian Tea: Enjoy a warm cup of chai to accompany your meal; its aromatic spices enhance the overall comforting experience.
-
Dal: A hearty bowl of dal provides protein richness and a comforting warmth that pairs wonderfully with the crispy puda. The earthy flavors create a well-rounded meal.
-
Sautéed Vegetables: Lightly sautéed seasonal veggies add color and variety to your plate while delivering a nutritious crunch alongside the pancakes.
-
Fresh Salad: Brighten your meal with a simple salad of cucumber, tomato, and lemon dressing for a refreshing contrast to the warm puda.
-
Pickled Onions: Tangy and crunchy pickled onions introduce a zesty pop that complements the earthiness of the spinach pancakes perfectly.
-
Fruit Chaat: A sweet and spicy fruit chaat provides a delightful balance, making for a well-rounded and exciting dining experience.
-
Spiced Rice: Serve with a side of fragrant spiced rice to create a hearty meal that satisfies both the appetite and taste buds.
Expert Tips for Spinach Puda
-
Proper Mixing: Ensure the batter is smooth and lump-free for even cooking; add water gradually until you achieve the right consistency.
-
Fresh Spinach: Always choose fresh spinach over frozen to avoid sogginess. Finely chop it to ensure a well-distributed flavor throughout the puda.
-
Heat Control: Maintain medium heat while cooking to avoid burning the pancakes. Adjust the heat as needed for even browning and crispness.
-
Oil Application: Use just enough oil for frying; too much can make the puda greasy. A light drizzle is perfect for a golden, crisp finish.
-
Serving Fresh: Serve Spinach Puda immediately after cooking for the best texture; store leftovers with parchment paper to prevent sticking.
Spinach Puda Variations & Substitutions
Feel free to get creative with your Spinach Puda! There are so many delightful twists you can try.
- Kale Swap: Substitute spinach with finely shredded kale for a heartier texture and an extra nutrient boost.
- Vegetable Blend: Add grated carrots and bell peppers to the batter for additional colors, flavors, and crunch.
- Cheesy Goodness: Mix in feta or paneer pieces for a creamy, savory twist that adds depth to every bite.
- Herb Infusion: Enhance the flavor by incorporating fresh herbs like cilantro or parsley into the batter. It brings a fresh aromatic note.
- Spice It Up: For those who love heat, increase the number of green chilies or include red chili powder to kick things up a notch.
- Nutty Flavor: Add ground nuts, such as almonds or walnuts, for an unforgettable nutty crunch and added nutrition.
- Flour Alternatives: If you’re avoiding gram flour, you can use chickpea flour or a gluten-free all-purpose blend instead.
- Savory Pancakes: Experiment with adding spices like garam masala or chat masala for an extra layer of savory goodness.
With so many variations to choose from, your Spinach Puda can take on a life of its own. For more ideas, check our Best Gluten-Free Recipes or explore other High-Protein Vegetarian Meals to keep the inspiration flowing!

Spinach Puda Recipe FAQs
How do I select the best spinach for my Spinach Puda?
Absolutely! When choosing spinach, look for vibrant, dark green leaves free of any dark spots or wilting. Fresh spinach has a crisp texture and should smell earthy and fresh. Avoid frozen spinach for this recipe to prevent sogginess—indicatively, fresh spinach should snap when bent.
How should I store leftover Spinach Puda, and how long will it last?
To store your Spinach Puda, place the leftovers in an airtight container, layering them with parchment paper in between to prevent sticking. They can last in the refrigerator for up to 3 days. Be sure to cool them completely before storing. Reheating in a skillet is the best way to bring back the crispy edges; avoid using a microwave if you can!
Can I freeze Spinach Puda, and what’s the best way to do it?
Yes, you can freeze your Spinach Puda! Once cooled, arrange them in a single layer on a baking sheet and freeze for about 1 to 2 hours. Then, transfer the frozen puda to a freezer-safe bag, where they will keep for up to 2 months. To reheat, allow them to thaw overnight in the fridge and then warm them up in a skillet with a drizzle of oil for the best texture.
What can I do if my Spinach Puda turns soggy after cooking?
Very! If you find your Spinach Puda is soggy, it’s often due to too much moisture in the batter or spinach. To troubleshoot, ensure your spinach is well-dried after washing and finely chopped for better incorporation. If needed, you can add a little more gram flour to thicken the batter. When cooking, maintaining the proper heat is crucial—if it’s too low, they won’t crisp up!
Are there any dietary considerations I should keep in mind when making Spinach Puda?
Of course! Spinach Puda is naturally gluten-free due to the use of gram flour. However, if you have allergies, double-check the flour label to ensure it hasn’t been processed in a facility with gluten contaminants. Additionally, always adjust the amount of green chili based on your spice tolerance, especially if serving to children or those with sensitivity to heat.
How can I enhance the nutritional value of my Spinach Puda?
You can add even more nutrition to your Spinach Puda by incorporating finely shredded vegetables like carrots or zucchini into the batter. You could also mix in some crumbled feta or paneer for added protein. Experimenting with spices, like adding ground flaxseeds or herbs, can also boost the health benefits while contributing to flavor.
Crispy Spinach Puda: Your New Favorite Gluten-Free Pancake
Ingredients
Equipment
Method
- Whisk together gram flour and water until smooth and slightly thick. Set it aside.
- Fold in chopped spinach, onions, green chili, garlic, cumin seeds, turmeric, and salt into the batter.
- Heat a non-stick or cast-iron skillet with a drizzle of oil until shimmering.
- Pour ladlefuls of batter onto the skillet, cooking for 2-3 minutes until golden brown on the bottom.
- Flip and cook the other side for another 2-3 minutes until crisp and golden.
- Repeat with remaining batter, adding oil as needed. Serve hot with mint chutney or yogurt.