

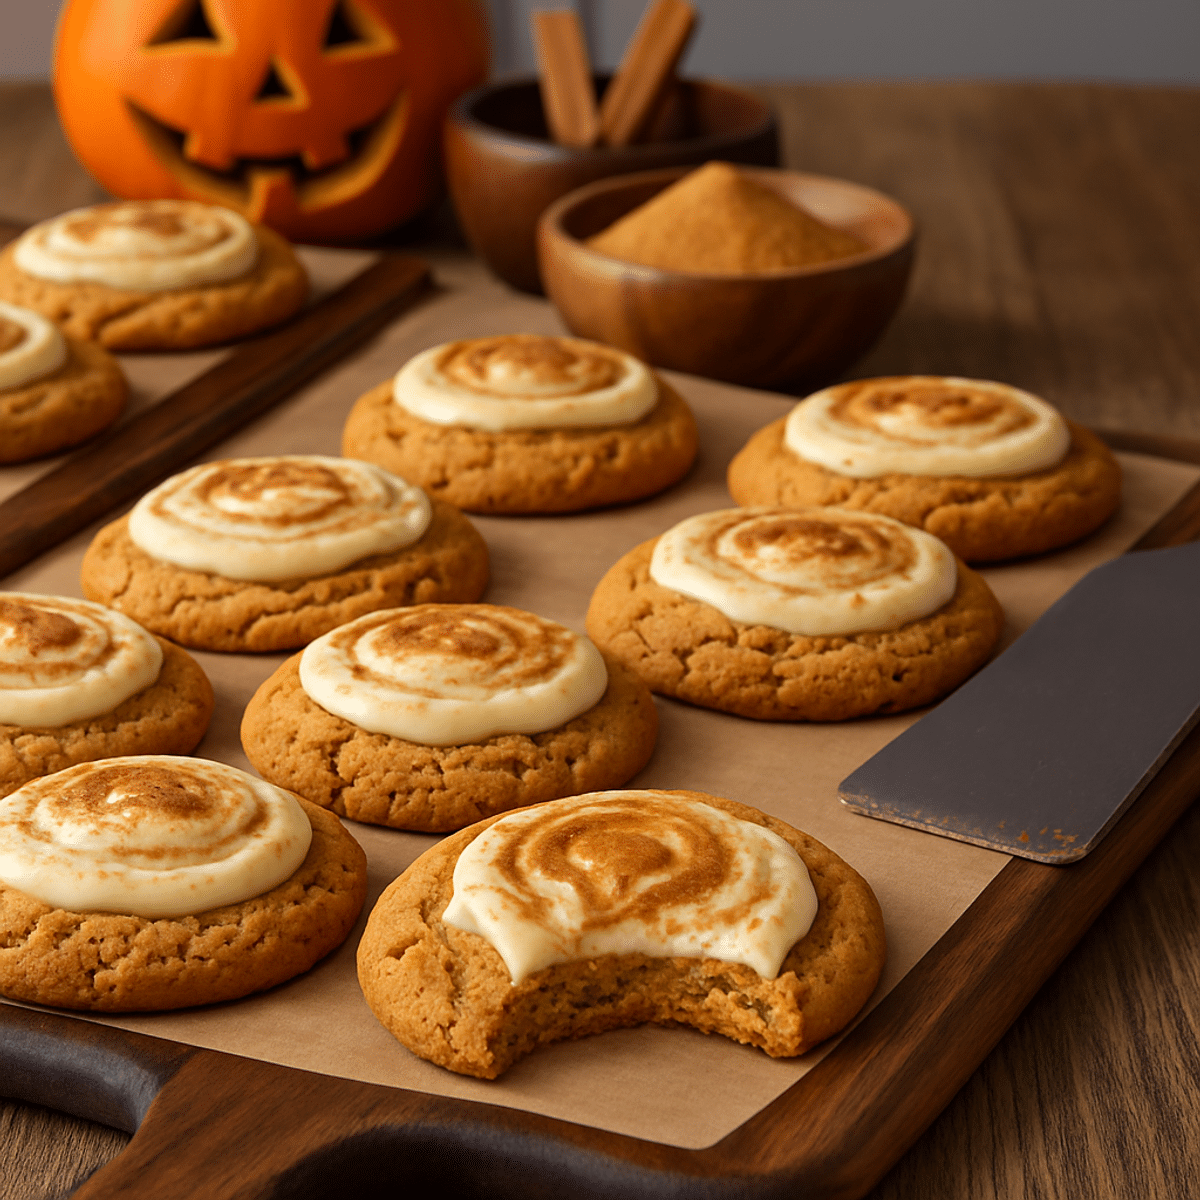
As the leaves turn vibrant shades of orange and gold, there's nothing quite like the warm aromas of fall wafting through the kitchen. Today, I’m excited to share a recipe that perfectly captures that cozy spirit: Pumpkin Cheesecake Cookies. Imagine biting into a soft, tender cookie with a dreamy cream cheese filling peeking through—the ideal treat for any family gathering or a weekend afternoon bake. These cookies not only promise a delicious fusion of spiced pumpkin and creamy cheesecake but are surprisingly easy to whip up, making them a perfect choice for both seasoned bakers and kitchen novices alike. Plus, they’re a fun way to use up that leftover pumpkin puree lingering in your pantry! Get ready to impress your loved ones with these delightful treats, which will have everyone coming back for more. Here’s exactly how to make it.
Ingredients
For the Cookie Dough
- 2 cups all-purpose flour
- 1 teaspoon baking powder
- 1/2 teaspoon baking soda
- 1/2 teaspoon salt
- 1 teaspoon ground cinnamon
- 1/2 teaspoon ground nutmeg
- 1/2 teaspoon ground ginger
- 1/2 cup unsalted butter, softened
- 3/4 cup granulated sugar
- 1/2 cup brown sugar, packed
- 1 cup pumpkin puree
- 1 large egg
- 2 teaspoons vanilla extract
For the Cream Cheese Filling
- 8 ounces cream cheese, softened
- 1/2 cup powdered sugar
- 1 teaspoon vanilla extract
Note: You can substitute pumpkin puree with applesauce in a pinch for a different flavor profile.
Why You'll Love This Recipe
- Cozy Fall Flavors — These cookies embody the essence of autumn with warming spices and smooth pumpkin, inviting you to savor each bite during chilly evenings.
- Creamy Surprise — The luscious cream cheese filling adds a delightful twist, elevating the texture and flavor to create a cookie that's each bite feels indulgent.
- Quick and Easy — With a prep time of just 25 minutes, you can whip up these treats with minimal fuss, making them perfect for spontaneous family gatherings.
- Kid-Friendly Fun — Kids will love helping shape the cookies and adding the cream cheese filling, turning baking into an enjoyable family activity.
- Make-Ahead Magic — These cookies store beautifully in the fridge, allowing you to bake them in advance and enjoy a sweet treat anytime you crave something special.
Recipe At a Glance
- Prep Time: 20 minutes
- Cook Time: 16 minutes
- Total Time: 36 minutes
- Servings: 24 cookies
Instructions
- Preheat the oven to 350 degrees F (175 degrees C).
- Line two baking sheets with parchment paper.
- In a bowl, combine 2 cups all-purpose flour, 1 teaspoon baking powder, 1/2 teaspoon baking soda, 1/2 teaspoon salt, 1 teaspoon ground cinnamon, 1/2 teaspoon ground nutmeg, and 1/2 teaspoon ground ginger.
- Whisk the dry ingredients until evenly combined.
- In a large mixing bowl, place 1/2 cup softened unsalted butter.
- Add 3/4 cup granulated sugar and 1/2 cup packed brown sugar to the butter.
- Beat the butter and sugars together until light and creamy.
- Add 1 cup pumpkin puree to the butter mixture.
- Add 1 large egg and 2 teaspoons vanilla extract to the mixture.
- Mix the pumpkin mixture until smooth.
- Gradually add the dry ingredients into the wet mixture.
- Stir gently until the cookie dough forms, being careful not to overmix.
- In a separate bowl, place 8 ounces softened cream cheese.
- Add 1/2 cup powdered sugar and 1 teaspoon vanilla extract to the cream cheese.
- Beat the cream cheese filling until smooth and creamy.
- Scoop the pumpkin cookie dough onto the prepared baking sheets.
- Flatten each cookie dough portion slightly.
- Add a small amount of cream cheese filling on top of each cookie.
- Cover the cream cheese filling with additional pumpkin cookie dough.
- Seal the edges of each cookie.
- Bake the cookies for 14 to 16 minutes, until the edges are set.
- Remove the cookies from the oven and allow them to cool on the baking sheet for 10 minutes.
- Transfer the cookies to a cooling rack and allow them to cool completely before serving.
- Store the cookies in the refrigerator for the best texture. Enjoy your cozy family treat!
Recipe Tips
-
Don’t Overmix the Dough — When combining the dry and wet ingredients, mix gently until just combined. Overmixing can lead to tough cookies, which detracts from their desired softness.
-
Achieve Perfect Cream Cheese Filling Consistency — Ensure your cream cheese is softened to room temperature before mixing. This will make it easy to blend with the sugar and vanilla, resulting in a smooth filling that won’t break through the dough during baking.
-
Use a Cookie Scoop for Uniformity — To ensure even baking and all cookies being the same size, use a cookie scoop for portioning out both the cookie dough and cream cheese filling. This also speeds up the assembly process.
-
Flat Top for Cream Cheese Filling — When shaping the cookies, slightly flatten them before placing the cream cheese filling on top. This not only helps the filling stay in place but also allows the cookies to bake evenly without puffing up too much.
-
Check for Edge Doneness — Pay attention to the edges of the cookies; they should be set and slightly golden while the center remains soft but not wet. This is an indicator that your cookies are baked perfectly without drying out.
What to Serve With This
- Hot Apple Cider — The warm spices in the cider complement the autumnal flavors of the cookies, creating a cozy drink pairing.
- Maple-Walnut Salad — A fresh salad with maple vinaigrette and walnuts adds a crunchy texture and balances the sweetness of the cookies.
- Caramel Pecan Ice Cream — This dessert offers a creamy and nutty contrast that enhances the rich cheesecake filling and pumpkin flavors.
- Vanilla Chai Latte — The spiced tea accentuates the warm spices in the cookies, making for a comforting and harmonious beverage choice.
Storage & Reheating
-
Refrigerator: Store the pumpkin cheesecake cookies in an airtight container in the refrigerator for up to 5 days. This will keep them fresh and maintain their soft texture.
-
Freezer: These cookies freeze well! Place the cooled cookies in a single layer in a freezer-safe container or a zip-top bag, ensuring they are well-sealed to prevent freezer burn. They can be stored for up to 2 months.
-
Reheating: To reheat, remove the desired number of cookies from the refrigerator or freezer. If frozen, allow them to thaw in the fridge overnight. For a warm treat, microwave the cookies for 10-15 seconds or until they are heated through. Alternatively, you can place them in a preheated oven at 350°F (175°C) for about 5 minutes. Enjoy the comforting warmth!
Substitutions & Variations
-
Gluten-free flour — Substitute all-purpose flour with a gluten-free flour blend to make these cookies suitable for those with gluten sensitivities. Many gluten-free blends work well in baking, maintaining a similar texture.
-
Coconut oil — Instead of unsalted butter, use melted coconut oil for a dairy-free version. It will impart a subtle coconut flavor while keeping the cookies moist.
-
Maple syrup — Replace granulated sugar and brown sugar with maple syrup for a natural sweetener option. Adjust the amount of flour slightly to counterbalance the added liquid from the syrup.
-
Greek yogurt — For the cream cheese filling, swap cream cheese for Greek yogurt for a lighter, tangy filling option. This will provide a similar texture while reducing the richness of the cream cheese.
Frequently Asked Questions
Can I use a different type of flour instead of all-purpose flour?
Yes, you can substitute all-purpose flour with a gluten-free flour blend or whole wheat flour, but note that the texture and moisture content may vary slightly.
How can I make these cookies ahead of time?
You can prepare the cookie dough and cream cheese filling in advance and store them separately in the refrigerator for up to 2 days. Assemble and bake the cookies just before serving for the best texture.
What should I do if my cream cheese filling is too runny?
If your cream cheese filling is too runny, try chilling it in the refrigerator for about 20-30 minutes to help firm it up before using it in your cookies.
How do I know when the cookies are done baking?
Look for slightly golden edges and a soft center; you can also gently press the edges with a finger—if they feel set and firm, they are likely done baking, even if the center is still a little soft.