

During a recent picnic, I overheard my friends rave about the classic Italian sandwiches—bold flavors, vibrant colors, and hearty satisfaction packed into each bite. Inspired, I knew it was time to create my own showstopper: the Pressed Italian Picnic Sandwich Loaf. This masterpiece combines layers of savory Italian deli meats, fresh veggies, and smooth cheeses into an irresistible, shareable dish. Not only is it a crowd-pleaser for outdoor adventures, but its no-mess, make-ahead nature means you can enjoy the festivities without the hassle of messy assembly. Plus, the fun part? You can customize each loaf to cater to different tastes or dietary needs, from zesty vegetarian options to spicy twists! So, are you ready to impress your friends and elevate your picnic game?
Why is this sandwich a must-try?
Flavor Explosion: Each bite of the Pressed Italian Picnic Sandwich Loaf delivers a vibrant mix of savory meats, fresh veggies, and creamy cheeses that will leave you craving more.
Customization Galore: Tailor this recipe to fit any dietary preference! Go vegetarian with grilled veggies or dial up the heat with spicy peppers.
Make-Ahead Marvel: Prepare it the night before and let the flavors meld, making your picnic prep a breeze. Grab it, slice it, and serve the next day!
Portable Perfection: This no-mess sandwich is easy to transport, ensuring your picnic remains hassle-free and enjoyable.
Crowd-Pleasing Appeal: Perfect for gatherings, this loaf will impress friends and family with its beautiful presentation and incredible taste. Don’t forget to check out our delectable Chicken Marsala Italian for another crowd favorite!
Pressed Italian Picnic Sandwich Loaf Ingredients
For the Bread
• Italian Bread Loaf – A sturdy, crusty bread holds the fillings well; ensure the crust is firm to prevent sagging.
For the Spread
• Olive Tapenade – Adds flavor and acts as a moisture barrier; substitute with pesto or hummus for a different twist.
For the Meats
• Salami – Provides rich, salty flavor; try prosciutto or turkey for a lighter option.
• Ham – Adds an extra protein layer; choose smoked or honey ham for varied flavor profiles.
For the Veggies
• Spinach – Fresh taste and color; swap with arugula or mixed greens if preferred.
• Peppers (roasted or fresh) – Brings sweetness and texture; use jalapeños for heat or cucumbers for crunch.
For the Cheese
• Cheese (e.g., provolone, mozzarella) – Creamy texture that binds the sandwich; feel free to substitute with cheddar or gouda.
For Compression
• Weight (skillet + canned goods) – Essential for pressing down the sandwich layers evenly for that perfect, pressed feel.
This Pressed Italian Picnic Sandwich Loaf is a delightful creation, bound to impress at your next outdoor feast!
Step‑by‑Step Instructions for Pressed Italian Picnic Sandwich Loaf
Step 1: Prepare the Bread
Start by cutting off the top quarter of the Italian bread loaf and hollowing out the inside, leaving a sturdy 1-inch shell. This will form the base for your Pressed Italian Picnic Sandwich Loaf. Ensure the crust is firm to hold the fillings without sagging, creating a perfect structure for your layers to come.
Step 2: Spread the Tapenade
Generously slather olive tapenade on both the hollowed-out base and the cut lid of the loaf. This acts as a moisture barrier to keep your Pressed Italian Picnic Sandwich Loaf from becoming soggy. Be sure to cover all surfaces evenly so that each bite is packed with that delicious Mediterranean flavor.
Step 3: Layer the Fillings
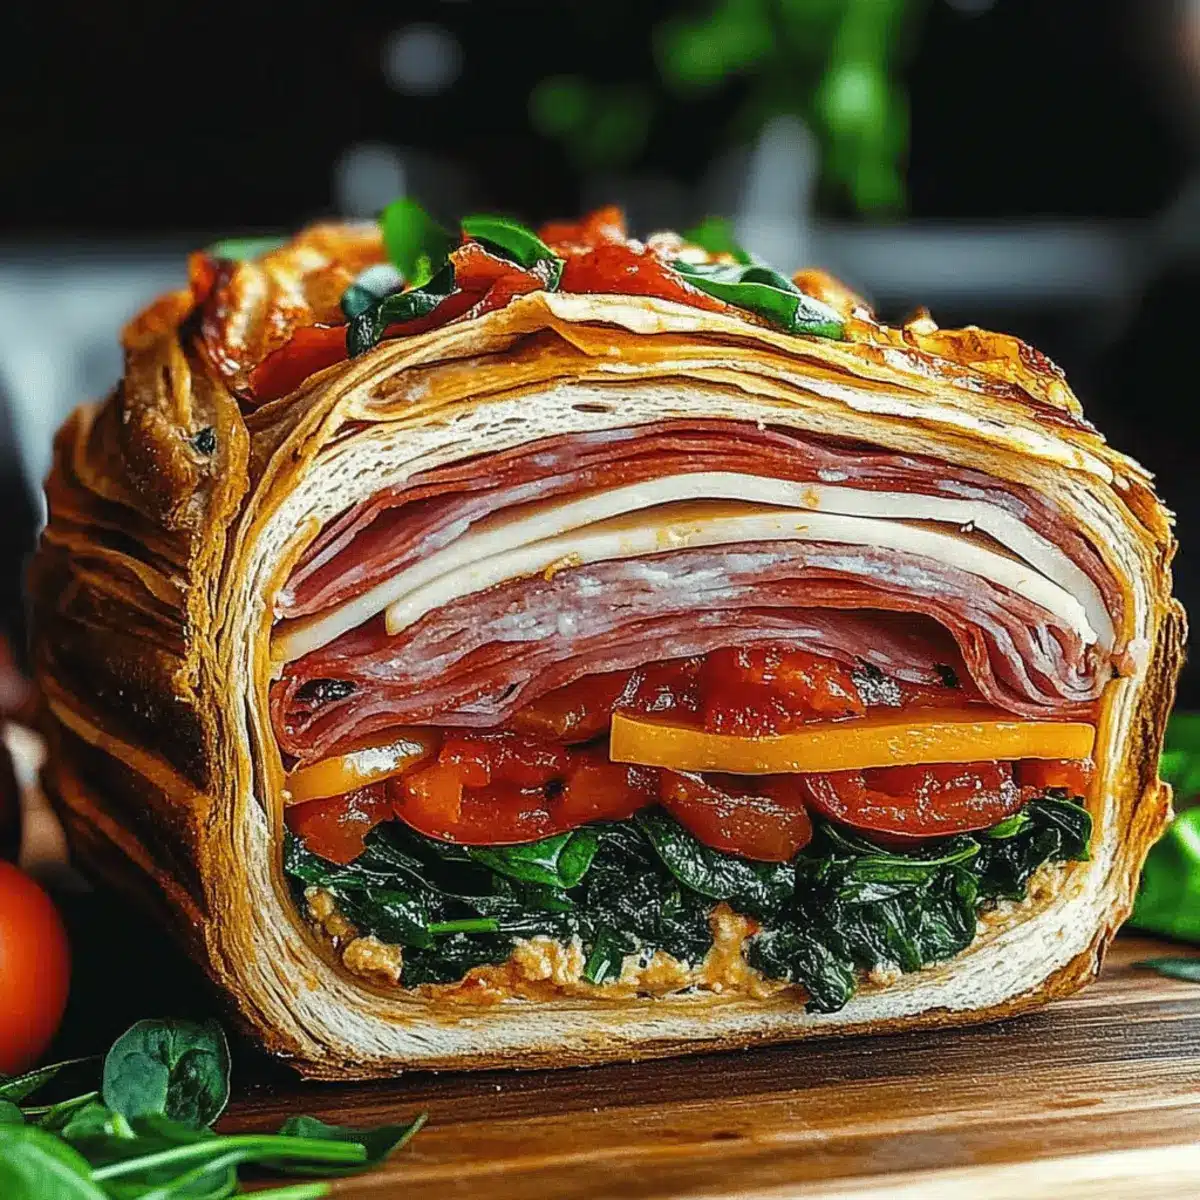
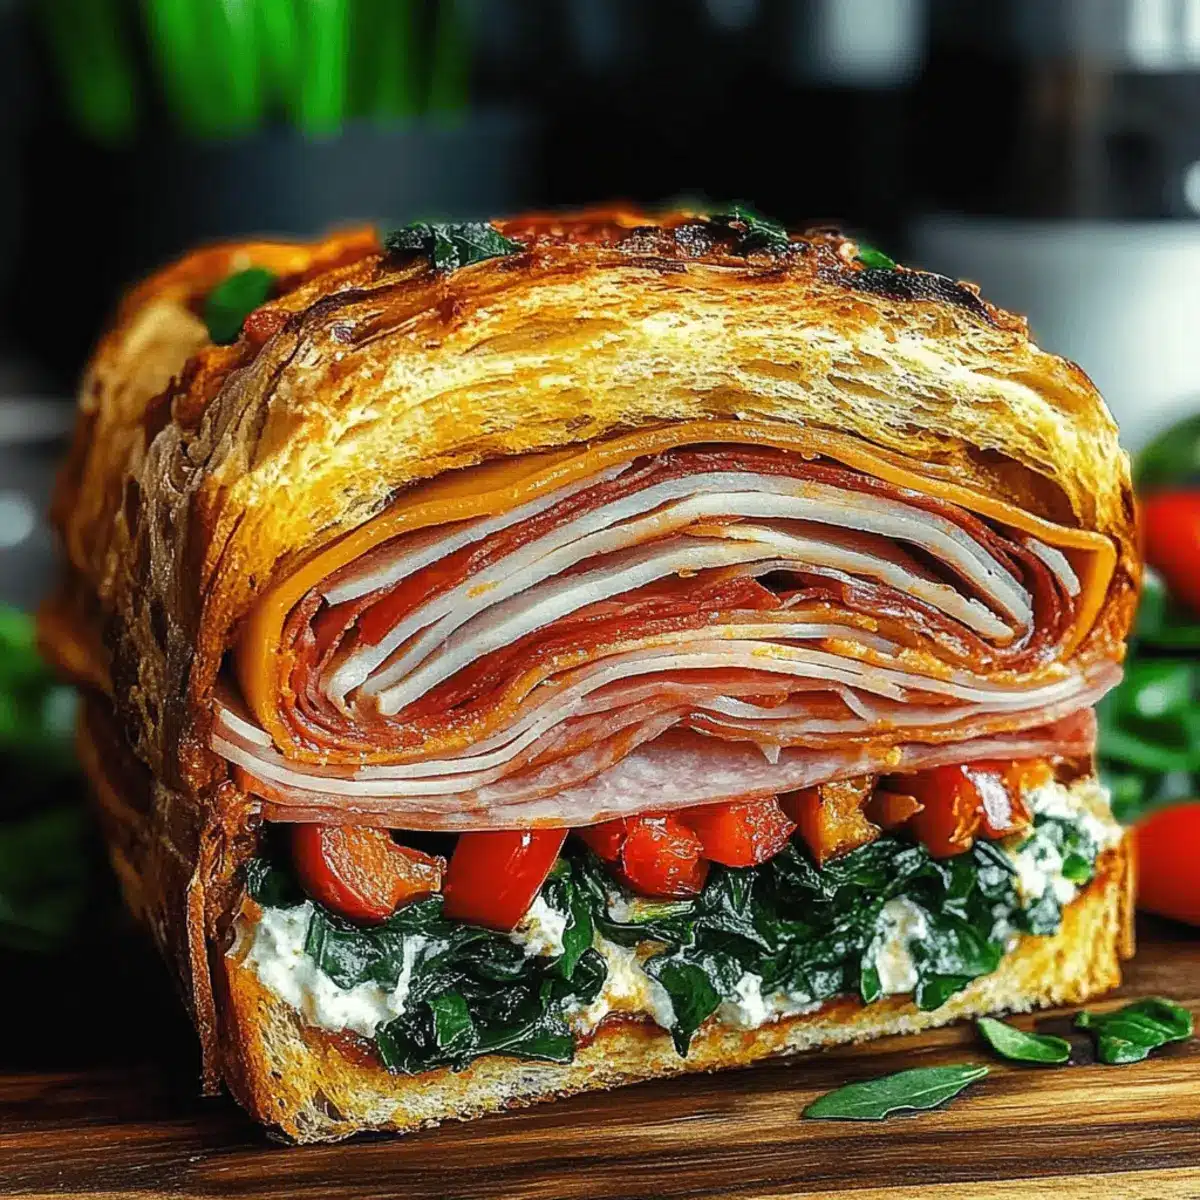
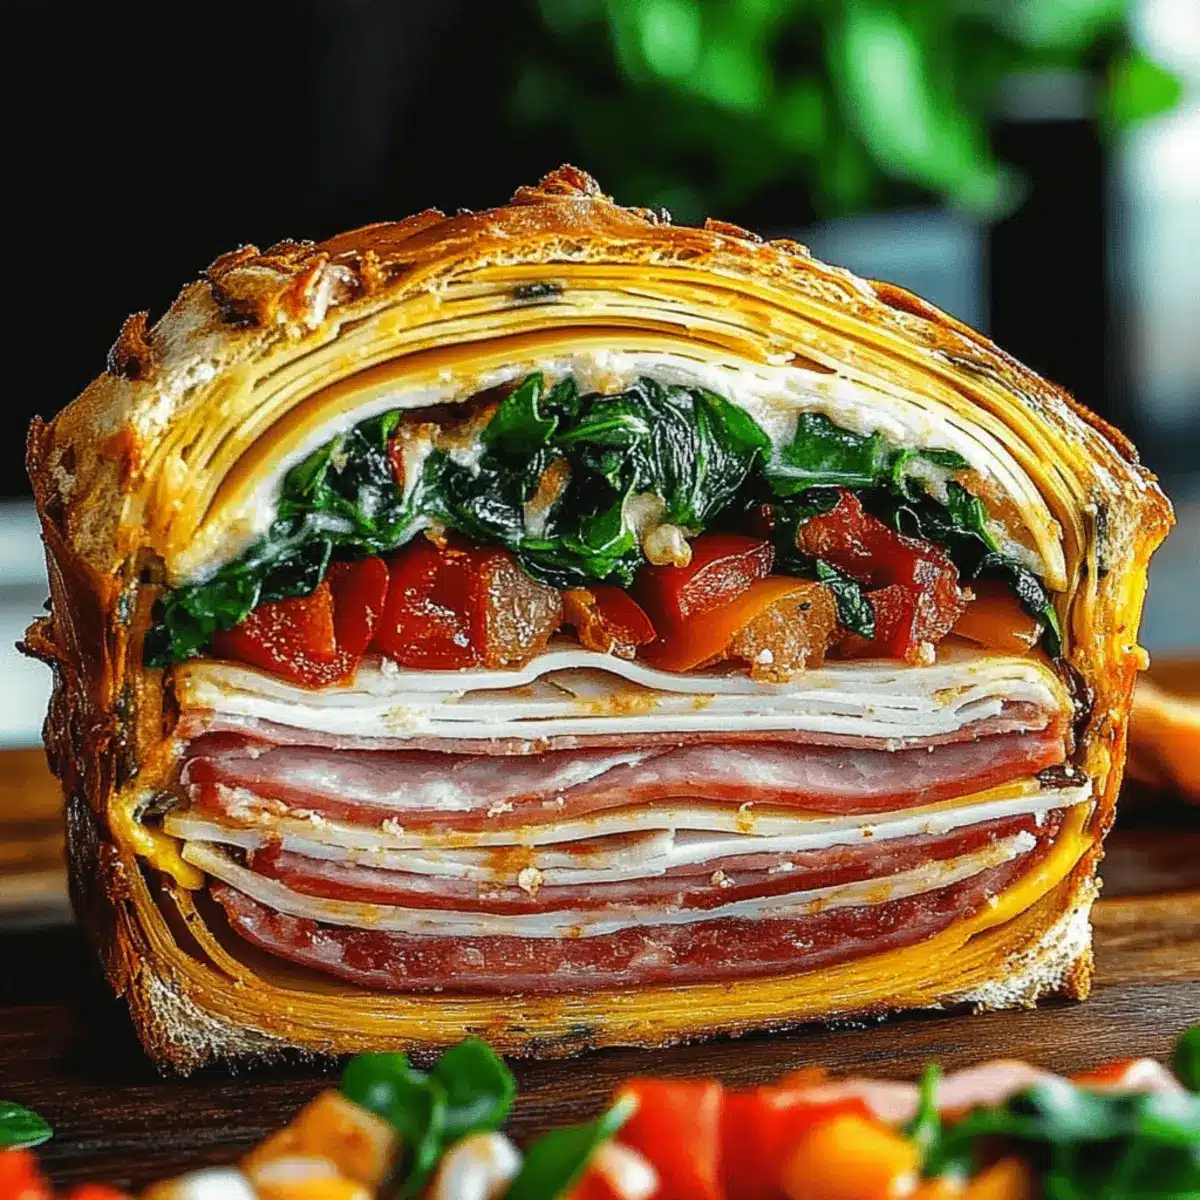
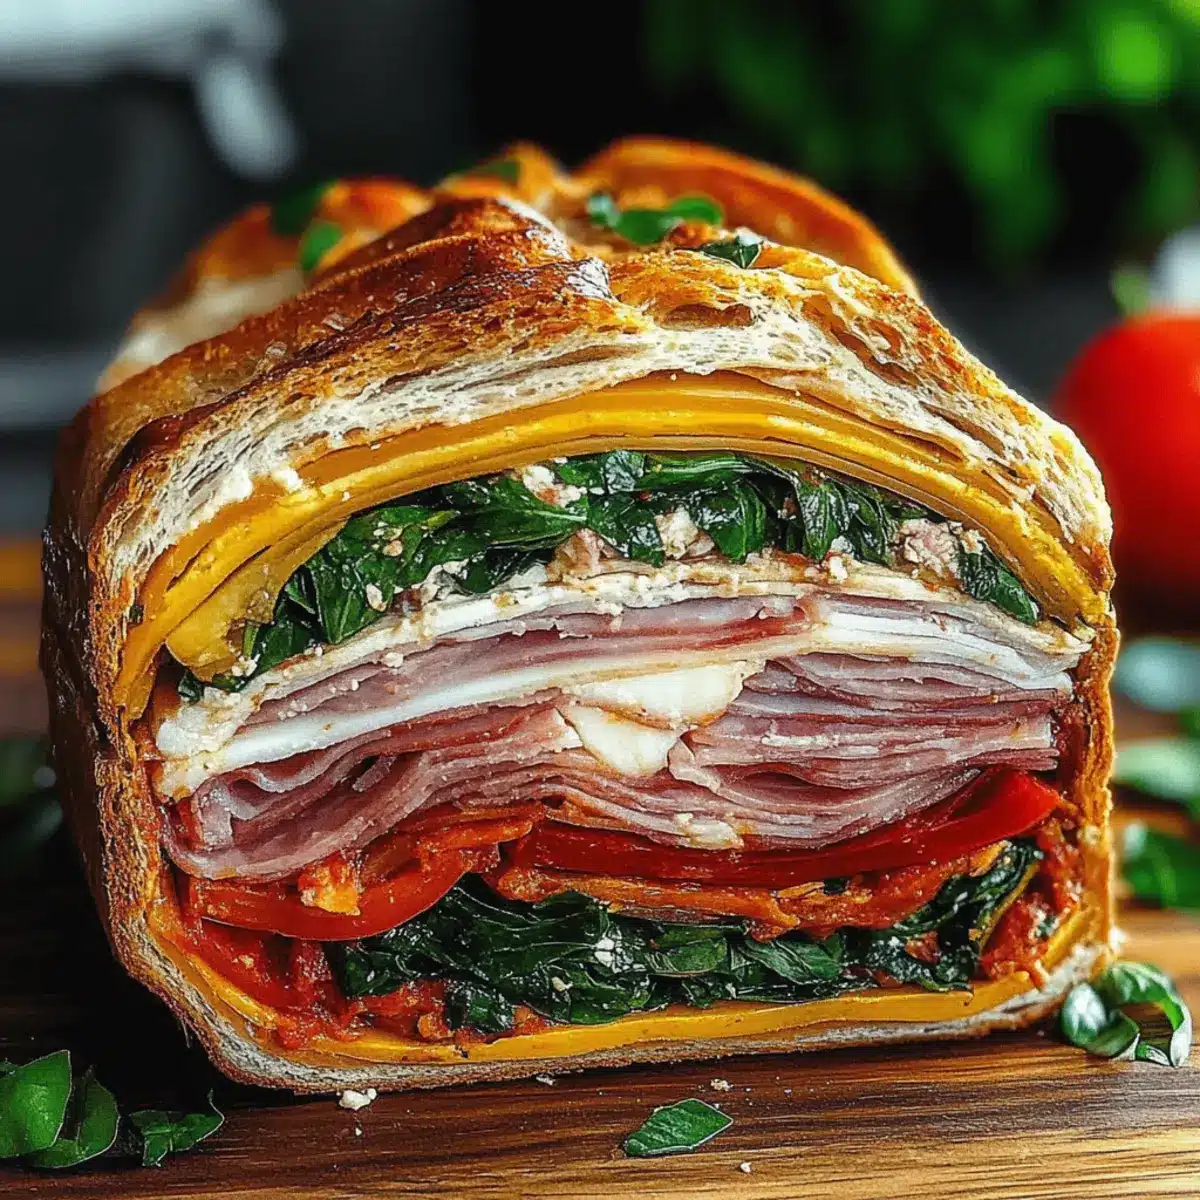
Begin layering your fillings by placing salami in the bottom of the hollowed loaf, followed by a layer of ham. Next, add roasted or fresh peppers, a handful of fresh spinach, and finally, a generous portion of your chosen cheese. Overlap the ingredients slightly for an appealing, compact Pressed Italian Picnic Sandwich Loaf brimming with flavor.
Step 4: Press the Sandwich
Once the filling layers are complete, replace the top of the loaf and wrap the entire sandwich tightly in plastic wrap, followed by aluminum foil. Place a heavy skillet or canned goods on top to evenly compress the sandwich. Refrigerate for at least 8 hours, preferably overnight, to allow all the flavors to meld beautifully.
Step 5: Serve the Pressed Sandwich
When ready to serve, unwrap the Pressed Italian Picnic Sandwich Loaf and brush the exterior with olive oil or melted butter for added flavor. Slice it neatly into wedges, revealing the colorful layers inside. Feel free to garnish with fresh herbs or veggies to enhance its visual appeal and enjoy this delightful picnic treat!
What to Serve with Pressed Italian Picnic Sandwich Loaf?
Pair your sandwich masterpiece with delightful sides and sips to create a memorable meal.
-
Crispy Potato Chips: Their salty crunch perfectly contrasts the sandwich’s tenderness, adding a satisfying texture to your picnic spread.
-
Antipasto Platter: Include marinated olives, artichokes, and roasted red peppers to complement the Italian flavors and add vibrant colors to your feast.
-
Fresh Fruit Salad: A medley of sweet, juicy fruits like watermelon and berries refreshes the palate between savory bites, making each mouthful a treat.
-
Classic Pasta Salad: Add in fresh veggies and a zesty dressing for a cool side dish that mirrors the flavors in your Pressed Italian Picnic Sandwich Loaf.
-
Lemonade or Iced Tea: The bright acidity of lemonade or the soothing notes of iced tea are ideal thirst-quenchers, enhancing your picnic experience.
-
Cheese Platter: Offer a variety of cheeses alongside your sandwich; it’s a sophisticated touch that allows for interactive tasting and complements the loaf’s rich filling.
Your picnic is not just about the Pressed Italian Picnic Sandwich Loaf; it’s a feast of flavors waiting to be enjoyed!
Expert Tips for Pressed Italian Picnic Sandwich Loaf
-
Layer Wisely: Start with meats closest to the bread to form a moisture barrier, preventing sogginess in your Pressed Italian Picnic Sandwich Loaf.
-
Chill Time: Allow the sandwich to press overnight for optimal flavor melding. The extra time enhances the overall taste experience.
-
Bread Test: Always check the sturdiness of your bread before starting; a soft loaf may lead to a messy outcome.
-
Customization Fun: Don’t hesitate to experiment with different fillings. A variety of toppings ensures everyone finds their favorite flavor in your Pressed Italian Picnic Sandwich Loaf.
-
Presentation Matters: For an appetizing display, slice at an angle and arrange the pieces on a platter. The vibrant colors will surely catch everyone’s eye!
Pressed Italian Picnic Sandwich Loaf Variations
Explore the endless possibilities to make this sandwich truly your own, igniting your culinary creativity!
-
Mediterranean Veggie: Use grilled eggplant, zucchini, and crumbled feta instead of meats, adding hummus for a luscious touch.
This variation is perfect for veggie lovers! The infusion of Mediterranean flavors transports you to sunny shores with each bite. -
Spicy Twist: Add hot capicola and pepper jack cheese, plus a chili-garlic spread for a thrilling kick.
If you crave spice, this version will ignite your taste buds and keep you reaching for more! -
Breakfast Loaf: Fill with scrambled eggs, crispy bacon, cheddar cheese, and even hash browns for a unique brunch delight.
Perfect for lazy weekend mornings or breakfast picnics, this twist turns your favorite meal into a handheld treat. -
Coastal Style: Mix tuna salad with dill Havarti and refreshing cucumber for a seafood-inspired option.
This variation brings a taste of the ocean to your picnic, proving that sandwiches can go beyond just deli meats! -
Low-Carb Version: Hollow out bell peppers and layer in your favorite fillings without the bread for a keto-friendly delight.
This is not only light on carbs but still packs tons of flavor, ensuring everyone can join in on the fun! -
Sweet & Savory: Incorporate figs or pear slices with goat cheese and prosciutto for an elegant flavor combination.
This luxurious variation is a hit at gatherings, balancing sweet and savory beautifully! -
Smoky BBQ: Replace traditional meats with smoked turkey and use a tangy BBQ sauce instead of tapenade for a southern twist.
The smoky, barbecue flavors transform this loaf into a summer classic that’ll have everyone asking for the recipe!
Don’t forget to check out our tasty Chicken Marsala Italian for more ways to satisfy your culinary cravings! Each variation is a delightful adventure waiting to be tasted!
How to Store and Freeze Pressed Italian Picnic Sandwich Loaf
Fridge: Keep your Pressed Italian Picnic Sandwich Loaf wrapped tightly in plastic wrap or foil to prevent it from drying out. It can last for up to 3 days in the refrigerator.
Freezer: For longer storage, wrap the loaf tightly in plastic wrap, then in aluminum foil, and freeze for up to 2 months. Thaw in the fridge overnight before serving.
Reheating: If you prefer your sandwich warm, heat individual slices in a skillet over low heat for about 3–5 minutes, or enjoy it cold for a refreshing picnic treat.
Make-Ahead Tips: Preparing the Pressed Italian Picnic Sandwich Loaf a day ahead not only saves time but also allows the flavors to develop beautifully.
Make Ahead Options
The Pressed Italian Picnic Sandwich Loaf is a meal prep dream come true, making it effortless to enjoy homemade goodness without stress! You can prepare the entire loaf up to 24 hours in advance. Simply follow the instructions to assemble the sandwich, wrap it tightly in plastic wrap and aluminum foil, and refrigerate it overnight to allow the flavors to meld beautifully. If you need even more prep time, you can also prep the fillings, such as slicing meats and veggies, and store them separately in the fridge for up to 3 days before assembling. This way, you ensure each component stays fresh and maintains its quality. To serve, just unwrapped it, brush it with olive oil or melted butter, slice into wedges, and relish the delightful burst of flavors that will impress everyone at your picnic!
Pressed Italian Picnic Sandwich Loaf Recipe FAQs
What type of bread is best for the Pressed Italian Picnic Sandwich Loaf?
Absolutely! The key to a successful Pressed Italian Picnic Sandwich Loaf is using a sturdy, crusty Italian bread. Look for a loaf with a firm crust that can hold the fillings without sagging. If you find one with a few hard spots, don’t worry—that structure is what you’ll want for keeping everything together.
How should I store leftovers of the Pressed Italian Picnic Sandwich Loaf?
To keep your Pressed Italian Picnic Sandwich Loaf fresh, wrap it tightly in plastic wrap or aluminum foil. It will stay good in the refrigerator for up to 3 days. Just be sure to press it down gently to avoid the ingredients shifting too much.
Can I freeze the Pressed Italian Picnic Sandwich Loaf?
Yes! Freezing is a great option for meal prep. Wrap the loaf tightly in plastic wrap and then in aluminum foil to prevent freezer burn. It can be frozen for up to 2 months. When you’re ready to enjoy it, thaw it in the refrigerator overnight before serving.
What if the bread becomes soggy? How can I prevent this?
Very! To avoid sogginess, make sure to layer the meats and cheeses first to create a barrier between the spread (like olive tapenade) and the bread. Also, ensure you’re applying a generous layer of the tapenade on both the base and lid, and allow the sandwich to press overnight in the fridge. This will help all the flavors meld beautifully without making the bread soggy.
Are there any dietary restrictions I should consider when making this sandwich?
Definitely! For those with dietary restrictions, this recipe offers excellent customization. You can easily make it vegetarian by swapping out the meats for roasted veggies like eggplant and zucchini. Also, consider using gluten-free bread if someone is gluten-sensitive. Just ensure you check every ingredient for potential allergens, particularly cheeses and spreads.
How can I enhance the flavors of my Pressed Italian Picnic Sandwich Loaf?
To amplify the flavor experience, consider marinating your veggies in balsamic vinegar or olive oil before layering them into the sandwich. You could also experiment with olives or sun-dried tomatoes as additional layers, making your Pressed Italian Picnic Sandwich Loaf even more vibrant and bursting with flavor!
Pressed Italian Picnic Sandwich Loaf for Perfect Outdoor Feasts
Ingredients
Equipment
Method
- Cut off the top quarter of the Italian bread loaf and hollow out the inside, leaving a sturdy 1-inch shell.
- Generously slather olive tapenade on both the hollowed-out base and the cut lid of the loaf.
- Begin layering your fillings by placing salami, then ham, followed by peppers, spinach, and cheese.
- Replace the top of the loaf and wrap tightly in plastic wrap and aluminum foil. Place a heavy skillet or canned goods on top to compress.
- Refrigerate for at least 8 hours, preferably overnight, to allow the flavors to meld.
- Unwrap and brush the exterior with olive oil or melted butter, then slice into wedges and serve.