

As I was savoring my last trip to a bustling dim sum restaurant, the fragrant aroma of crispy shrimp toast wafted by, beckoning my curiosity. That delightful experience inspired me to create my own version: the Perfect Shrimp Toast. This air fryer recipe captures the traditional Cantonese flavors without the extra oil, making it a healthy, guilt-free indulgence that you can whip up in no time. Not only is this dish a fantastic appetizer that impresses guests with its crunch and savory shrimp filling, but it’s also a versatile option suited for a cozy night in or a festive gathering. Ready to dive into this crunchy, flavorful journey? Let’s get cooking!
What Makes Perfect Shrimp Toast Stand Out?
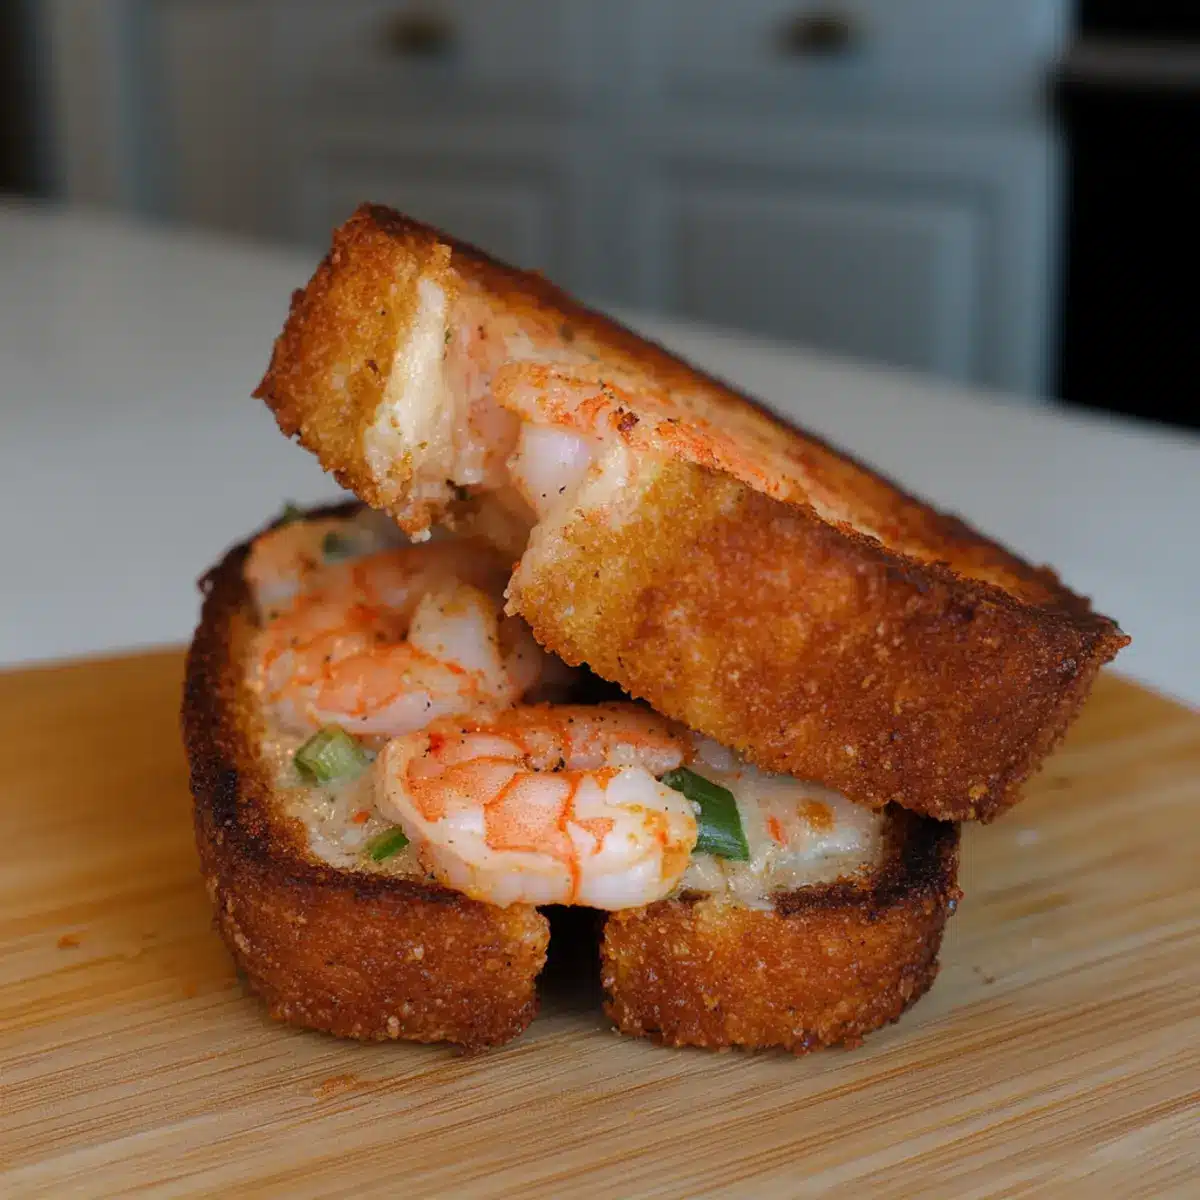
Crispy Texture: The air fryer technique delivers a golden-brown crunch, providing that satisfying crunch without the grease of traditional frying.
Savory Flavors: Packed with minced shrimp and aromatic seasoning, every bite bursts with savory goodness, capturing the essence of Cantonese cuisine.
Quick Prep: With the convenience of the air fryer, you can whip up this dish in just 20 minutes, perfect for busy weeknights or impromptu gatherings.
Customization: Feel free to experiment! Swap out the bread for whole grain or sourdough for added flavor, or even add veggies to the filling for an extra health boost.
Crowd Favorite: Serve as an appetizer at your next get-together, and watch it disappear—everyone loves a delicious twist on a classic dim sum favorite!
Make Ahead: Prepare the shrimp filling ahead of time and refrigerate. This allows for an effortless assembly and cooking process right before serving!
Perfect Shrimp Toast Ingredients
For the Shrimp Filling
• Shrimp – Use small, inexpensive shrimp for better texture; larger shrimp are better suited for whole dishes.
• Salt – This is essential for seasoning, enhancing the savory flavor of the filling.
• White Pepper – Offers warmth and depth, adding to the overall taste.
• Green Onion – Finely chopped provides a fresh and mild onion flavor, brightening the filling.
• Garlic – Grated for easy incorporation, it adds a savory note that’s hard to resist.
• Egg White – Acts as a binder, keeping the shrimp mixture cohesive and flavorful.
• Sugar – Balances the filling’s flavors, creating a delightful taste experience.
• Cornstarch – Helps bind the filling while achieving the desired texture for the shrimp mixture.
For the Base
• Bread – Crusts should be removed for optimal texture; this forms the delicious base of your shrimp toast.
For the Dipping Sauce
• Japanese Mayo – Brings a creamy consistency with a hint of sweetness, perfect for dipping.
• Sriracha – For those who enjoy a spicy kick, this adds a delightful heat to the sauce.
This collection of ingredients promises to create your very own perfect shrimp toast, combining all the delicious elements for a crispy, savory delight that’s perfect for sharing!
Step‑by‑Step Instructions for Perfect Shrimp Toast
Step 1: Prepare the Shrimp Filling
Finely mince the shrimp until it resembles a paste, ensuring a smooth texture that will bond well. In a mixing bowl, combine the minced shrimp with salt, white pepper, chopped green onions, grated garlic, egg white, sugar, and cornstarch. Mix thoroughly until all ingredients are evenly incorporated, creating a cohesive and flavorful shrimp filling. Set aside this delicious mixture as you prep the bread.
Step 2: Prep the Bread
Take 6-8 slices of bread and carefully remove the crusts using a sharp knife. This will help achieve the perfect texture for your shrimp toast. Slice the bread into halves or quarters, depending on your preferred shape for the toast. Ensure the pieces are thick enough to hold the shrimp filling while being crispy on the outside when cooked.
Step 3: Assemble the Shrimp Toast
Place a generous spoonful of the shrimp filling onto one slice of bread, spreading it out to cover the surface. Next, top it with another slice of bread to create a sandwich-like structure. Press gently to ensure the filling sticks well and doesn’t spill out during cooking. Repeat this process for all remaining bread slices, making a lovely batch of shrimp toasts.
Step 4: Prepare for Cooking
If you opt to deep fry, heat oil in a deep pan to approximately 350°F (175°C). Alternatively, for a healthier version, preheat your air fryer or oven to 350°F (180°C). Lightly spray both sides of each shrimp toast with oil if using the air frying method, ensuring an even, golden-brown crispiness across the surface of your perfect shrimp toast.
Step 5: Cook the Shrimp Toast
For the deep-frying method, carefully lower the shrimp toasts into the hot oil. Fry them for 3-4 minutes until they turn golden brown and crisp on both sides. If using the air fryer or oven, place the toasts in a single layer and cook for about 10 minutes, flipping halfway through to achieve even browning. Keep an eye on them, as cooking times may vary!
Step 6: Prepare the Dipping Sauce
While the shrimp toast is cooking, whisk together Japanese mayo and sriracha in a small bowl to create a creamy and spicy dipping sauce. Adjust the amount of sriracha to your desired level of heat, blending perfectly with the savory flavors of the shrimp toast. Set aside to allow the flavors to meld before serving.
Step 7: Serve and Enjoy
Once perfectly golden and crispy, remove the shrimp toast from the heat and place them on a serving platter. Serve warm with the creamy sriracha dipping sauce on the side. Delight in the crunchy exterior and savory filling of your perfect shrimp toast, making it a flavorful appetizer that everyone will adore.
Make Ahead Options
These Perfect Shrimp Toast are ideal for meal prep enthusiasts! You can prepare the shrimp filling up to 24 hours in advance by finely mincing the shrimp and mixing it with salt, white pepper, green onion, garlic, egg white, sugar, and cornstarch. Store the filling in an airtight container in the refrigerator to maintain freshness. When you’re ready to serve, simply assemble the shrimp toast by spreading the filling on the bread, then air fry or deep fry them until golden brown. This method not only saves you time on busy weeknights but also ensures that your shrimp toast remains just as delicious when you’re ready to enjoy them!
Expert Tips for Perfect Shrimp Toast
- Minced Shrimp: Ensure shrimp are finely minced for a smooth, cohesive filling that won’t fall apart during cooking.
- Choose Bread Wisely: Opt for a sturdy bread that holds moisture well; removing crusts helps achieve the ideal crispiness for your perfect shrimp toast.
- Cooking Techniques: For a healthier twist, air fry instead of deep frying; it delivers the same great crunch with less oil.
- Flipping Essential: Whether frying or air frying, flip the toast halfway through to ensure even browning and crispiness on both sides.
- Adjust Timings: Be mindful of cooking times, as they may vary based on bread thickness and shrimp filling amount.
How to Store and Freeze Perfect Shrimp Toast
Fridge: Store any leftover shrimp toast in an airtight container for up to 3 days. Reheat in the air fryer at 350°F for about 5 minutes to regain crispiness.
Freezer: For longer storage, freeze uncooked shrimp toast in a single layer on a baking sheet, then transfer to a ziplock bag for up to 2 months. Cook from frozen, adding a few extra minutes to the cooking time.
Make-Ahead: The shrimp filling can be prepared in advance and stored in the refrigerator for up to 1 day. Assemble and cook the shrimp toast just before serving to retain that delightful crunch.
Reheating: For best results, reheat cooked shrimp toast in the air fryer rather than the microwave, as this keeps the texture crispy while warming the filling.
What to Serve with Perfect Shrimp Toast?
Experience the magic of a complete meal with delightful pairings that enhance every crispy, savory bite of shrimp toast.
-
Fresh Garden Salad: A light salad with mixed greens offers a refreshing crunch that balances the richness of the shrimp filling.
-
Stir-Fried Vegetables: Colorful vegetables stir-fried with garlic and soy sauce add a vibrant touch, bringing both flavor and nutrition to your plate. The combination is as visually pleasing as it is delicious!
-
Lemon Ginger Tea: A warm cup of lemon ginger tea provides a soothing counterpart with its zesty and aromatic notes, perfect for sipping between bites.
-
Coconut Rice: Creamy coconut rice rounds out the dish, infusing subtle sweetness and a tropical flair that beautifully contrasts the savory shrimp toast.
-
Dipping Sauce Trio: Besides the spicy sriracha mayo, consider creating a sweet chili sauce and a tangy hoisin dip for added variety. Each offers its unique twist to the shrimp toast experience.
-
Mango Sorbet: End your meal with a refreshing scoop of mango sorbet, offering a sweet and fruity note that cleanses the palate delightfully after the flavorful shrimp toast.
Perfect Shrimp Toast Variations & Substitutions
Feel free to get creative with this shrimp toast recipe, tailoring it to your taste for a delectable experience!
- Dairy-Free: Substitute Japanese mayo with a dairy-free alternative, like avocado or a nut-based spread, for a creamy twist.
- Whole Grain: Opt for whole grain or sourdough bread to elevate flavor while adding a wholesome touch to your shrimp toast.
- Veggie Boost: Incorporate finely chopped bell peppers or carrots into the shrimp filling for added nutrition and a delightful crunch.
- Spicy Option: Spice things up by adding diced jalapeños or chili flakes to the shrimp mixture for a fiery flavor explosion.
- Citrus Zing: Mix in a dash of lemon or lime juice into the shrimp filling; it brightens up the flavor, making each bite pop!
- Asian Fusion: Swap the sriracha sauce with a sweet chili sauce for a sweet and savory dipping experience that’s absolutely irresistible.
- Herb Infusion: Fresh herbs like cilantro or basil can be minced and added to the filling, offering a fragrant twist to the traditional shrimp toast.
- Baked Variant: Love the air fryer? Try baking the shrimp toast at 400°F for about 12-15 minutes for a different texture while keeping it healthy.
Whether you’re whipping up a batch for a cozy night in or showcasing a dish for guests, these variations ensure you can enjoy your perfect shrimp toast in your own unique way. If you’re also looking for more delightful dishes, consider pairing this with Baked Beans Comfort or serve alongside Buttermilk Pancakes Breakfast. Happy cooking!
Perfect Shrimp Toast Recipe FAQs
How do I choose the right shrimp for my shrimp toast?
Absolutely! For the best texture in your shrimp filling, I recommend using small, inexpensive shrimp. They blend seamlessly when minced and create a delightful paste. While larger shrimp are perfect in whole dishes, they might not yield the same rich flavor and smoothness that these little guys do in shrimp toast.
How should I store leftover shrimp toast?
For any leftover shrimp toast, store it in an airtight container in the refrigerator for up to 3 days. To reheat, pop them in the air fryer at 350°F for about 5 minutes to bring back that crispy texture. Avoid using the microwave, as it can make the toast soggy.
Can I freeze shrimp toast?
Yes! To freeze uncooked shrimp toast, lay them out in a single layer on a baking sheet to firm them up. Once they’re frozen, transfer to a ziplock bag and store for up to 2 months. When you’re ready to cook, just add a few extra minutes to your cooking time. It’s like having a treat ready to go!
What if the shrimp filling is too watery?
Very good question! If your shrimp filling seems too watery, you can add a little extra cornstarch to help absorb the excess moisture. A tablespoon at a time usually does the trick. Mince the shrimp finely but be careful not to over-process, as you want to maintain a bit of texture for the filling.
Can shrimp toast be made gluten-free?
Certainly! To make a gluten-free version of perfect shrimp toast, simply substitute regular bread with a gluten-free variety. Ensure that all additional ingredients, such as sauces and seasonings, are also gluten-free. This way, everyone can enjoy this savory delight!
Perfect Shrimp Toast: Crispy, Savory Delight for Home Chefs
Ingredients
Equipment
Method
- Finely mince the shrimp until it resembles a paste. Combine with salt, white pepper, green onions, garlic, egg white, sugar, and cornstarch in a mixing bowl.
- Remove crusts from bread slices using a sharp knife. Slice the bread into halves or quarters.
- Spread a generous spoonful of the shrimp filling onto one slice of bread. Top with another slice to create a sandwich. Repeat for all bread slices.
- Preheat air fryer or oven to 350°F (180°C). Lightly spray both sides of each shrimp toast with oil.
- Cook shrimp toasts in the air fryer for 10 minutes, flipping halfway through, until golden and crispy.
- Whisk together Japanese mayo and sriracha for the dipping sauce. Set aside.
- Serve warm with the dipping sauce on the side.