

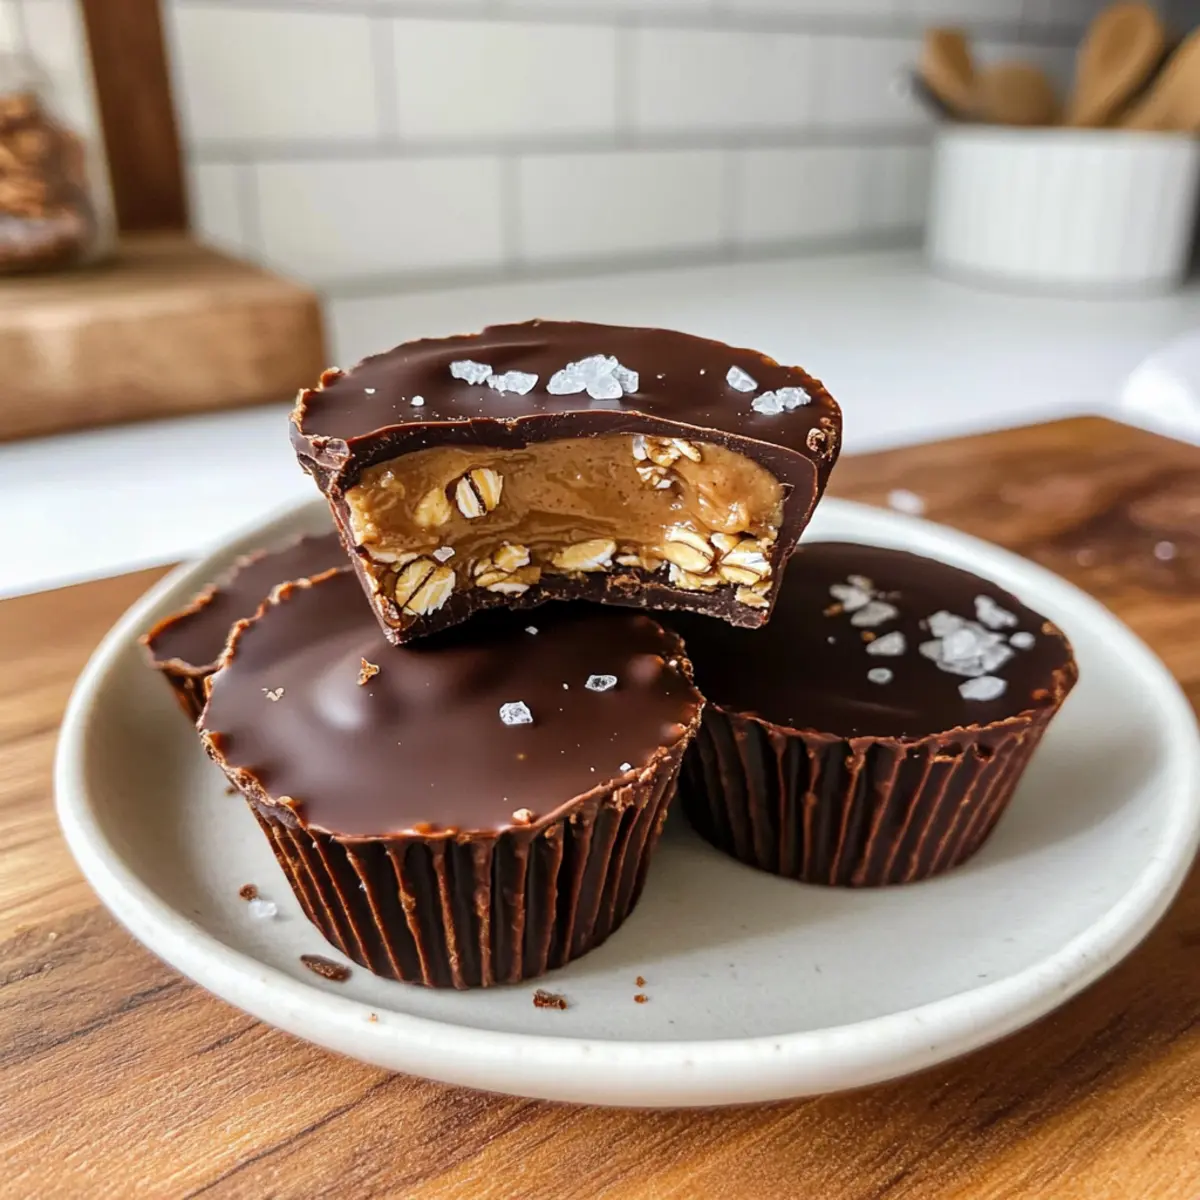
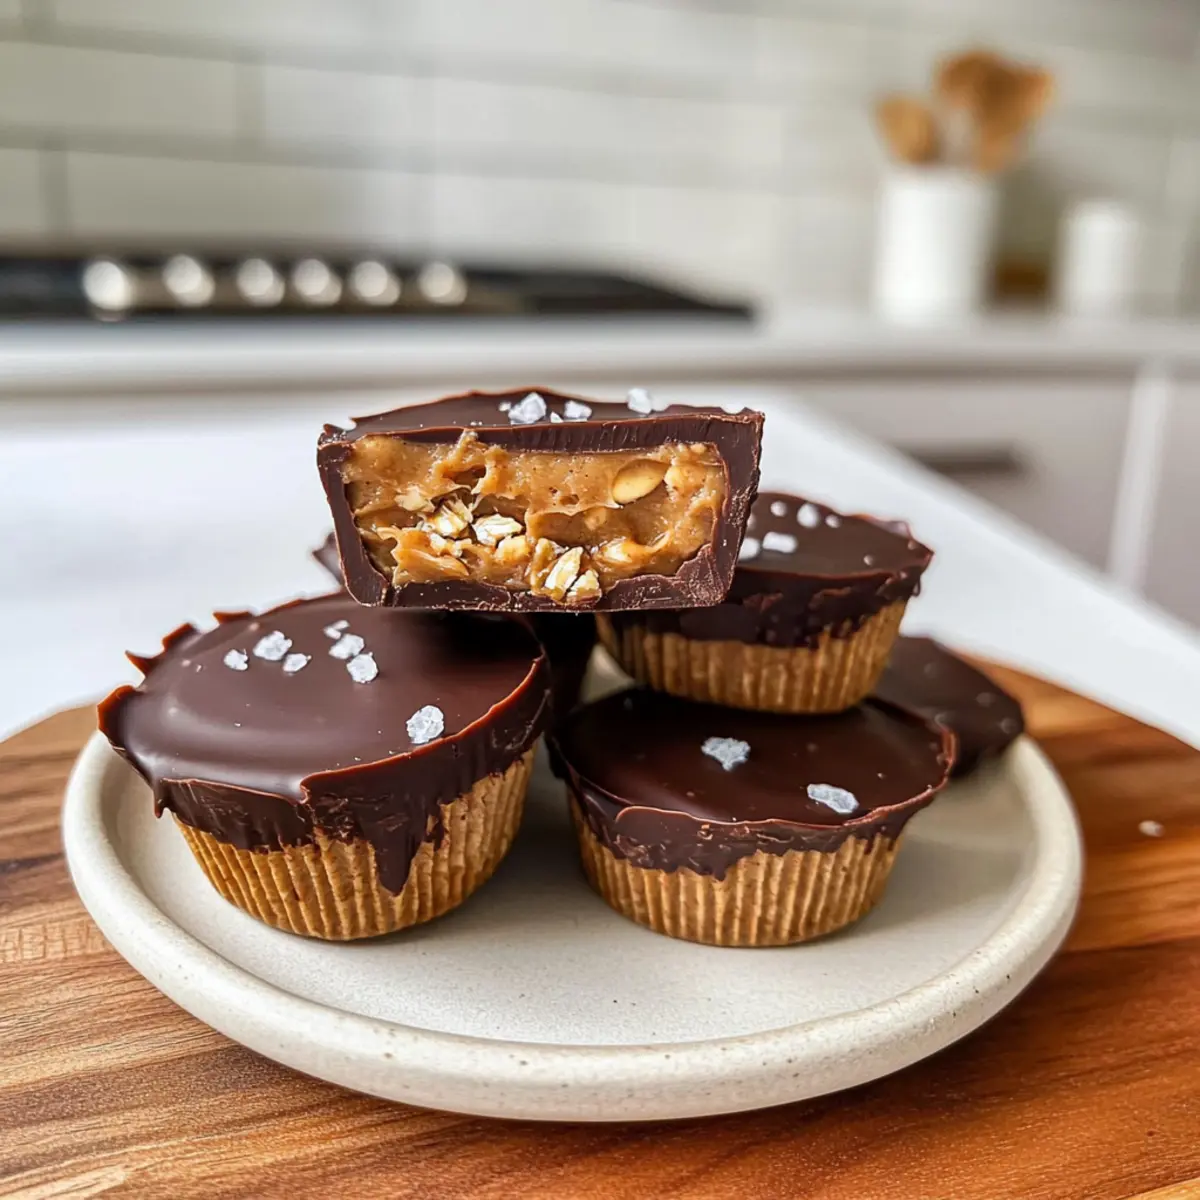
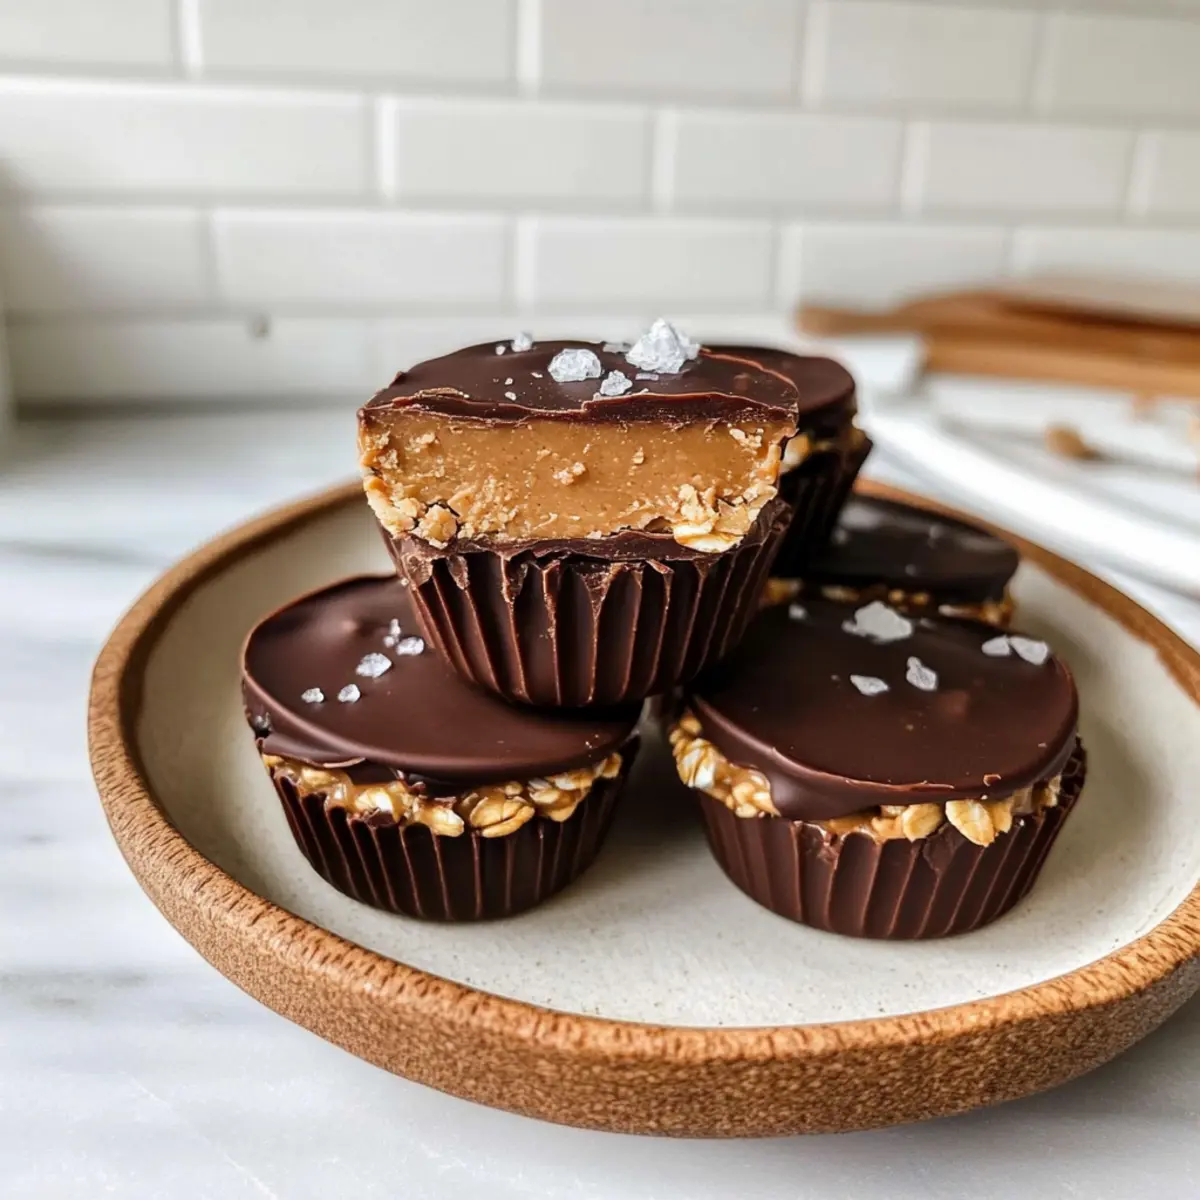
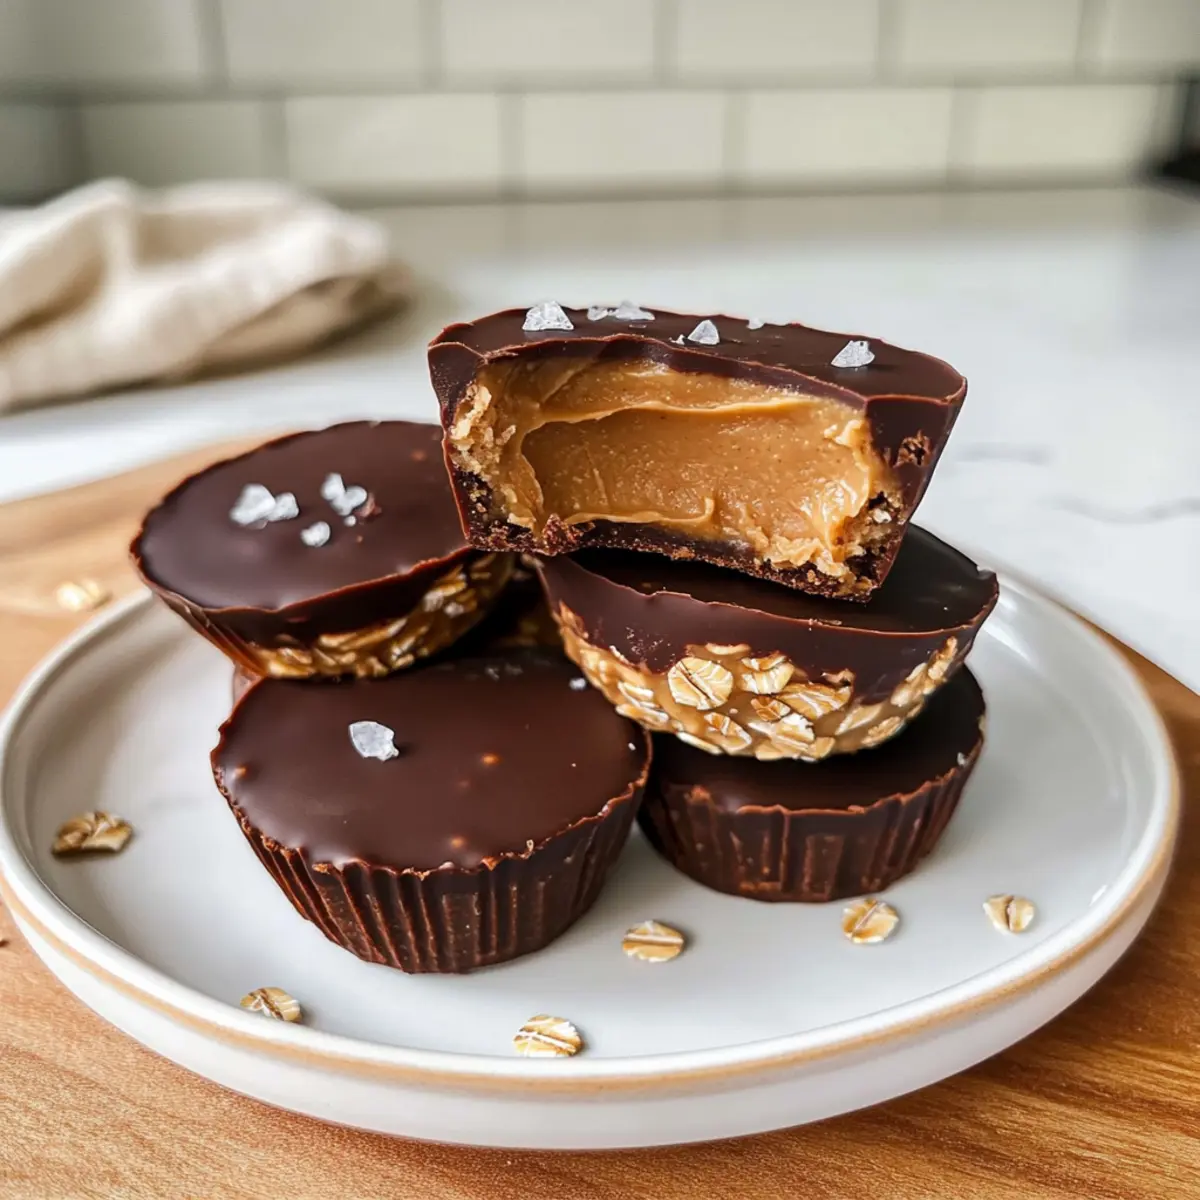
As I rummaged through my pantry one lazy afternoon, a wave of inspiration hit—why not whip up something that embraces my love for peanut butter? That’s how these delightful No-Bake Peanut Butter Oat Cups were born! In less than 20 minutes, you can create these creamy, chewy bites that satisfy your sweet tooth while being gluten-free, dairy-free, and vegan. With just a handful of simple, wholesome ingredients like rolled oats and natural peanut butter, they’re not only incredibly quick to make but also serve as a healthy alternative to store-bought snacks. Imagine indulging in guilt-free treats that are perfect for both kids and adults! Are you ready to elevate your snacking game? Let’s dive into this easy recipe!
Why choose Peanut Butter Oat Cups?
Quick and Easy: Prepare these cups in under 20 minutes, making them an ideal choice for busy days.
Healthy Indulgence: Enjoy a delightful treat that’s both satisfying and nutritious, packed with wholesome ingredients that you can feel good about.
Vegan and Versatile: Perfect for various diets—gluten-free, dairy-free, and vegan—these cups cater to everyone!
No Baking Required: Skip the oven and keep your kitchen cool with this no-bake recipe that serves up deliciousness with minimal effort.
Crowd-Pleaser: They’re a hit for all ages—great for kids and adults alike! Serve them as an afternoon pick-me-up or a light dessert.
If you love quick snacks like these, you might also enjoy Honey Butter Chicken or Lemon Garlic Butter Salmon, both of which offer delicious flavors without the hassle.
Peanut Butter Oat Cups Ingredients
For the Base
- Peanut Butter – Use creamy, all-natural peanut butter for optimal flavor; substitute with any nut or seed butter for a nut-free version.
- Old Fashioned Rolled Oats – These provide the perfect chewy texture; if you prefer, quick oats can be used, but the texture will differ.
- Maple Syrup – Adds natural sweetness; feel free to swap it with honey or agave for a different flavor profile or omit it for a lower-sugar option.
- Protein Powder – An optional boost to enhance nutrition; consider this if you seek added protein in your snacks.
For the Topping
- Chocolate Chips – They add a decadent touch; melted dark chocolate is great for keeping it vegan!
- Flaky Sea Salt – A finishing touch that enhances flavor; sprinkle on top before serving for a bit of zest.
These Peanut Butter Oat Cups are a delightful way to enjoy quick snacks that are healthy and satisfying!
Step‑by‑Step Instructions for Peanut Butter Oat Cups
Step 1: Mix the Base
In a mixing bowl, combine 1 cup of creamy peanut butter with 1/4 cup of maple syrup. Stir vigorously until the mixture is smooth and well blended, about 1-2 minutes. You want a velvety consistency that encourages the oats to stick together. This delightful peanut butter base is the heart of your delicious Peanut Butter Oat Cups.
Step 2: Incorporate the Oats
Add 2 cups of old-fashioned rolled oats to the peanut butter mixture. Use a spatula to carefully fold the oats in, ensuring they are evenly coated with the peanut butter mixture. Continue this process until no dry oats are visible, which should take about 2-3 minutes. The result will be a thick, sticky mixture that forms the base of your cups.
Step 3: Press into Molds
Scoop out about 2 tablespoons of the oat mixture and press it firmly into silicone molds. This process is crucial; make sure to compact the mixture well to ensure the peanut butter oat cups hold their shape when frozen. Aim to fill each mold to the top for the best results. Continue until all the mixture is used up, typically filling 10-12 cups.
Step 4: Freeze the Cups
Once all the oat mixture is in the molds, place them in the freezer for 20 minutes. This chilling time will help the cups firm up, making them easier to handle. Look for the edges to become solid and hold their form when lightly pressed. While waiting, you can prepare the chocolate topping for added decadence.
Step 5: Melt Chocolate for Topping
In a microwave-safe bowl, combine 1/2 cup of chocolate chips with a teaspoon of vegetable oil. Microwave in 30-second intervals, stirring in between, until fully melted and smooth—this usually takes around 1-2 minutes. Ensure the chocolate is glossy and liquid, ready to elevate your Peanut Butter Oat Cups into a decadent dessert.
Step 6: Top with Chocolate
After the initial freezing, remove the molds from the freezer. Drizzle or spoon the melted chocolate over each oat cup, allowing it to flow and cover just the top. This step adds richness and a beautiful finish to your treats. Return the cups to the freezer for another 20 minutes, ensuring the chocolate sets firmly.
Step 7: Final Touch and Serve
Once the chocolate is set, gently pop the Peanut Butter Oat Cups out of the molds. Optionally, sprinkle a pinch of flaky sea salt on each cup for an added burst of flavor. These cups can be enjoyed right away or stored in an airtight container. Indulge in your delicious, homemade snacks that are sure to delight everyone!
Storage Tips for Peanut Butter Oat Cups
Fridge: Store in an airtight container in the refrigerator for up to 1 week. This keeps the Peanut Butter Oat Cups soft and chewy, perfect for quick snacking!
Freezer: For longer shelf life, freeze for up to 3 months in an airtight container. When you’re ready to enjoy, allow them to soften at room temperature for a few minutes.
Thawing: Avoid placing frozen cups in the microwave, as this can alter the texture; simply let them sit out until they reach your preferred softness.
Serving Tip: If you prefer a firmer bite, enjoy straight from the freezer! They make for a delightful treat on hot days.
Make Ahead Options
These No-Bake Peanut Butter Oat Cups are perfect for meal prep enthusiasts looking to save time! You can mix the base up to 24 hours in advance, storing it in an airtight container in the refrigerator to keep it fresh and prevent browning. Additionally, you can freeze the cups after assembling them; they will maintain their delightful texture for up to 3 months. To finish, simply melt the chocolate topping and drizzle it over the frozen cups right before serving. This way, you’ll enjoy your healthy snacks that are just as delicious with minimal effort, making them a fantastic treat for busy weeknights or on-the-go cravings!
Expert Tips for Peanut Butter Oat Cups
-
Use the Right Peanut Butter: A creamy, all-natural peanut butter offers the best results; avoid runny options that can lead to a mushy texture.
-
Pre-measure Ingredients: Gather and measure all ingredients before starting; this saves time and helps ensure nothing is missed during preparation.
-
Firm Pressing: Be sure to press the oat mixture firmly into the molds; this guarantees that your Peanut Butter Oat Cups hold their shape after freezing.
-
Mind the Chocolate: Melt chocolate in short intervals to prevent burning; stir thoroughly to maintain a smooth, glossy finish for your topping.
-
Storage Options: Store in an airtight container in the refrigerator for a softer texture or freeze for a firmer bite—just allow a few minutes at room temperature before enjoying.
Peanut Butter Oat Cups Variations
Feel free to unleash your creativity with these delightful twists on the classic recipe that will tickle your taste buds!
-
Nut-Free Alternative: Use sunflower seed butter instead of peanut butter for a nut-free option without compromising flavor.
This maintains the creamy texture while keeping it safe for school lunches or gatherings. -
Chocolate Lover: Mix in cocoa powder to the base for a chocolatey version of these treats.
It’s an indulgent twist that’s sure to satisfy even the most dedicated chocolate fans! -
Extra Crunch: Add 1/2 cup of crushed nuts, like almonds or walnuts, for added texture and flavor.
This step brings in a satisfying crunch that pairs beautifully with the chewy oat base. -
Fruit Infusion: Stir in some dried fruits like cranberries or raisins into the oat mixture for a fruity burst.
This subtle sweetness complements the peanut butter perfectly while adding natural sugars. -
Low-Sugar Option: Replace maple syrup with a sugar-free sweetener like erythritol for a lower-calorie treat.
You can enjoy the same great taste while skipping the sugar, making it guilt-free! -
Protein Punch: Incorporate a scoop of your favorite protein powder into the mix for an extra health boost.
This makes your snacks even more satisfying and perfect for post-workout energy! -
Spice It Up: A dash of cinnamon or vanilla extract can elevate the flavor profile and add warmth.
The aromatic notes make these cups even more enticing and delicious. -
Salty-Sweet Twist: Drizzle some honey or agave on top before serving for a touch of sweetness.
This contrast with the peanut butter and the chocolate makes your Peanut Butter Oat Cups irresistible!
These variations can take your snacking to another level. If you love these treats, don’t forget to try out fun recipes like Brown Butter Pecan or Peanut Butter Blossoms for more delightful flavors!
What to Serve with No-Bake Peanut Butter Oat Cups
Treat your taste buds by creating a delightful meal around these rich and satisfying bites!
-
Fresh Fruit Salad:
Bright, juicy fruits like strawberries and blueberries add a refreshing contrast, enhancing the creamy flavors of the oat cups. A hint of citrus will brighten your palate, making each bite feel like summer. -
Coconut Yogurt:
A dollop of creamy coconut yogurt complements the peanut butter’s richness while adding a dreamy texture. Top it with granola for a wholesome crunch! -
Dark Chocolate Dipped Pretzels:
The salty-sweet combination of pretzels and dark chocolate is the perfect crunchy counterpart to these soft oat cups. Together, they create a deliciously indulgent snack experience. -
Almond Milk Smoothie:
Blend up creamy almond milk with a banana and a scoop of protein for a nourishing drink that pairs perfectly with the oat cups. It’s a winning combination of flavors and nutrition! -
Chia Seed Pudding:
This creamy and nutrient-packed pudding adds an extra boost of health while providing a lovely texture contrast to the dense oat cups. Try topping it with fruit! -
Herbal Iced Tea:
A refreshing herbal iced tea, perhaps with a hint of mint or lemon, creates a beautiful balance with the creamy and sweet flavors of the peanut butter cups. It’s a delightful sip on a warm day. -
Nutty Granola Bars:
These chewy bars echo the flavor profile of the peanut butter oat cups, creating a cohesive snacking theme. Plus, they are easy to grab on the go! -
Roasted Chickpeas:
Savory, crunchy roasted chickpeas provide a delightful textural contrast and a boost of protein that complements the oats beautifully. Add some spices for extra zing! -
Chocolate Fudge Brownies:
For the ultimate sweet indulgence, pair with fudgy vegan brownies. The richness marries perfectly with the peanut butter bites for a dessert experience that satisfies any sweet tooth.
Peanut Butter Oat Cups Recipe FAQs
What type of peanut butter should I use?
Absolutely! I recommend using creamy, all-natural peanut butter for the best flavor and texture. Avoid runny varieties, as they can lead to a mushy mixture. If you’re looking for a nut-free option, any nut or seed butter works wonderfully as a substitute!
How should I store the Peanut Butter Oat Cups?
You can store these cups in an airtight container in the refrigerator for up to 1 week for a chewy texture. Alternatively, for longer shelf-life, freeze them for up to 3 months. Just remember to allow them to soften at room temperature before enjoying!
Can I freeze Peanut Butter Oat Cups?
Certainly! To freeze, place the cups in an airtight container, separating layers with parchment paper if stacking. They can be kept frozen for up to 3 months. When you’re ready to enjoy, simply remove them from the freezer and let them sit at room temperature for a few minutes to soften before taking a bite.
What if my chocolate chips aren’t melting smoothly?
Very often, burning chocolate happens when it’s heated too quickly. If your chocolate isn’t melting smoothly, try adding a teaspoon of oil, and melt it in 30-second intervals, stirring in between. This method prevents burning and ensures a glossy finish.
Are there any dietary considerations for the Peanut Butter Oat Cups?
Yes, these treats are incredibly versatile! They are gluten-free, dairy-free, and vegan, making them suitable for a variety of dietary needs. However, if you or someone you’re serving has nut allergies, feel free to substitute the peanut butter with sunflower seed butter for a nut-free version.
How do I know if my Peanut Butter Oat Cups are firm enough after freezing?
Check the edges of the cups; they should feel solid and hold their shape when lightly pressed. If they are still soft, give them a little more time in the freezer. Typically, about 20-40 minutes should do the trick for gentle firmness!
Delicious Peanut Butter Oat Cups for Quick Vegan Snacks
Ingredients
Equipment
Method
- In a mixing bowl, combine 1 cup of creamy peanut butter with 1/4 cup of maple syrup. Stir vigorously until smooth.
- Add 2 cups of old-fashioned rolled oats and fold until evenly coated.
- Scoop out about 2 tablespoons of the mixture and press it firmly into silicone molds.
- Freeze for 20 minutes to help the cups firm up.
- Melt 1/2 cup of chocolate chips with 1 teaspoon of vegetable oil in the microwave, stirring every 30 seconds until fully melted.
- Drizzle or spoon the melted chocolate over each cup and freeze for another 20 minutes.
- Once set, gently pop the cups out of the molds and sprinkle with flaky sea salt if desired.