

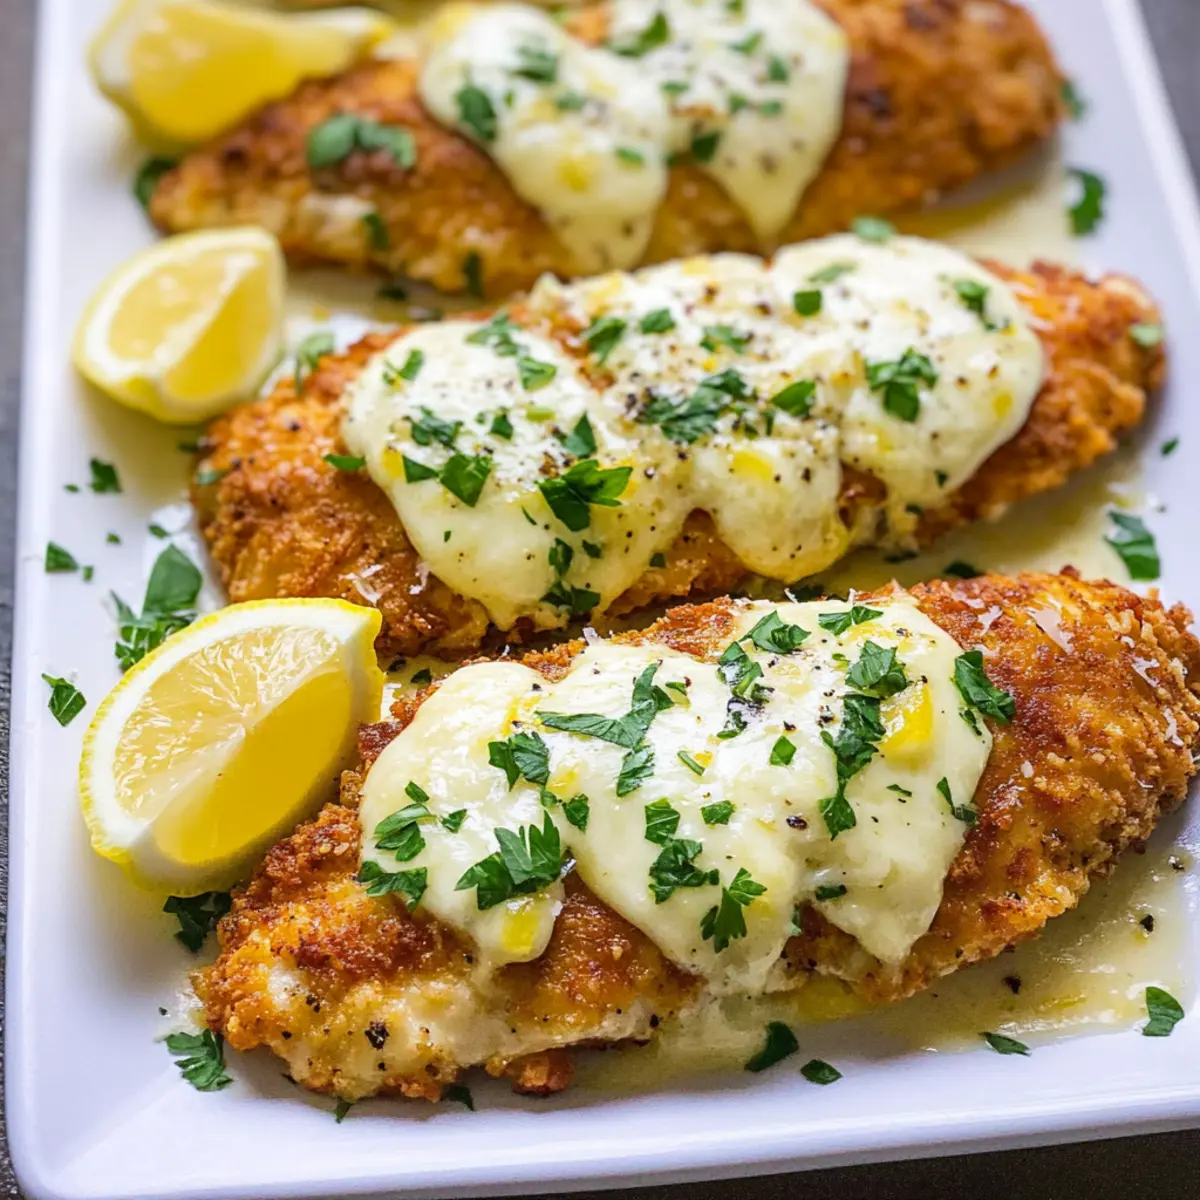
I still chuckle recalling the first time I attempted to make Lemon Chicken Romano. The kitchen filled with zesty lemon aromas, and I couldn’t believe how easily a simple weeknight dinner transformed into something so elegant. This delightful dish effortlessly marries crispy chicken cutlets coated in savory Romano cheese with a melty, gooey topping of mozzarella and provolone. Not only is Lemon Chicken Romano a crowd-pleaser, but it’s also an incredibly accessible meal that comes together in no time. That’s right—dinner can be both satisfying and quick to whip up! So, why settle for another night of takeout when you can impress your family with this delectable comfort food? Ready to dive into this culinary adventure? Let’s get started!

Why is Lemon Chicken Romano a Must-Try?
Irresistible Flavor: The blend of zesty lemon and savory cheeses creates a symphony of taste that dances on your palate, making every bite a delightful experience.
Crispy Texture: The panko and Romano cheese coating ensures a golden, crunchy crust that complements the tender chicken perfectly.
Quick Preparation: With just a few simple steps, you can have this impressive dish ready in under 30 minutes, perfect for a busy weeknight!
Versatile Dish: Serve it alongside steamed asparagus or a fresh salad for a balanced meal, or pair it with pasta for a heartier option. You’ll also love how it elevates your dinner table without breaking a sweat.
Crowd-Pleasing Comfort: This Lemon Chicken Romano is an instant favorite, making it ideal for family gatherings or dinner parties where everyone will be asking for seconds!
Lemon Chicken Romano Ingredients
Here’s everything you need to create your delicious Lemon Chicken Romano!
For the Chicken
• Chicken Breasts – Lean protein that’s halved and pounded for even cooking and tenderness.
For the Cheese Topping
• Mozzarella Cheese – Provides creaminess and melt; feel free to use more provolone if desired.
• Provolone Cheese – Adds a complex flavor and melt; you can substitute it with extra mozzarella if you prefer.
• Romano Cheese – Offers a sharp and nutty flavor to the breadcrumb mixture; Parmesan is a suitable alternative if you’re out.
For the Dredging
• Egg – Acts as a binder to help the breadcrumbs adhere; no substitutions are recommended here.
• All-Purpose Flour – Helps the egg mixture stick to the chicken; gluten-free flour can be used as an alternative.
• Panko Bread Crumbs – Creates a delectable crispy coating; traditional breadcrumbs can be used, but the texture may vary.
For Flavoring
• Fresh Oregano – Imparts aromatic herb flavor; dried oregano can be used if fresh isn’t available.
• Lemon Zest – Provides fresh citrus notes for brightness; zest before juicing for maximum flavor.
• Garlic Powder – Enhances the overall flavor; fresh garlic can offer a more robust taste.
For the Cooking
• Olive Oil – Used for frying, ensuring a crispy texture and adds flavor; vegetable oil is a fine substitute.
For Serving
• Lemon Wedges – Essential for brightening the dish with fresh acidity; don’t skip this!
• Fresh Parsley (optional) – A lovely garnish for added color; can be omitted if you don’t have any on hand.
Now that you have all your ingredients ready, you’re just a few simple steps away from enjoying the delightful taste of Lemon Chicken Romano!
Step‑by‑Step Instructions for Lemon Chicken Romano
Step 1: Preheat the Oven
Begin by preheating your oven to 350°F (175°C). This ensures that your baking sheet is ready for the delicious Lemon Chicken Romano once the chicken is perfectly fried and topped with cheese. While the oven heats up, prepare the chicken cutlets for a quick yet satisfying meal.
Step 2: Prepare the Chicken Cutlets
Take your chicken breasts and slice them horizontally into 1/2-inch thickness. Lightly sprinkle with salt and allow them to rest at room temperature for about 10 minutes. This resting period helps in even cooking, ensuring that your cutlets turn out juicy and flavorful.
Step 3: Set Up Dredging Stations
In one shallow dish, whisk together the egg and flour until smooth. In another dish, combine the panko breadcrumbs with Romano cheese, fresh oregano, lemon zest, garlic powder, and a touch of pepper. This setup will provide you with a simple, organized way to coat each piece of chicken for the Lemon Chicken Romano.
Step 4: Dredge the Chicken
Take each chicken cutlet and first dip it into the egg mixture, making sure it’s well-coated. Then, press it into the panko mixture, ensuring a thick and even layer covers the entire surface. The combination of egg and breadcrumb coating is key to achieving that beautifully crispy texture on your Lemon Chicken Romano.
Step 5: Fry the Cutlets
In a medium skillet, heat a generous amount of olive oil over medium-high heat. Once shimmering, carefully place two of the coated chicken cutlets into the skillet. Fry them for about 4 minutes, flipping halfway through, until they are golden brown and crispy on both sides. This step infuses your kitchen with delightful aromas!
Step 6: Bake the Chicken
Transfer the fried cutlets to a baking sheet and repeat the frying process with the remaining chicken cutlets. After all are fried, top each with a generous mound of mozzarella and provolone cheese. Place the baking sheet in your preheated oven, letting them bake for 8-10 minutes or until the chicken reaches an internal temperature of 165°F (74°C).
Step 7: Serve
Once the Lemon Chicken Romano is out of the oven, it’s time to plate up! Serve each cutlet warm with fresh lemon wedges on the side for that necessary burst of acidity. You can also sprinkle some fresh parsley for a vibrant finishing touch, elevating your meal’s presentation!

How to Store and Freeze Lemon Chicken Romano
Fridge: Store leftovers in an airtight container for up to 3 days. This will keep your Lemon Chicken Romano tasting fresh and ready to enjoy.
Freezer: Allow cutlets to cool completely before wrapping them tightly in plastic wrap and aluminum foil. They can be frozen for up to 2 months.
Reheating: For best results, reheat the chicken in the oven at 350°F (175°C) for about 10-15 minutes. This method will help maintain the crispy texture while warming everything through.
Tip: Always ensure your chicken is reheated to an internal temperature of 165°F (74°C) for safe eating.
What to Serve with Lemon Chicken Romano
Creating the perfect meal means pairing delightful sides that enhance the bright flavors and crispy textures of your dish.
-
Creamy Mashed Potatoes: The buttery smoothness of mashed potatoes creates a delightful contrast to the crispy chicken, adding comfort to your plate.
-
Garlicky Green Beans: Sautéed in olive oil and minced garlic, green beans add a fresh, vibrant crunch that balances the richness of the chicken.
-
Caesar Salad: A classic Caesar salad with crisp romaine, crunchy croutons, and tangy dressing complements the savory Romano flavors while brightening your meal.
-
Lemon Herb Quinoa: This light and zesty quinoa dish not only enhances the citrus notes but also adds a wholesome texture that pairs beautifully with the chicken.
-
Herbed Couscous: Fluffy, flavorful couscous, cooked with fresh herbs and lemon zest, offers a lovely, light option that highlights the main dish without overwhelming it.
-
Chardonnay: A chilled glass of this white wine balances the lemony brightness of your chicken, elevating the dining experience with every sip.
-
Tiramisu: For a sweet finale, indulge in the creamy layers of tiramisu, providing a satisfying contrast to the tangy Lemon Chicken Romano while staying true to its Italian roots.
-
Steamed Broccoli: Simple steamed broccoli provides not just a crunchy texture but also a touch of green freshness that perfectly complements the chicken.
With these delightful pairings, your Lemon Chicken Romano will shine as the star of a beautifully crafted dinner table!
Make Ahead Options
These Lemon Chicken Romano cutlets are perfect for busy home cooks looking to make their weeknight meals a breeze! You can prepare the chicken cutlets by dredging them in the egg and breadcrumb mixtures up to 24 hours in advance. Simply refrigerate them covered to maintain freshness and prevent drying out. When it’s time to serve, heat oil in your skillet and fry the prepared cutlets directly from the fridge for a crispy finish, or bake them in the oven for about 10 minutes after frying if you prefer a healthier option. This way, you’ll enjoy restaurant-quality Lemon Chicken Romano with minimal effort during your busy week!
Lemon Chicken Romano Variations
Explore delightful twists to personalize your Lemon Chicken Romano, adding your unique flair to this comfort food classic!
- Cheese Swap: Replace Romano with Gouda or Havarti for a creamier, milder flavor. Each cheese brings a unique richness that’ll keep everyone guessing!
- Herb Infusion: Enhance flavor by adding fresh basil or thyme to the breadcrumb mixture. This will infuse each bite with a delightful aromatic twist!
- Heat It Up: Sprinkle in some red pepper flakes for an extra kick if you love a touch of spice. It’s a small adjustment that can completely transform your dish!
- Pork or Turkey: Substitute chicken with thinly sliced pork loin or turkey cutlets for a different take. Both options provide an equally delicious and tender texture!
- Citrus Twist: Experiment with lime or orange zest instead of lemon for a fruity refresh. These citrus alternatives will give your dish a surprise flavor dimension!
- Vegetarian Option: Try using eggplant or zucchini cutlets for a hearty vegetarian version. The crispy coating will elevate these veggies into a satisfying meal!
- Breadcrumb Variations: Use crushed cornflakes or quinoa flakes for a gluten-free alternative to traditional breadcrumbs, ensuring everyone can enjoy this dish!
Don’t forget to check out some of my other favorites like Bbq Chicken Twice or Lemon Raspberry Crumble for even more culinary inspiration!
Expert Tips for Lemon Chicken Romano
• Even Thickness: Cut the chicken to an even 1/2-inch thickness to ensure uniform cooking and avoid dry spots.
• Don’t Skip Resting: Let the coated chicken rest briefly before frying to help the breadcrumbs adhere better, creating that perfect crispy crust.
• Use Fresh Ingredients: Fresh oregano and lemon zest amplify the dish’s flavors; dried alternatives can work but may not bring the same brightness.
• Monitor the Heat: Maintain medium-high heat when frying to achieve a golden crust without burning; adjust the temperature if oil begins to smoke.
• Check Doneness: Utilize a meat thermometer to ensure the chicken reaches 165°F (74°C), keeping it juicy yet fully cooked.
• Garnish for Flavor: Serve with lemon wedges on the side to brighten the Lemon Chicken Romano and enhance the overall taste.

Lemon Chicken Romano Recipe FAQs
How do I select ripe chicken breasts for Lemon Chicken Romano?
Absolutely! When choosing chicken breasts, look for ones that are plump and have a pinkish hue, with no dark spots. Make sure there’s no unpleasant odor, as that indicates spoilage. It’s best to buy a thicker cut for even cooking and tenderness.
How should I store leftovers of Lemon Chicken Romano?
Store any leftover Lemon Chicken Romano in an airtight container in the refrigerator for up to 3 days. This helps keep your chicken fresh and delicious. If you notice the coating becoming excessively soggy, simply reheating it in the oven can help restore some crispiness.
Can I freeze Lemon Chicken Romano?
Yes, you can! To freeze, allow the cutlets to cool completely. Wrap each one tightly in plastic wrap, followed by a layer of aluminum foil to prevent freezer burn. They can be stored in the freezer for up to 2 months. Just remember to label them with the date!
What should I do if my chicken cutlets aren’t staying crispy?
Very! If you find your Lemon Chicken Romano’s coating isn’t as crispy as expected, make sure the oil is hot enough before frying; it should shimmer but not smoke. Also, avoid overcrowding the pan, which can lower the oil temperature and result in soggy cutlets. Finally, let the chicken rest after frying before baking.
Are there any dietary concerns I should be aware of with this recipe?
It’s always wise to consider allergies! Make sure to check for dairy allergies since the creamy melted cheeses are a central ingredient. Additionally, if gluten is a concern, substitute regular all-purpose flour and panko breadcrumbs with gluten-free alternatives. Adjusting seasoning and flavoring to suit your dietary needs can also make this recipe accessible to everyone at your table.
How can I ensure my chicken is fully cooked and safe to eat?
For perfectly cooked chicken, use a meat thermometer! Insert it into the thickest part of the chicken cutlet, and ensure it reads 165°F (74°C). This not only guarantees doneness but also helps retain juiciness, making your Lemon Chicken Romano a delightful experience!
Crispy Lemon Chicken Romano: A Comfort Food Classic
Ingredients
Equipment
Method
- Preheat your oven to 350°F (175°C).
- Slice chicken breasts horizontally into 1/2-inch thickness and sprinkle with salt. Allow to rest for 10 minutes.
- In one shallow dish, whisk together egg and flour. In another, combine panko breadcrumbs, Romano cheese, oregano, lemon zest, garlic powder, and pepper.
- Dredge each chicken cutlet in the egg mixture and then press into the panko mixture.
- Heat olive oil in a skillet. Fry coated chicken cutlets for about 4 minutes per side until golden brown.
- Transfer fried cutlets to a baking sheet, top with mozzarella and provolone, and bake for 8-10 minutes until internal temperature reaches 165°F (74°C).
- Serve warm with lemon wedges and optional parsley garnish.