

Standing in my kitchen, the aroma of soy sauce and garlic swirling around me, I felt transported to a bustling izakaya in Japan. Ah, Chicken Karaage, the crispy Japanese fried chicken that delivers a crunch with every bite, is simply irresistible! This recipe showcases not just a cooking routine, but an experience filled with flavor and warmth, perfect for weekends or casual gatherings. With minimal prep time and gluten-free options, this dish is tailor-made for everyone, whether you’re impressing guests or just treating yourself after a long day. Pair it with creamy kewpie mayo, and you’ve got a delightful meal that could rival any takeout. Are you ready to bring the magic of homemade Chicken Karaage into your kitchen?
Why Is Chicken Karaage So Irresistible?
Crispy Delight: The golden-brown coating boasts an incredible crunch, giving you that satisfying bite we all crave in fried chicken.
Flavor Explosion: Infused with soy sauce, garlic, and ginger, each piece is packed with savory nuances that elevate your dining experience.
Quick and Easy: With a few straightforward steps, you can whip up this delicious dish in just over an hour—perfect for a midweek dinner or weekend feast!
Versatile Pairings: Enjoy it as an appetizer or a main course, served with creamy kewpie mayo or on a bed of rice alongside coleslaw.
Crowd-Pleaser: This chicken is always a hit at gatherings, leaving your friends and family begging for seconds! Experience the warmth of homemade cooking with this delightful recipe that even rival fast food in taste!
Japanese Fried Chicken Ingredients
For the Marinade
- Boneless Skin-On Chicken Thighs – Their rich flavor and crispy skin make them the perfect base for this Japanese Fried Chicken.
- Salt – Essential for enhancing flavor; don’t skip this crucial step!
- Soy Sauce – Adds umami and depth; use tamari for a gluten-free option.
- Mirin – Provides sweetness; can be replaced with sugar and water if you’re out.
- Sugar – Balances the savory notes; both white and brown sugar work well.
- Minced Garlic – Fresh garlic adds that punch of aromatic flavor; always opt for fresh.
- Minced Ginger – Brightens the dish with warmth and spice; fresh gives the best results.
- White Pepper – Offers a subtle heat; substitute with black pepper if you prefer.
For the Coating
- Cornstarch – Key for achieving the signature crunch; gluten-free and can be swapped with potato starch if needed.
- Large Egg – Helps bind the coating; omit if necessary due to dietary restrictions.
For Frying
- Oil – Use a high smoke point oil for frying, such as vegetable or canola oil.
With these ingredients, you’re just a step away from creating the delightful Japanese Fried Chicken your taste buds have been yearning for! Enjoy the adventure of bringing this crispy, juicy dish to your table and watch as it quickly becomes a family favorite.
Step‑by‑Step Instructions for Crispy Chicken Karaage: The Ultimate Japanese Fried Chicken
Step 1: Prepare the Chicken
Start by deboning the boneless skin-on chicken thighs and cutting them into 2-inch pieces, aiming for 3-4 pieces per thigh. Pat them dry with paper towels to ensure a crispy surface later. This Chicken Karaage will benefit from uniform pieces, so take your time to ensure even cuts for consistent cooking.
Step 2: Marinate the Chicken
In a mixing bowl, combine the chicken pieces with salt, soy sauce, mirin, sugar, minced garlic, minced ginger, and white pepper. Stir well to coat all pieces evenly, then add the cornstarch and a large egg to bind. Let the mixture marinate for at least 15 minutes in the refrigerator to allow the flavors of this Japanese Fried Chicken to meld and develop.
Step 3: Coat the Chicken
Transfer the marinated chicken into a large plastic bag containing more cornstarch. Seal the bag and shake to thoroughly coat each piece with cornstarch. This creates a crispy outer layer when fried. A good coating is crucial for that signature texture, so feel free to use your hands to ensure every piece is well covered.
Step 4: Rest the Coated Chicken
Place the coated chicken on a wire rack and let it rest for 20-30 minutes. Flip the pieces halfway through to allow the cornstarch to hydrate properly. This resting period is essential to achieve that crunch in your Chicken Karaage, as it helps the coating adhere better during frying.
Step 5: Heat the Oil
In a deep frying pan or Dutch oven, heat a generous amount of oil to 300°F – 325°F. Use a cooking thermometer for accuracy. Carefully add a few pieces of the chicken (don’t overcrowd) and fry for about 4 minutes until they turn a light golden brown. This initial frying sets the coating and prepares it for that extra crunch.
Step 6: Double Fry for Crispiness
Once the first fry is complete, remove the chicken and increase the oil temperature to 375°F. Return the chicken to the oil and fry for an additional 1-2 minutes or until they achieve a deep golden brown color and the coating is extra crispy. Keep an eye on the color as this step is key to creating perfect, crunchy Chicken Karaage.
Step 7: Season and Serve
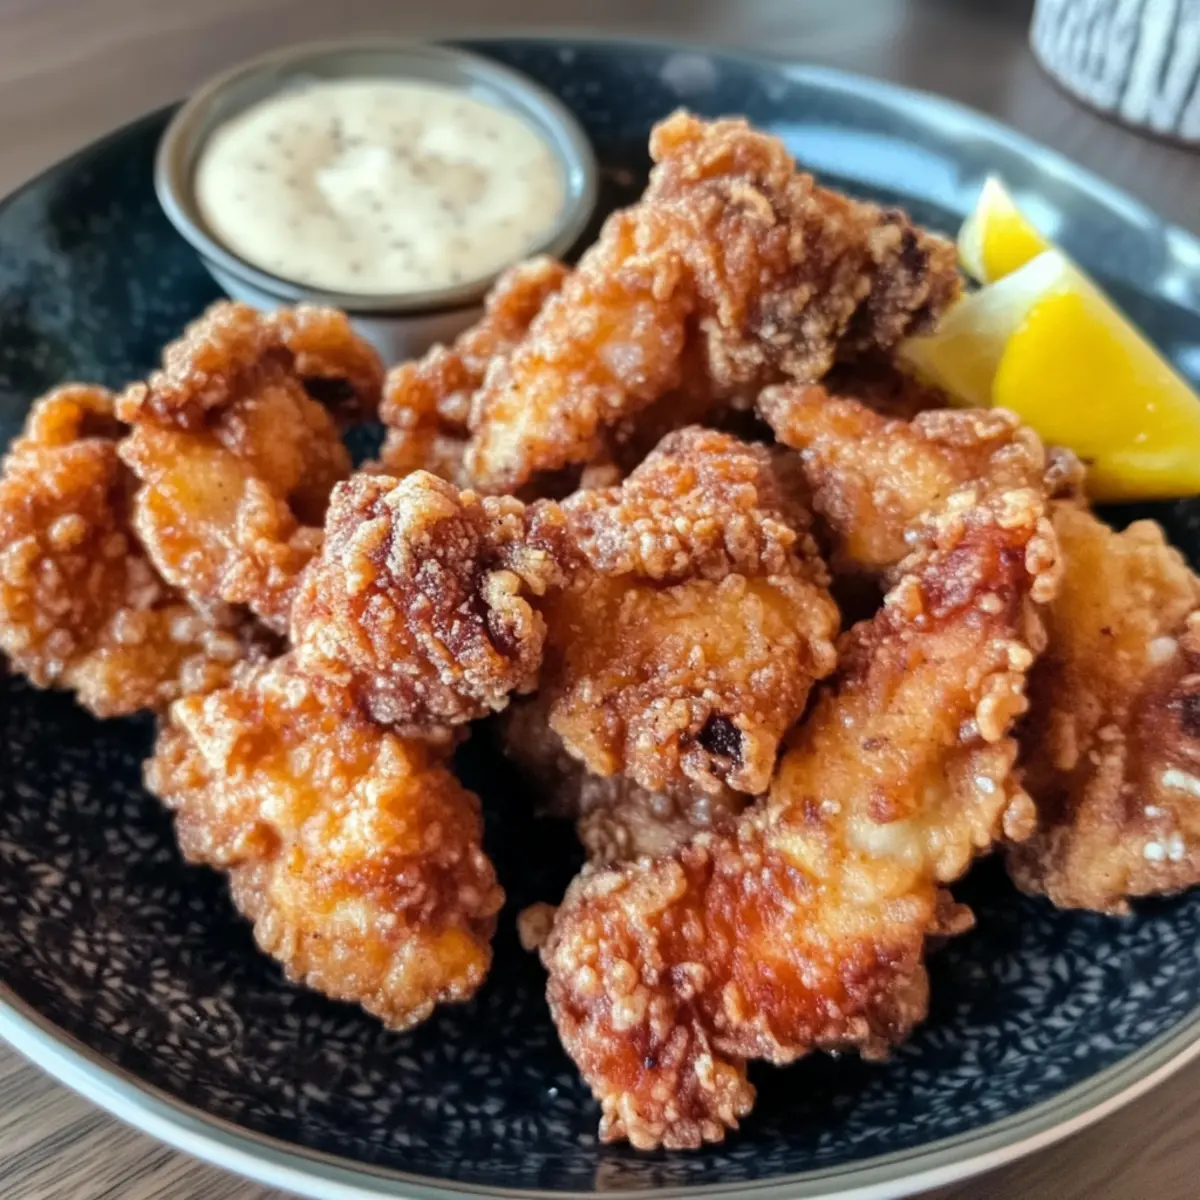
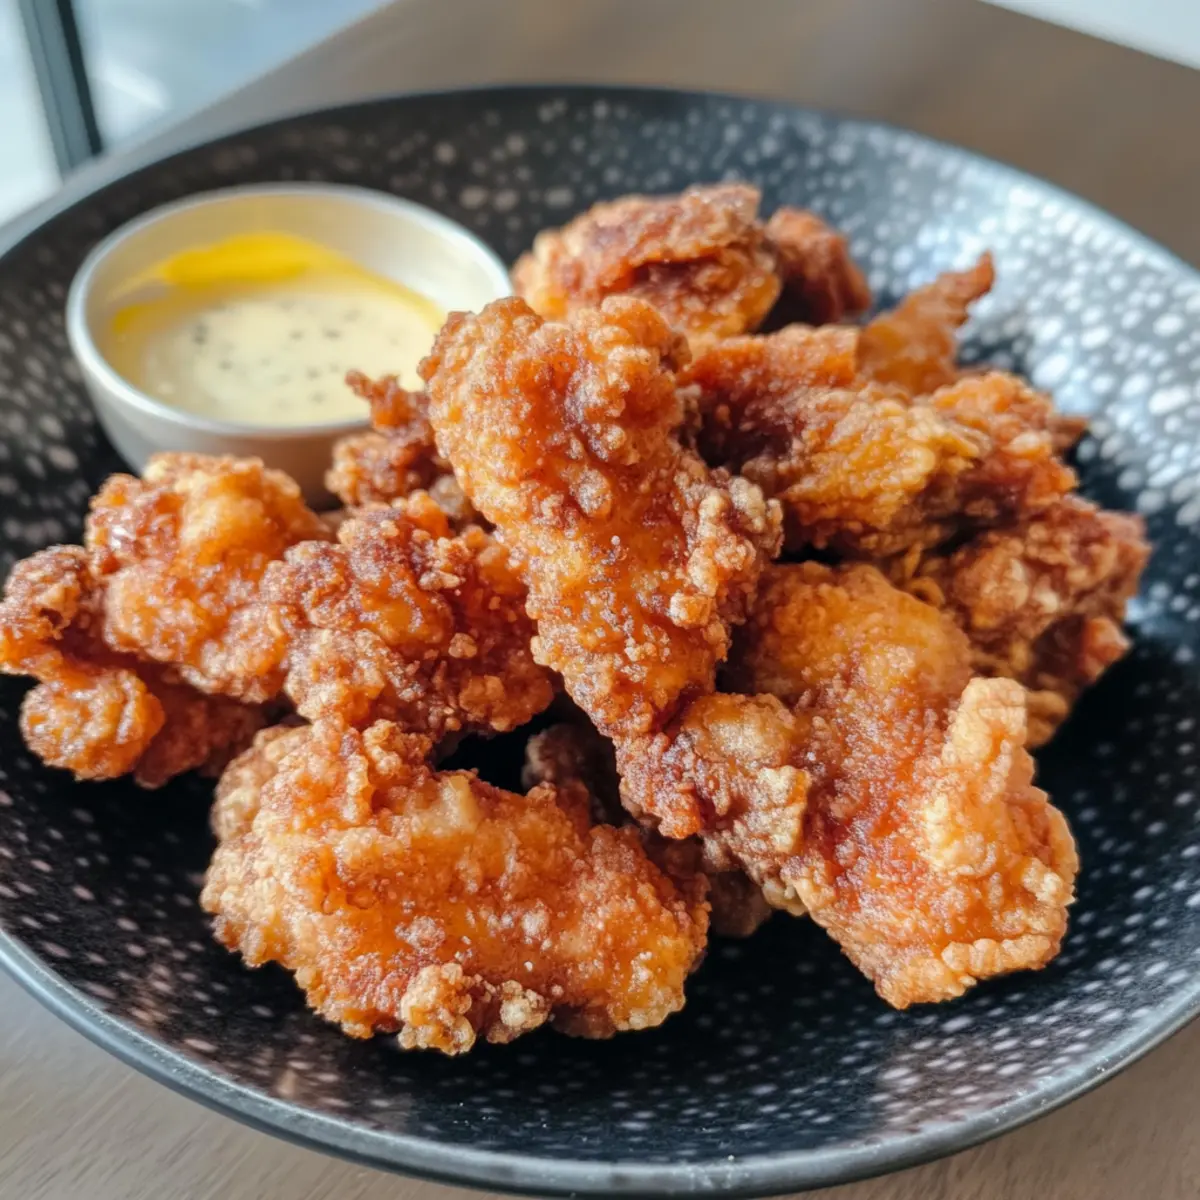
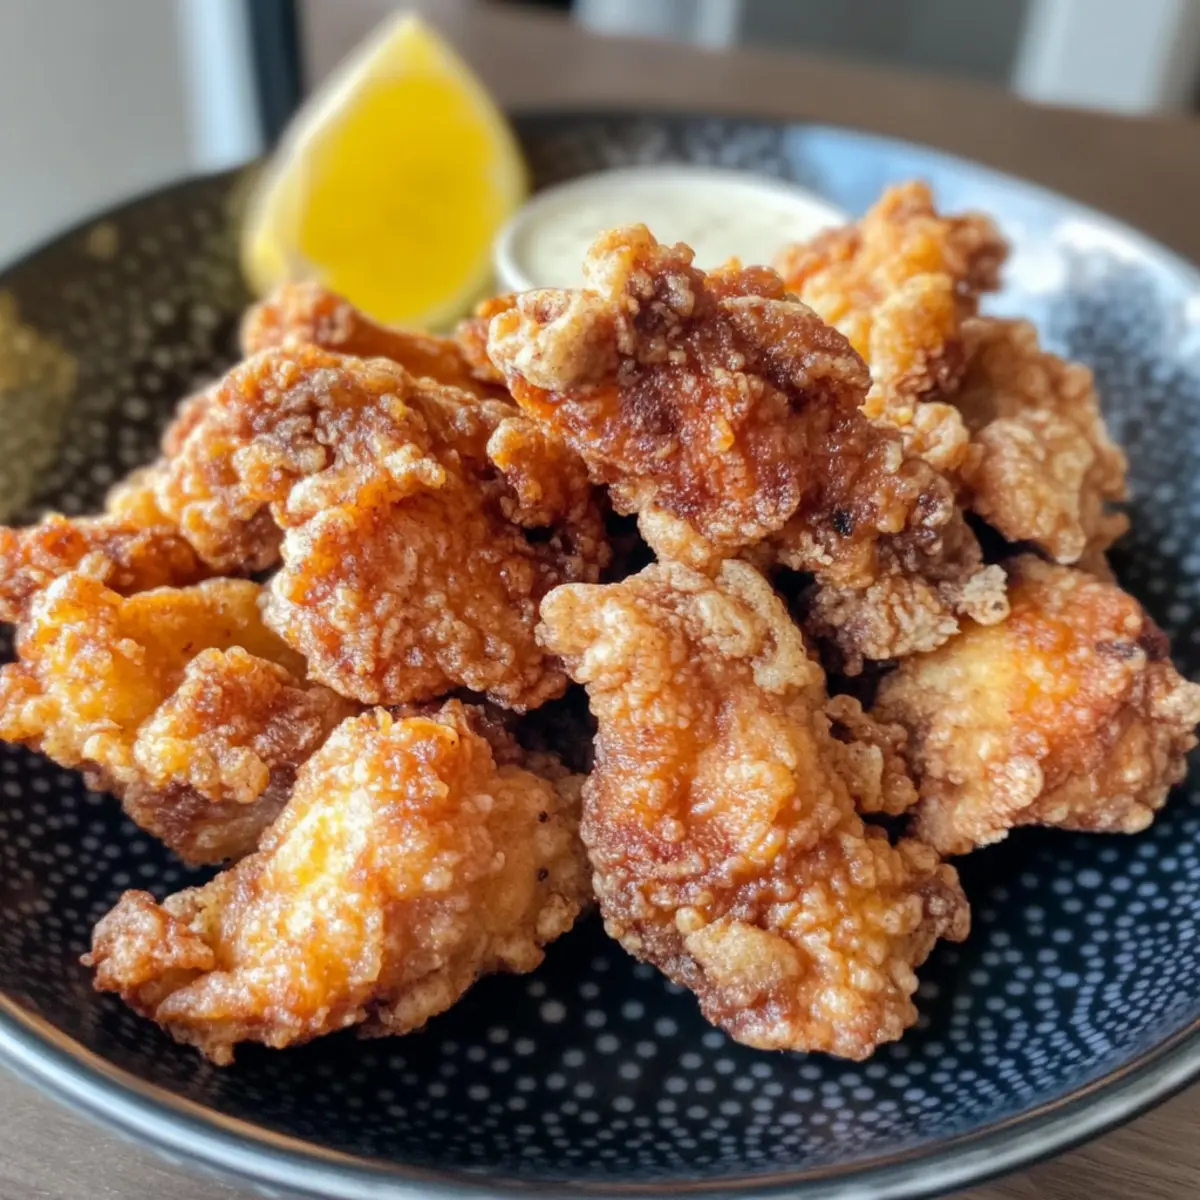
Immediately after frying, season the crispy Chicken Karaage with a touch of salt while it’s still hot. Serve this delightfully crunchy dish with creamy kewpie mayo and fresh lemon wedges for squeezing over. Your homemade Japanese Fried Chicken is now ready to share with friends and family, making any meal feel special!

Expert Tips for Perfect Chicken Karaage
• Oil Temperature Matters: Maintain oil at 300°F – 325°F for the first fry to ensure even cooking; too cool means soggy breading.
• Double Fry Technique: Don’t skip the second fry at 375°F; this is essential for that unbeatable crunchy exterior on your Japanese Fried Chicken.
• Rest for Crispiness: Allow coated chicken to rest on a wire rack before frying; this process helps the coating adhere and achieve maximum crunch.
• Avoid Clumping: Dust off excess cornstarch from the coated chicken before frying to prevent clumping and promote even crispiness.
• Season Immediately: Sprinkle salt on the hot Karaage right after frying for enhanced flavor; it’s a simple step that makes a big difference!
What to Serve with Crispy Chicken Karaage?
There are many delightful options to elevate your meal alongside this crispy, savory masterpiece.
-
Creamy Coleslaw: This refreshing side adds a crisp crunch and creamy contrast, balancing the savory flavors of Chicken Karaage perfectly. A sprinkle of sesame seeds can highlight Asian flavors beautifully.
-
Steamed Jasmine Rice: With its light and aromatic qualities, fragrant jasmine rice makes an ideal base for soaking up the rich flavors of the chicken. Serve it warm, drizzled with soy sauce for an extra touch.
-
Pickled Vegetables: A tangy, crunchy side of pickles offers a fresh contrast that complements the crispy coating. Try a mix of carrots, cucumbers, and daikon radish for a colorful palette.
-
Miso Soup: A warm bowl of miso soup adds a comforting touch, enhancing your dining experience. Its umami flavors pair seamlessly with the savory chicken, creating a well-rounded meal.
-
Japanese Sweet Potato Fries: Crispy sweet potato fries not only provide a sweet contrast but also add a wholesome touch to your plate. Dust them with a hint of sea salt to bring out their natural sweetness.
-
Sake or Japanese Beer: For beverages, a chilled sake or crisp Japanese lager amplifies the culinary experience, providing a light and refreshing counterpoint to your savory Chicken Karaage.
-
Fruit Sorbet: Conclude your meal with a refreshing fruit sorbet, offering a sweet yet light finish that cleanses the palate after the rich chicken. A mango or yuzu sorbet could be an exciting choice!
-
Simple Green Salad: A salad with fresh greens, cucumbers, and a light citrus dressing offers a refreshing balance. The acidity complements the deep flavors of the chicken, making each bite a delight!
Make Ahead Options
Preparing Chicken Karaage ahead of time is a fantastic way to save precious minutes during busy weeknights! You can marinate the chicken pieces in the seasoned mixture up to 24 hours in advance; just cover and refrigerate them in an airtight container. If you’re looking to coat the chicken, you can also dust them with cornstarch and keep them on a wire rack for up to 3 hours before frying—this rest time ensures optimal crunchiness. When you’re ready to enjoy your meal, simply heat the oil and proceed with the frying steps as usual. Trust me, your Chicken Karaage will still taste just as delicious with this prep strategy, giving you more time to relax and enjoy!
Japanese Fried Chicken Variations
Feel free to get creative with your Chicken Karaage as it invites endless customization to match your taste!
- Spicy Kick: Add chili powder or chili paste to the marinade for a fiery twist that lifts the flavors.
- Zesty Herb Mix: Incorporate fresh herbs like thyme or rosemary into the marinade for a fragrant herby essence.
- Dipping Sauces Galore: Experiment with sauces like sweet chili or a soy sauce-based dip for varied dining experiences.
- Coconut Coating: Substitute cornstarch with shredded coconut for a tropical crunch that adds a delightful twist to the texture.
- Lean Option: Use boneless chicken breast instead of thighs for a lighter version, though it may slightly alter the traditional flavor.
- Garlic Infusion: Increase the amount of minced garlic for those who crave an extra punch—this will enhance the flavor beautifully.
- Honey Glaze: Drizzle a little honey over the hot chicken after frying for a sweet finish that balances the savory elements.
The beauty of Chicken Karaage lies in its versatility, allowing you to create a tailored experience that’s sure to impress. Whether you’re feeling adventurous with fried chicken ideas or want a comforting classic, this dish holds endless possibilities! For more delicious chicken inspiration, you might enjoy my recipe for Balsamic Chicken Roasted or the comforting Creamy Chicken and Wild Rice.
Storage Tips for Chicken Karaage
Room Temperature: Enjoy your Chicken Karaage immediately after frying for the best taste; it’s simply irresistible fresh!
Fridge: Store any leftovers in an airtight container for up to 2 days. To maintain crispiness, allow to cool completely before sealing.
Freezer: If you want to store for longer, freeze the cooled Chicken Karaage in a single layer on a baking sheet before transferring to a freezer-safe bag. It can last up to 1 month.
Reheating: For the best results, reheat in an oven at 375°F for 10–15 minutes to restore the crunchy exterior of your Japanese Fried Chicken.
Chicken Karaage (Japanese Fried Chicken) Recipe FAQs
How do I choose the right chicken for Chicken Karaage?
Absolutely! For the best Chicken Karaage, opt for boneless skin-on chicken thighs. They not only provide rich flavor but also contribute to that delightful crunch we love. If you’re in a pinch, you can use deboned chicken thighs without skin, though it might reduce the crispiness a bit.
How should I store leftover Chicken Karaage?
Very! If you have leftovers, store them in an airtight container in the refrigerator for up to 2 days. It’s essential to let the chicken cool completely before sealing it to help retain its crispy texture. When you’re ready to enjoy again, simply reheat in the oven for the best result!
Can I freeze Chicken Karaage?
Yes, you can! To freeze your leftover Chicken Karaage, lay the cooled pieces in a single layer on a baking sheet and place them in the freezer for about 1-2 hours until firm. After that, transfer them to a freezer-safe bag, squeezing out the air. They can stay good for up to 1 month. When ready to eat, reheat directly from frozen in the oven for about 20-25 minutes at 375°F.
What should I do if my Chicken Karaage isn’t crispy enough?
Don’t worry! If your Chicken Karaage isn’t getting that perfect crunch, there are a few tricks you can try. First, make sure the oil is at the right temperature—ideally between 300°F to 325°F for the first fry. If the oil is too cool, this can lead to sogginess. Also, double frying is crucial for achieving that golden glove of crunch, so don’t skip the second fry at 375°F. Lastly, always ensure to dust off excess cornstarch before frying to prevent clumping!
Is Chicken Karaage gluten-free?
Absolutely! Chicken Karaage can be gluten-free by using tamari instead of soy sauce. Ensure that all your other ingredients, including the cornstarch, are certified gluten-free. If you’re making it for someone with specific dietary restrictions or allergies, always double-check each product’s label.
How long should I let my Chicken Karaage rest before frying?
I often recommend letting the coated Chicken Karaage rest on a wire rack for about 20-30 minutes before frying. This step is vital as it allows the cornstarch to hydrate properly and helps achieve that signature crispy texture. Remember to flip the pieces halfway through this resting period!
Mouthwatering Japanese Fried Chicken: Crispy Perfection
Ingredients
Equipment
Method
- Prepare the chicken by deboning the chicken thighs and cutting them into 2-inch pieces. Pat them dry with paper towels.
- Marinate the chicken pieces with salt, soy sauce, mirin, sugar, minced garlic, minced ginger, and white pepper. Let it sit for at least 15 minutes.
- Coat the marinated chicken with more cornstarch in a plastic bag. Shake to ensure an even coating.
- Rest the coated chicken on a wire rack for 20-30 minutes, flipping halfway for proper hydration of the cornstarch.
- Heat oil in a deep frying pan to 300°F – 325°F. Fry chicken pieces for about 4 minutes until light golden brown.
- Increase oil temperature to 375°F, then return chicken to fry for 1-2 additional minutes until a deep golden brown color.
- Season the crispy Chicken Karaage with salt and serve with kewpie mayo and lemon wedges.