

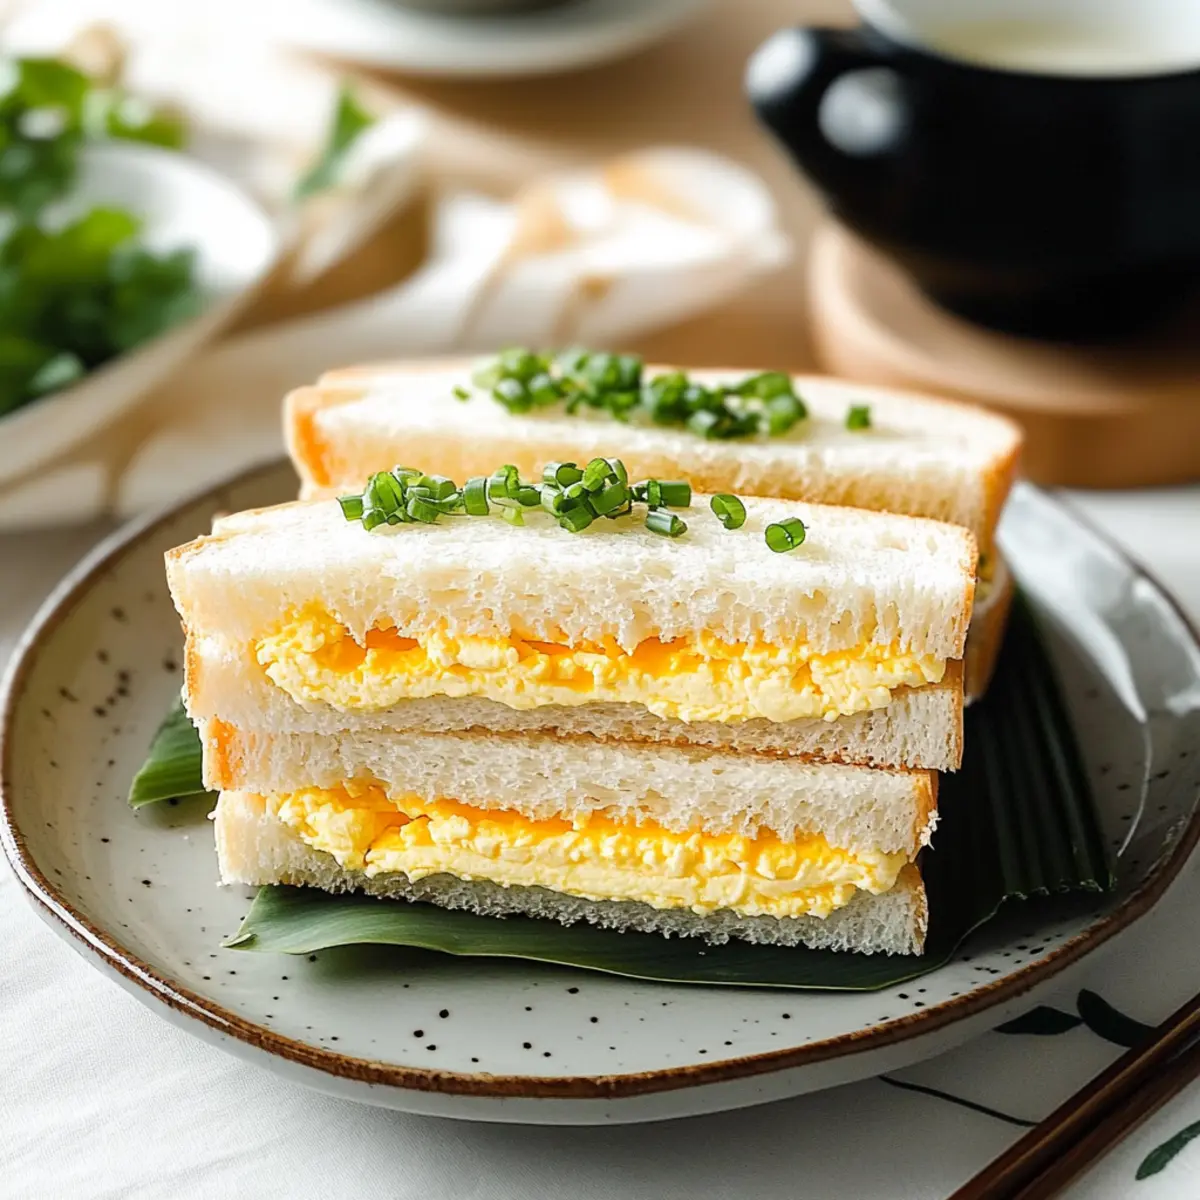
As I took my first bite of a Tamago Sando, I was whisked away to the bustling streets of Tokyo, where artisanal sandwiches meet everyday convenience. This Japanese egg sandwich is not just a meal; it’s a delightful experience wrapped in a soft embrace of shokupan bread. With its creamy egg salad filling—enhanced by the rich umami of Kewpie mayonnaise—this dish offers both a quick snack and a satisfying lunch option. The beauty of this recipe lies in its versatility; whether you prefer hard-boiled or medium-boiled eggs, you’ll achieve a deliciously fluffy result in just 35 minutes. Perfect for anyone craving a home-cooked taste without the fuss of takeout, this Tamago Sando is a gentle reminder that comfort can come in the simplest forms. Are you ready to elevate your lunchtime game? Let’s dive into this delightful recipe!
Why is Tamago Sando so beloved?
Simplicity at Its Finest: With just a few ingredients and minimal prep, this Japanese Egg Sandwich is a breeze to make.
Gourmet Flavor: The use of Kewpie mayonnaise elevates the classic egg salad, bringing richness and depth that’s hard to resist.
Versatile Enjoyment: You can customize your tamago sando by choosing between hard or medium-boiled eggs, allowing for personalized texture preferences.
Quick and Satisfying: Ready in just 35 minutes, it’s perfect for busy days when you crave a wholesome meal without the wait.
Perfect for Any Occasion: Whether you’re serving it at a brunch with friends or packing it as a quick lunch, this sandwich is sure to impress.
For more delicious ideas to brighten your meals, check out my Bacon Potato Egg or Savory Turkey Egg recipes!
Japanese Egg Sandwich Ingredients
• Here’s everything you need to create the ultimate Tamago Sando!
For the Eggs
- Large-sized eggs (6) – Perfect for hard boiling; use room temperature eggs for better shell removal.
- Large-sized egg (1) – Optional for medium-boiling; creates a delightful gelatinous center.
- Water – Essential for boiling those delicious eggs.
- Ice – Quickly cools boiled eggs to stop the cooking process.
For the Filling
- Whole milk (2 tsp) – Adds creaminess to the luxurious egg filling.
- Kewpie Japanese mayonnaise (4 tbsp) – This ingredient offers a rich, umami flavor; essential for an authentic Tamago Sando.
- White granulated sugar (½ tsp) – Balances flavors and enhances sweetness.
- Salt (¾ tsp) – Enhances the overall flavor; Diamond Crystal brand is preferred for better measurement.
- Black pepper (¼ tsp) – Adds a subtle touch of spice.
For the Bread
- Shokupan (4 slices) – The soft, fluffy Japanese milk bread; crusts removed for a better texture. Substitute with soft white bread if unavailable.
- Unsalted butter (softened) – Adds a rich layer of flavor when spread on the bread.
For the Garnish (Optional)
- Chives (1 tbsp, finely chopped) – Introduces a fresh note and a pop of color to the filling.
With these ingredients gathered, you’re well on your way to crafting a delicious Japanese Egg Sandwich that will bring the tastes of Japan right to your home!
Step‑by‑Step Instructions for Japanese Egg Sandwich
Step 1: Boil Eggs
Begin by boiling your large eggs, placing them in a pot and covering with water. For hard-boiled eggs, let them boil for 9 minutes before transferring them to an ice bath to cool and stop the cooking process. If you’re making a medium-boiled egg, cook it for 7 minutes and 30 seconds before moving it to the ice bath. The perfect boiling method ensures your Japanese Egg Sandwich filling will have just the right texture.
Step 2: Prepare Filling
Once the hard-boiled eggs are cooled, carefully peel them and place them in a mixing bowl. Mash them until they are broken down but still have some texture. Add in the whole milk, Kewpie mayonnaise, sugar, salt, and black pepper. Mix everything thoroughly until it’s well combined and creamy. Allow the egg salad mixture to chill in the fridge for 10 minutes to enhance the flavors as you prepare the bread.
Step 3: Assemble Sandwiches
Take four soft slices of shokupan bread and remove the crusts for a classic presentation. Spread a generous layer of softened unsalted butter on one side of each slice. Begin building your Japanese Egg Sandwich by placing a halved medium-boiled egg on the buttered side of one slice, then generously surround it with the chilled egg salad mixture before topping it with another buttered slice, butter side down.
Step 4: Serve
Cut each completed sandwich in half diagonally to reveal the creamy filling, creating an inviting presentation. Serve your Japanese Egg Sandwich immediately for the best texture, showcasing the beautiful contrast between the soft bread and the rich egg salad. This delightful dish is perfect for a quick lunch or snack, and it’s sure to impress anyone who gets to taste it!
How to Store and Freeze Japanese Egg Sandwich
Fridge: Store your assembled Japanese Egg Sandwich wrapped in parchment paper or an airtight container in the refrigerator for up to 3 days to maintain freshness.
Make-Ahead: You can prepare the egg filling ahead of time and keep it separate in the fridge. Assemble the sandwiches within a few hours of serving for optimal taste and texture.
Freezer: If you wish to freeze your sandwiches, place them in a freezer-safe container without the egg filling to prevent sogginess. Store for up to 2 months, then thaw and prepare fresh bread before serving.
Reheating: Reheat any leftover sandwiches gently in a microwave for about 20-30 seconds, ensuring they’re still cool to the touch, as the filling may become very warm. Enjoy!
Make Ahead Options
These Japanese Egg Sandwiches are perfect for meal prep enthusiasts! You can prepare the egg salad filling up to 3 days in advance, allowing the flavors to meld beautifully. Simply boil and cool the eggs, then mash them with the Kewpie mayonnaise, milk, sugar, salt, and pepper, and store it in an airtight container in the refrigerator. If you’re looking to save time on the day of serving, you can also slice the shokupan and spread softened butter on the bread, wrapping it tightly (without the filling) for up to 24 hours. When it’s time to enjoy your Tamago Sando, simply assemble the sandwiches, and they’ll be just as delicious and fresh as if made that day!
Japanese Egg Sandwich Variations
Feel free to personalize your Tamago Sando adventure with these delightful twists, adding your own unique flair!
-
Avocado Swap: Replace the egg filling with ripe avocado for a creamy and nutritious twist. The smooth avocado will bring a fresh flavor that beautifully complements the bread.
-
Spicy Sriracha: Kick up the heat by mixing sriracha into your egg salad. This fiery addition adds a tantalizing punch that will awaken your taste buds.
-
Dill Delight: Incorporate fresh dill into the filling for a herbaceous lift. This light and refreshing flavor can brighten up the creamy egg mixture, making each bite a delight.
-
Pickle Crunch: Toss in diced pickles or relish for an irresistible tang. These crunchy bites contrast perfectly with the creamy filling, adding an exciting texture to your sandwich.
-
Herbed Variation: Add finely chopped chives, green onions, or parsley for a burst of freshness. Herbs not only enhance the flavor but also make the egg salad visually appealing.
-
Cream Cheese Addition: Mix in a tablespoon of cream cheese with the egg filling for extra creaminess. This twist creates a devilishly lush texture that’s impossible to resist.
-
Smoked Salmon Upgrade: Elevate your sandwich by layering smoked salmon with the egg salad. This gourmet touch brings an umami richness that’s reminiscent of high-end brunches.
-
Veggie-Packed Sandwich: Add in grated carrots, diced bell peppers, or spinach for extra nutrition and crunch. This makes for a more colorful sandwich that’s still beautifully creamy.
For more culinary inspirations, don’t miss my recipes for Burritos Sausage Eggs or explore the savory delight in the Savory Turkey Egg. Happy cooking!
What to Serve with Fluffy Japanese Egg Sandwich (Tamago Sando)
Create a memorable meal around this light and creamy delight, elevating your dining experience to new heights.
- Japanese Pickles: These tangy bites bring a refreshing crunch that perfectly contrast the richness of the egg filling. The flavors dance together for a delightful palate experience.
- Miso Soup: A warm and soothing bowl of umami-packed miso soup serves as an ideal counterpart to the sandwich. It’s comforting and light, enhancing your overall dining comfort.
- Green Salad: A crisp salad topped with a light sesame dressing adds freshness and balance to the creamy sandwich. The textures play beautifully against each other.
- Fruit Salad: Chilled fruit salad, bursting with seasonal fruits, adds a sweet, refreshing element that complements the savory flavors wonderfully. Plus, it’s a feast for the eyes!
- Iced Matcha Latte: This creamy, earthy green tea drink pairs surprisingly well, adding a touch of calm and sophistication to your meal. Its balanced flavors will make your lunchtime special.
- Chips or Crisps: Crunchy chips offer a satisfying contrast to the soft sandwich, giving you a fun texture combination. Opt for lightly salted varieties for a balanced taste.
- Sliced Avocado: Creamy avocado slices on the side add richness and a healthful twist, elevating the nutrition and flavor of your meal ensemble. They meld seamlessly with the sandwich’s flavors.
- Sparkling Water: A refreshing beverage, sparkling water cleanses your palate and enhances the meal experience without overshadowing the delicate flavors of the egg sandwich.
- Matcha Mochi: As a delightful dessert, these sweet, chewy treats add an authentic Japanese touch to round off your meal, leaving you with a satisfying sweetness.
- Japanese Curry: For a heartier option, a bowl of mild Japanese curry can accompany your sandwich beautifully, providing warmth and depth, perfect for comfort food lovers.
Expert Tips for Japanese Egg Sandwich
-
Egg Freshness Matters: Use eggs that aren’t overly fresh for easier peeling. Older eggs tend to yield better results when making your Japanese Egg Sandwich.
-
Temperature Check: Ensure your eggs are at room temperature before boiling. This promotes even cooking and helps achieve the perfect texture for both hard-boiled and medium-boiled variations.
-
Kewpie Mayonnaise Essentials: Don’t substitute with regular mayo if you can help it! Kewpie mayonnaise is key for authentic flavor, so seek it out for that rich umami taste.
-
Chill for Creaminess: Chill your egg filling for at least 10 minutes before assembling your sandwiches. This enhances the flavors and makes spreading much easier.
-
Cut with Care: When cutting your sandwiches, use a sharp knife to prevent squashing the soft shokupan. A clean cut not only looks better but also preserves the delightful texture.
Japanese Egg Sandwich (Tamago Sando) Recipe FAQs
How do I choose the right eggs for my Tamago Sando?
Absolutely, egg selection is crucial! For the best results, opt for large-sized eggs at room temperature. This helps in easier peeling after boiling. When looking for freshness, choose eggs that aren’t too fresh as they can be harder to peel due to their membrane’s strong attachment to the shell.
What’s the best way to store leftover Japanese Egg Sandwiches?
Great question! To keep your Tamago Sando fresh, wrap the sandwiches in parchment paper or place them in an airtight container and store in the refrigerator for up to 3 days. If you’re preparing them ahead of time, consider keeping the egg filling separate and assembling the sandwiches just a few hours before serving for the best texture.
Can I freeze my Japanese Egg Sandwiches?
Very much so! To freeze, I recommend assembling your sandwiches without the egg filling. Place them in a freezer-safe container and store for up to 2 months. When you’re ready to enjoy, just thaw them in the fridge overnight, then prepare fresh bread and add the egg filling for a delicious sandwich that feels freshly made.
What can I do if my boiled eggs are too hard or too soft?
Don’t worry; we all have those days! If your eggs turn out too hard, try cooking them for a shorter time next round—generally, 9 minutes for hard-boiled but check at 8 minutes for a softer yield. For medium-boiled, adjust upwards from 7 minutes 30 seconds as needed. Also, ensure that you use an ice bath immediately after boiling; this helps stop the cooking process and can salvage overcooked eggs by cooling them quickly.
Are there any dietary concerns I should be aware of with this recipe?
Absolutely! This recipe is vegetarian-friendly, but if you have any egg allergies, it’s best to skip it altogether. For those with specific dietary needs, you can substitute Kewpie mayonnaise with a vegan alternative for a plant-based version. Just check labels for any allergens if you’re preparing this for a gathering.
What’s the best way to ensure my egg filling has the right texture?
To achieve that creamy, fluffy texture, I suggest mashing your hard-boiled eggs gently but thoroughly before mixing in the other ingredients. Use a fork for a more rustic look, or a potato masher for finer consistency. After mixing in milk and Kewpie mayonnaise, pop the mixture in the fridge for about 10 minutes—this chilling step not only melds those flavors beautifully but also helps to firm up the mixture, making it easier to spread on your sandwich!
Creamy Japanese Egg Sandwich Perfect for Quick Lunches
Ingredients
Equipment
Method
- Boil your large eggs, placing them in a pot and covering with water. For hard-boiled, boil for 9 minutes; for medium-boiled, 7 minutes and 30 seconds. Transfer to an ice bath to cool.
- Once cooled, peel the eggs and mash them in a mixing bowl. Add the whole milk, Kewpie mayonnaise, sugar, salt, and black pepper. Mix until creamy and chill in the fridge for 10 minutes.
- Remove crusts from shokupan bread and spread softened unsalted butter on one side of each slice. Layer the egg filling between two buttered slices with a halved medium-boiled egg.
- Cut the sandwiches in half diagonally and serve immediately to enjoy the best texture.