

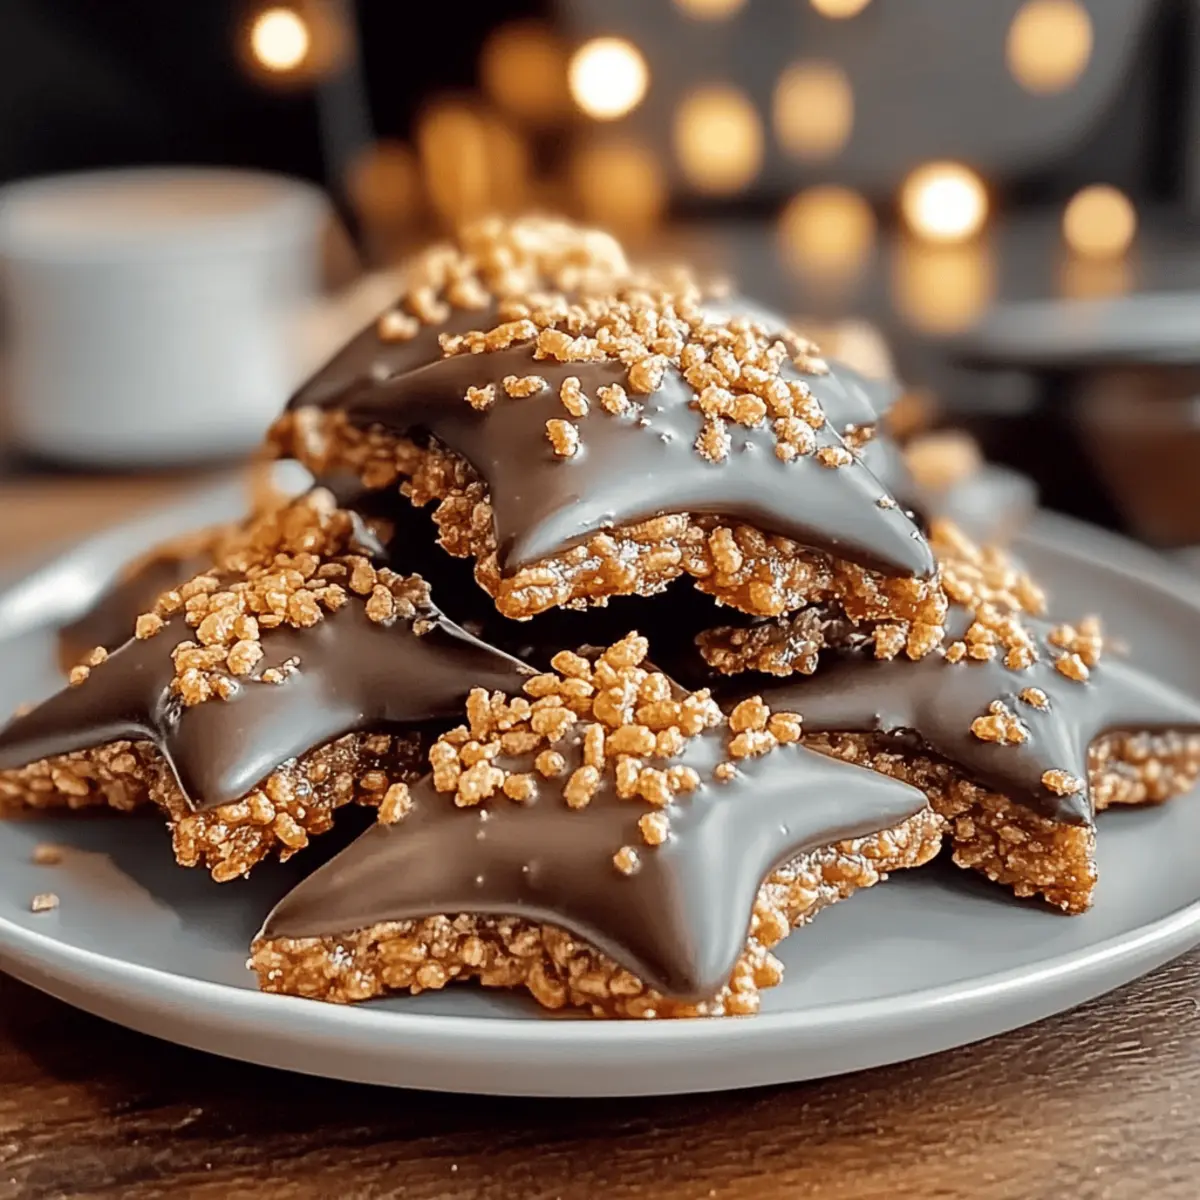
As I stood in my kitchen, the sweet scent of melting caramel enveloped me in warmth, transporting me back to my childhood. It was the perfect time to whip up a batch of homemade Star Crunch cookies, those irresistibly chewy treats that combine gooey caramel, rich chocolate, and crispy rice cereal. This recipe not only offers a delightful nostalgic experience but is also quick to prepare—ideal for those busy weeknights or last-minute gatherings. You can even make it your own with easy adaptations like vegan or gluten-free options, ensuring everyone at your table can indulge without compromise. What custom twist will you add to your Star Crunch cookies?

Why Are Star Crunch Cookies So Special?
Nostalgic Flavor: These cookies transport you back to childhood with every bite of gooey caramel and rich chocolate.
Quick to Make: You can whip up a batch in no time—ideal for busy weeknights or unexpected guests.
Customizable Options: Whether you prefer gluten-free or vegan treats, this recipe allows for easy adaptations!
Crowd-Pleaser: Perfect for family gatherings, everyone will love the combination of chewy and crunchy textures.
Versatile Enjoyment: They pair beautifully with a cold glass of milk or a scoop of ice cream, making them the ultimate comfort food.
Indulge in your creativity by trying various flavor twists, from dried fruits to nutty add-ins. These delightful homemade Star Crunch cookies are a perfect treat for all occasions!
Homemade Star Crunch Ingredients
For the Cookie Mixture
- Crispy Rice Cereal – Provides structure and a satisfying crunch; use gluten-free cereal for a gluten-free version.
- Unsalted Butter – Adds richness and moisture; substitute with vegan butter for a dairy-free option.
- Caramel Candies (14 oz) – Offers sweetness and a sticky texture; for a healthier take, opt for homemade or sugar-free caramel.
- Semi-Sweet Chocolate Chips (1 cup) – Enhances sweetness with chocolate flavor; dark chocolate chips can be used for a deeper flavor.
- Vanilla Extract (1 tsp) – Adds aromatic sweetness; opt for pure vanilla for the best results.
- Salt (1 pinch) – Balances sweetness and enhances overall flavor.
Optional Add-Ins
- Chopped Nuts – Add almonds or pecans for an extra crunch boost; they provide healthy fats and protein.
- Dried Fruits – Mix in cranberries or raisins for a sweet and chewy twist; perfect for adding flavor and texture.
- Flavor Extracts – Incorporate almond or coconut for a delightful aromatic variation.
- Spices – If you’re feeling adventurous, a pinch of cayenne can add surprising heat to your homemade Star Crunch cookies!
Step‑by‑Step Instructions for Homemade Star Crunch
Step 1: Melt Ingredients
In a medium saucepan over low heat, combine the caramel candies and unsalted butter, stirring continuously. Keep an eye on the mixture as it melts, ensuring it becomes smooth and free of lumps, which typically takes about 5-7 minutes. Once melted, remove the saucepan from heat, allowing the luscious aroma of the caramel to fill your kitchen.
Step 2: Combine Chocolate
Immediately stir in 1 cup of semi-sweet chocolate chips into the melted caramel and butter combination. Keep mixing until the chocolate chips are fully melted and seamlessly integrated, creating a creamy chocolatey mixture. This should take about 1-2 minutes. The glossy, rich texture guarantees that your homemade Star Crunch cookies will be irresistibly decadent.
Step 3: Mix with Cereal
In a large mixing bowl, pour the warm caramel-chocolate mixture over 6 cups of crispy rice cereal. Gently fold the cereal into the mixture, ensuring each piece is evenly coated without crushing the cereal. This process should take around 2-3 minutes, and as you combine, the distinct sound of crispy rice being coated will echo the delightful crunch awaiting you.
Step 4: Shape Cookies
Using a cookie scoop or your hands, portion out the mixture and shape it into round cookies, placing them on a parchment-lined baking sheet. Leave about 1-2 inches of space between each cookie to allow for slight spreading as they set. This step requires about 10 minutes, and you will see the tempting glossy sheen of your homemade Star Crunch beginning to take shape.
Step 5: Cool Cookies
Allow the shaped cookies to cool at room temperature for about 10-15 minutes, or for quicker results, place the tray in the refrigerator until firm. The cookies should feel slightly sticky on the outside but hold their shape beautifully. As they cool, the sweet aroma will fill your space, reminding you of those nostalgic moments shared over treats from childhood.
What to Serve with Homemade Star Crunch Cookies?
Indulging in a batch of homemade Star Crunch cookies invites warmth and comfort into your home, enhancing your delightful treat experience.
-
Cold Glass of Milk: A classic pairing that balances the sweetness of the cookies, making every bite feel like a comforting hug.
-
Vanilla Ice Cream: Scooping vanilla ice cream on top creates a delightful contrast of temperatures, enhancing the cookie’s chewy texture and rich flavors.
-
Fresh Berries: Raspberries or strawberries add a bright, tart contrast that cuts through the sweetness of the cookies, refreshing the palate with each bite.
-
Nutty Trail Mix: A small serving of trail mix provides an enjoyable crunch and earthy flavor that complements the sweet, sticky texture of the cookies.
-
Caramel Sauce Drizzle: For a truly indulgent experience, drizzle some warm caramel sauce on your cookies to elevate the sweetness and gooeyness to new heights.
-
Coffee or Latte: A rich, bold coffee or creamy latte enhances the experience with its robust flavor, providing a perfect contrast to the sugary cookies.
-
Chocolate Dipping Sauce: For dessert lovers, serving a warm chocolate sauce for dipping adds another layer of decadence, making these treats even more irresistible.
Pair these ideas and watch as your homemade Star Crunch cookies transform a simple snack into a heartwarming occasion for all!
Helpful Tricks for Star Crunch Cookies
-
Stirring Technique: Always stir continuously while melting the caramel to prevent it from burning and ensure a smooth texture for your homemade Star Crunch cookies.
-
Coat Evenly: Make sure every cereal piece is coated to avoid dry spots. Gently fold the mixture; a light hand keeps the crunchy texture intact.
-
Cooling Time: Allow cookies to cool completely before storing to maintain their chewiness. If you’re in a rush, refrigerating can speed up the process!
-
Avoid Add-In Overload: While adding extras like nuts or dried fruits is tempting, keep it balanced to maintain the cookie’s original flavors and texture.
-
Storage Know-How: To ensure freshness, store your homemade Star Crunch cookies in an airtight container at room temperature; they can last for up to a week!
Make Ahead Options
These homemade Star Crunch cookies are perfect for busy home cooks looking to save time! You can prepare the caramel and chocolate mixture up to 24 hours in advance. Simply melt the caramel candies and butter, mix in the chocolate chips, and allow it to cool slightly before storing in an airtight container in the refrigerator. When you’re ready to make the cookies, mix in the crispy rice cereal and shape them into cookies. For optimal texture, avoid refrigerating the formed cookies for too long—just cool them at room temperature for about 10-15 minutes before serving. Your delicious Star Crunch will be just as irresistible, ready to enjoy whenever you are!
How to Store and Freeze Homemade Star Crunch
Room Temperature: Store your homemade Star Crunch cookies in an airtight container at room temperature for up to 1 week. This keeps them chewy and delicious, ready for snacking anytime!
Refrigerator: For longer freshness, refrigerate the cookies in a sealed container for up to 2 weeks. This helps maintain their texture while staving off any unwanted moisture.
Freezer: Wrap cookies individually in plastic wrap and place them in a freezer-safe container or bag to freeze for up to 3 months. Thaw at room temperature or gently reheat in the microwave for a warm treat.
Reheating: To enjoy your chilled or frozen cookies warm, simply pop them in the microwave for 10-15 seconds, ensuring they’re ultra gooey and perfect for indulgent bites.
Homemade Star Crunch Variations
Customize these delicious homemade Star Crunch cookies to suit your taste buds and dietary needs!
-
Vegan Delight: Substitute unsalted butter with coconut oil or vegan butter for a completely plant-based treat that everyone can enjoy.
-
Gluten-Free Option: Use gluten-free crispy rice cereal, and your cookies will still have that satisfying crunch without the gluten.
-
Sugar-Free Sweetness: Try using sugar-free caramel and chocolate chips to create a guilt-free indulgence without compromising flavor.
-
Nutty Surprise: Incorporate chopped nuts like walnuts or pecans for a delightful crunch that adds healthy fats and makes them irresistible.
-
Fruit Flare: Stir in dried fruits, such as apricots or raisins, to infuse your cookies with wholesome sweetness and chewy texture.
-
Cocoa Twist: For chocolate lovers, mix in cocoa powder along with the caramel mixture to get an extra chocolatey experience.
-
Add Some Spice: Spice things up by adding a pinch of cinnamon or nutmeg for warmth, or a bit of cayenne for a surprising kick that elevates the flavor profile.
As you experiment with these variations, don’t forget to check out ideas on how to make the best classic cookies, or consider trying some of these fun flavor twists to take your baking game to the next level! Let your creativity shine as you adapt these cookies to your family’s liking!

Homemade Star Crunch Cookies Recipe FAQs
What type of crispy rice cereal should I use?
Absolutely! You can use any brand of crispy rice cereal for your homemade Star Crunch cookies. For a gluten-free version, opt for gluten-free crispy rice cereal, which has become widely available. Always check the ingredient label to ensure it meets your dietary needs.
How should I store my Star Crunch cookies?
You can store your homemade Star Crunch cookies in an airtight container at room temperature for up to 1 week. For longer freshness, transfer them to the refrigerator, where they can last up to 2 weeks. Just be sure they are completely cooled before packing them away so they retain their delicious chewiness!
Can I freeze Star Crunch cookies, and how?
Absolutely! To freeze your homemade Star Crunch cookies, wrap each cookie individually in plastic wrap and place them in a freezer-safe container or resealable bag. They can be stored in the freezer for up to 3 months. When you’re ready to enjoy, simply thaw at room temperature or reheat in the microwave for a quick, gooey treat!
What if my cookies turn out too sticky?
If your homemade Star Crunch cookies are too sticky, it could be due to the caramel mixture being too warm or not cooling properly before shaping. To remedy this, allow the mixture to cool a bit longer before shaping it into cookies. You can also lightly coat your hands with some cooking spray or flour when forming the cookies to help reduce stickiness.
Are there any dietary considerations for Star Crunch cookies?
Yes! If you have allergies or dietary restrictions, there are several substitutions available for the homemade Star Crunch cookies. Use vegan butter and dairy-free chocolate chips for a dairy-free version, and opt for sugar-free caramel if you are watching your sugar intake. Always double-check the labels of the ingredients you use to ensure they meet your dietary needs!
Can I substitute any of the ingredients?
The more the merrier! You can definitely substitute ingredients in this recipe. For instance, replace unsalted butter with vegan butter for a dairy-free option. You can also swap semi-sweet chocolate chips with dark chocolate for a richer flavor or use your favorite nut butter in place of some of the caramel for added texture and taste. Get creative and enjoy the process!

Irresistible Homemade Star Crunch: A Sweet Nostalgic Delight
Ingredients
Equipment
Method
- In a medium saucepan over low heat, combine the caramel candies and unsalted butter, stirring continuously until smooth, about 5-7 minutes.
- Immediately stir in 1 cup of semi-sweet chocolate chips until fully integrated, about 1-2 minutes.
- In a large mixing bowl, pour the warm caramel-chocolate mixture over 6 cups of crispy rice cereal and gently fold for 2-3 minutes.
- Using a cookie scoop or your hands, shape the mixture into cookies on a parchment-lined baking sheet, leaving space between each.
- Allow the cookies to cool for about 10-15 minutes at room temperature or refrigerate until firm.