

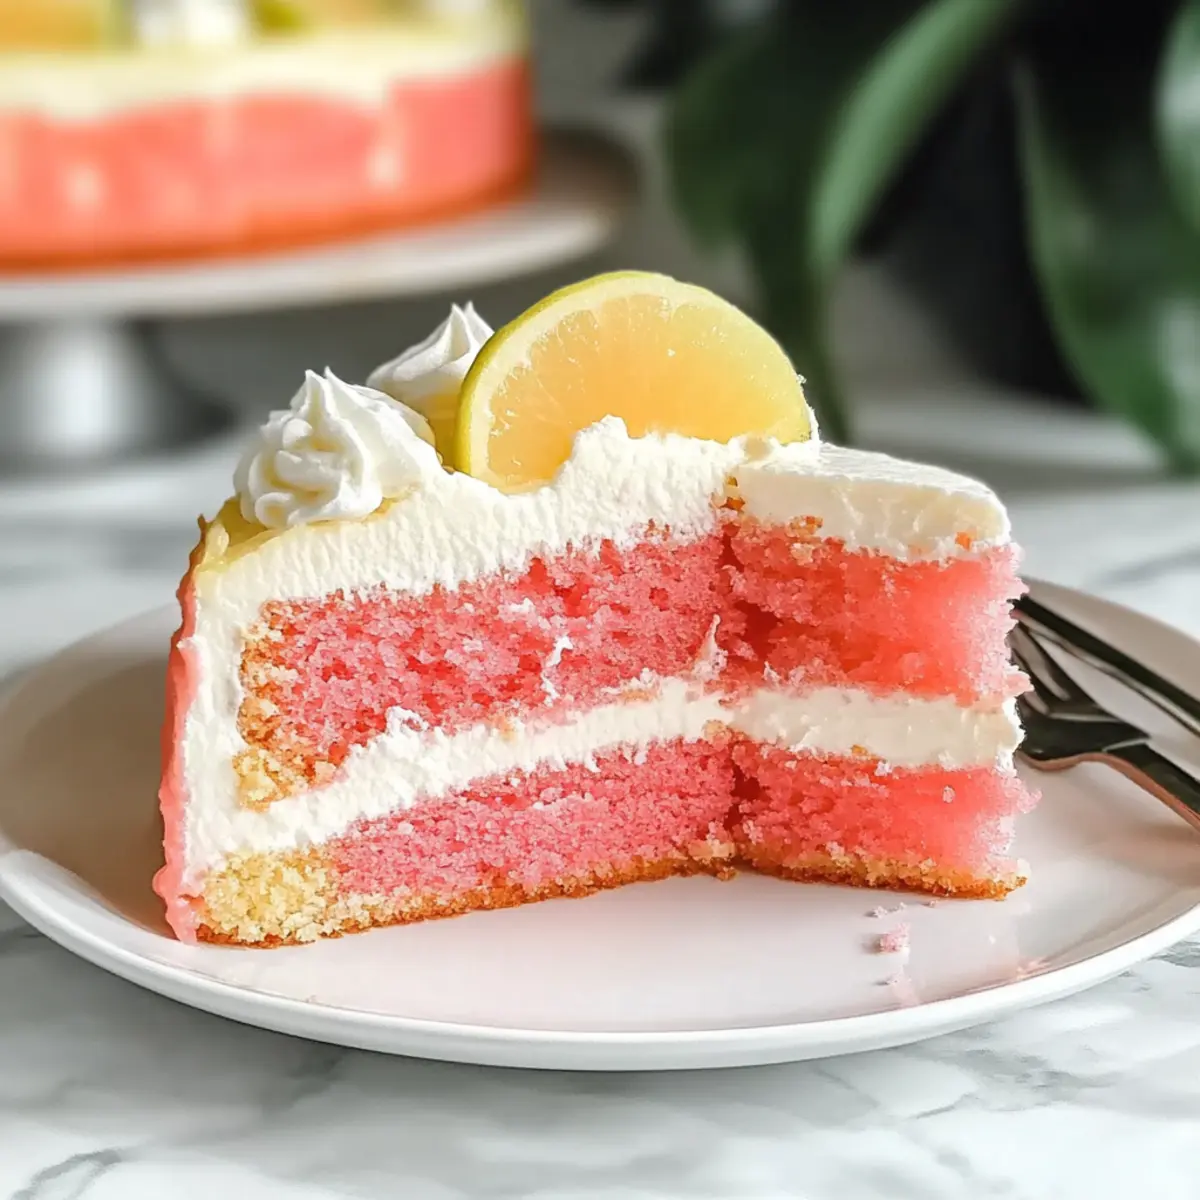
As I lifted the warm, golden slice from the pan, the sweet, tangy scent of guava filled the kitchen, whisking me away to sun-soaked tropical shores. This Hawaiian Guava Cake isn’t just a dessert; it’s a refreshing escape from the mundane, blending tropical flavors with creamy goodness. With its easy prep and dazzling presentation, this cake shines at both casual gatherings and festive celebrations, making it a true crowd-pleaser. Plus, it’s customizable with gluten-free and dairy-free options, so everyone can savor a slice of paradise. Ready to indulge your sweet tooth in a new favorite treat? Let’s dive into this dreamy recipe together!
Why is Hawaiian Guava Cake a must-try?
Irresistible Flavor: The vibrant guava pairs beautifully with subtle hints of coconut, making each bite feel like a tropical getaway.
Easy to Prepare: With simple steps, this cake saves you time in the kitchen while delivering stunning results.
Customizable Options: Enjoy gluten-free or dairy-free alternatives, allowing everyone to indulge without worry.
Perfect for Any Occasion: Whether it’s a summer barbecue or a holiday feast, this cake impresses at any gathering.
Gorgeous Presentation: Its colorful layers and glossy glaze are sure to turn heads and spark conversations!
For more delicious options, don’t miss my recipes for Strawberry Cake Mix or the scrumptious Caramel Swirl Cheesecake.
Hawaiian Guava Cake Ingredients
• To make your mouth water with anticipation, here’s what you need to create this tropical delight!
For the Cake
- Strawberry Cake Mix – A sweet base that provides structure; swap for gluten-free cake mix if needed.
- Guava Juice – The star ingredient for that refreshing tropical flavor; opt for fresh guava nectar or canned juice.
- Eggs – Important for helping the cake rise; try using applesauce or a flax egg for dairy-free options.
- Coconut Oil – Adds moisture and richness; can be replaced with vegetable oil, if desired.
For the Cream Cheese Layer
- Cream Cheese – Forms a rich, creamy layer on top; substitute with dairy-free cream cheese for a dairy-free version.
- Granulated Sugar – Sweetens the cream cheese mixture; feel free to reduce the quantity for a lighter sweetness.
- Vanilla Extract – Enhances the cake’s overall flavor; pure extract is recommended for the best results.
- Cool Whip – Contributes to a light, fluffy texture; use a dairy-free whipped topping for alternative diets.
For the Topping
- Coconut Flakes – An optional topping that adds flavor and texture; choose between sweetened or unsweetened to suit your taste.
With these ingredients, you’re all set to embark on a delicious tropical journey right in your kitchen. Let’s get baking!
Step‑by‑Step Instructions for Hawaiian Guava Cake
Step 1: Preparation
Begin by preheating your oven to 350°F (175°C). While it warms up, generously coat a 13 x 9-inch baking dish with vegetable spray to prevent sticking. This will ensure your Hawaiian Guava Cake releases smoothly after baking. Gather all your ingredients so they are within reach, setting the stage for a seamless baking experience.
Step 2: Mix Cake Batter
In a stand mixer or mixing bowl, combine the strawberry cake mix, guava juice, eggs, and melted coconut oil. Start mixing on low speed to incorporate the ingredients, then increase to medium and blend for 2 minutes until the batter is smooth and has an even consistency. Look for a thick pancake-like texture, indicative of a well-mixed batter.
Step 3: Bake
Pour the cake batter into the prepared baking dish, spreading it evenly with a spatula. Place it in the preheated oven and bake for 24-26 minutes, or until the top is lightly golden and a toothpick comes out clean when inserted into the center. Keep an eye on it to avoid overbaking, ensuring a moist Hawaiian Guava Cake.
Step 4: Cool
Once baked, carefully remove the cake from the oven and allow it to cool in the pan for about 10 minutes. Then transfer it to a wire rack to cool completely at room temperature. Cooling is essential as it prevents the cream cheese layer from melting, ensuring a delicious combination of textures in your final dessert.
Step 5: Make Cream Cheese Layer
In a mixing bowl, beat the cream cheese until fluffy, which should take about 2-3 minutes. Gradually mix in the granulated sugar and vanilla extract until well combined. Then fold in the Cool Whip gently, aiming for a light and airy texture. Refrigerate this mixture while your cake cools completely to maintain its integrity.
Step 6: Spread Cream Cheese Layer
Once the cake is cooled, evenly spread the prepared cream cheese mixture over the top, using an offset spatula for a smoother finish. This layer will provide a creamy richness to balance the tropical flavors of the Hawaiian Guava Cake. After spreading, place the cake back in the refrigerator to allow the cream cheese layer to set completely.
Step 7: Prepare Guava Gel
In a saucepan, bring the guava juice and sugar to a gentle boil over medium heat. Meanwhile, in a small bowl, whisk together cornstarch and water until smooth. Slowly whisk this mixture into the boiling guava juice, continuously stirring. Return to heat and cook until it thickens, which should take about 2-3 minutes. Once thickened, remove it from heat and let it cool slightly.
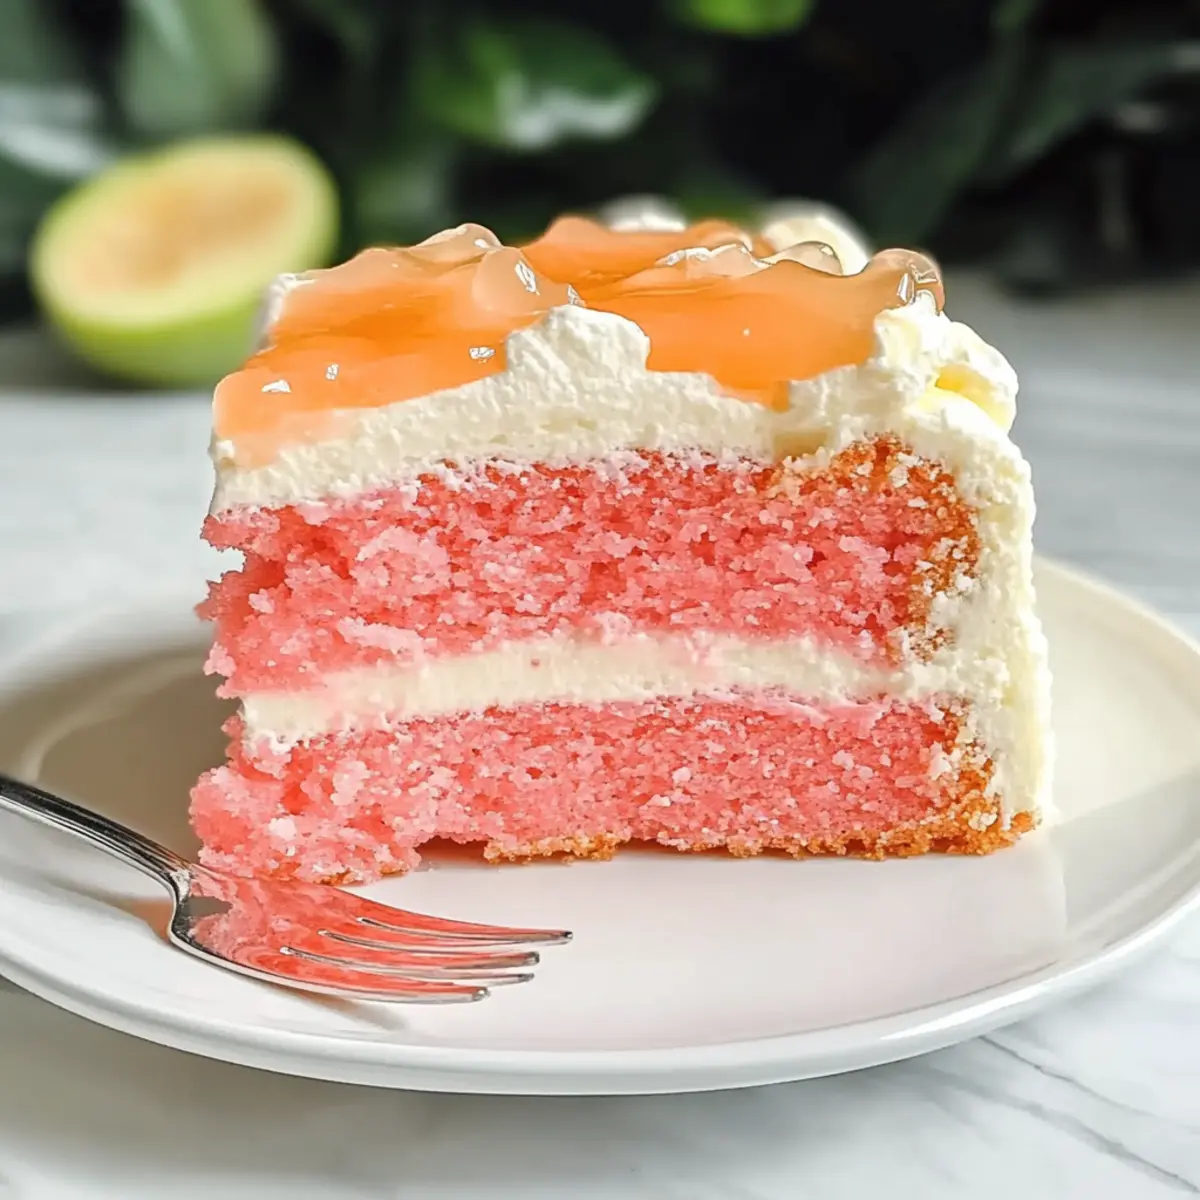
Step 8: Glaze Cake
When the guava gel has cooled to room temperature, carefully pour it over the chilled cream cheese layer of your Hawaiian Guava Cake. Use a spatula to spread it evenly if needed, creating a shiny, inviting top. This glaze will add that extra tropical flair and vibrant color that enhances both presentation and flavor.
Step 9: Refrigerate
To finish, cover the cake with plastic wrap and allow it to chill in the refrigerator for at least 1 hour before serving. This resting time helps the flavors to meld beautifully, enhancing the overall taste of your Hawaiian Guava Cake. If desired, sprinkle with coconut flakes just before serving for that final touch of tropical magic.
Make Ahead Options
This Hawaiian Guava Cake is perfect for meal prep, saving you time on busy days! You can bake the cake base up to 24 hours in advance—simply cool it completely and store it tightly wrapped in the refrigerator. The cream cheese layer can also be made up to 3 days ahead; just keep it in an airtight container in the fridge until you’re ready to use it. When it’s time to assemble, spread the chilled cream cheese layer over the cake, prepare the guava gel, and chill the assembled dessert for at least an hour before serving. This way, your cake remains just as delicious and beautifully presented while easing your prep stress!
Expert Tips for Hawaiian Guava Cake
-
Room Temperature Ingredients: Ensure all ingredients, especially cream cheese, are at room temperature. This leads to a smoother batter and cream layer.
-
Mind the Bake Time: Avoid overbaking the cake; watch closely from the 24-minute mark to keep it moist and fluffy.
-
Cool Completely: Let the cake cool fully before adding the cream cheese layer to prevent melting—patience pays off for the best Hawaiian Guava Cake!
-
Thicken Guava Gel: If your guava gel is too runny, whisk in cornstarch slowly while heating. This will ensure a perfect glaze that sits beautifully on the cake.
-
Refrigeration is Key: Allow the cake to chill before serving. This not only enhances flavor but also helps the layers set and makes for easier slicing.
-
Customizations Welcome: Feel free to experiment with toppings such as pineapple or macadamia nuts, enhancing your cake’s tropical feel while keeping it uniquely yours.
How to Store and Freeze Hawaiian Guava Cake
Fridge: Store leftover Hawaiian Guava Cake covered in the refrigerator for up to 3 days. This keeps the cake moist and the cream cheese layer fresh.
Freezer: For longer storage, freeze individual slices wrapped tightly in plastic wrap and aluminum foil. They can last up to 2 months, maintaining their delicious tropical flavor.
Thawing: When ready to enjoy, simply thaw the frozen slices in the fridge overnight or at room temperature for a couple of hours before serving.
Reheating: To refresh the cake, you can microwave a slice for about 10-15 seconds; just be careful not to overheat it, or the texture may suffer!
What to Serve with Hawaiian Guava Cake
As you savor the sweet, tangy notes of this tropical delight, think about how to complement its irresistible flavors with perfect pairings.
-
Tropical Fruit Salad: A refreshing mix of ripe mango, pineapple, and kiwi provides a bright contrast to the cake’s sweetness.
-
Coconut Ice Cream: Creamy and rich, this dessert adds an indulgent twist, enhancing the cake’s tropical coconut notes while providing a cooling effect.
-
Mango Sorbet: This light and fruity option refreshes the palate, creating a delightful balance with the rich guava cake.
-
Whipped Cream: A dollop of lightly sweetened whipped cream adds a fluffy texture that beautifully complements the cake’s creamy layer for an extra touch.
-
Pineapple Upside-Down Cake: Serve a small slice alongside for a lovely variation; the caramelized pineapple and buttery crust echo tropical vibes and enrich the experience.
-
Sparkling Water with Lime: A crisp, effervescent drink, it cleanses the palate and elevates the overall dessert experience with a bright citrus hint.
-
Coffee or Espresso: A warm cup balances the sweetness of the cake while the rich flavors enhance each delicious bite, creating a cozy atmosphere.
Hawaiian Guava Cake Variations & Substitutions
Customize your Hawaiian Guava Cake to suit your taste buds and dietary preferences with these delightful twists! Each option offers a unique flavor or texture that will make your cake truly shine.
- Gluten-Free: Substitute traditional cake mix with a gluten-free option to enjoy this tropical treat without worry.
- Dairy-Free: Swap cream cheese and Cool Whip with dairy-free alternatives, allowing everyone to indulge.
- Fruit Boost: Add diced fresh pineapple or mango to the batter for an extra burst of tropical flavor that enhances the cake.
- Chocolate Drizzle: Amp up the decadence by drizzling melted dark chocolate on top for a luscious twist.
- Spicy Kick: Bring some excitement by incorporating a pinch of cayenne pepper into the guava glaze for an unexpected heat contrast.
- Nutty Crunch: Fold in chopped macadamia nuts to the batter for a delightful texture and added flavor that complements guava beautifully.
- Caramel Swirl: Drizzle caramel sauce over the cream cheese layer for a rich and sweet topping that pairs wonderfully with the guava.
- Coconut Flakes: Mix in sweetened or unsweetened coconut flakes to the cake batter for a chewiness that enhances the tropical feel.
With these variations, you can create a unique version of this Hawaiian Guava Cake for every occasion. For more delicious options, consider trying my Buttermilk Pancakes Breakfast or the delightful Pecan Pie Cheesecake. Happy baking!
Hawaiian Guava Cake Recipe FAQs
How do I select ripe guavas for the cake?
Absolutely! When choosing guavas, look for ones that are slightly soft to the touch and have a fragrant aroma. The skin should be a bit wrinkled and yellow-green, indicating ripeness. Avoid any with dark spots or blemishes, as they may be overripe or spoiled.
How should I store leftover Hawaiian Guava Cake?
You can store leftover Hawaiian Guava Cake covered in an airtight container in the refrigerator for up to 3 days. Be sure to keep it chilled to maintain its moistness and fresh flavor.
Can I freeze Hawaiian Guava Cake?
Very! To freeze, wrap individual slices tightly in plastic wrap, then in aluminum foil to prevent freezer burn. This delightful treat will keep for up to 2 months. When you’re ready to enjoy, simply thaw in the refrigerator overnight or at room temperature for a couple of hours.
What should I do if my guava gel is too runny?
No problem! If your guava gel ends up runny, don’t worry. Simply whisk together 1 tablespoon of cornstarch with 2 tablespoons of cold water in a small bowl to create a slurry. Return your guava juice mixture to heat, slowly add the cornstarch slurry, and stir constantly until the mixture thickens, which should take about 2-3 minutes. This will give you that glossy, perfect glaze!
Are there any allergy concerns with this recipe?
Definitely! If you’re making this Hawaiian Guava Cake, keep in mind that it contains eggs and dairy (in the cream cheese and Cool Whip). For those with dietary restrictions, you can easily substitute eggs with applesauce or a flax egg, and choose dairy-free cream cheese and whipped topping to cater to those who are lactose intolerant or vegan. Always check ingredient labels for potential allergens, especially with pre-made products.
Can I adjust the sweetness of the cake?
Of course! If you prefer a less sweet Hawaiian Guava Cake, feel free to reduce the granulated sugar in both the cream cheese layer and the glaze. Start by cutting the sugar in half, and taste as you go to find the perfect balance to suit your palate!
Tropical Hawaiian Guava Cake to Brighten Your Day
Ingredients
Equipment
Method
- Preheat your oven to 350°F (175°C) and coat a 13 x 9-inch baking dish with vegetable spray.
- In a stand mixer, combine the strawberry cake mix, guava juice, eggs, and melted coconut oil. Mix on low, then increase to medium for 2 minutes until smooth.
- Pour the cake batter into the prepared dish and bake for 24-26 minutes until golden and a toothpick comes out clean.
- Allow the cake to cool in the pan for 10 minutes, then transfer to a wire rack to cool completely at room temperature.
- Beat the cream cheese until fluffy, then mix in sugar and vanilla. Fold in Cool Whip and refrigerate.
- Spread the cream cheese mixture evenly over the cooled cake and refrigerate to set.
- In a saucepan, bring guava juice and sugar to a boil. Whisk cornstarch and water until smooth, then add to the juice until thickened.
- Pour guava gel over the cream cheese layer, spreading evenly, then refrigerate for at least 1 hour before serving.
- Optionally, sprinkle with coconut flakes before serving.