

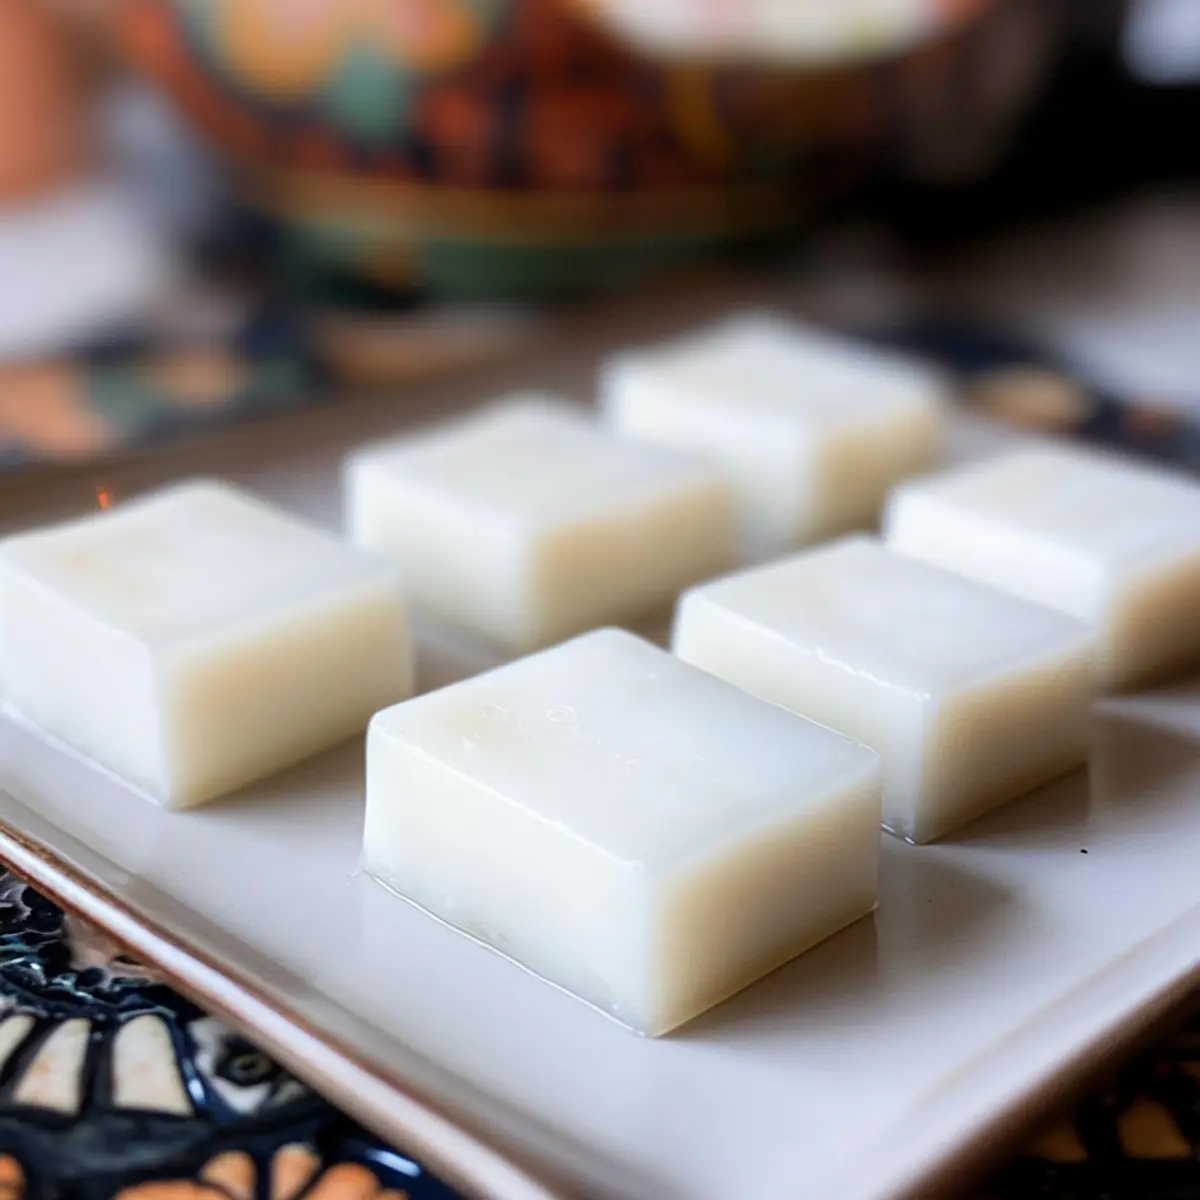
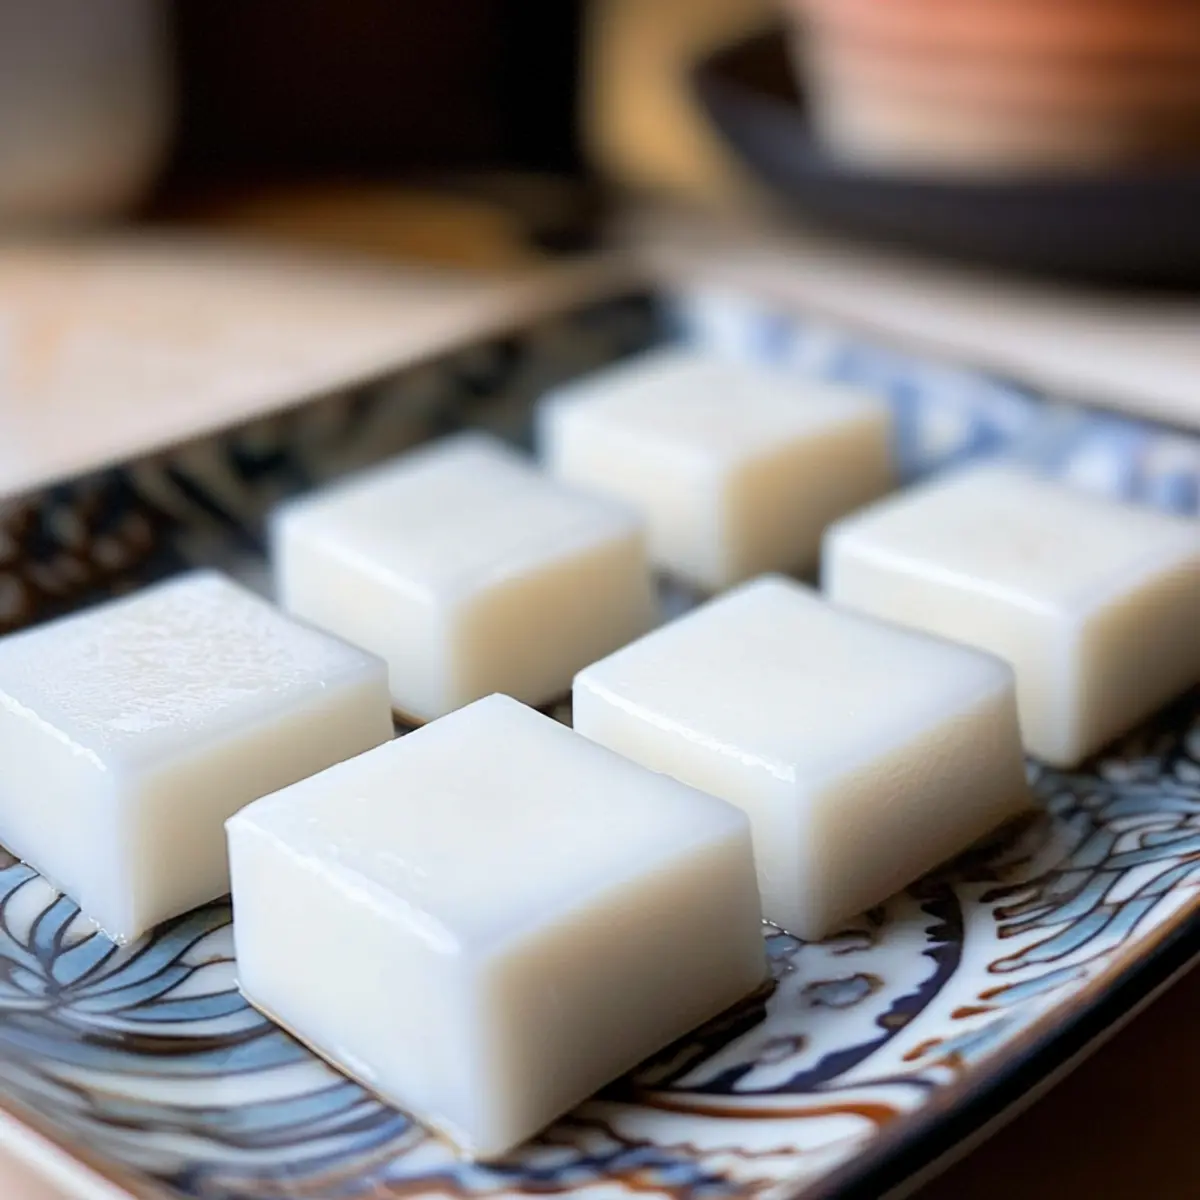
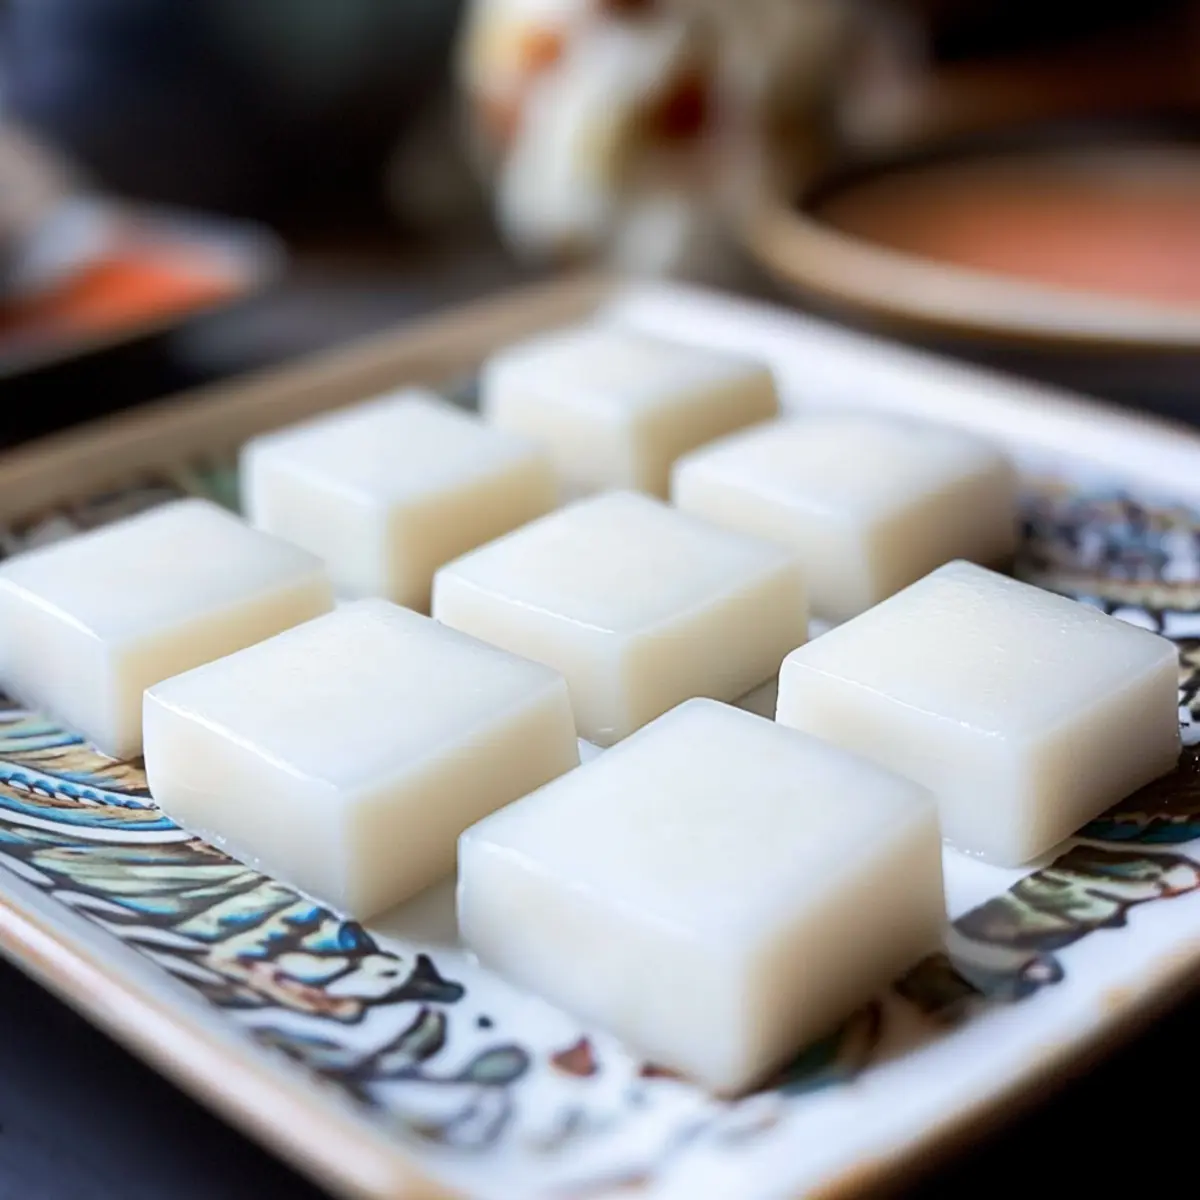
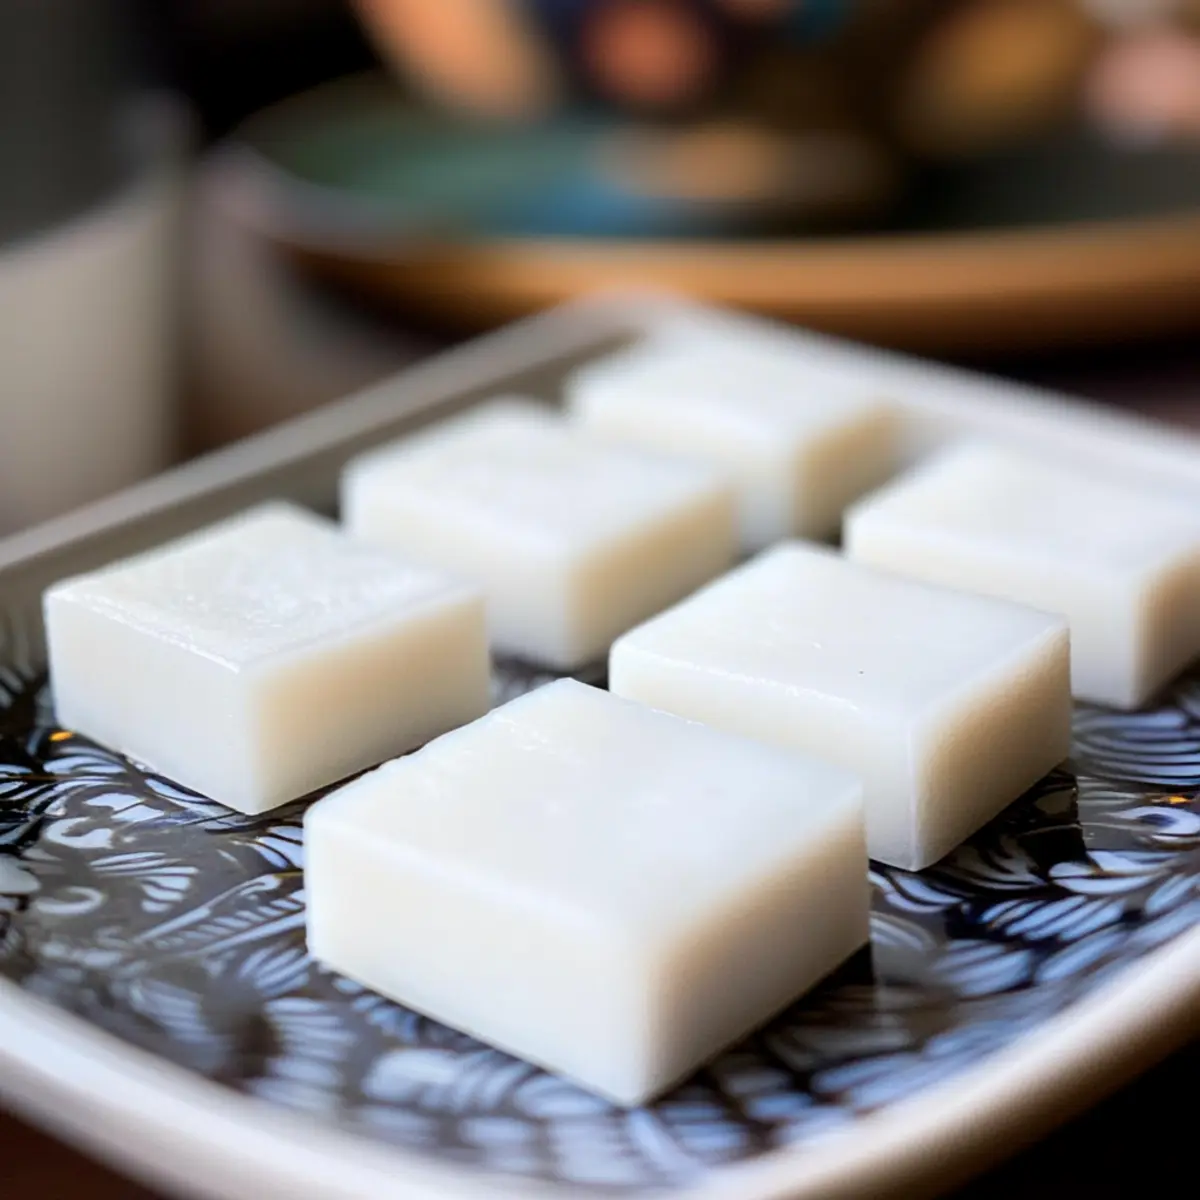
There’s nothing quite like discovering a new dessert that transports you to far-off shores with just one bite, and haupia (Hawaiian Coconut Pudding) is a perfect example of that magic. This delightful treat harmonizes the creamy richness of coconut milk with a subtle sweetness, resembling a delightful blend of pudding and jelly—ideal for any dessert lover. One of the best perks of making haupia is its simplicity; with minimal ingredients and quick prep time, you can impress your friends and family in no time. Plus, this gluten-free and vegetarian dessert is a light yet satisfying option that can stand alone or elegantly accompany savory dishes. Are you ready to dive into the world of haupia and explore all its delicious variations?
Why Is Haupia So Irresistible?
Simplicity, this recipe is easy to whip up with just a handful of ingredients. Versatility shines through as you can customize the thickness and flavor, whether you prefer a firmer coconut treat or a lighter pudding. Crowd-Pleasing appeal makes haupia perfect for gatherings, sure to impress even the pickiest eaters. Cultural charm adds a unique touch, as this dessert is a traditional Hawaiian delight often enjoyed at special celebrations. If you love unique desserts, check out our Chewy Coconut Oatmeal or the Chocolate Pecan Coconut variations for more tropical inspirations!
Haupia Ingredients
For the Haupia Base
- Coconut Milk – Use full-fat coconut milk for a rich and creamy texture that enhances the haupia experience.
- Cornstarch – This thickening agent is crucial; adjust the amount for your desired firmness—more for a firm texture and less for a softer pudding.
- Sugar – Sweeten to taste; if you prefer less sweetness, simply reduce the amount.
- Water – Essential for dissolving the cornstarch, ensuring a smooth consistency in your haupia.
Optional Flavor Enhancements
- Agar-Agar – For a vegan-friendly variation, replace cornstarch with agar-agar for a lighter, set texture.
- Flavor Additions – Experiment with layering haupia with chocolate or fruit purees for a delicious twist on this classic treat.
Step‑by‑Step Instructions for Haupia (Hawaiian Coconut Pudding)
Step 1: Prepare the Cornstarch Mixture
In a small bowl, combine the cornstarch with a generous amount of water, stirring until completely dissolved. This simple mixture is crucial for your haupia’s texture, so take your time to ensure there are no lumps. Once smooth, set it aside, ready for the next step.
Step 2: Heat the Coconut Milk
In a medium saucepan, pour in the full-fat coconut milk and add sugar to taste. Place the saucepan over medium heat and whisk gently until the mixture is heated, just before it begins to boil, creating small bubbles around the edges. This fragrant base will be the heart of your haupia.
Step 3: Combine Mixtures
Once the coconut milk and sugar are heated, slowly drizzle the cornstarch-water mixture into the saucepan while continuously whisking. This technique helps prevent lumps and ensures a smooth blend. Keep whisking until the mixture thickens, which should take about 2-3 minutes, resulting in a creamy texture.
Step 4: Cook to Desired Thickness
Reduce the heat to low and continue to cook the mixture for an additional 10-15 minutes, whisking frequently. You’ll know it’s done when it has thickened considerably, and you can see it pulling away from the sides of the pan. Aim for a pudding-like consistency for your haupia.
Step 5: Pour and Cool
Pour the thickened haupia into a greased or parchment-lined 8×8 pan, making sure to spread it evenly. Let it cool at room temperature for about 15 minutes. As it cools, the mixture will set slightly, making it easier to slice once chilled.
Step 6: Chill Until Firm
After cooling for 15 minutes, transfer the pan to the refrigerator and allow the haupia to chill for 1-2 hours until it has firmed up completely. The dessert should feel smooth and slightly bouncy, ready to be cut into delightful squares for serving.
What to Serve with Classic Hawaiian Haupia?
There’s an incredible world of flavor waiting to be explored when you pair this creamy coconut delight with the perfect sides or beverages.
-
Grilled Pineapple: The caramelized sweetness of grilled pineapple complements the subtle richness of haupia wonderfully, creating a tropical symphony of flavors.
-
Hawaiian Chicken Skewers: Savory, marinated chicken on skewers brings a touch of umami to balance haupia’s creaminess, making it a fantastic duo for a Hawaiian feast.
-
Coconut Rice: The light and fluffy coconut rice allows the delicate flavors of haupia to shine, connecting your dishes with a shared coconut theme.
-
Fresh Mango Salad: A refreshing mango salad brings brightness and texture, adding a delightful crunch and tang that perfectly contrasts the smooth haupia.
-
Lilikoi (Passion Fruit) Sauce: Drizzling a sweet and tangy passion fruit sauce over your haupia elevates its presentation and introduces a zesty twist that tantalizes the taste buds.
-
Hibiscus Iced Tea: A chilled glass of hibiscus iced tea offers a floral and slightly tart sip, cleansing the palate and enhancing the overall experience of this tropical dessert.
Embrace these pairings and transport your taste buds to a sunny Hawaiian getaway!
Expert Tips for Haupia (Hawaiian Coconut Pudding)
-
Texture Control: Adjust cornstarch: For firmer haupia, increase cornstarch by one tablespoon; reduce it for a softer pudding-like result.
-
Smooth Mixture: Avoid lumps: Ensure the cornstarch is completely dissolved in water before adding it to the hot coconut mixture to create a smooth consistency.
-
Proper Cooling: Allow time to chill: Let haupia cool at room temperature for at least 15 minutes before refrigerating, ensuring an even texture.
-
Flavor Exploration: Experiment with variations: Try layering haupia with chocolate or fruit purees for a unique twist that elevates the classic Hawaiian dessert.
-
Storage Tips: Keep it fresh: Store leftover haupia in the refrigerator and consume within 2-3 days for optimal flavor and texture.
Make Ahead Options
Haupia (Hawaiian Coconut Pudding) is a fantastic dessert for meal prep, perfectly suited for busy weeknights! You can prepare the haupia mixture up to 24 hours in advance; simply follow the recipe up to the point of pouring it into the pan. After that, let it cool at room temperature before covering it tightly with plastic wrap and refrigerating. To maintain its glorious texture and flavor, make sure to serve the haupia chilled within 3 days. When you’re ready to serve, just cut it into squares, and enjoy this creamy delight that promises to impress without all the last-minute work!
How to Store and Freeze Haupia
Fridge: Keep haupia stored in an airtight container in the refrigerator for up to 2-3 days to maintain its creamy texture and flavors.
Freezer: For longer storage, freeze cut pieces of haupia in a single layer on a baking sheet, then transfer them to a resealable freezer bag, where they can be kept for up to 1 month.
Reheating: To enjoy frozen haupia, thaw overnight in the fridge and serve chilled. Avoid microwave reheating as it may alter the texture.
Serving Fresh: For the best taste experience, savor your haupia fresh from the fridge. A light chill enhances its delightful coconut flavor!
Haupia Variations & Substitutions
Feel free to get creative with haupia, making it your own delightful masterpiece that tantalizes the taste buds.
-
Agar-Agar: Substitute cornstarch with agar-agar for a vegan-friendly, lighter texture that still delivers the same coconut flavor magic. It’s perfect for those who prefer plant-based options!
-
Flavor Boost: Add vanilla extract or almond extract to the coconut milk for an aromatic twist on the classic haupia, enhancing its deliciously sweet profile.
-
Fruity Layers: Layer haupia with mango or passion fruit puree before it sets to introduce a vibrant flavor contrast, creating a tropical paradise in each bite. You could even top it with fresh fruit for an extra pop of color!
-
Chocolate Delight: Incorporate cocoa powder into half of the mixture for a chocolate haupia variation. Swirl it with the original mix to achieve a stunning marbled effect that’s visually appealing as well as tasty.
-
Nutty Crunch: For an added texture twist, sprinkle toasted coconut flakes or chopped nuts like macadamias on top before chilling. The nutty flavors will add a delightful crunch to each smooth bite.
-
Spicy Kick: If you’re feeling adventurous, a pinch of cayenne pepper or ginger can add a subtle heat that beautifully contrasts the sweetness, making haupia a unique dessert conversation starter.
-
Savory Application: Consider utilizing haupia as a filling in crepes or cakes for a fusion twist, turning this elegant dessert into an exciting new dish.
-
Chilled Soufflé: Whisk in a touch of whipped cream to the base before pouring it into the dish to create a lighter, soufflé-like haupia that feels airy and decadent.
These variations open a world of culinary creativity, allowing you to put your unique spin on this traditional Hawaiian dessert. Enjoy the journey of exploration, and don’t forget to try our Chewy Coconut Oatmeal or the Chocolate Pecan Coconut for more tropical inspirations!
Haupia (Hawaiian Coconut Pudding) Recipe FAQs
What kind of coconut milk should I use for haupia?
Absolutely, using full-fat coconut milk is highly recommended for haupia. It gives the pudding that rich and creamy texture that elevates the entire dessert experience. Light coconut milk may lead to a less satisfying consistency.
How should I store haupia, and how long will it last?
You can keep haupia stored in an airtight container in the refrigerator for up to 2-3 days. This helps maintain its delightful creaminess and flavors. If you notice any separation or a change in texture, it’s best to enjoy it sooner rather than later!
Can haupia be frozen, and if so, how?
Yes, you can freeze haupia! First, cut it into squares and place them in a single layer on a baking sheet. Freeze for about 1 hour until firm, then transfer the pieces to a resealable freezer bag. They can be kept frozen for up to 1 month. When you’re ready to enjoy it, thaw them in the fridge overnight for the best texture.
What should I do if my haupia is too watery or too firm?
If your haupia turns out too firm, it may be due to excessive cornstarch. For future batches, decrease the amount by one tablespoon. On the other hand, if it’s too watery, increase the cornstarch slightly next time for a firmer texture. Remember, cooking the mixture over low heat for the right amount of time is key to thickening it properly!
Is haupia safe for people with dietary restrictions, like allergies or gluten intolerance?
Yes, haupia is gluten-free, making it a fantastic option for those with gluten sensitivities or celiac disease. However, if you’re serving it to someone with allergies, always check the coconut milk label to ensure it’s free from any allergens they may have. Enjoy with peace of mind!
Creamy Haupia (Hawaiian Coconut Pudding) That Melts In Your Mouth
Ingredients
Equipment
Method
- In a small bowl, combine the cornstarch with water, stirring until completely dissolved.
- In a medium saucepan, heat coconut milk and sugar over medium heat, whisking until just before boiling.
- Slowly drizzle in the cornstarch-water mixture while whisking continuously until it thickens (about 2-3 minutes).
- Reduce heat to low and cook for an additional 10-15 minutes, whisking frequently until pudding-like consistency.
- Pour the mixture into a greased or parchment-lined 8x8 pan and let cool at room temperature for 15 minutes.
- Transfer to the refrigerator and chill for 1-2 hours until firm.