

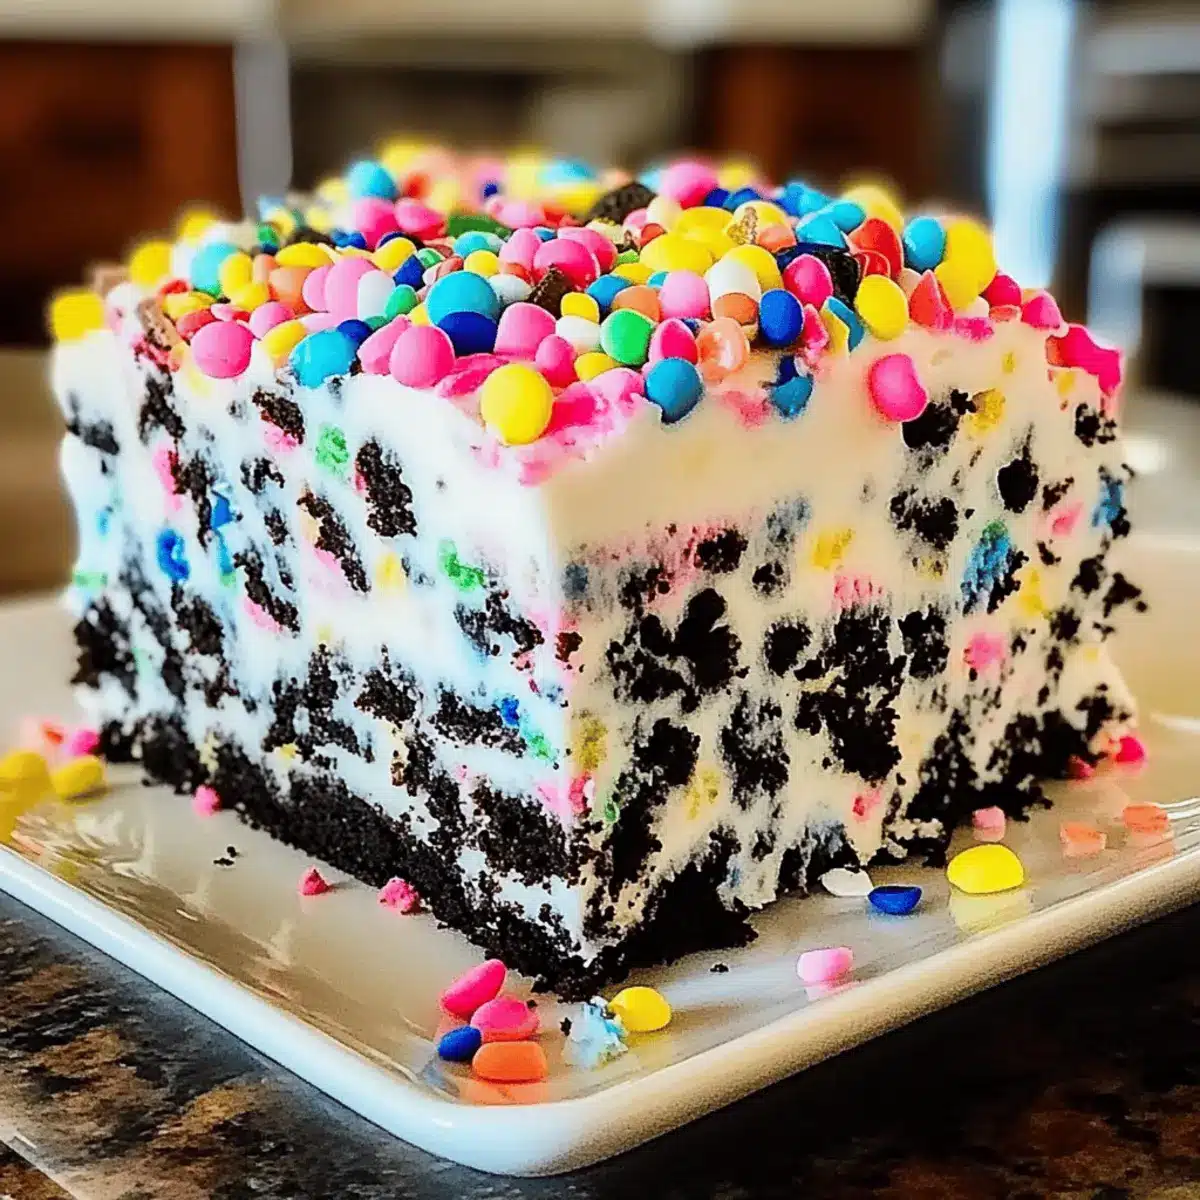
The sound of spoons clinking against bowls filled with whipped cream and cookies always brings a smile to my face. Today, I’m excited to share my go-to indulgence: a No-Bake Funfetti Oreo Icebox Cake that transforms any gathering into a mini celebration. This delightful dessert requires only 15 minutes of prep, making it the perfect choice for busy weeknights or surprise get-togethers. It’s not just a treat for kids; adults can’t resist the creamy layers and the playful crunch of Birthday Cake Oreos either. Picture luscious cream cheese mingling with sweet vanilla, all artfully layered and ready to impress. Whether it’s a birthday party or just a cozy family dinner, this easy dessert is sure to steal the spotlight. Want to learn how to make this show-stopping cake? Let’s dive in!
Why is this dessert a crowd-pleaser?
Simplicity: It requires just 15 minutes of prep time, making it a go-to for any busy home chef.
No Baking Needed: Perfect for those hot summer days when you want a sweet treat without turning on the oven.
Kid-Friendly: The colorful sprinkles and creamy layers are not only visually appealing but also a hit with children and adults alike!
Versatile Options: Substitute with your favorite cookie flavors or add fresh fruit for a personalized twist, just like in our Pecan Pie Cheesecake or Chocolate Lava Cakes.
Perfect for Celebrations: This Funfetti Oreo Icebox Cake elevates any gathering, whether it’s a birthday bash or a cozy family dinner.
Storage Friendly: Make it ahead of time; it keeps well in the fridge, allowing you to focus on the fun part—celebrating!
Funfetti Oreo Icebox Cake Ingredients
For the Cake Layers
• Birthday Cake Oreos – The star of this dessert; you can also replace them with regular or chocolate-flavored Oreos.
• Heavy Cream – Whip to stiff peaks for that luscious, airy texture that complements the cake perfectly.
For the Cream Filling
• Cream Cheese – This adds rich, creamy goodness; ensure it’s softened for easy blending with other ingredients.
• Powdered Sugar – Sweetness in every bite; feel free to adjust according to your sweetness preference.
• Vanilla Extract – A touch of this classic flavor enhances all the tastes, or swap in almond extract for variation.
For the Decoration
• Colorful Sprinkles – Not just for fun; they also brighten the cake, though you can skip them for a more elegant look.
Get ready to impress your family with this delightful Funfetti Oreo Icebox Cake!
Step‑by‑Step Instructions for Funfetti Oreo Icebox Cake
Step 1: Whip the Cream
In a large mixing bowl, pour in the heavy cream. Using an electric mixer, beat the cream on medium-high speed until stiff peaks form, which should take about 3–5 minutes. You’ll know it’s ready when the cream holds its shape and resembles fluffy clouds. Set aside to maintain that light, airy texture perfect for your Funfetti Oreo Icebox Cake.
Step 2: Mix the Cream Cheese Filling
In another bowl, combine softened cream cheese, powdered sugar, and vanilla extract. Using a hand mixer on medium speed, mix until the ingredients are smooth and creamy, approximately 2–3 minutes. Make sure there are no lumps and the mixture is well blended. This rich cream will provide a delicious contrast to the crunchy layers of the Funfetti Oreo Icebox Cake.
Step 3: Fold in the Whipped Cream
Gently fold the whipped cream into the cream cheese mixture using a spatula. Begin by adding one-third of the whipped cream to lighten the mixture, then fold in the rest until just combined. Be careful not to overmix, as you want to keep the filling airy and fluffy. This creamy layer is the heart of your Funfetti Oreo Icebox Cake.
Step 4: Start Layering with Oreos
Grab a 9×13 inch dish and begin layering your Funfetti Oreo Icebox Cake. Place a single layer of Birthday Cake Oreos at the bottom of the dish, ensuring they are tightly packed. This will create a strong base for the layers of cream. Furthermore, you could alternate with regular Oreos if you’re aiming for extra flavor variety.
Step 5: Add the First Cream Layer
Spread half of the cream mixture evenly over the first layer of Oreos. Use a spatula to smooth it out, ensuring that every cookie is covered. This creamy layer adds indulgence and flavor richness to your Funfetti Oreo Icebox Cake, making it extra delightful.
Step 6: Repeat with More Oreos
Once the first layer of cream is smoothed out, add another layer of Birthday Cake Oreos on top. Again, position them closely together for an even structure. This second layer will ensure each slice has a perfect balance of cookie and cream, creating that classic icebox cake texture you love.
Step 7: Finish with Remaining Cream
Spread the remaining cream mixture over the second layer of Oreos, smoothing it out evenly across the top. This final layer of creamy goodness should be as even as possible, as it will be the surface of your Funfetti Oreo Icebox Cake, ready to be decorated!
Step 8: Decorate and Chill
Garnish the top of your cake with colorful sprinkles, adding a festive touch. Once decorated, cover the dish tightly with plastic wrap. Chill in the refrigerator for at least 4 hours or, even better, overnight. This setting time allows the flavors to meld beautifully, resulting in a delightful slice every time.
What to Serve with No-Bake Funfetti Oreo Icebox Cake
Looking to create a vibrant feast that perfectly complements this delightful, creamy dessert?
-
Fresh Berries: A medley of strawberries, blueberries, and raspberries adds a refreshing contrast to the rich cake, enhancing each bite. The tartness plays beautifully with the sweet layers.
-
Chocolate Covered Strawberries: These elegant treats bring a touch of decadence, creating a beautiful balance between the bright flavors of the cake and the rich chocolate.
-
Whipped Cream: Each serving dollop adds an airy touch, amplifying the cake’s creamy deliciousness while offering a classic dessert pairing that everyone loves.
-
Sparkling Lemonade: A bubbly, citrusy drink cuts through the sweetness, ensuring the cake’s flavors shine. It’s refreshing and perfect for any celebration.
-
Vanilla Ice Cream: The combination of warm and cold sensations elevates the eating experience; creamy ice cream alongside the cake is a match made in heaven.
-
Chocolate Sauce Drizzle: A rich chocolate drizzle over each slice adds depth and extra indulgence, turning a simple dessert into something truly luxurious.
-
Fruit Salad: A light, refreshing fruit salad provides a healthful counterpoint, bringing zest and color to the table, perfect for balancing the rich flavors.
-
Coffee or Tea: A warm cup of coffee or herbal tea rounds off the meal, offering a comforting finish while enhancing the dessert’s sweetness.
-
Mini Cupcakes: Delightful mini treats that echo the cake’s funfetti spirit, inviting guests to indulge in a cheerful bite-sized portion.
Make Ahead Options
This No-Bake Funfetti Oreo Icebox Cake is a fantastic choice for busy home cooks who want to save time and make dessert ahead of celebrations! You can prepare the cream filling and layer the Oreo base up to 24 hours in advance. Simply mix the whipped cream and cream cheese filling, layer it with the Birthday Cake Oreos in your dish, and refrigerate it tightly covered. Just be sure to add colorful sprinkles before serving to keep them fresh and vibrant. When ready to delight your guests, remove from the fridge, slice, and serve. You’ll enjoy delicious, easy-to-make layers without any last-minute stress!
How to Store and Freeze Funfetti Oreo Icebox Cake
Fridge: Keep leftovers tightly covered in the refrigerator. This dessert will stay fresh for up to 5 days, maintaining its creamy texture and delightful flavor.
Freezer: If you have a lot left over, you can freeze it. Wrap slices individually in plastic wrap, then place them in an airtight container. It can stay frozen for up to 2 months.
Thawing: When ready to enjoy, move it to the fridge to thaw overnight. This ensures the Funfetti Oreo Icebox Cake retains its creamy consistency.
Slicing Tip: For clean slices, use a sharp knife dipped in hot water, cleaning it between cuts for a picture-perfect presentation!
Funfetti Oreo Icebox Cake Variations
Feel free to let your creativity shine and customize this cake to suit your taste or dietary needs!
-
Dairy-Free: Substitute heavy cream and cream cheese with coconut cream and dairy-free cream cheese for a vegan-friendly version. The result is just as creamy and delicious!
-
Gluten-Free: Use gluten-free Oreos to create a delightful dessert that everyone can enjoy. The layers will still have that satisfying crunch and creamy layers.
-
Flavor Twist: Experiment with different Oreo flavors, such as Mint or Red Velvet, for a fun twist on the classic recipe. Your cake will turn into a flavorful surprise!
-
Fruity Freshness: Add layers of fresh fruits, such as sliced strawberries or bananas, between the Oreo layers. This brings a refreshing taste and colorful touch to your icebox cake.
-
Chocolate Lovers: Fold in mini chocolate chips into the cream mixture for an extra textural element. This little addition can elevate the chocolatey sweetness.
-
Nutty Crunch: Sprinkle in chopped nuts like pecans or walnuts for a delightful crunch that pairs wonderfully with the creamy layers. This will make each bite even more satisfying!
-
A Touch of Heat: Add a pinch of cinnamon or cayenne to the cream mixture to introduce a surprising warmth. This can be a delightful surprise for those who love sweet heat!
-
Layered Delight: Instead of one large cake, create fun mini dessert cups with layers of cookies and cream. They are visually striking and perfect for serving at gatherings, similar to our delightful Strawberry Cake Mix Cookies!
Feel free to mix and match these variations to create your perfect version of the Funfetti Oreo Icebox Cake!
Expert Tips for Funfetti Oreo Icebox Cake
Chill Time: Always refrigerate the cake overnight if possible. This allows the layers to set, enhancing flavor and texture.
Gentle Mixing: Avoid overmixing your whipped cream and cream cheese mixture. This helps keep the filling light and fluffy, crucial for your Funfetti Oreo Icebox Cake.
Storage Care: Keep your dessert tightly covered in the fridge to prevent it from absorbing any odors. It’s best enjoyed within 3-5 days.
Cookie Substitutions: Feel free to experiment with different flavored Oreos for a unique twist, ensuring all layers are balanced for the ultimate flavor experience.
Funfetti Oreo Icebox Cake Recipe FAQs
What type of Oreos should I use?
Absolutely! While Birthday Cake Oreos are the star of this recipe, feel free to substitute them with regular Oreos or even chocolate-flavored varieties. Each type will lend a unique flavor to your cake, so have fun with it!
How should I store the Funfetti Oreo Icebox Cake?
Keep your leftovers tightly covered in the refrigerator. This dessert is best enjoyed within 3-5 days, during which it will maintain its delicious creamy texture. Just make sure it’s well-wrapped to avoid absorbing any odors from your fridge!
Can I freeze the Funfetti Oreo Icebox Cake?
Yes, you can! If you’d like to save some for later, wrap individual slices tightly in plastic wrap and place them in an airtight container. It can be frozen for up to 2 months. When you’re ready to enjoy, simply transfer it to the fridge to thaw overnight for optimal texture retention.
What should I do if my whipped cream doesn’t reach stiff peaks?
Very! If your whipped cream isn’t achieving stiff peaks, make sure your heavy cream is cold, and your mixing bowl is free from any grease—this makes a big difference! You may need to beat it on high speed for another minute or so. If it still won’t stiffen, consider adding a little bit of cornstarch—about a tablespoon—to help stabilize it.
Are there any dietary considerations for this recipe?
Certainly! This recipe contains dairy, specifically cream cheese and heavy cream, so those with lactose intolerance should be cautious. If you’re looking for a dairy-free option, try using coconut cream as a substitute for the whipped cream and a dairy-free cream cheese alternative. Always check the labels for any allergies!
How can I ensure my Icebox Cake has the best flavor and texture?
For the most flavorful results, refrigerate your Funfetti Oreo Icebox Cake overnight. This resting time allows the layers’ flavors to meld beautifully and enhances the cake’s texture. Also, avoid overmixing your cream cheese and whipped cream, as you want that light and fluffy consistency that makes every bite a delight.
Delightful Funfetti Oreo Icebox Cake for Easy Celebrations
Ingredients
Equipment
Method
- In a large mixing bowl, pour in the heavy cream. Beat on medium-high speed until stiff peaks form, about 3–5 minutes.
- In another bowl, combine softened cream cheese, powdered sugar, and vanilla extract. Mix until smooth and creamy, about 2–3 minutes.
- Gently fold the whipped cream into the cream cheese mixture using a spatula until combined.
- In a 9x13 inch dish, layer the Birthday Cake Oreos tightly at the bottom.
- Spread half of the cream mixture evenly over the first layer of Oreos.
- Add another layer of Birthday Cake Oreos on top.
- Spread the remaining cream mixture over the second layer of Oreos.
- Garnish the top with colorful sprinkles, cover, and chill in the refrigerator for at least 4 hours or overnight.