

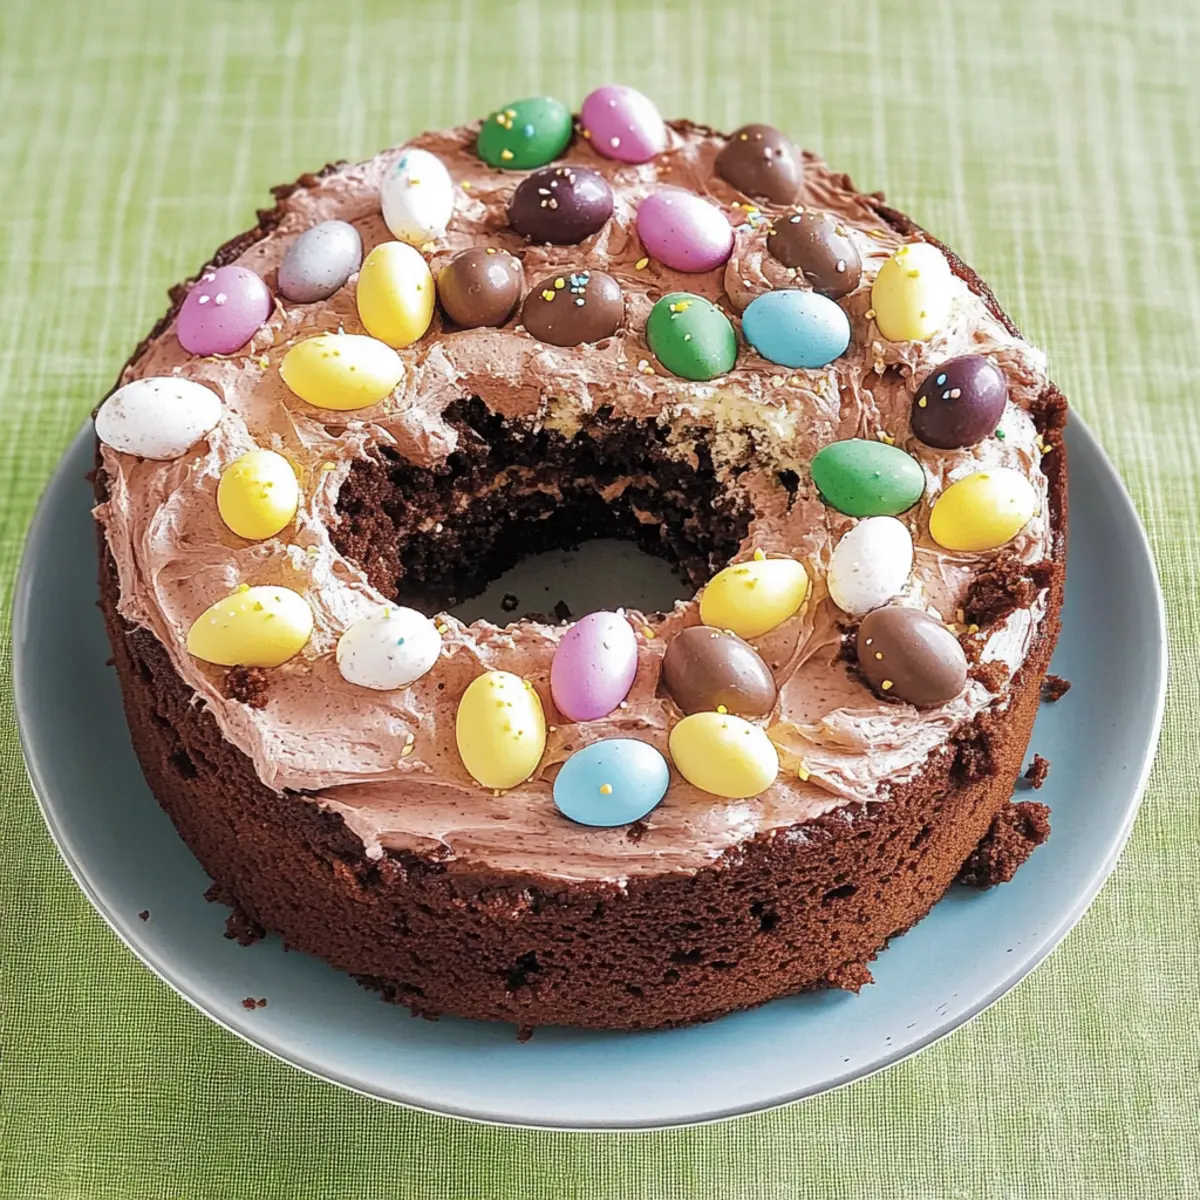
As I sifted through a sea of colorful Easter treats, one creation caught my eye—an Easter Egg Cake that effortlessly brings joy and indulgence to any gathering. This delightful cake, with its rich, fudgy texture reminiscent of a brownie, is not only a showstopper for festive occasions but also simple to make, appealing to both seasoned bakers and novices alike. What makes this Easter Egg Nest Cake so irresistible is its gluten-free option, allowing everyone to indulge without worry. Topped with plush cream and dotted with delightful mini chocolate eggs, this cake is a pure celebration of sweets that will leave your guests smiling. Are you ready to create some delectable memories?
Why Is This Cake a Must-Try?
Simplicity at Its Best: This Easter Egg Nest Cake is easy to make, requiring only straightforward steps that even beginner bakers can master.
Decadent Indulgence: With a rich, fudgy texture akin to a brownie, it’s perfect for chocolate lovers seeking a delightful treat.
Gluten-Free Delight: The option of gluten-free ingredients means everyone can enjoy this delicious cake without compromising their dietary needs.
Versatile Variations: Feel free to switch up decorations, like using fresh raspberries or different chocolate treats, for a personalized touch.
Memorable Celebration: Whether it’s Easter or any occasion, this cake creates unforgettable moments that have family and friends coming back for more.
Pair this with a scoop of ice cream for an extra special delight, just like the Caramel Swirl Cheesecake makes a great dessert option, too!
Easter Egg Nest Cake Ingredients
Discover the key components for creating this delightful dessert!
For the Cake
- Dark Chocolate – Provides rich flavor and moisture; choose high-quality chocolate for the best results.
- Butter – Adds richness and a smooth texture; substitute with vegan butter for a dairy-free option.
- Sugar – Sweetens the cake perfectly; opt for coconut sugar for a lower glycemic alternative.
- Eggs – Offers essential structure and moisture; replace with flax eggs for a vegan version (1 tablespoon flaxseed meal + 2.5 tablespoons water per egg).
- Gluten-Free Flour Blend – Helps create structure; a blend ensures the best texture in your Easter Egg Nest Cake.
- Baking Powder – Aids in the cake’s rise; be sure it’s gluten-free if necessary.
For the Topping
- Cream – Adds a luxurious finishing touch; you can use coconut cream to keep it vegan.
- Mini Chocolate Eggs – Perfect for decoration and a sweet burst; feel free to use other chocolate candies to suit your taste.
Embrace the joy of baking and bring this Easter Egg Nest Cake to your next celebration!
Step‑by‑Step Instructions for Easter Egg Nest Cake
Step 1: Preheat and Prepare the Tin
Begin by preheating your oven to 180°C (350°F) to ensure it’s hot when you’re ready to bake. While the oven heats, take a round cake tin and grease it well with butter or non-stick spray. This step will help your Easter Egg Nest Cake slide out easily once baked, ensuring it remains intact and beautiful for serving.
Step 2: Melt Chocolate and Butter
In a heatproof bowl, combine dark chocolate and butter, then place it over a saucepan of simmering water. Stir occasionally until both ingredients melt together smoothly, about 5-7 minutes. The mixture should be glossy and rich, forming the base of your cake batter. Once fully melted, remove it from the heat and let it cool slightly.
Step 3: Mix Dry Ingredients
In another mixing bowl, combine your gluten-free flour blend, baking powder, and sugar. Use a whisk to blend them together thoroughly, ensuring there are no lumps and the dry ingredients are evenly distributed. This step is crucial for achieving a light texture in your Easter Egg Nest Cake, providing the perfect foundation for the fudgy moisture from the chocolate.
Step 4: Combine the Ingredients
Pour the melted chocolate mixture into the bowl of dry ingredients. Add the eggs and mix until everything is well combined and a rich, thick batter forms—this should take about 2-3 minutes of whisking or stirring. The final texture should be smooth and glossy, indicating your batter is ready for the oven to create a moist Easter Egg Nest Cake.
Step 5: Bake the Cake
Pour the batter into your prepared cake tin, smoothing the top with a spatula. Place the tin in the preheated oven and bake for 25-30 minutes. Keep an eye on it during the last few minutes; a toothpick inserted into the center should come out clean when the cake is done. This ensures your Easter Egg Nest Cake will be perfectly fudgy and not overbaked.
Step 6: Cool Down
Once baked, remove the cake from the oven and allow it to cool in the tin for about 10-15 minutes. Then, carefully turn it out onto a wire rack to cool completely. This step is essential to avoid a soggy bottom and to prepare a firm base before adding the luscious cream topping.
Step 7: Whip the Cream
As your cake cools, take a mixing bowl and whip the cream (or coconut cream for a vegan option) until soft peaks form. This should take about 3-5 minutes with a hand mixer. The whipped cream will create a fluffy, delightful topping that beautifully contrasts with the rich texture of your Easter Egg Nest Cake.
Step 8: Decorate and Serve
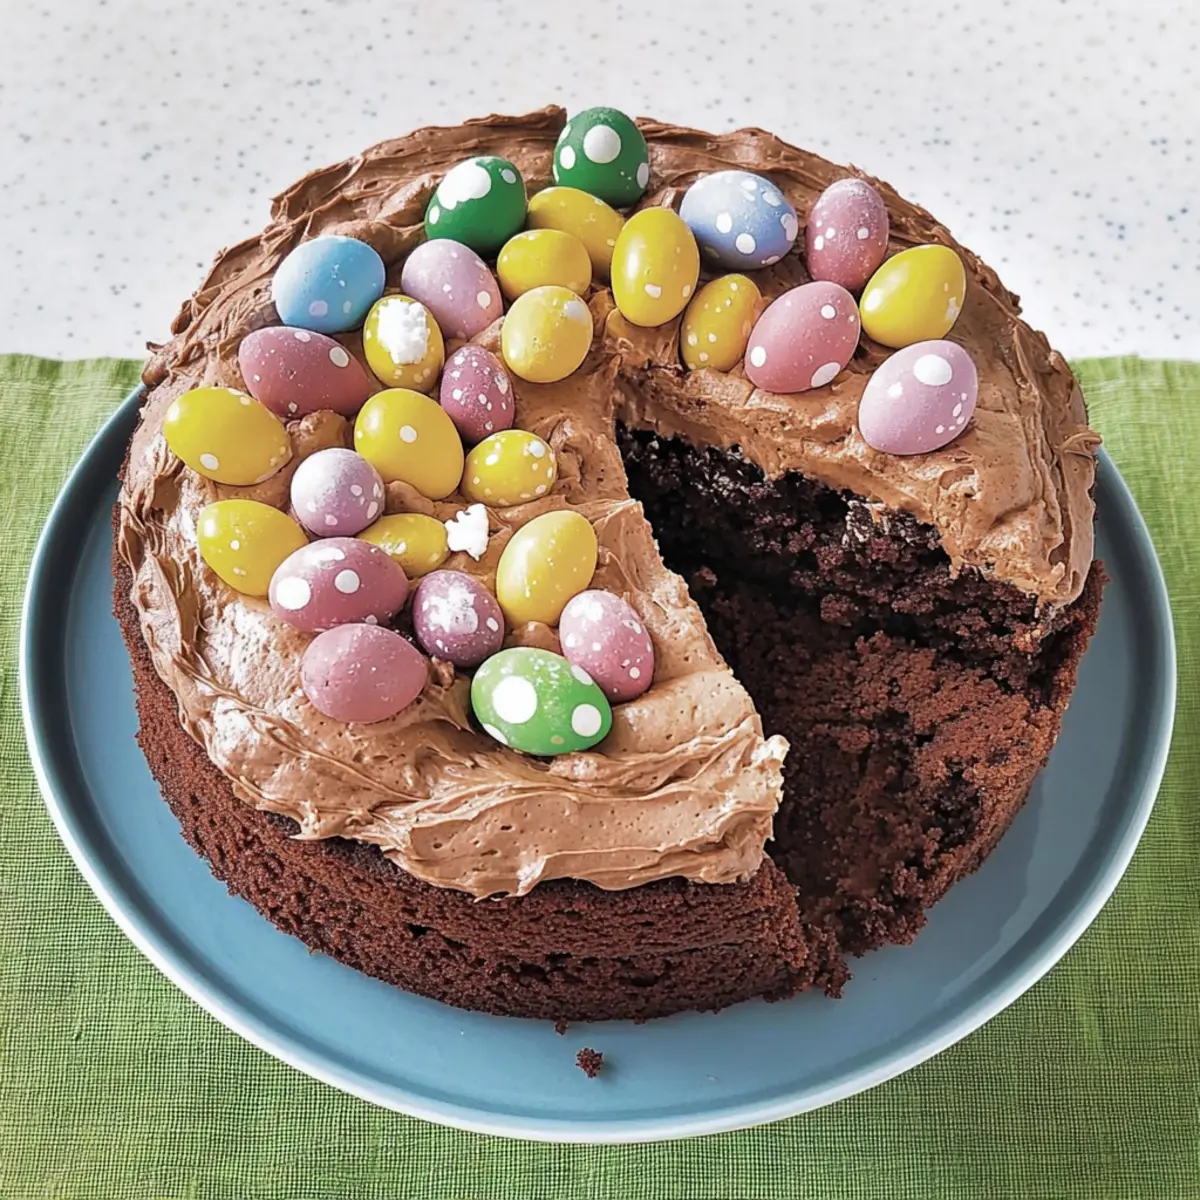
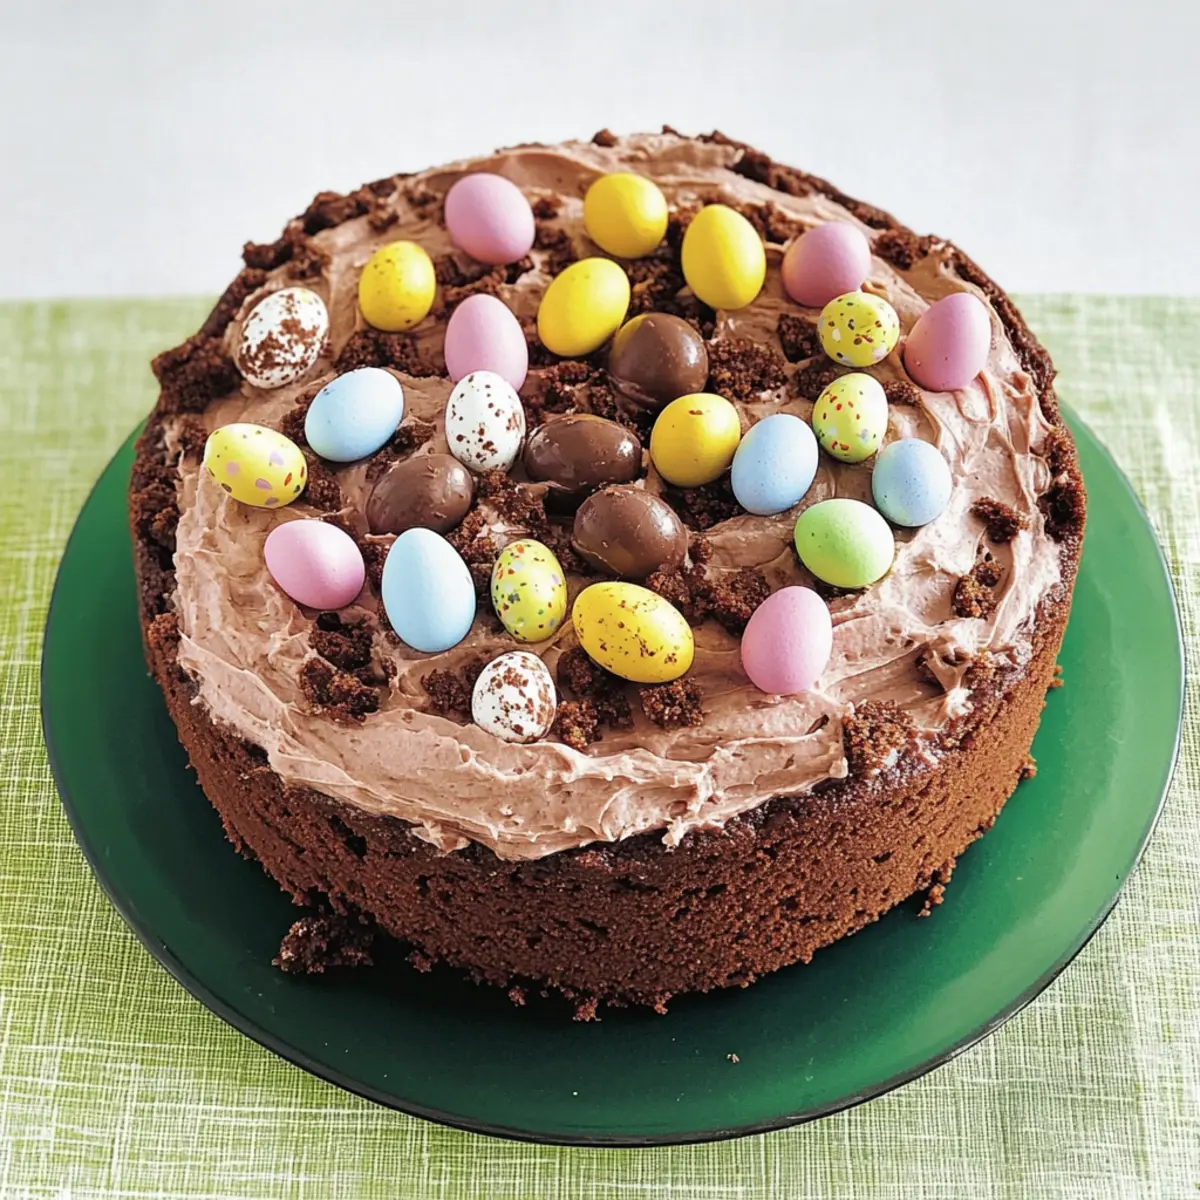
Once the cake has fully cooled, spread the whipped cream generously over the top. Arrange your mini chocolate eggs attractively on the cream, transforming your delightful creation into a festive centerpiece. Serve immediately or chill for a brief moment to set the cream. Now your Easter Egg Nest Cake is ready to be enjoyed at any gathering!
How to Store and Freeze Easter Egg Nest Cake
Room Temperature: Store the unfilled Easter Egg Nest Cake in an airtight container for up to 3 days, ensuring it remains moist and fresh.
Fridge: If you’ve added the cream topping, consume within a day for optimal texture, and cover it with plastic wrap to prevent drying out.
Freezer: You can freeze an unfilled cake for up to 1 month. Wrap it tightly in plastic wrap and aluminum foil to prevent freezer burn, making future gatherings easier.
Reheating: If you’d like to enjoy the cake warm, gently reheat it in the oven at low heat until just warmed through, but avoid prolonged exposure to maintain its fudgy goodness.
Expert Tips for Easter Egg Nest Cake
-
Quality Ingredients Matter: Use high-grade dark chocolate and butter for the best flavor and texture; this makes all the difference in your Easter Egg Nest Cake.
-
Don’t Overmix: Once you combine wet and dry ingredients, mix just until blended. Overmixing can lead to a denser cake, which we want to avoid for that fudgy, moist result.
-
Check the Bake: Always perform the toothpick test towards the end of baking to ensure the cake is perfectly moist and fudgy. Keep an eye on the time to prevent overbaking.
-
Chill Before Topping: For better cream layering and presentation, consider chilling the cake before adding the whipped cream; this will help it hold shape beautifully.
-
Get Creative with Toppings: Feel free to swap mini chocolate eggs with seasonal fruits like fresh raspberries, or create a colorful nest with shredded coconut for added flair!
Make Ahead Options
These Easter Egg Nest Cakes are perfect for busy home cooks looking to save time without sacrificing flavor! You can prepare the cake up to 3 days in advance by baking it and allowing it to cool completely. Once cool, wrap it tightly in plastic wrap and store it in the refrigerator to maintain its moist texture. The whipped cream topping, however, is best prepared right before serving to ensure its light and fluffy consistency. If you’d like, you can whip the cream and chill it for up to 24 hours. When you’re ready to serve, simply spread the cream on top of the cake and garnish with those festive mini chocolate eggs for a show-stopping dessert that tastes just as delicious!
Easter Egg Nest Cake Variations
Feel free to let your creativity soar with these delightful twists on the classic Easter Egg Nest Cake!
-
Gluten-Free Substitution: Use a different blend of gluten-free flours, like almond or coconut flour, to experiment with texture. Each blend can provide a unique flavor profile and nutritional benefits.
-
Dairy-Free Delight: Swap out butter for vegan butter and cream for coconut cream to make the entire cake dairy-free. This way, everyone can enjoy it without compromise!
-
Fruity Twist: Replace mini chocolate eggs with fresh raspberries or strawberries for a vibrant touch. The fruit adds a burst of freshness and pairs beautifully with the rich chocolate.
-
Citrus Zing: Mix in a tablespoon of orange or lemon zest into the batter for a refreshing citrus flavor. This twist brightens up the cake and adds a lovely aromatic element.
-
Extra Chocolate: For the ultimate indulgence, add chocolate chips to the batter. As the cake bakes, they melt and create gooey pockets of deliciousness.
-
Spice It Up: Incorporate a teaspoon of cinnamon or espresso powder into the mix for added warmth or depth. It will elevate the chocolate flavor with a delicious twist.
-
Nutty Crunch: Fold in chopped walnuts or pecans to the batter for a delightful crunch. Nuts not only enhance texture but also add healthy fats for a satisfying bite.
-
Elevate with Extracts: Experiment with flavored extracts, such as almond or mint, to create a unique flavor profile. Just a few drops can transform this cake into something truly special.
As you customize your cake, don’t forget to pair it with a scoop of ice cream! If you’re looking for more delightful desserts, the Chocolate Lava Cakes will definitely satisfy any sweet tooth!
What to Serve with Easter Egg Nest Cake
Indulge your senses by creating a full meal experience around this delightful dessert, making every gathering even more special.
-
Fresh Berries: Juicy strawberries, raspberries, or blueberries add a burst of flavor that complements the rich chocolate perfectly. Their natural acidity cuts through the sweetness, providing a balanced bite.
-
Vanilla Ice Cream: A scoop of creamy vanilla ice cream melts beautifully into the warmth of the cake, offering a luscious contrast in temperature and texture. It’s a classic pairing that never disappoints.
-
Chocolate Ganache Drizzle: A warm drizzle of chocolate ganache enhances the chocolate flavor, creating an extra layer of indulgence that’s ideal for chocolate lovers. This decadent addition can be made effortlessly with just two ingredients!
-
Espresso or Coffee: A rich cup of coffee or espresso brings out the chocolate’s deep flavors, making each bite even more delicious. This pairing offers a comforting warmth, perfect for casual gatherings or festive celebrations.
-
Whipped Coconut Cream: For a light, dairy-free option, whipped coconut cream provides a creamy topping that’s equally indulgent. Its subtle sweetness is a wonderful match for the fudgy cake,keeping the dessert light and airy.
-
Chocolate Mint Tea: This refreshing herbal tea infusion balances the richness of the cake while adding a unique flavor twist. Served warm or iced, it’s an excellent choice for a delightful after-dinner drink.
-
Cheesecake Bites: Mini cheesecake bites can add a fun twist to your dessert spread, complementing the rich chocolate with their creamy tanginess. Their bite-sized nature makes them easy to enjoy alongside the cake.
-
Orange Zest Garnish: A sprinkle of fresh orange zest brightens the dessert with a citrusy aroma that enhances the chocolate experience, providing a refreshing contrast that everyone will love.

Easter Egg Nest Cake Recipe FAQs
How do I select the best dark chocolate for my cake?
Absolutely! Choose high-quality dark chocolate with a cocoa content of at least 70% for the richest flavor. Brands like Ghirardelli or Valrhona are excellent choices. This ensures your Easter Egg Nest Cake has the decadent, fudgy texture chocolate lovers adore.
How should I store my Easter Egg Nest Cake?
For an unfilled cake, store it in an airtight container at room temperature for up to 3 days. If the cake is topped with cream, cover it with plastic wrap and consume within a day for the best taste and texture. Keeping it chilled will help preserve its fluffy topping.
Can I freeze the Easter Egg Nest Cake?
Yes! You can freeze an unfilled cake for up to 1 month. Wrap it tightly in plastic wrap and then in aluminum foil to prevent freezer burn. When you’re ready to enjoy it, simply let it thaw in the refrigerator for a few hours or overnight before serving.
What if my cake turns out too dense?
If you encounter a dense cake, it could be due to overmixing the batter. Make sure to stir just until the ingredients are combined. Additionally, checking the cake towards the end of baking with the toothpick test helps ensure it remains fudgy and moist, not dry.
Are there any dietary considerations for this cake?
Very! This Easter Egg Nest Cake is easily adaptable for dietary needs. To make it gluten-free, ensure all your ingredients, particularly the baking powder and chocolate, are labeled gluten-free. For dairy-free options, substitute butter with vegan butter and cream with coconut cream, making it accessible for everyone!
Can I customize the toppings for my cake?
The more, the merrier! Feel free to get creative with the toppings. Instead of mini chocolate eggs, you can use fresh fruit like raspberries for a fruity twist or even a sprinkle of shredded coconut to mimic a nest. Let your creativity shine!
Decadent Easter Egg Nest Cake: A Simple Treat to Love
Ingredients
Equipment
Method
- Preheat your oven to 180°C (350°F) and grease a round cake tin with butter or non-stick spray.
- Melt dark chocolate and butter together in a heatproof bowl over simmering water until smooth.
- In a separate bowl, whisk together gluten-free flour blend, baking powder, and sugar.
- Pour the melted chocolate mixture into the dry ingredients, add eggs, and mix until a thick batter forms.
- Pour the batter into the prepared tin and bake for 25-30 minutes, ensuring a toothpick comes out clean.
- Allow the cake to cool in the tin for 10-15 minutes, then turn out onto a wire rack to cool completely.
- Whip cream until soft peaks form and set aside.
- Once cooled, spread whipped cream over the cake and decorate with mini chocolate eggs.