

As I stood over my mixing bowl, coffee granules danced through the air, filling my kitchen with a comforting aroma that felt like a warm hug. That’s when I realized these Coffee Meringues would soon become a cherished staple in my dessert repertoire. Not only are they a delightful gluten-free treat that comes together with minimal fuss, but they also serve as the perfect companion for your afternoon pick-me-up. Each light, crisp morsel delivers a satisfyingly robust coffee flavor, making these sweets not just easy to whip up but also a charming way to elevate your post-meal indulgence. Curious about how to create these airy delights? Let’s dive into the simple steps to bake your own Coffee Meringues!

Why Are Coffee Meringues a Must-Try?
Simplicity, these meringues are incredibly easy to make with just a few pantry staples, making them perfect for novice bakers. Rich Flavor, each bite bursts with the delightful essence of coffee, satisfying your sweet tooth and caffeine cravings simultaneously. Gluten-Free, enjoy a light dessert that everyone can partake in without worry. Perfect Pairing, serve them alongside your favorite coffee or tea for a delightful afternoon treat. Whether for a special occasion or just because, these Coffee Meringues are sure to impress your family and friends! For more coffee-infused fun, check out our tips on brewing the perfect cup to enjoy alongside.
Coffee Meringues Ingredients
• For the Meringue
- Egg Whites – Use large, room-temperature egg whites to achieve the best volume when whipping.
- Granulated Sugar – Essential for stability and sweetness; it helps create those stiff peaks that meringues are known for.
- Instant Coffee Granules – Adds a robust coffee flavor; using espresso powder can intensify this delightful taste.
- Pure Vanilla Extract – Enhances the meringue’s flavor with aromatic richness.
- Salt – Just a pinch balances the sweetness and enhances the overall flavor profile.
Step‑by‑Step Instructions for Coffee Meringues
Step 1: Preheat Oven
Begin by preheating your oven to 200°F (95°C). While it warms up, prepare two baking sheets by lining them with parchment paper, ensuring they are ready to hold your sweet creations. This low temperature is essential for drying out the meringues, resulting in that delightful crisp texture that defines coffee meringues.
Step 2: Whip Egg Whites
In a large mixing bowl, combine 4 large egg whites with a pinch of salt. Using an electric mixer, beat on medium speed until soft peaks begin to form, which should take about 2-3 minutes. Look for the mixture to turn white and frothy, signaling it’s time to elevate the speed to high and continue whipping until the peaks hold their shape.
Step 3: Add Sugar Gradually
With the mixer still on high speed, gradually add 1 cup of granulated sugar, about 1 tablespoon at a time. This process should take around 5 minutes, allowing the sugar to dissolve fully and helping the egg whites to become glossy and thick. You’ll know it’s ready when stiff peaks form and the mixture feels smooth and shiny.
Step 4: Add Flavorings
Next, gently fold in 1 tablespoon of instant coffee granules and 1 teaspoon of pure vanilla extract. Ensure the coffee granules fully dissolve within the meringue mixture for even flavor distribution. The mixture should remain thick and glossy as you spoon and fold, capturing that delicious coffee essence throughout the coffee meringues.
Step 5: Pipe Meringues
Transfer the fluffy meringue mixture into a piping bag fitted with a star tip for beautiful swirls. Pipe small circles or swirls onto the prepared parchment-lined baking sheets, leaving enough space between each for proper air circulation. The meringues don’t need to be perfect; the natural shapes will add to their charm when baked.
Step 6: Bake
Carefully place the baking sheets into the preheated oven and bake for approximately 3 hours. Keep an eye on them as they slowly dry out. The meringues should be completely dry and have a crisp texture when finished. A light golden hue will indicate they are nicely baked, maintaining that delightful coffee flavor.
Step 7: Cool
Once baked, turn off the oven but leave the meringues inside with the door closed for 1 hour. This resting period prevents cracks and allows them to cool down slowly, ensuring a perfectly light and crisp finish. After the hour, remove the coffee meringues from the oven, allowing them to cool completely on the baking sheets before serving.

What to Serve with Coffee Meringues
Savor the delightful crunch of these airy treats alongside complementary flavors for a truly memorable experience.
-
Fresh Berries: Juicy strawberries or raspberries add a burst of color and tartness that balances the sweetness of meringues.
-
Rich Chocolate Ganache: Drizzle a velvety chocolate ganache over each meringue for a luscious contrast, enhancing the coffee flavor.
-
Crème Fraîche: A dollop of tangy crème fraîche creates a rich, creamy texture that complements the crisp meringues beautifully.
-
Iced Coffee: Pair your meringues with a chilled iced coffee for a refreshing treat that echoes their coffee essence.
-
Vanilla Ice Cream: The creaminess of vanilla ice cream provides a delightful cooling effect, perfect for enjoying alongside these crisp delights.
-
Almond Biscotti: These crunchy, nutty cookies not only add a wonderful texture but also pair perfectly for a coffee moment.
-
Herbal Tea: A soothing herbal tea can brighten the palate, contrasting nicely with the robust flavor of coffee meringues and making for a calming afternoon snack.
Make Ahead Options
These Coffee Meringues are a fantastic treat to make ahead of time, perfect for busy home cooks looking to save time during the week. You can whip the meringue and pipe the shapes onto the baking sheets up to 24 hours before baking. Simply cover the prepared baking sheets with plastic wrap and refrigerate them overnight to maintain their quality. When you’re ready to enjoy, bake them as directed, and they will emerge just as light and crisp as if made fresh that day. This prep-ahead strategy allows you to have a delightful dessert ready with minimal effort right when you need it, making every coffee break a little more special!
Expert Tips for Coffee Meringues
- Egg Whites Matter: Ensure that no yolk or grease contaminates your egg whites; even a small amount can prevent them from whipping to the desired volume.
- Perfect Timing: Monitor the cookie baking time closely; underbaked meringues can be chewy instead of light and crisp. Adjust if necessary.
- Humidity Awareness: Meringues are sensitive to moisture; avoid making them on humid days, as this can lead to sticky, less-than-perfect results.
- Flavor Boost: Use high-quality espresso powder for a deeper coffee flavor; it can elevate the taste and make your coffee meringues truly delightful.
- Storage is Key: Store cooked meringues in an airtight container to maintain their crispiness; humidity can quickly ruin their texture.
How to Store and Freeze Coffee Meringues
Airtight Container: Store the coffee meringues in an airtight container at room temperature for up to 3 weeks to maintain their crispness.
Humidity Avoidance: Keep away from humid areas; moisture can cause your delightful meringues to become sticky and lose their desired texture.
Freezer Option: If you need to store them longer, freeze the meringues in a single layer on a baking sheet, then transfer to a freezer-safe bag for up to 2 months.
Reheating Tip: If meringues lose their crispness after storage, simply place them in a low oven (200°F/95°C) for a few minutes to revive their texture.
Coffee Meringues: Customizing Your Treats
Embrace the joy of personalizing your coffee meringues with these fun ideas that invite creativity in the kitchen!
-
Espresso Powder: Swap instant coffee with espresso powder for a bolder coffee kick. Your meringues will boast a richer flavor that coffee lovers will adore.
-
Nut Flavors: Incorporate almond or hazelnut extract for a nutty twist. This adds a warm, aromatic layer to your meringues, making each bite a delightful surprise.
-
Cocoa Delight: Mix in cocoa powder for mocha meringues. The chocolatey hint pairs beautifully with coffee, creating a delicious blend perfect for dessert lovers.
-
Sugar Alternatives: Use coconut sugar or a sugar substitute for a healthier option. While it may slightly alter the texture, you’ll still achieve delightful, airy meringues.
-
Choco Drizzle: For a decorative touch, drizzle melted chocolate over cooled meringues. This not only enhances presentation but also adds a sweet, indulgent flavor layer.
-
Spicy Kick: Add a pinch of cinnamon or cayenne pepper to the meringue mix for a warm spice note. It creates a unique flavor profile that will intrigue your palate.
-
Fruity Fusion: Fold in crushed freeze-dried fruits like raspberry or strawberry for a fruity note. This brings a vibrant color and a deliciously tart balance to your coffee meringues.
-
Dairy-Free Cream: Serve these meringues with a dollop of coconut whipped cream as a delicious, dairy-free accompaniment. It’s a lovely way to elevate your treat!
These variations not only offer a chance to personalize your meringues but also create unforgettable desserts that cater to every flavor preference. Consider pairing your creations with a perfect brew by exploring our tips on brewing the perfect cup for an all-encompassing coffee experience.

Coffee Meringues Recipe FAQs
How do I choose the right egg whites for coffee meringues?
Absolutely! For the best volume and stability, use large egg whites that are at room temperature. This allows them to whip up nicely into those beautiful stiff peaks we want for our coffee meringues!
What’s the best way to store coffee meringues?
To keep your meringues crispy, store them in an airtight container at room temperature for up to 3 weeks. Avoid placing them in humid areas, as moisture can turn them sticky.
Can I freeze coffee meringues? How?
Very! To freeze your coffee meringues, place them in a single layer on a baking sheet, and freeze until solid. Then, transfer them to a freezer-safe bag or container. They can be stored for up to 2 months. To revive their crispiness after thawing, pop them in a low oven (200°F/95°C) for a few minutes.
What should I do if my meringues are sticky?
If your meringues turn out sticky, it could be due to humid conditions. First, ensure you let them bake long enough to dry out completely. If they still feel sticky after baking, place them in a dry oven at a low temperature (around 200°F/95°C) for a short time to help them crisp up.
Are coffee meringues suitable for gluten-free diets?
Yes, indeed! Coffee meringues are naturally gluten-free, making them a delightful treat for anyone avoiding gluten. Just be sure to check that the ingredients, especially the sugar, are certified gluten-free if you have severe allergies.
How can I enhance the flavor of my coffee meringues?
Oh, the more the merrier! You can substitute instant coffee granules with high-quality espresso powder for a bolder flavor. Additionally, consider adding a teaspoon of almond or hazelnut extract to the meringue for a delicious twist!
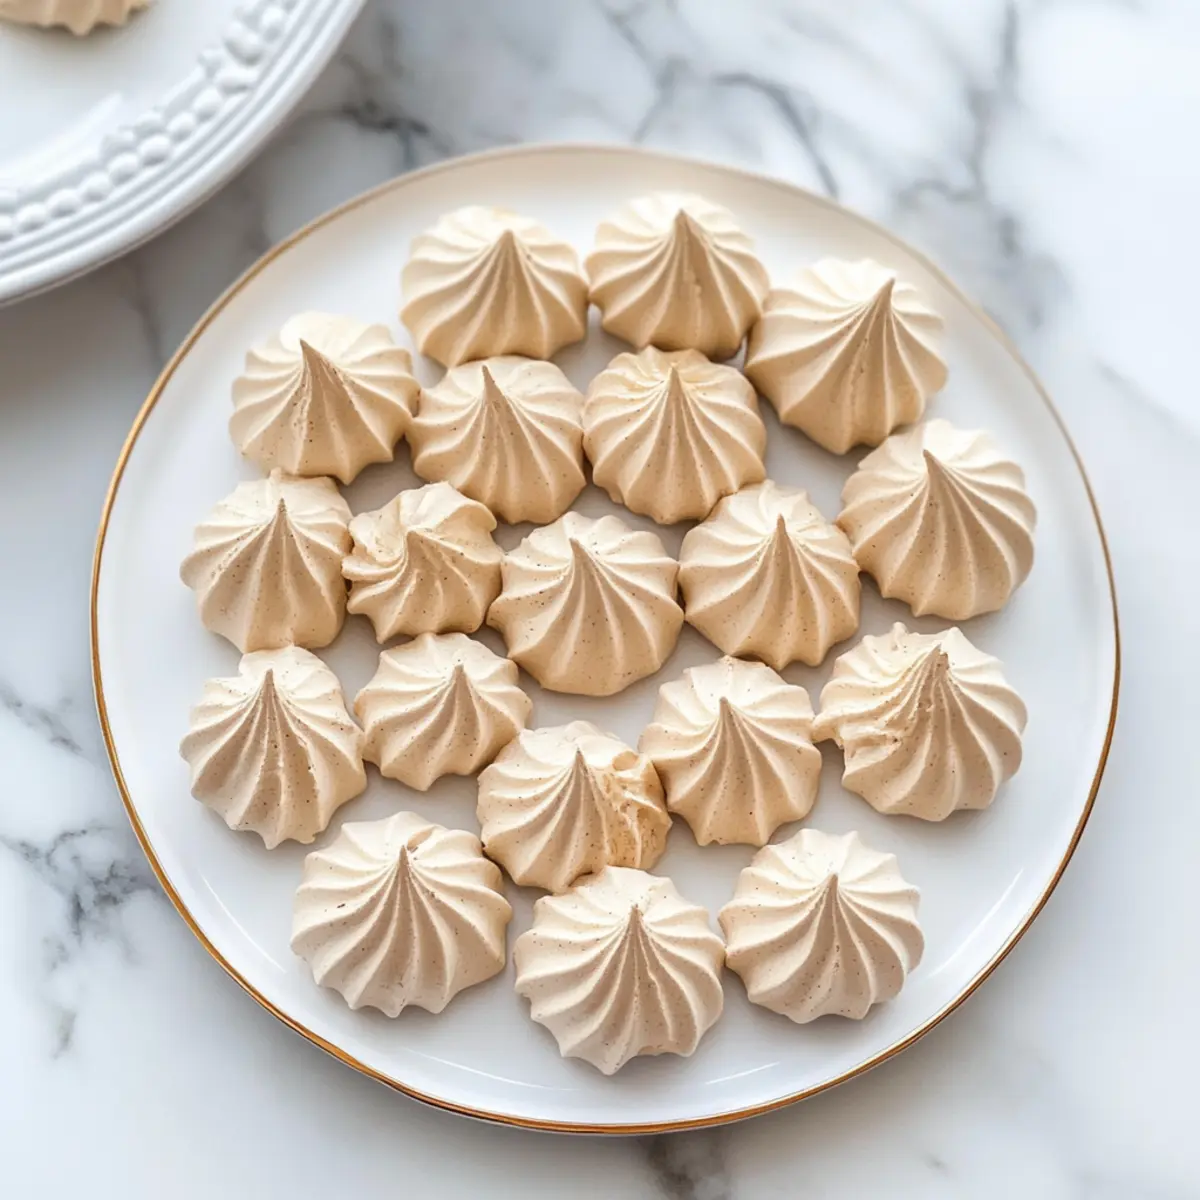
Coffee Meringues: Crisp Delights for Coffee Lovers Everywhere
Ingredients
Equipment
Method
- Preheat your oven to 200°F (95°C) and prepare two baking sheets lined with parchment paper.
- In a large mixing bowl, combine 4 egg whites and a pinch of salt. Beat on medium speed until soft peaks form, about 2-3 minutes.
- Gradually add 1 cup of granulated sugar, 1 tablespoon at a time, while beating on high speed until stiff peaks form, approximately 5 minutes.
- Gently fold in 1 tablespoon of instant coffee granules and 1 teaspoon of pure vanilla extract.
- Transfer the meringue mixture into a piping bag fitted with a star tip and pipe onto the prepared sheets.
- Bake in the preheated oven for about 3 hours, watching for a light golden hue and complete dryness.
- Once baked, turn off the oven and let the meringues cool inside for 1 hour with the door closed.
- After cooling, remove from the oven and allow to cool completely on the baking sheets before serving.