

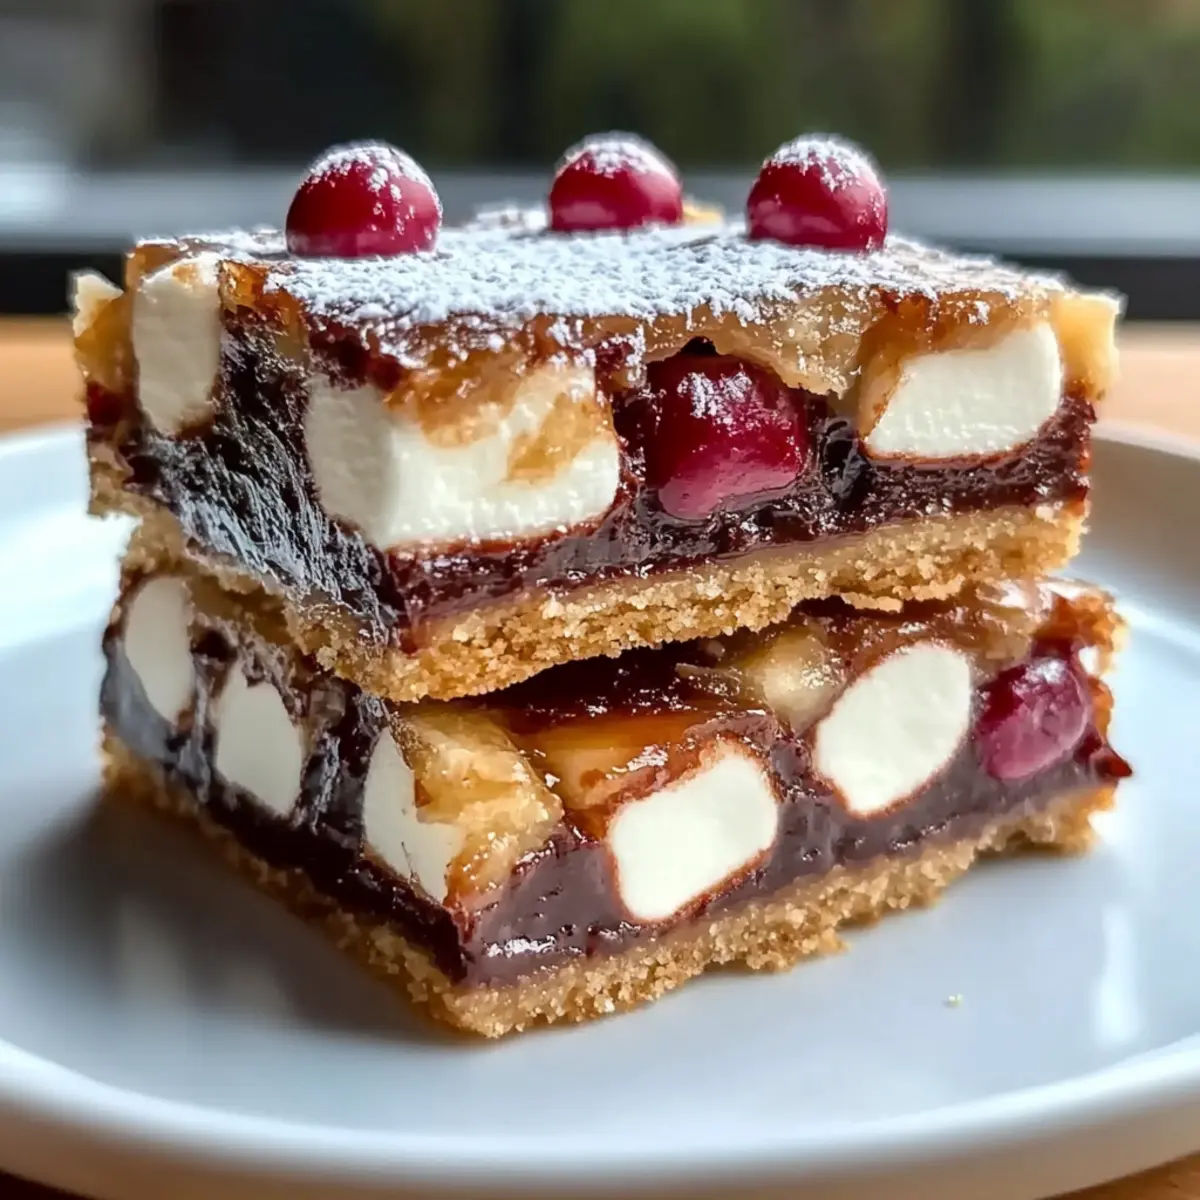
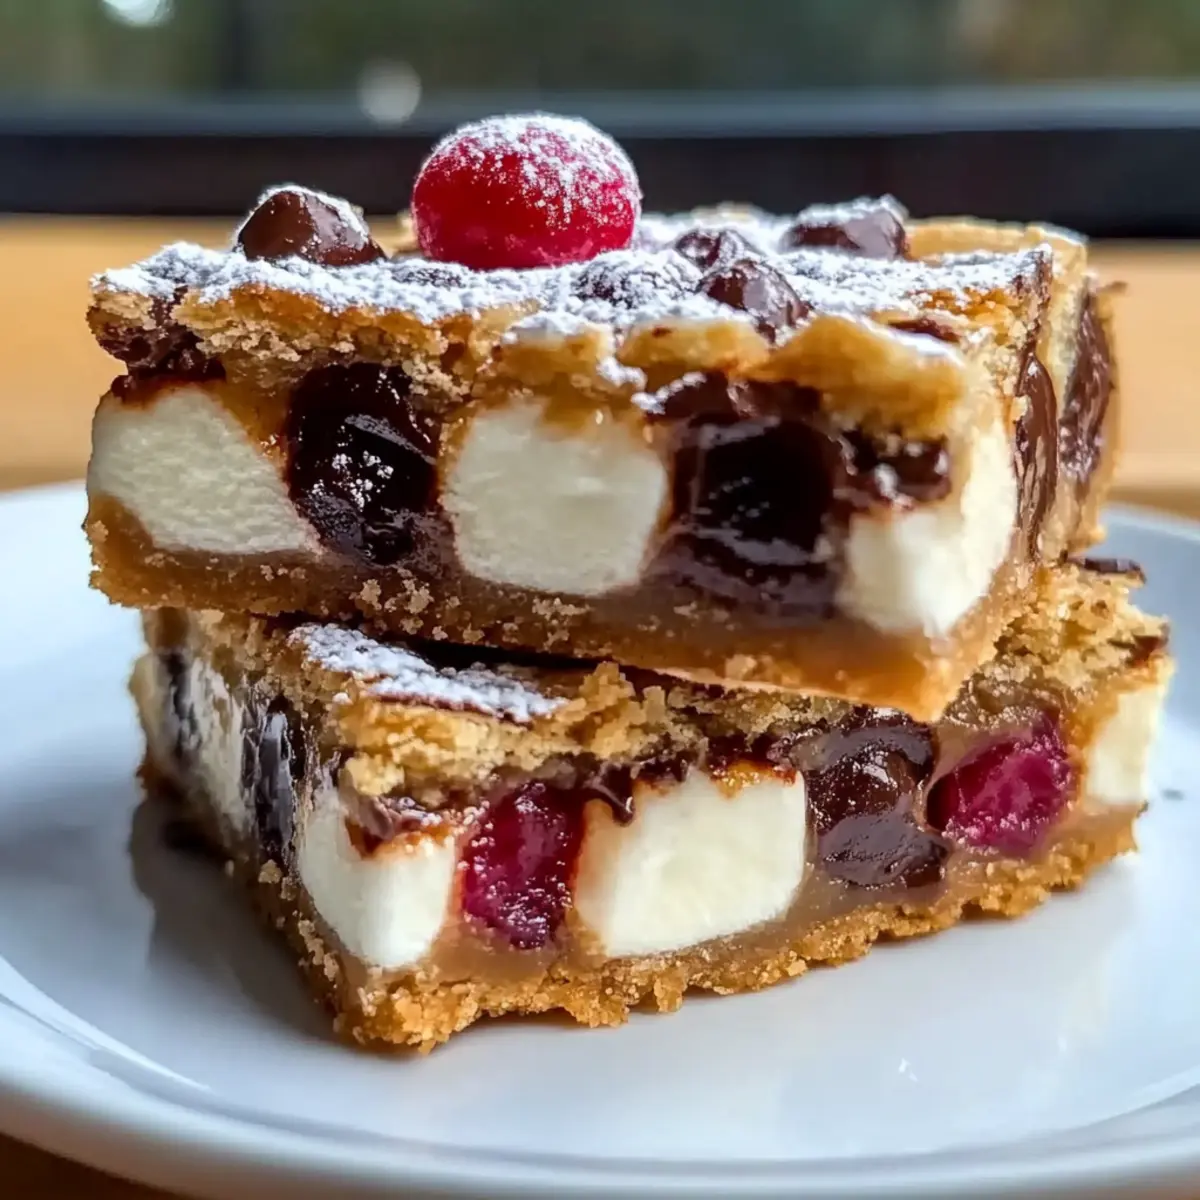
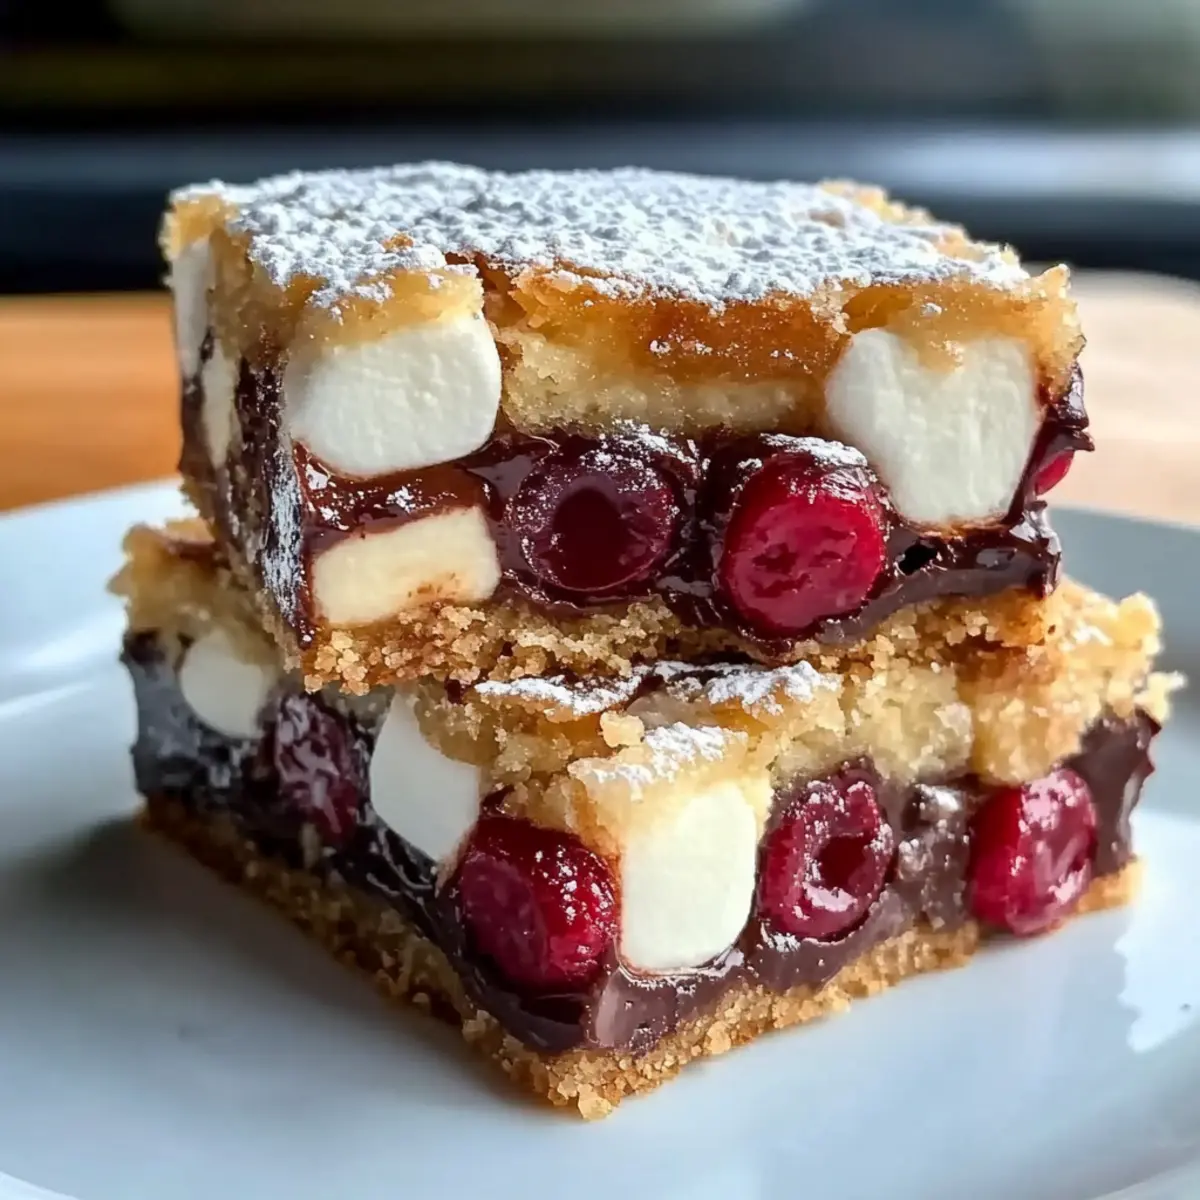
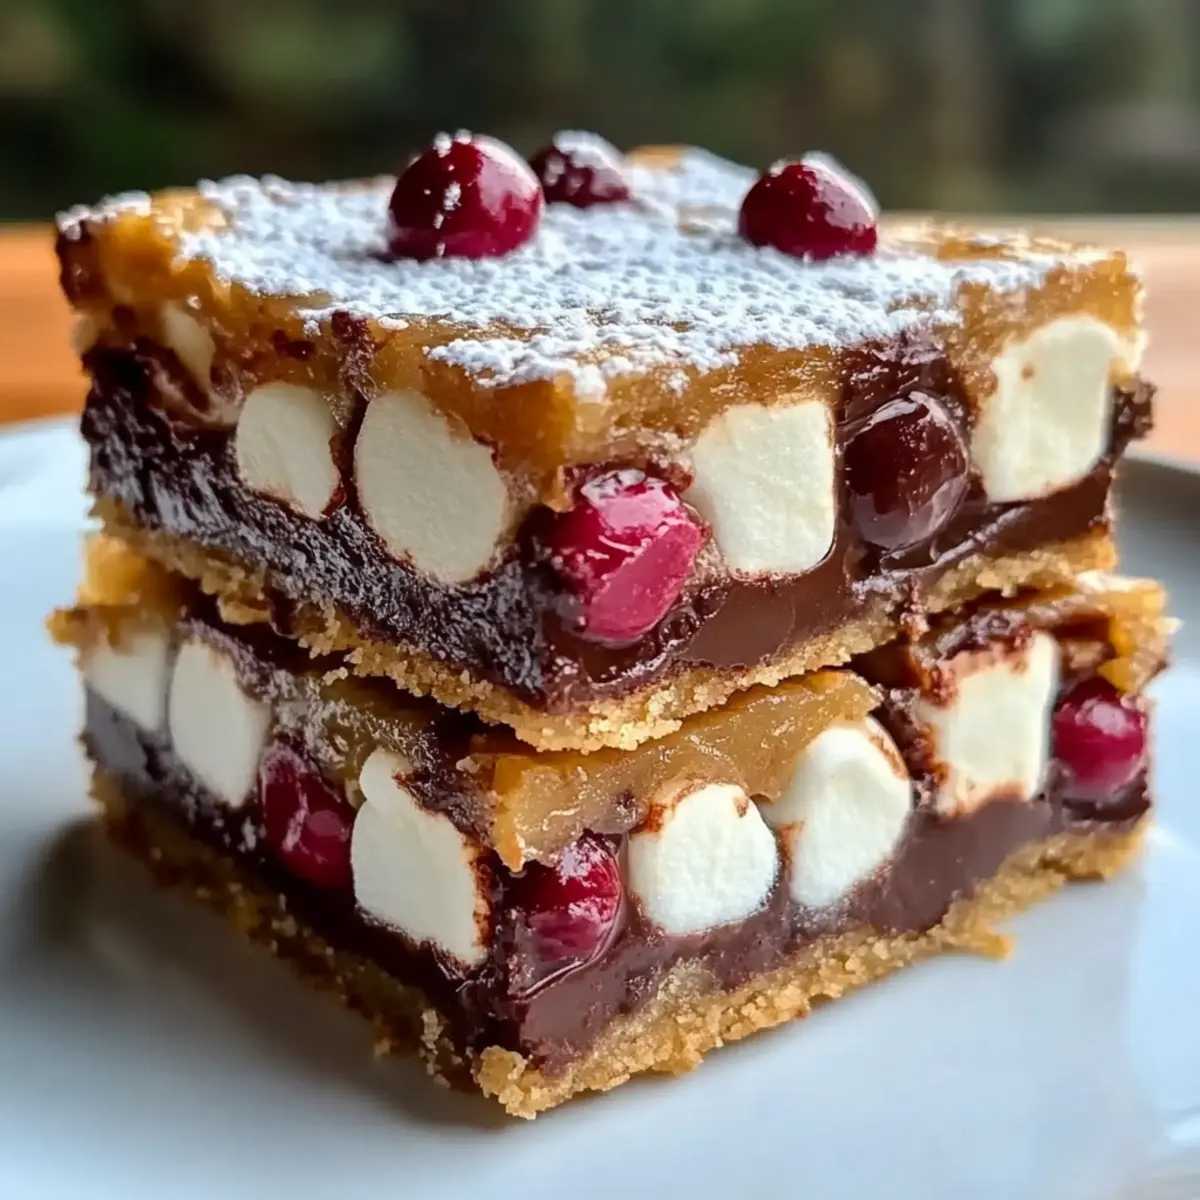
As the sweet scent of chocolate wafts through my kitchen, I can’t help but feel the holiday spirit bubbling up inside me. These Quick and Easy Christmas Bars with Chocolate and Marshmallows are my go-to treat during the festive season, allowing me to whip up a delicious dessert in just 45 minutes! The best part? They’re completely customizable to suit any dietary preference—whether you need nut-free, gluten-free, or even vegan options, I’ve got you covered. Perfect for last-minute gatherings or an indulgent midnight snack, these bars are sure to impress friends and family alike. Are you ready to bring a little festive magic into your kitchen? Grab your ingredients and let’s get started!
Why are these Christmas Bars a must-try?
Unmatched Customizability: These bars are incredibly adaptable, offering nut-free, gluten-free, and vegan variations to please every guest.
Quick and Easy: With just 45 minutes from start to finish, you can enjoy homemade goodness without the hassle.
Rich Chocolate Flavor: The combination of cocoa powder and chocolate chips creates a decadent treat that’s hard to resist.
Perfect for Any Occasion: Whether it’s a holiday party or a cozy family night, these bars are always a crowd-pleaser. For more inspiring desserts, be sure to check out these delicious Raspberry Crumble Bars.
Fun Texture: With chewy marshmallows and a fudgy base, each bite delivers a delightful mix of textures that keeps everyone coming back for more!
Christmas Bars Ingredients
• For the Base
- Graham Cracker Crumbs – Provides a sweet, crunchy base; you can crush whole graham crackers for fresh crumbs.
- Unsweetened Cocoa Powder – Adds deep chocolate flavor; opt for high-quality cocoa for best results.
- Powdered Sugar – Sweetens and creates a smooth texture; essential for that melt-in-your-mouth experience.
- Unsalted Butter (melted) – Binds ingredients and adds richness; substitute with melted coconut oil for a dairy-free option.
• For the Chewy Goodness
- Sweetened Condensed Milk – Adds creaminess and moisture; key for achieving that chewy texture in your Christmas bars.
- Mini Marshmallows – Offers chewiness and a fun texture; mini ones distribute better in the mixture.
• For the Chocolate Lovin’
- Chocolate Chips – Enhance the chocolate flavor; use dark, milk, or white chocolate chips as preferred.
- Chopped Nuts (optional) – Adds crunch; omit for nut-free versions.
Feel the joy of baking as you create these delightful Christmas Bars that everyone will love!
Step‑by‑Step Instructions for Christmas Bars
Step 1: Preheat the Oven
Begin by preheating your oven to 350°F (175°C). This step is crucial for ensuring your Christmas Bars bake evenly, creating that perfectly gooey texture. As the oven warms up, prepare your 9×13 inch baking pan by greasing it lightly or lining it with parchment paper for easy removal.
Step 2: Mix the Dry Ingredients
In a large mixing bowl, combine the graham cracker crumbs, unsweetened cocoa powder, and powdered sugar. Use a whisk to blend these dry ingredients until they’re thoroughly mixed, breaking up any lumps for a smooth consistency. This base will provide the sweet and crunchy foundation for your delicious Christmas Bars.
Step 3: Incorporate the Wet Ingredients
Melt the unsalted butter and stir it into the dry mixture, followed by the sweetened condensed milk. Use a spatula to mix until a thick, cohesive batter forms. This blend adds richness and binds everything together, ensuring your Christmas Bars turn out chewy and indulgent.
Step 4: Fold in the Mix-Ins
Gently fold in the mini marshmallows and chocolate chips, along with any optional chopped nuts if desired. Be careful not to overmix, as you want to keep the airiness of the marshmallows intact for that wonderful texture. The mixture should be colorful and inviting, ready for the baking pan.
Step 5: Spread and Bake
Transfer the mixture into your prepared baking pan, smoothing the top with your spatula for an even layer. Place the pan in the preheated oven and bake for 25-30 minutes. Look for the edges to set, while the center still maintains a slight wobble—this ensures that your Christmas Bars are perfectly chewy.
Step 6: Cool and Cut
Once baked, remove the pan from the oven and allow the bars to cool in the pan completely. This is important to prevent them from crumbling when cut. Once cool, slice into squares and serve your delicious Christmas Bars, ready to be enjoyed by family and friends!
Make Ahead Options
These Christmas Bars are perfect for meal prep during the busy holiday season! You can prepare the dry ingredients (graham cracker crumbs, cocoa powder, and powdered sugar) up to 3 days in advance; simply store them in an airtight container at room temperature. On the day you want to bake, mix in the wet ingredients and fold in the mini marshmallows and chocolate chips just before spreading the mixture in the baking pan. To maintain quality, ensure the bars cool completely before slicing, and if you have leftovers, store them at room temperature for up to a week or refrigerate them for up to 3 days. This way, you can enjoy delicious homemade Christmas Bars with minimal fuss, saving valuable time for holiday festivities!
How to Store and Freeze Christmas Bars
Room Temperature: Store your Christmas Bars in an airtight container at room temperature for up to 1 week to maintain their delicious chewy texture.
Fridge: If you prefer a colder treat, refrigerate the bars in an airtight container for up to 2 weeks; just allow them to come to room temperature before serving.
Freezer: To enjoy these festive delights later, freeze the Christmas Bars wrapped tightly in plastic wrap and aluminum foil for up to 3 months.
Reheating: If desired, reheat frozen bars in a microwave-safe dish for about 10-15 seconds to restore their chewy goodness before indulging.
Expert Tips for the Best Christmas Bars
Perfectly Melted Butter: Ensure your butter is fully melted for a smooth mixture that binds well.
Parchment Paper Magic: Line your baking pan with parchment paper for easy removal and perfect shaping of the Christmas Bars.
Cooling Time Counts: Allow the bars to cool completely in the pan to avoid crumbling when cutting.
Mix-in Variations: Feel free to experiment with favorite add-ins like coconut or dried fruits for a personal touch.
Storage Savvy: Store leftovers in an airtight container at room temperature for up to a week, or freeze them for up to three months.
Christmas Bars: Inspiring Variations
Feel free to put your own twist on these delightful Christmas Bars! Let your creativity shine through tasty substitutions and additions.
-
Nut-Free Delight: Omit chopped nuts and replace them with more chocolate chips for a pure chocolate experience. It’s a sweet treat that’s perfect for those with nut allergies!
-
Gluten-Free Option: Swap regular graham cracker crumbs with gluten-free alternatives or crushed almond flour for a gluten-free version the whole family can enjoy.
-
Vegan Adaptation: Replace the melted butter with coconut oil and opt for a vegan sweetened condensed milk for a plant-based treat that still satisfies.
-
Mint Chocolate Twist: Add a few drops of peppermint extract for a whimsical and festive flavor, turning your bars into a refreshing holiday dessert.
-
Fruit and Nut Medley: Stir in dried cranberries or cherries along with some chopped nuts for an added burst of flavor and a festive pop of color.
-
Spicy Kick: Infuse your bars with a pinch of cinnamon or nutmeg to warm up those chilly holiday nights. The subtle spice complements the sweet chocolate beautifully.
-
Chunky Chocolate Bars: Instead of mini chocolate chips, use large chunks of chocolate for gooey, melty bites throughout your bars—perfect for the true chocoholics!
-
Toasted Coconut Topping: Sprinkle toasted coconut flakes on top after baking for a deliciously chewy texture and a touch of tropical flair to your Christmas Bars.
These variations allow you to make these Christmas Bars your own while still capturing the essence of delicious holiday goodness. For more inspiration, check out these scrumptious Raspberry Crumble Bars for another tasty option!
What to Serve with Christmas Bars
Indulge in the holiday spirit by creating a delightful meal that perfectly complements your festive treats.
- Hot Cocoa: A velvety cup of hot cocoa adds warmth and richness, making every bite of the Christmas Bars even more indulgent.
- Spiced Apple Cider: This aromatic, spiced beverage complements the chocolate nicely and serves as a lovely festive drink.
- Vanilla Ice Cream: A scoop of creamy vanilla ice cream paired with the rich chocolate bars creates a blissful contrast of temperatures and flavors.
- Peppermint Tea: Serve a refreshing cup of peppermint tea alongside the bars for a light, herbal touch that balances the sweetness.
- Fruit Salad: A vibrant mix of fresh fruits adds a refreshing crunch and a pop of color, enhancing your overall festive spread.
- Powdered Sugar Dusting: A simple sprinkle of powdered sugar gives an elegant touch, making these Christmas Bars look as delightful as they taste.
- Chocolate Drizzle: More chocolate? Why not! A drizzle of melted chocolate can elevate the presentation and deepen that decadent chocolate flavor.
- Nutty Granola: Serve a small bowl of nutty granola on the side to provide a satisfying crunch with every bite.
- Holiday Cookies: Plate a selection of assorted holiday cookies for a sweet festive table that gives guests plenty of delightful options.
Christmas Bars Recipe FAQs
What type of graham crackers should I use for the base?
Absolutely! For the best results, use regular honey graham crackers to achieve that classic sweet flavor. If you need a gluten-free option, seek out gluten-free graham cracker crumbs made from almond flour or alternative grains. Freshly crushed whole graham crackers work well too, just ensure they aren’t too coarse.
How should I store my Christmas Bars?
You can store your Christmas Bars in an airtight container at room temperature for up to 1 week. This helps retain their chewy texture while allowing the flavors to enhance. If you would rather enjoy them chilled, refrigerate them and they will stay fresh for about 2 weeks.
Can I freeze Christmas Bars?
Absolutely! To freeze, wrap the bars individually in plastic wrap and then in aluminum foil to prevent freezer burn. They will last up to 3 months in the freezer. When ready to enjoy, let them thaw in the fridge overnight or reheat in the microwave for about 10-15 seconds for that fresh taste.
What do I do if my bars crumble when cutting?
If your Christmas Bars crumble when cutting, it’s likely they didn’t cool completely before slicing. Allow them to cool in the pan until they reach room temperature to firm up. If they are already cooled and crumbling, consider chilling them in the fridge for about 30 minutes before attempting to cut again for cleaner slices.
Are these bars safe for people with nut allergies?
Yes! You can easily make these Christmas Bars nut-free by simply omitting the chopped nuts. Ensure all your other ingredients, like chocolate chips, are also without nuts, as some brands may be processed in facilities that handle nuts. Always check labels or consult with those you are serving to maintain safety.
Can I make these bars vegan?
Very! To create delicious vegan Christmas Bars, substitute the unsalted butter with melted coconut oil and replace the sweetened condensed milk with a vegan alternative like coconut cream or almond milk mixed with a bit of sugar. These swaps ensure everyone can indulge in this festive treat!
Irresistible Christmas Bars: Easy, Chewy, and Oh-So-Chocolatey
Ingredients
Equipment
Method
- Preheat your oven to 350°F (175°C) and prepare a 9x13 inch baking pan.
- In a large mixing bowl, combine the graham cracker crumbs, unsweetened cocoa powder, and powdered sugar.
- Melt the unsalted butter and stir it into the dry mixture, followed by the sweetened condensed milk.
- Fold in the mini marshmallows and chocolate chips, along with any optional chopped nuts.
- Spread the mixture into your prepared baking pan and bake for 25-30 minutes.
- Allow the bars to cool completely in the pan before cutting into squares.