

There’s something magical about layering the rich flavors of chocolate and the subtle nuttiness of hazelnuts into a beautifully crafted dessert. Welcome to my world of baking bliss with this incredible Chocolate Hazelnut Cake, where each mouthwatering layer tells a story of indulgence and creativity. Perfect for impressing guests or simply treating yourself, this cake offers the remarkable benefits of being customizable for different dietary needs, whether you prefer gluten-free, vegan, or nut-free versions. Plus, its stunning presentation elevates any occasion, making it a true centerpiece for your dessert table. Can you picture slicing into that decadent cake and revealing those luscious layers? Let’s dive into the recipe that will not only satisfy your sweet cravings but also inspire your inner baker!
Why is this Chocolate Hazelnut Cake special?
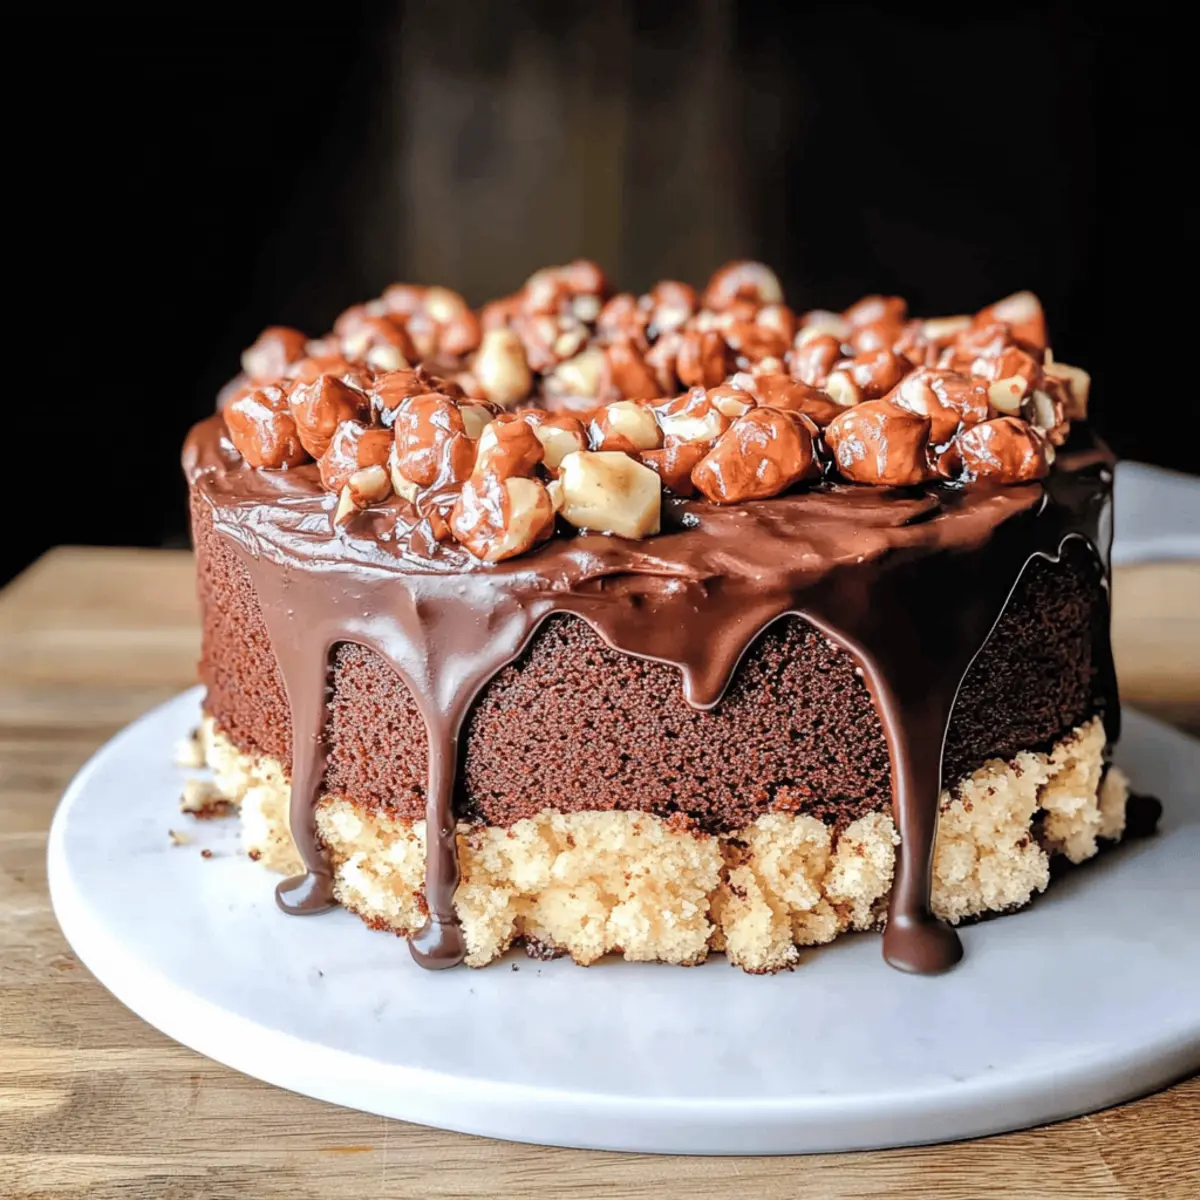
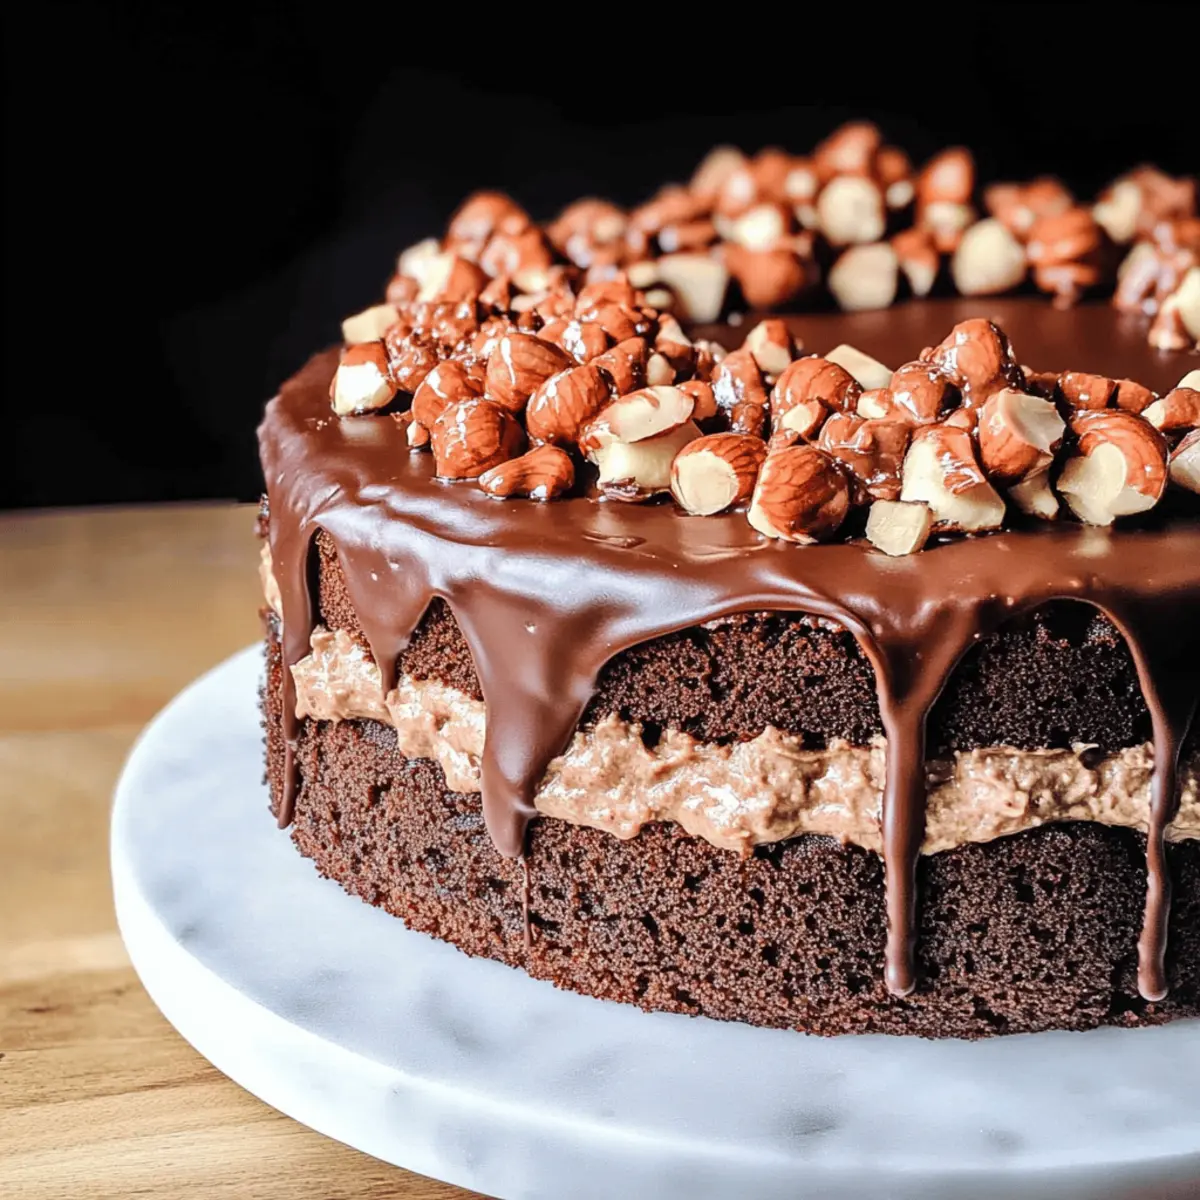
Irresistible Layers: Each slice reveals luscious layers of hazelnut dacquoise and rich chocolate pastry cream, promising a flavor explosion.
Diet-Friendly Variations: Whether you’re gluten-free, nut-free, or vegan, this recipe offers adaptable options that cater to everyone at the table.
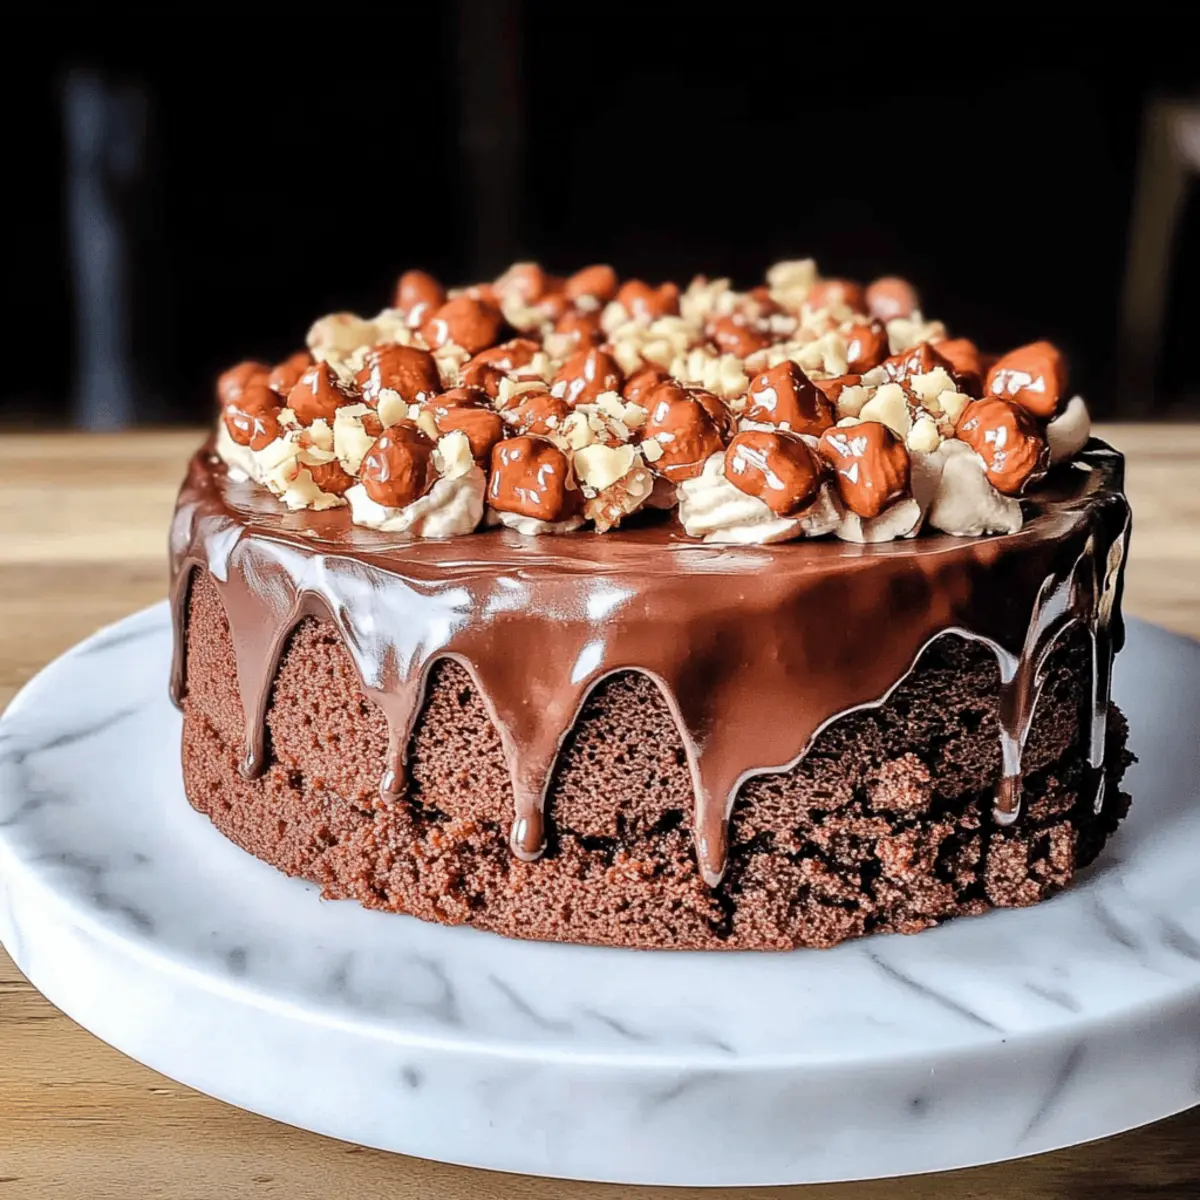
Showstopper Presentation: With its stunning layers and glazes, this cake is a visual delight, perfect for special occasions or simply to impress your loved ones.
Decadent Taste: The combination of flavors elevates every bite, balancing the nuttiness of hazelnuts with rich chocolate, creating a truly decadent experience.
Easy Assembly: Despite its dazzling appearance, the recipe is surprisingly simple to follow, making it approachable for bakers of all skill levels.
Savor the joy of baking with this incredible Chocolate Hazelnut Cake, and don’t forget to check out our Soft Chewy Chocolate Chip Cookies for another delightful treat!
Chocolate Hazelnut Cake Ingredients
For the Cake Layers
- Hazelnut Flour – Essential for the dacquoise texture; you can make your own by finely grinding toasted hazelnuts.
- Egg Whites – Vital for creating that airy, fluffy texture; substitute with aquafaba (3 tablespoons per egg white) for a vegan option.
- Granulated Sugar – Sweetens the dacquoise; you can use a cane sugar alternative if preferred.
- All-Purpose Flour – Provides stability; opt for a gluten-free blend for a gluten-free version.
- Fine Salt – Enhances sweetness; kosher salt works well.
For the Pastry Cream
- Whole Milk – Adds richness; use full-fat almond milk for a dairy-free alternative.
- Dark Cooking Chocolate – Forms the base for a rich flavor; semi-sweet chocolate can be used as a substitute, adjusting sugar accordingly.
- Corn Starch – Thickens the pastry cream; swap with all-purpose flour if needed.
- Egg Yolks – Contribute to the creamy richness; for a vegan alternative, mix 2 tablespoons of cornstarch with 2 tablespoons of water.
- Vanilla Extract – Boosts the flavors; choose pure extract for the best taste.
For the Hazelnut Praline
- Granulated Sugar – Caramelizes for a sweet crunch; you can use coconut sugar for a less processed option.
- Toasted Hazelnuts – Adds a delightful, crunchy texture; walnuts can be a great nut-free substitute if needed.
- Bicarbonate Soda – Helps create a light, airy texture; substituting with honey can provide a sweeter taste.
For the Glaze
- Powdered Sugar – Sweetens the glaze; consider using a sugar-free alternative if preferred.
- Unsalted Butter – Provides richness to the glaze; plant-based butter works perfectly for a vegan touch.
This Chocolate Hazelnut Cake is sure to bring joy to your kitchen, whether you’re preparing a special celebration or indulging in a sweet treat at home!
Step‑by‑Step Instructions for Decadent Chocolate Hazelnut Cake
Step 1: Preheat Oven
Begin by preheating your oven to 170°C (340°F). While it warms up, take two round cake pans and line them with baking paper to prevent sticking. This is a crucial step for a successful Chocolate Hazelnut Cake, as the right temperature ensures even baking.
Step 2: Toast Hazelnuts
Spread the hazelnuts on a baking tray, ensuring they are in a single layer. Roast in the preheated oven for about 20 minutes, or until they turn golden brown and aromatic. Once done, remove them from the oven and let the hazelnuts cool completely before blending them into a fine flour.
Step 3: Prepare Pastry Cream
In a medium saucepan, whisk together the dry ingredients: corn starch, caster sugar, and a pinch of salt. Gradually add warm milk and egg yolks, stirring continuously over medium heat. Cook until the mixture thickens, which will take around 5-7 minutes; it should coat the back of a spoon. Remove from heat and stir in butter and dark cooking chocolate until smooth.
Step 4: Make Hazelnut Praline
In a saucepan, combine granulated sugar and a splash of water. Heat over medium until the sugar caramelizes, turning a light amber color. Stir in the toasted hazelnuts and bicarbonate soda, mixing until coated. Once it cools, blend the mixture into a smooth paste for a delightful addition to your cake.
Step 5: Create Dacquoise
Process half of the toasted hazelnuts into fine crumbs, then set aside. In a separate bowl, whip the egg whites with granulated sugar until stiff peaks form. Gently fold in the hazelnut flour and all-purpose flour, being careful not to deflate the mixture. Pipe this airy batter onto your prepared pans and bake for about 15 minutes until lightly golden.
Step 6: Layer Cake
After the dacquoise layers have cooled completely, it’s time to assemble the cake. Use a springform pan for easier layering. Place one dacquoise layer at the bottom, spread a generous layer of pastry cream on top, and repeat with the second layer. Reserve some pastry cream for decorating the finished Chocolate Hazelnut Cake.
Step 7: Prepare Glazes
To create the glazes, mix powdered sugar with melted unsalted butter in a bowl until smooth. Divide the mixture into two parts, adding melted dark chocolate to one for a richer glaze and leaving the other vanilla-flavored. This will give your cake a stunning finish with contrasting flavors.
Step 8: Assemble Cake
Pour the chocolate glaze evenly over the assembled cake, ensuring it drips down the sides for a luxurious look. Chill the cake in the refrigerator for at least 4 hours or overnight to set properly. Once firm, coat the sides with reserved pastry cream and sprinkle with any leftover hazelnut crumbs for an appealing crunch.
Expert Tips for Chocolate Hazelnut Cake
-
Measure Ingredients Accurately: Use a kitchen scale for precision, especially with hazelnut flour and sugar; improper measurements can lead to dense layers.
-
Cool Layers Completely: Allow the dacquoise layers to cool down before assembly; this prevents them from collapsing and ensures a structured cake.
-
Whip Egg Whites Carefully: Achieve stiff peaks when whipping egg whites; this is crucial for a light and airy dacquoise. Too loose, and your layers may fall flat.
-
Use an Offset Spatula: For even distribution of pastry cream between layers, an offset spatula ensures smooth and beautiful assembly, enhancing the visual appeal of your Chocolate Hazelnut Cake.
-
Chill to Set: Don’t skip the chilling step! Allowing the assembled cake to chill for several hours ensures a clean slice and enhances the flavors.
-
Store Properly: Keep the cake in an airtight container in the fridge; it remains fresh for up to three days, preserving that delightful taste and texture.
How to Store and Freeze Chocolate Hazelnut Cake
Fridge: Store your Chocolate Hazelnut Cake in an airtight container for up to 3 days to maintain its delightful freshness and flavor.
Freezer: For longer storage, wrap individual slices in plastic wrap followed by aluminum foil, and freeze for up to 2 months. Thaw in the fridge for best results.
Reheating: If desired, gently reheat slices in the microwave for about 10-15 seconds to enjoy that freshly baked taste.
Serving: Always serve chilled for the best flavor experience, especially when featuring those rich chocolate and hazelnut layers!
Chocolate Hazelnut Cake Variations
Feel free to unleash your creativity and personalize this delightful cake with these delicious variations!
-
Gluten-Free: Swap all-purpose flour with a gluten-free flour blend for a similar texture without the gluten. Your guests will never know the difference!
-
Nut-Free: For a nut-free twist, replace ground hazelnuts with sunflower seed flour, offering a unique flavor while keeping it allergen-friendly.
-
Vegan Option: Use aquafaba in place of egg whites and plant-based butter for a delectable vegan version. It’s a great way to make this treat suitable for everyone!
-
Citrus Zest Addition: Add a tablespoon of orange or lemon zest to the pastry cream for a refreshing zing that beautifully complements the chocolatey richness.
-
Mocha Flavor: Stir in a splash of espresso in the pastry cream for a rich mocha twist that coffee lovers are sure to enjoy.
-
Spiced Delight: A sprinkle of cinnamon or nutmeg in the dacquoise will enhance the cake with warmth and depth; perfect for cozy gatherings.
-
Fruity Layers: Layer in fresh berries, like raspberries or strawberries, between the cake layers for a tart, vibrant contrast to the sweet chocolate.
-
Decorative Toppings: Amp up your presentation with edible flowers or chocolate shavings, turning this cake into a stunning masterpiece, perfect for any special occasion!
If you love indulging in delightful desserts, you might also enjoy our White Chocolate Macadamia or the comforting flavors of Chocolate Lava Cakes. Happy baking!
Make Ahead Options
These Chocolate Hazelnut Cake components are perfect for busy home cooks looking for meal prep solutions! You can prepare the hazelnut dacquoise and pastry cream up to 24 hours in advance; simply store them in airtight containers in the refrigerator to maintain their freshness and flavors. Additionally, the hazelnut praline can be made a few days ahead (up to 3 days) and kept in a sealed container at room temperature. When you’re ready to serve, assemble the cake by layering the prepped dacquoise and pastry cream, then finish with the glazes and a brief chill in the refrigerator to ensure everything sets beautifully. You’ll achieve stunning results with minimal last-minute effort, making this dessert a showstopper on any occasion!
What to Serve with Hazelnut and Chocolate Layer Cake
Elevate your dessert experience with delicious pairings that complement the rich, nutty flavor of this cake.
-
Creamy Whipped Cream: A dollop of lightly sweetened whipped cream balances the cake’s richness, adding a velvety texture that melts in your mouth.
-
Fresh Berries: Juicy raspberries or strawberries bring a delightful tartness that cuts through the sweetness, providing a refreshing contrast with each bite.
-
Espresso or Coffee: A warm cup of espresso enhances the chocolate notes beautifully, creating a comforting atmosphere, perfect for coffee lovers.
-
Chocolate Ganache: Drizzling extra chocolate ganache over the top amplifies the decadence, making it an extra indulgent treat without overwhelming the palate.
-
Vanilla Ice Cream: Serving a scoop of vanilla ice cream alongside adds a creamy coolness, enriching the overall taste experience while inviting a comforting element to each slice.
-
Citrus Zest: A sprinkle of citrus zest on top can brighten the flavors, offering a surprising and refreshing twist that beautifully complements the chocolate hazelnut cake.
-
Nut Mix: A small bowl of lightly salted mixed nuts at the table enhances the nutty theme, providing an intriguing textural contrast to the smooth, rich layers of the cake.
-
Mint Tea: A steaming cup of mint tea can cleanse the palate, refreshing your senses after indulging in the cake’s richness, and leaves you feeling refreshed.
-
Cheese Trio: A selection of soft cheeses like Brie or goat cheese creates an unexpected savory element, contrasting nicely with the sweetness of the cake for an exciting dessert experience.

Chocolate Hazelnut Cake Recipe FAQs
How do I select the right hazelnuts?
Absolutely! Look for hazelnuts that are plump and have a light brown color without dark spots or blemishes. For freshness, it’s best to buy them raw or roasted. If you notice any unusual or dark spots, it may indicate rancidity.
How should I store my Chocolate Hazelnut Cake?
To maintain its deliciousness, store your cake in an airtight container in the refrigerator for up to 3 days. If you’re planning to enjoy it later, wrap individual slices in plastic wrap followed by aluminum foil, which will keep in the freezer for up to 2 months.
Can I freeze the Chocolate Hazelnut Cake?
Yes! To freeze, slice the cake and wrap each piece tightly in plastic wrap, then follow with aluminum foil. This double-layer protection keeps your cake fresh. When you’re ready to enjoy it, simply thaw in the refrigerator overnight for the best texture and flavor.
What if my dacquoise layers are too dense?
Very! If your dacquoise layers end up dense, it might be because the egg whites weren’t whipped to stiff peaks. Make sure to whip them well until you can turn the bowl upside-down without them spilling out. Also, gentle folding in the hazelnut flour is key to retaining air in the batter.
Are there any common allergens in this recipe?
Of course! This Chocolate Hazelnut Cake contains multiple allergens, including eggs, nuts, and dairy. If catering to allergies, you can substitute egg whites with aquafaba and use plant-based butter for dairy concerns. Always double-check labels on packaged ingredients to avoid surprises.
Can I make this cake ahead of time?
Absolutely! You can prepare the cake layers and pastry cream a day ahead, then assemble them on the day you plan to serve. This not only saves time but also allows the flavors to meld together beautifully overnight in the fridge. Just remember to chill the assembled cake for at least 4 hours before slicing!
Decadent Chocolate Hazelnut Cake to Satisfy Your Sweet Cravings
Ingredients
Equipment
Method
- Preheat your oven to 170°C (340°F) and line two round cake pans with baking paper to prevent sticking.
- Toast hazelnuts on a baking tray for about 20 minutes until golden brown. Cool completely and blend into a fine flour.
- Whisk together corn starch, sugar, and salt in a saucepan. Gradually add warm milk and egg yolks while stirring over medium heat. Cook until thickened, about 5-7 minutes. Stir in butter and chocolate until smooth.
- Combine sugar and a splash of water in a saucepan over medium heat until caramelized. Add toasted hazelnuts and bicarbonate soda, stirring until coated. Blend into a smooth paste.
- Process half of toasted hazelnuts into fine crumbs. Whip egg whites and sugar to stiff peaks, then gently fold in hazelnut and all-purpose flours. Pipe onto prepared pans and bake for about 15 minutes.
- Assemble the cake by layering dacquoise, pastry cream, and repeat for the second layer. Reserve some pastry cream for decoration.
- Mix powdered sugar with melted butter to create glazes. Divide and add melted chocolate to one for richer flavor. Decorate the cake with both glazes.
- Pour chocolate glaze over the cake, chill for 4 hours or overnight, then decorate with reserved pastry cream and hazelnut crumbs.