

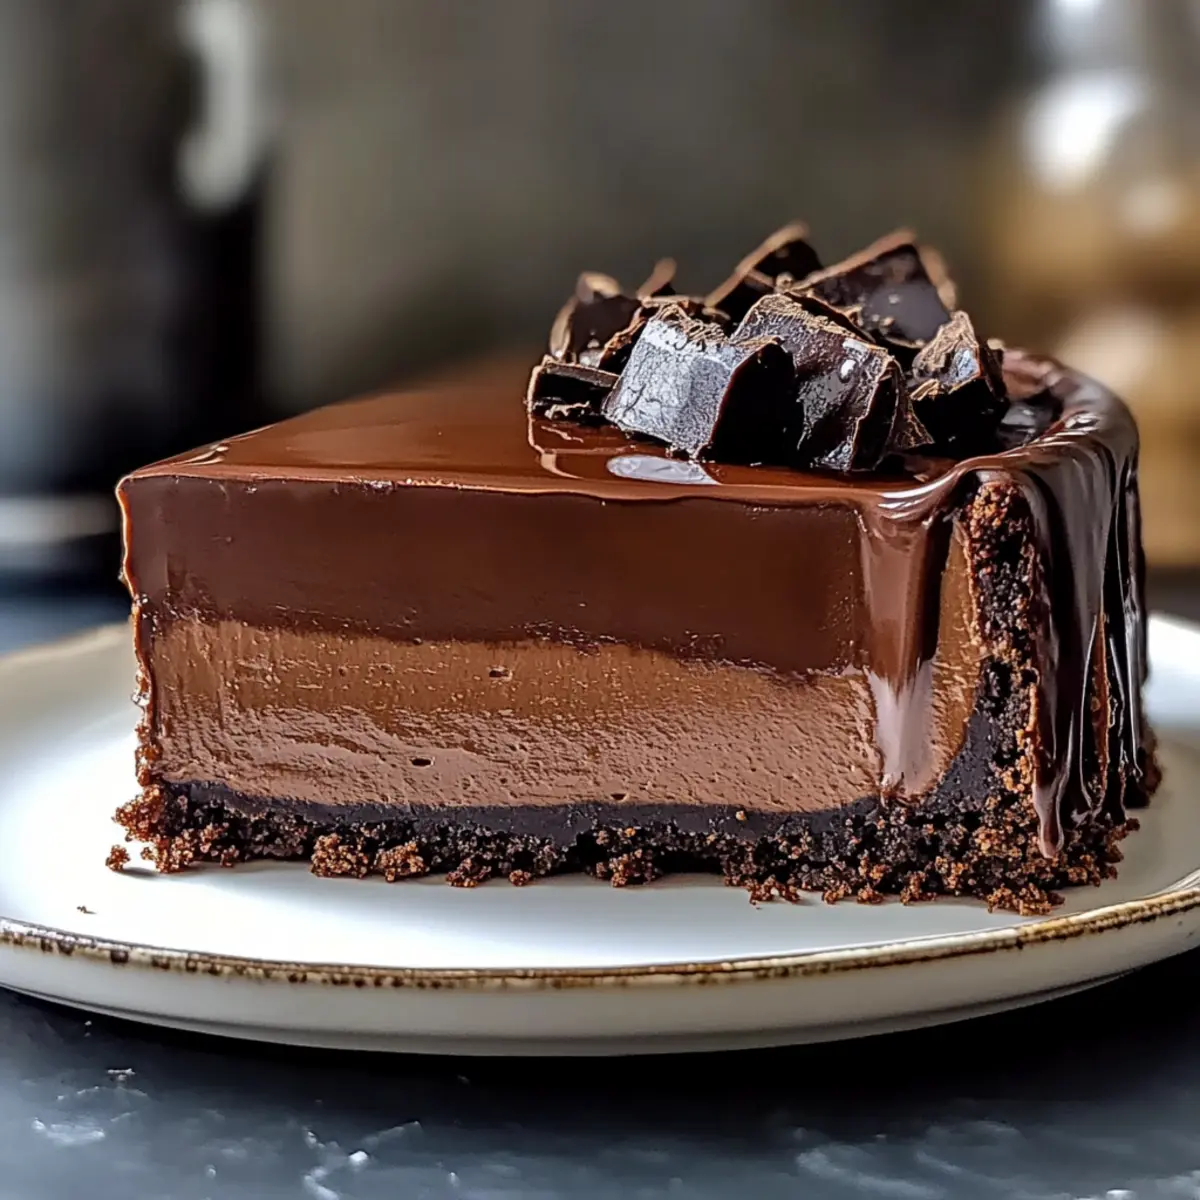
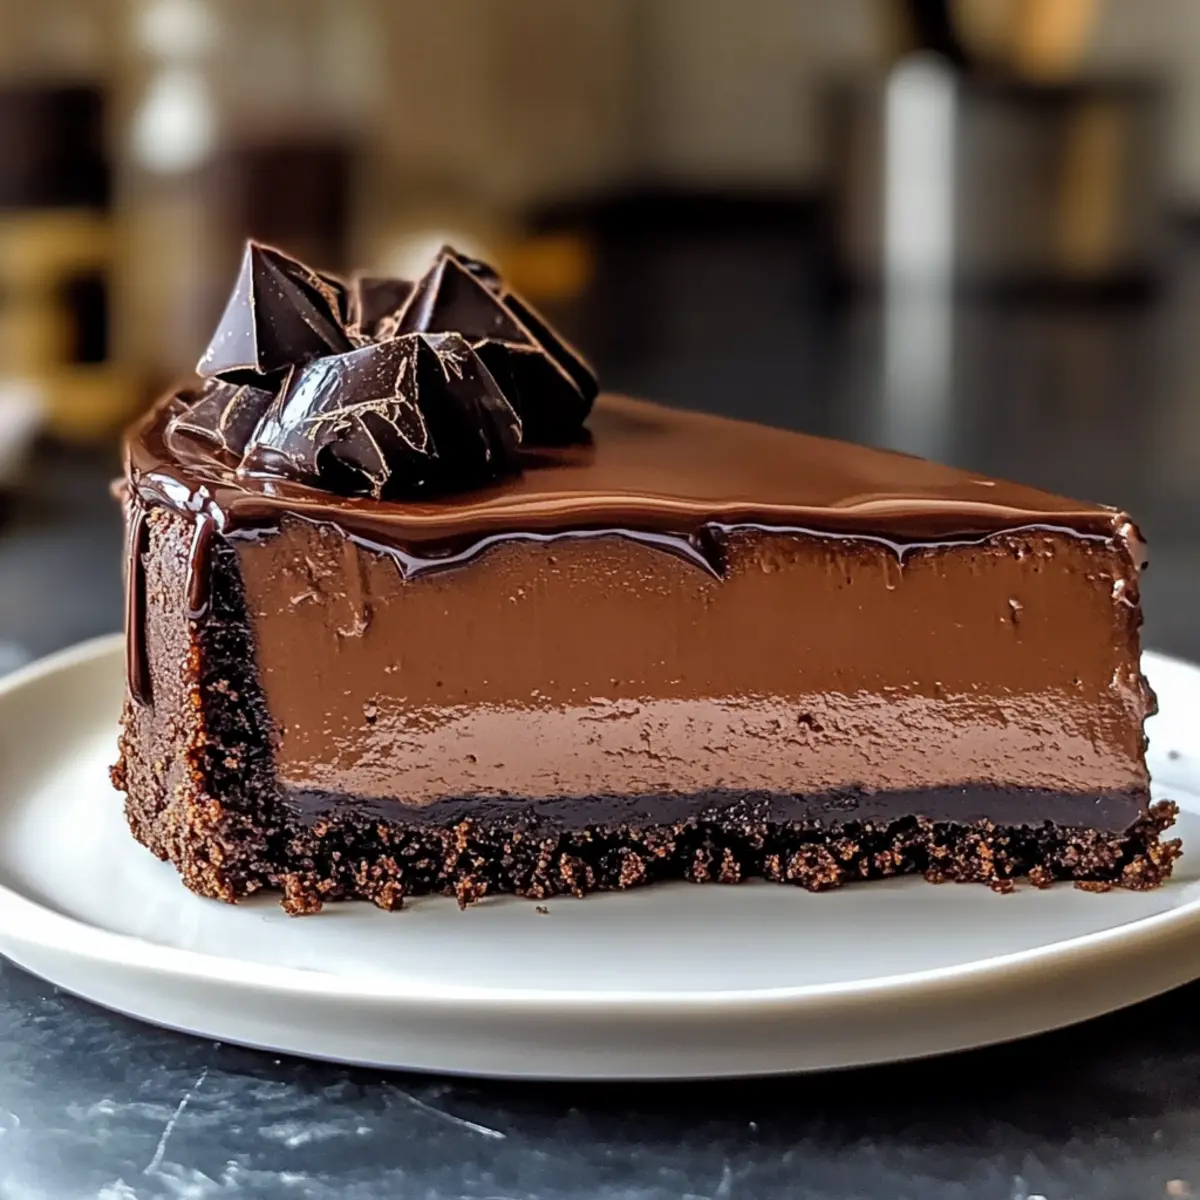
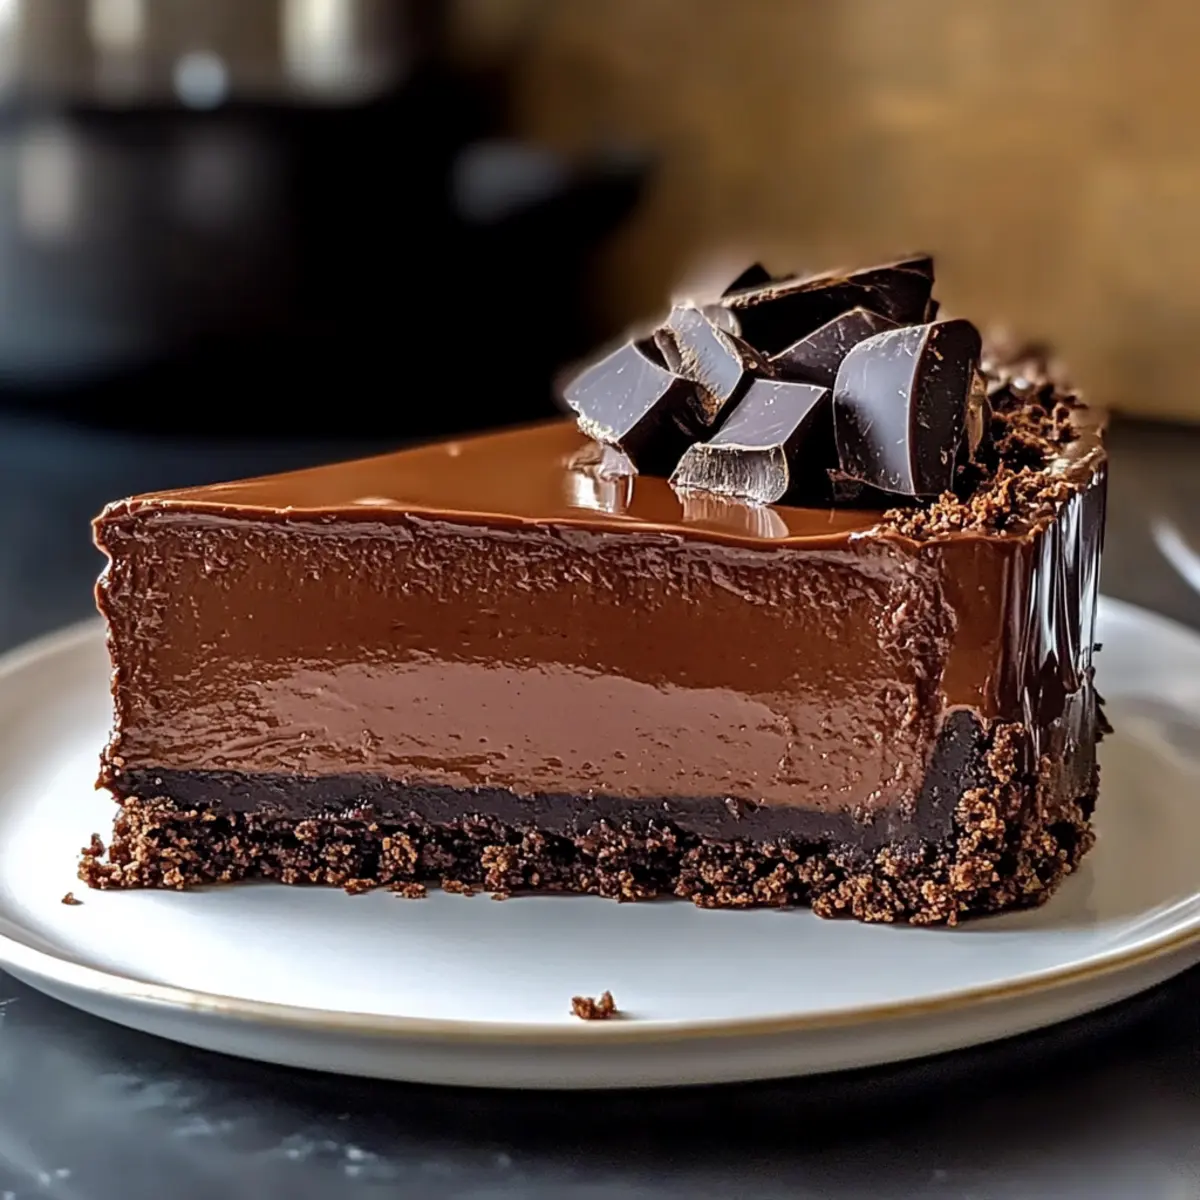
As I unwrapped the foil from my latest kitchen creation, the rich aroma of chocolate filled my home, promising a delightful indulgence. Introducing my Ultimate Chocolate Cheesecake, where a silky cream cheese filling meets a chocolate cookie crust, culminating in a glossy ganache that simply melts on your tongue. This isn’t just any dessert—it’s the perfect crowd-pleaser that’s adaptable for everyone, offering both dairy-free and gluten-free variations. Plus, you can whip it up in advance and pop it in the freezer, making your hosting duties a breeze! Ready to elevate your dessert game and surprise your friends and family? Let’s dive into the chocolate wonderland of this cheesecake that will undoubtedly leave them craving more!
Why is This Chocolate Cheesecake Special?
Irresistible, the Ultimate Chocolate Cheesecake is a treat that combines creamy decadence with a crunchy chocolate cookie crust, creating a flavor explosion unlike any other. Versatile, its dairy-free and gluten-free options mean everyone can indulge, making it perfect for gatherings. Time-saving, this showstopper can be made ahead and frozen without losing its luxurious texture. Pair it with fresh berries or whipped cream for an extra touch, or try it alongside a slice of Pecan Pie Cheesecake for more dessert inspiration. You’ll love how easy it is to whip up and how much your guests will adore it!
Chocolate Cheesecake Ingredients
• Discover everything you need to create this decadent dessert!
For the Crust
- Chocolate Wafer Crumbs – Provides a crumbly base and rich chocolate flavor; substitute with graham cracker crumbs for a different twist.
- Unsalted Butter – Binds the crust together; coconut oil can be used as a dairy-free alternative.
For the Filling
- Bittersweet Chocolate – Main flavor component in the filling; coarsely chopped for easier melting; semi-sweet chocolate can offer a sweeter experience.
- Full-Fat Cream Cheese – Ensures a rich and creamy texture; low-fat versions may alter the texture.
- Granulated Sugar – Sweetens the filling; avoid substitutions to maintain proper sweetness.
- Light Brown Sugar – Adds moisture and depth; dark brown sugar can deepen the flavor profile.
- Unsweetened Cocoa Powder – Enhances chocolate flavor; substitute with Dutch cocoa for a smoother taste.
- Large Eggs & Egg Yolks – Provide structure and richness; flaxseed substitution may affect texture.
- Heavy Cream – Introduces creaminess to the filling; use non-dairy cream if preferred.
- Vanilla Extract – Enhances the flavor profile; no substitutes needed.
For the Ganache
- Semi-Sweet Chocolate – Creates a rich topping; dark chocolate can be used for a more intense flavor.
- Heavy Cream – Contributes to a creamy texture; non-dairy cream can be used.
- Unsalted Butter – Adds richness and gloss; can be omitted for a non-dairy version.
Step‑by‑Step Instructions for Ultimate Chocolate Cheesecake
Step 1: Preheat the Oven
Begin by preheating your oven to 325°F (163°C). While the oven heats, prepare a 9-inch springform pan by greasing it well and wrapping the exterior with aluminum foil. This will help prevent water from seeping in during the water bath, ensuring your Ultimate Chocolate Cheesecake remains perfectly intact.
Step 2: Make the Crust
In a mixing bowl, combine chocolate wafer crumbs with melted unsalted butter, stirring until the crumbs are thoroughly coated. Press this mixture firmly into the bottom of the prepared springform pan to create an even crust. Bake the crust for 10 minutes, then allow it to cool completely on a wire rack before adding the filling.
Step 3: Melt the Chocolate
Using a double boiler, melt the bittersweet chocolate over simmering water, stirring frequently until smooth. Once melted, remove from heat and let it cool slightly while you prepare the cheesecake filling. This melted chocolate is key to achieving the rich flavor in your Ultimate Chocolate Cheesecake.
Step 4: Blend the Cream Cheese
In a food processor, add the full-fat cream cheese. Blend until it becomes completely smooth and creamy. Gradually mix in granulated sugar, light brown sugar, and unsweetened cocoa powder, ensuring each ingredient is well incorporated before adding the next. This method guarantees a silky texture in your filling.
Step 5: Add Eggs and Cream
With the food processor running, add in the eggs—both whole eggs and yolks—along with the heavy cream. Blend until just combined and smooth, being careful not to overmix. The eggs add structure to the cheesecake, giving it that beloved creamy, dense texture.
Step 6: Mix Chocolate and Vanilla
Now, gently fold the cooled melted chocolate and vanilla extract into the cheesecake mixture using a spatula. This step blends the chocolate flavor thoroughly into the filling. Once combined, pour the rich mixture over your cooled crust, spreading it evenly for a uniform bake.
Step 7: Set Up the Water Bath
Place the springform pan into a larger baking pan. Carefully add hot water to the larger pan until it reaches about 1 inch up the sides of the springform. This water bath helps regulate temperature, resulting in a smooth and crack-free Ultimate Chocolate Cheesecake throughout the baking process.
Step 8: Bake the Cheesecake
Bake your cheesecake in the preheated oven for 1 hour and 10 minutes. Keep an eye on it—you’re looking for the edges to be set while the center jiggles slightly when gently shaken. After baking, remove it from the oven and cool it on a wire rack for at least 30 minutes.
Step 9: Chill the Cheesecake
Once cooled to room temperature, cover the cheesecake and refrigerate it for a minimum of 6 hours, or ideally overnight. This chilling time allows the flavors to meld and deepens the overall taste of your Ultimate Chocolate Cheesecake, making it even more delicious.
Step 10: Prepare the Ganache
In a small saucepan, simmer heavy cream over medium heat. Once it starts to bubble, pour it over the semi-sweet chocolate in a mixing bowl. Whisk until smooth and creamy, then mix in butter for added richness. Let the ganache cool to a spreadable consistency before using it.
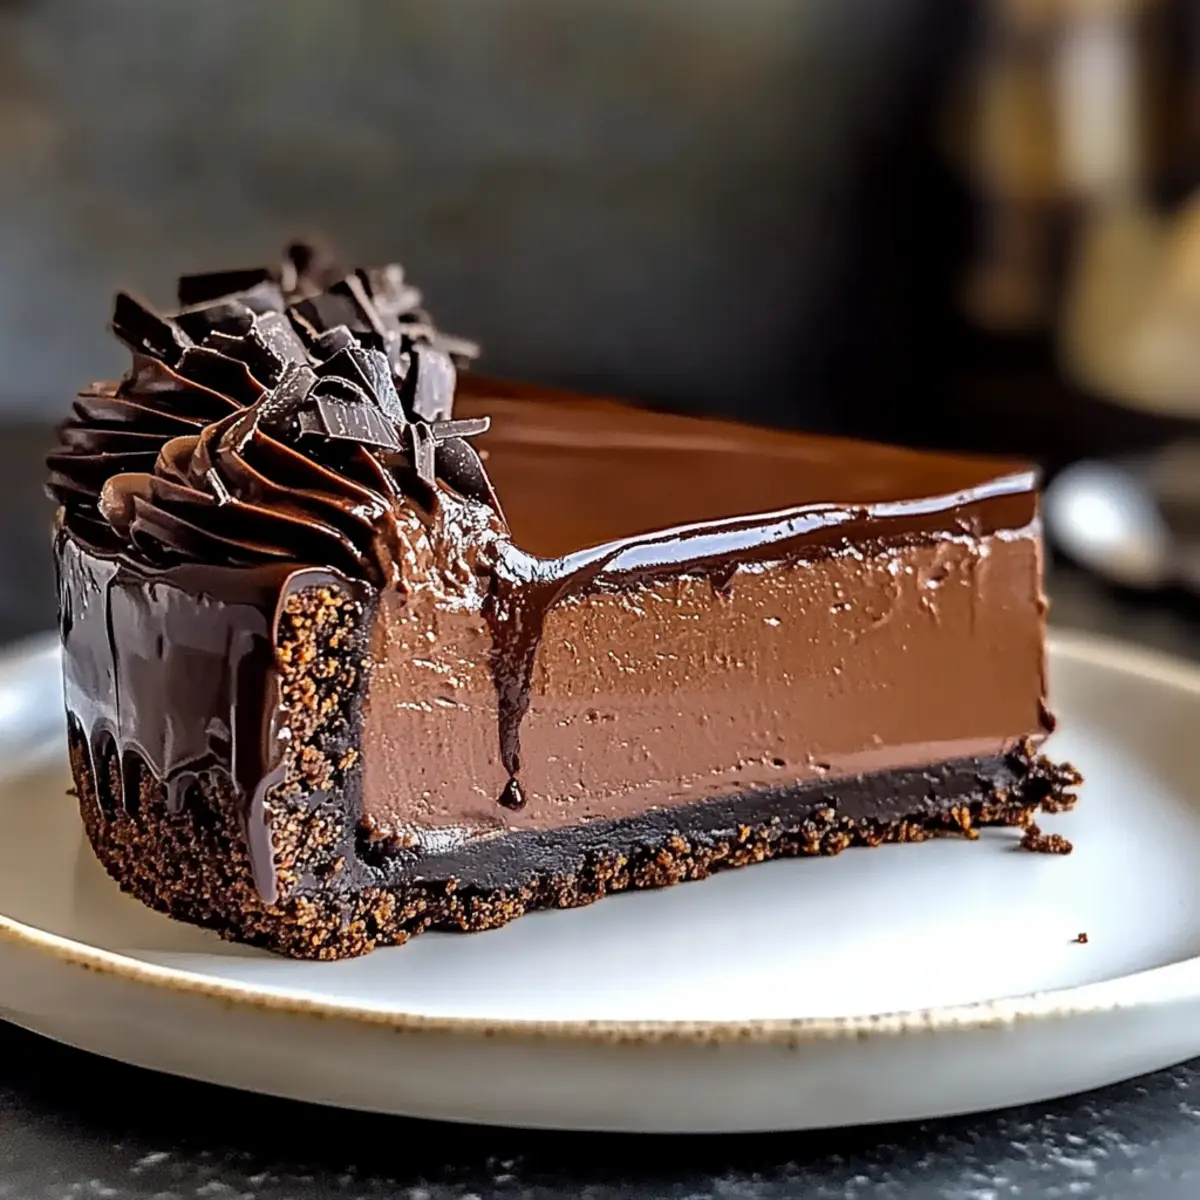
Step 11: Top the Cheesecake
Once the cheesecake has chilled and the ganache has cooled slightly, pour the rich ganache over the top of the cheesecake. Use a spatula to spread it evenly across the surface. Allow the cheesecake to set at room temperature for 1 hour before slicing, ensuring every piece showcases that luscious chocolate layer.
Chocolate Cheesecake Variations
Feel free to get creative and tailor this chocolate cheesecake to your taste buds for an even more enchanting experience!
-
Dairy-Free: Substitute full-fat cream cheese and heavy cream with luscious coconut cream for a tropical twist.
-
Gluten-Free: Use gluten-free chocolate wafer crumbs or ground almonds in your crust to enjoy without worry.
-
Flavor Boost: Add a teaspoon of coffee or espresso powder to the filling to deepen the chocolate flavor—it’s a game changer!
-
Minty Fresh: Incorporate a splash of peppermint extract for a refreshing twist, especially wonderful around the holidays.
-
Nutty Crust: Swap chocolate wafer crumbs for crushed nuts or nut-based cookies to introduce a delightful crunch.
-
Fruity Delight: Fold in small chunks of fresh raspberries or cherries into the cheesecake mix for a fruity surprise!
-
Crunchy Topping: Sprinkle some crushed chocolate toffee or toasty almonds on top of the ganache for an extra layer of texture.
-
Spicy Kick: Mix in a pinch of cinnamon or cayenne pepper for a subtle heat that will surprise and delight your taste buds.
For more sweet inspiration, you might enjoy trying a slice of Pecan Pie Cheesecake or a rich Soft Chewy Chocolate for that cozy, homemade touch!
Make Ahead Options
These Ultimate Chocolate Cheesecake preparations are a dream for busy home cooks! You can prepare the crust and filling up to 24 hours in advance, allowing you to refrigerate both components separately. To do this, make the crust and let it cool completely before covering it with plastic wrap. Next, prepare the cheesecake filling, pour it over the cooled crust, and pop it into the refrigerator overnight. This helps the flavors develop while maintaining its rich, creamy texture. When you’re ready to serve, simply bake as instructed. Top it with ganache and let it set at room temperature before slicing, ensuring each piece remains just as delicious and decadent as if freshly made.
How to Store and Freeze Chocolate Cheesecake
- Fridge: Store your Ultimate Chocolate Cheesecake covered in plastic wrap or an airtight container for up to 5 days. This keeps it fresh and delicious for leisurely indulgence.
- Freezer: For longer storage, wrap the cheesecake tightly in plastic wrap and aluminum foil. It will remain freezer-friendly for up to 2 months without losing its creamy texture.
- Thawing: To enjoy after freezing, simply transfer the cheesecake to the fridge 24 hours before serving. This gradual thaw helps maintain its rich flavor and consistency.
- Reheating: Although it’s usually served chilled, if desired, you can let it sit at room temperature for about 30 minutes before serving to enhance its creamy indulgence.
Expert Tips for the Best Chocolate Cheesecake
- Temperature Matters: Ensure all ingredients are at room temperature, especially cream cheese, for a smooth filling and to avoid lumps.
- Water Bath Technique: Always use a water bath to bake your cheesecake. This technique prevents cracks by providing even heat distribution.
- Chill Time is Crucial: Be patient! Refrigerate the cheesecake for at least 6 hours, preferably overnight, to enhance flavors and achieve the best texture.
- Slice with Care: For perfect slices, use a warm knife—just dip it in hot water and wipe it before cutting each slice of your chocolate cheesecake.
- Avoid Overmixing: When adding eggs to the filling, mix just until combined. Overmixing can introduce air, causing cracks during baking.
- Storage Wisdom: If making ahead, wrap the cheesecake well and freeze it for up to 2 months. Thaw it in the fridge for convenient serving later.
What to Serve with Ultimate Chocolate Cheesecake
Looking to create a memorable dining experience that perfectly complements this rich dessert?
-
Fresh Berries: The tartness of mixed berries cuts through the cheesecake’s richness, offering a refreshing contrast that enhances each decadent bite.
-
Whipped Cream: Light and fluffy, whipped cream adds a delightful creaminess, inviting you to savor the layers of chocolate indulgence.
-
Coffee: A steaming cup of coffee pairs beautifully with chocolate, intensifying its flavors and providing a cozy finish to your meal.
-
Mint Leaves: Garnishing with fresh mint adds a pop of color and a hint of freshness, balancing the dense chocolate with its invigorating aroma.
-
Chocolate Drizzle: A drizzle of melted chocolate over the cheesecake enhances its indulgent appeal, creating a visually stunning dessert presentation for your guests.
-
Caramel Sauce: Rich, sweet caramel sauce creates a deliciously sticky contrast that complements the chocolate for an extra layer of indulgence.
-
Vanilla Ice Cream: The coolness of vanilla ice cream contrasts nicely with the warm notes of chocolate, providing a comforting balance to the cheesecake’s richness.
-
Nutty Brittle: A crunchy nut brittle adds texture and a savory element, making each slice uniquely delightful with its sweet and salty notes.
-
Port Wine or Red Wine: A glass of port or a fruity red wine enhances the chocolate flavor, creating a sophisticated pairing for an elevated dessert experience.
Ultimate Chocolate Cheesecake Recipe FAQs
How do I know if my chocolate is ripe for melting?
Absolutely! When selecting chocolate for this cheesecake, opt for high-quality bittersweet chocolate. Look for bars that are smooth and shiny, without any dull spots or discoloration. If you see any dark spots, it might be stale. If you’re using it for melting, coarsely chop it for quicker melting, and avoid chocolate labeled as “baking chocolate” that contains fillers.
What’s the best way to store leftover cheesecake?
Very simple! Keep your Ultimate Chocolate Cheesecake covered tightly with plastic wrap or in an airtight container in the fridge for up to 5 days. This helps maintain its creamy texture while keeping it fresh. If you notice it developing any odors from the fridge, consider consuming it sooner!
Can I freeze the cheesecake, and if so, how?
Absolutely! To freeze your cheesecake, make sure it’s completely cooled and set. Wrap it snugly in plastic wrap followed by aluminum foil. This will keep it fresh for up to 2 months. When you’re ready to enjoy, simply place the cheesecake in the fridge to thaw overnight. This gradual process helps preserve its luscious creamy texture!
What should I do if my cheesecake crack?
Ah, the dreaded cracks! If your Ultimate Chocolate Cheesecake cracks during baking, don’t fret. This often happens if the batter is overmixed or if the temperature during baking fluctuates too much. For a preventive measure, make sure to bake in a water bath and ensure that you don’t overmix the batter. Additionally, if cracks do appear, you can easily cover them with ganache, making for a delicious disguise!
Are there any dietary restrictions I should consider?
Yes! If you’re making this Ultimate Chocolate Cheesecake for guests, keep in mind that it can be made dairy-free and gluten-free. Use coconut cream and gluten-free cookie crumbs to accommodate those with these dietary preferences. Always check for specific allergies, especially with common ingredients like eggs and nuts. It’s always thoughtful to ask guests if they have any dietary restrictions.
Irresistible Chocolate Cheesecake That's Freezer-Friendly
Ingredients
Equipment
Method
- Preheat your oven to 325°F (163°C) and prepare a 9-inch springform pan by greasing it and wrapping it with aluminum foil.
- Combine chocolate wafer crumbs with melted unsalted butter in a mixing bowl. Press into the bottom of the prepared springform pan and bake for 10 minutes.
- Melt bittersweet chocolate over a double boiler, stirring frequently until smooth. Let it cool slightly.
- Blend full-fat cream cheese in a food processor until smooth. Gradually mix in granulated sugar, light brown sugar, and unsweetened cocoa powder.
- With the food processor running, add in the eggs and heavy cream. Blend until just combined and smooth.
- Fold the cooled melted chocolate and vanilla extract into the cheesecake mixture, then pour it over the cooled crust.
- Set the springform pan into a larger baking pan and add hot water until it reaches about 1 inch up the sides of the springform.
- Bake for 1 hour and 10 minutes until the edges are set and the center jiggles slightly.
- Cool on a wire rack for at least 30 minutes, then refrigerate for a minimum of 6 hours.
- Simmer heavy cream in a small saucepan, then pour over semi-sweet chocolate in a bowl and whisk until smooth. Mix in butter.
- Pour the ganache over the chilled cheesecake, spreading it evenly. Let set at room temperature for 1 hour before slicing.