

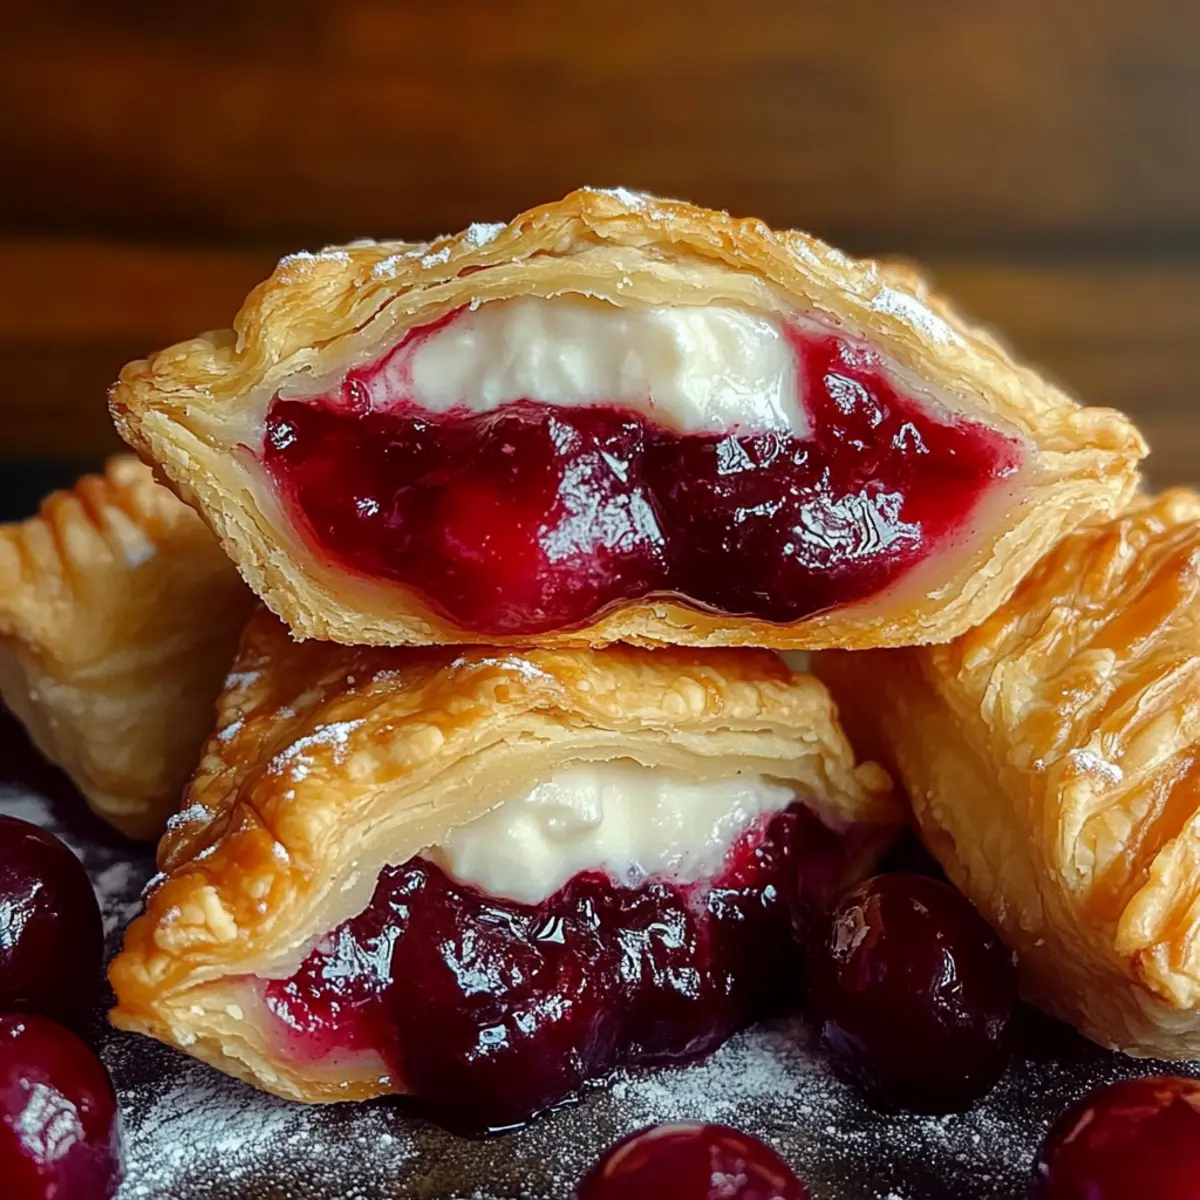
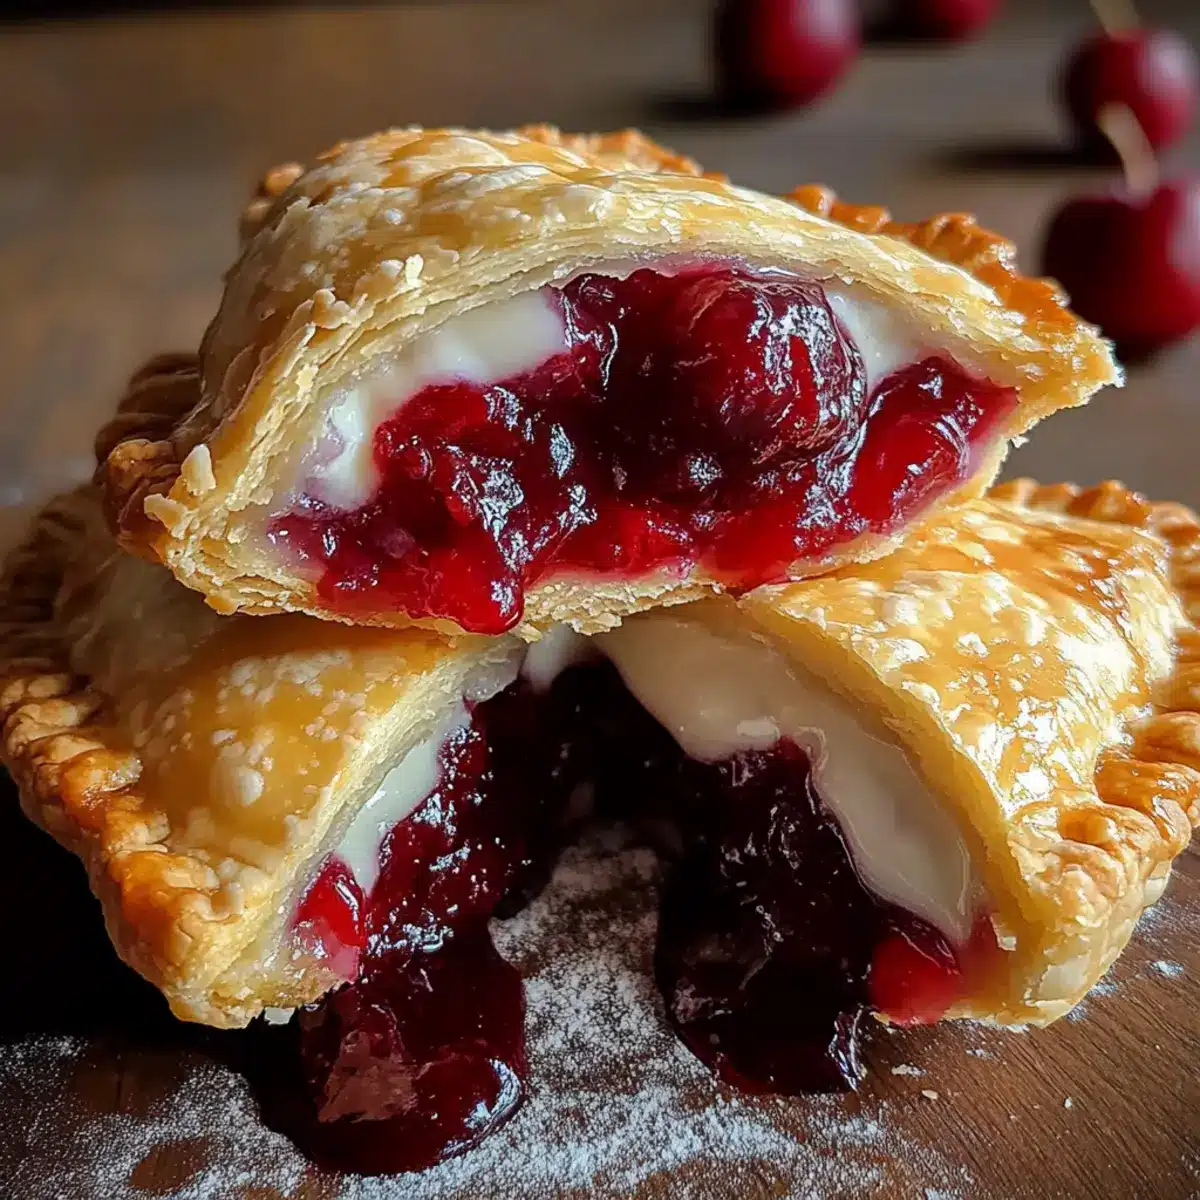
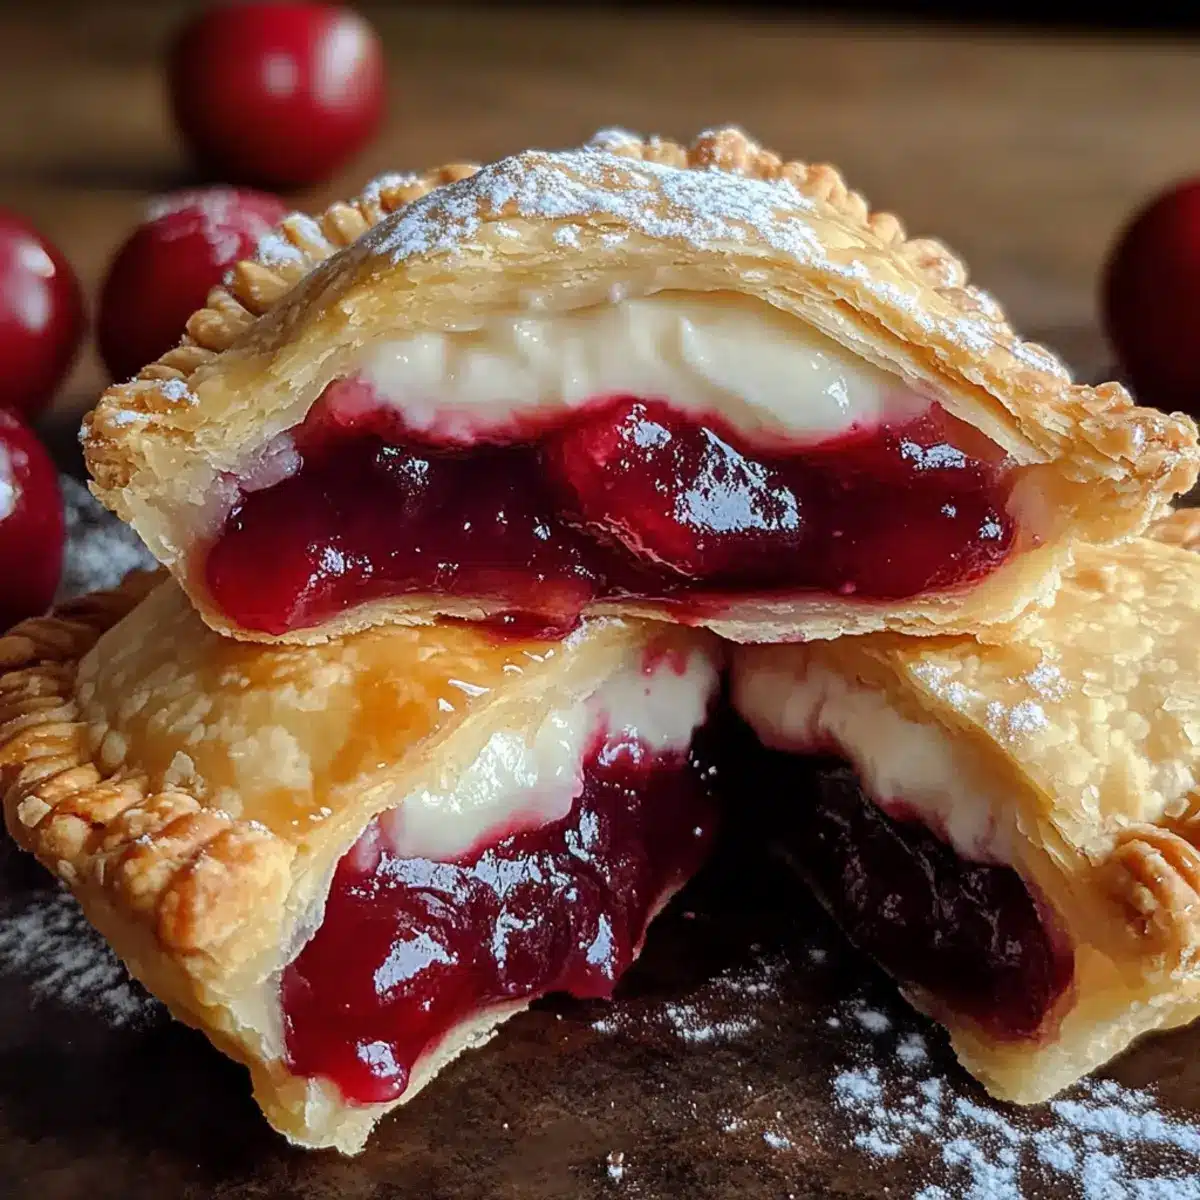
The aroma of sizzling pastry fills the kitchen as I take my first bite of these delightful Cherry Cheesecake Hand Pies. The combination of creamy cheesecake and sweet, tart cherries is simply irresistible, all wrapped in a golden, crispy crust. What I love most about this recipe is how incredibly quick it is to whip up—perfect for those busy evenings when you still want to impress guests or treat yourself! Plus, these hand pies are a total crowd-pleaser; they disappear faster than you can say, “second helping!” Whether you’re celebrating a special occasion or just craving a quick pick-me-up, these little treats will surely brighten your day. Who else is ready to indulge in this delicious adventure?
Why Should You Try Hand Pies?
Quick and Easy: From start to finish, these Cherry Cheesecake Hand Pies can be made in no time, making them the ultimate solution for satisfying your sweet tooth without a lot of fuss.
Crowd-Pleasing Treat: These hand pies are always a hit at gatherings! Their delightful combination of creamy cheesecake and tart cherry filling keeps everyone coming back for more.
Versatile Filling Options: Feeling adventurous? You can easily switch up the fillings to suit any occasion—try blueberry or apple for a fun twist.
Perfect for Any Time: Whether it’s a casual weeknight treat or a dessert for special occasions, these hand pies fit right in anywhere.
Serve warm for a comforting dessert experience that’s simply irresistible. Try pairing it with a scoop of vanilla ice cream for an extra touch of indulgence! Want another decadent option? Check out my Caramel Swirl Cheesecake or Pecan Pie Cheesecake.
Cherry Cheesecake Hand Pies Ingredients
For the Cream Cheese Filling
• Cream Cheese – Provides a creamy texture and rich flavor; ensure it’s softened for smooth mixing.
• Granulated Sugar – Adds sweetness to the filling; can be reduced for a less sweet option.
For the Pie Assembly
• Cherry Pie Filling – Offers a burst of fruity flavor; substitute with other fillings like blueberries or apples if desired.
• Pie Crust – Forms the hand pie shell; use refrigerated for ease, or homemade for a fresher taste.
For Frying & Glazing
• Vegetable Oil – Essential for frying; maintain oil at 190°C for optimal crispiness.
• Powdered Sugar – Sweetens the glaze and gives a glossy finish; adjust for personal sweetness preference.
• Corn Syrup – Helps create a smooth glaze; can be omitted but may affect texture.
• Water – Combines with powdered sugar and corn syrup to make the glaze; adjust for desired thickness.
Now you’re ready to whip up some delicious Cherry Cheesecake Hand Pies that will have everyone raving!
Step‑by‑Step Instructions for Cherry Cheesecake Hand Pies
Step 1: Prepare Oil
Begin by heating vegetable oil in a large pot over medium heat, reaching a temperature of 190°C (375°F) for frying. Use a thermometer for accuracy to ensure the oil is hot enough, as this is crucial for achieving the crispy exterior of your Cherry Cheesecake Hand Pies.
Step 2: Make Filling
In a mixing bowl, combine softened cream cheese and granulated sugar. Using a hand mixer or a sturdy spatula, mix them together until the mixture is smooth and creamy, with no lumps remaining. This filling will create the rich, delightful core of the hand pies, so take your time to ensure it’s well blended.
Step 3: Roll Dough
Unroll your pie crust on a lightly floured surface and use a rolling pin to flatten it slightly. Next, cut the crust into 6 circles, each about 13–15 cm in diameter. These rounds will serve as the base for your Cherry Cheesecake Hand Pies, so ensure they’re uniform for even cooking.
Step 4: Assemble Pies
Spoon approximately 20g of the cream cheese filling and 30g of cherry pie filling onto the center of each dough circle. Gently brush the edges with a little water to help seal them. Carefully fold each circle over to create a half-moon shape, pressing the edges to seal tightly and preventing any filling from leaking during frying.
Step 5: Fry Pies
Once your oil is hot, gently lower each assembled hand pie into the hot oil, frying in batches to avoid overcrowding. Fry each pie for about 2–3 minutes on each side or until they turn a golden brown. Use a slotted utensil to turn them for even coloring, then transfer the fried hand pies to a paper towel-lined plate to drain excess oil.
Step 6: Glaze Pies
In a small bowl, whisk together powdered sugar, corn syrup, and water until smooth. While the Cherry Cheesecake Hand Pies are still warm, brush them generously with the glaze to achieve a glistening finish. This adds both sweetness and a delightful texture that complements the crispy crust and creamy filling.
Cherry Cheesecake Hand Pies Variations
Feel free to get creative with your Cherry Cheesecake Hand Pies—customizing them will make each bite special!
-
Fruit Filling Swap: Substitute cherry pie filling with blueberry, strawberry, or raspberry for a fresh twist that brightens the flavor profile.
-
Nutty Delight: Add crushed walnuts or pecans to the cream cheese filling for a delightful crunch that complements the smooth cheesecake essence.
-
Baked Option: For a lighter alternative, bake the hand pies at 375°F (190°C) for 15-20 minutes instead of frying to enjoy a golden, crispy treat with less oil.
-
Flavored Cream Cheese: Experiment by mixing in vanilla or almond extract into the cream cheese filling for an exciting, aromatic flavor boost that tantalizes your taste buds.
-
Spicy Kick: Infuse a tad of cinnamon or nutmeg into the cream cheese filling for a warm, cozy essence that enhances the chai-like experience of the hand pie.
-
Gourmet Glaze: Swap traditional glaze for a chocolate drizzle or raspberry coulis after glazing the pies, elevating your hand pies to gourmet status.
-
Smaller Treats: Cut the pie crust circles smaller for bite-sized hand pies! These mini versions are perfect for sharing at parties or gatherings.
For more delicious inspiration, why not try the decadent flavors of my Tiramisu Cheesecake Dessert or indulge in a rich No-Bake Oreo Cheesecake? Each recipe brings a unique twist to your dessert table!
What to Serve with Cherry Cheesecake Hand Pies
Indulging in these delightful hand pies? Let’s elevate your dessert experience with some perfect pairings!
-
Vanilla Ice Cream: The creamy, cool sweetness of vanilla ice cream contrasts beautifully with the warm, crispy hand pies, creating a comforting blend. A scoop beside your pie turns this treat into a fabulous dessert hug!
-
Fresh Berries: A medley of fresh strawberries, blueberries, or raspberries adds a refreshing burst of flavor that balances the richness of the cheesecake filling beautifully. Their natural tartness enhances the sweet notes in your hand pies.
-
Whipped Cream: Light and airy whipped cream is a classic accompaniment. It adds a fluffy texture that complements each bite, making every moment feel like a special occasion.
-
Chocolate Sauce: Drizzling warm chocolate sauce over your hand pies introduces an indulgent twist that is simply irresistible. The rich chocolate flavor pairs harmoniously with the sweet cherry filling.
-
Mint Leaves: For a fresh finish, sprinkle a few mint leaves on your plate. Their fragrant aroma elevates the dessert experience, making your presentation pop with color and a hint of sophistication.
-
Coffee or Espresso: Serve with a cup of rich coffee or a short pull of espresso. The robust flavors will enhance the sweetness of the hand pies, making for an enjoyable end to a meal or a delightful afternoon pick-me-up.
How to Store and Freeze Cherry Cheesecake Hand Pies
Airtight Container: Store leftover Cherry Cheesecake Hand Pies in an airtight container at room temperature for up to 2 days to maintain their freshness and crispiness.
Refrigeration: For extended preservation, refrigerate the hand pies for up to 5 days. Allow them to cool completely before placing them in the fridge to prevent moisture buildup.
Freezing: Assemble un-fried hand pies, place them on a tray, and freeze until solid. Once frozen, transfer to a freezer bag for up to 3 months. Fry from frozen when you’re ready to enjoy!
Reheating: When reheating, consider baking in a preheated oven at 190°C (375°F) for 10-15 minutes to restore the crispiness. Enjoy that delicious flavor all over again!
Make Ahead Options
These Cherry Cheesecake Hand Pies are fantastic for meal prep! You can assemble the hand pies up to 24 hours in advance, simply refrigerate them before frying. This way, the flavors meld beautifully and you save precious time on busy days. When you’re ready to serve, heat your oil and cook the pies straight from the fridge or keep them in the refrigerator for up to 3 days before frying for a freshly made taste. Just remember to ensure they’re sealed tightly to prevent any filling from leaking out. This method keeps them just as delicious and crispy, allowing you to enjoy a quick and impressive treat with minimal effort!
Expert Tips for Cherry Cheesecake Hand Pies
-
Perfect Oil Temperature: Ensure your frying oil reaches 190°C (375°F) for crispy results; too low will result in soggy pies.
-
Sealing Edges: Dip your fingertip in water to moisten the edges before folding to ensure a tight seal and prevent any filling leakage.
-
Rotate for Even Cooking: Turn the hand pies frequently while frying to achieve an even golden-brown color all around.
-
Draining Excess Oil: Allow the fried Cherry Cheesecake Hand Pies to drain on paper towels to maintain their crispy texture and avoid greasiness.
-
Work Quickly on Glaze: Brush the warm pies with glaze right away; this helps the glaze stick better and adds to the overall indulgent experience.
Cherry Cheesecake Hand Pies Recipe FAQs
How do I select the right cherries for the filling?
When choosing cherries for your filling, look for firm, plump fruits with vibrant color. Sweet varieties, like Bing cherries, tend to work best for a dessert filling, while tart cherries can balance the sweetness of the cream cheese. Avoid any cherries with dark spots or blemishes, as these may indicate overripeness.
How should I store leftover Cherry Cheesecake Hand Pies?
To maintain their crispy texture, store leftover Cherry Cheesecake Hand Pies in an airtight container at room temperature for up to 2 days. For longer preservation, refrigerate them for up to 5 days. Make sure they cool completely before storage to avoid condensation, which could soften the crust.
Can I freeze Cherry Cheesecake Hand Pies?
Absolutely! To freeze, assemble the un-fried hand pies and arrange them in a single layer on a baking tray. Freeze until solid, then transfer them to a freezer bag for up to 3 months. When you’re ready to enjoy, fry them from frozen for a quick and delightful treat, adjusting frying time as necessary to ensure a golden brown finish.
What should I do if my pie crust is too sticky to work with?
If your pie crust is sticking to the surface or your rolling pin, sprinkle a little flour onto the surface or on top of the dough. This will help reduce stickiness. Another tip is to chill the dough in the fridge for about 15–20 minutes before rolling it out, making it easier to handle.
Are there any dietary considerations when making these hand pies?
These Cherry Cheesecake Hand Pies are vegetarian; however, they do contain cream cheese and sugar, which may not suit everyone’s dietary preferences or restrictions. For a dairy-free option, you can try substituting traditional cream cheese with a plant-based alternative. Always check the labels to ensure the fillings are also suitable for your dietary needs.
How can I make the glaze less sweet if desired?
If you find the glaze too sweet, you can decrease the amount of powdered sugar and adjust the water accordingly to reach your desired consistency. Alternatively, adding a squeeze of lemon juice can balance the sweetness with a refreshing tang, creating a delightful flavor contrast that complements the hand pies perfectly.

Delicious Cherry Cheesecake Hand Pies for Effortless Indulgence
Ingredients
Equipment
Method
- Heat vegetable oil in a large pot over medium heat to 190°C (375°F) for frying.
- In a mixing bowl, combine softened cream cheese and granulated sugar until smooth and creamy.
- Roll out the pie crust and cut it into 6 circles, about 13–15 cm in diameter.
- Place approximately 20g of cream cheese filling and 30g of cherry pie filling in the center of each circle, brush edges with water, and fold over to seal.
- Fry each hand pie for 2–3 minutes on each side until golden brown, then drain on paper towels.
- Combine powdered sugar, corn syrup, and water to make the glaze, then brush the warm pies with it.