

As I opened the oven door, the intoxicating aroma of garlic and melted cheese wafted through my kitchen, instantly transporting me to a cozy café in a bustling city. This delightfully flaky treat, the Cheesy Garlic Cruffin, is my go-to recipe for satisfying that craving for something savory yet indulgent. With just a handful of ingredients, you’ll create a batch of warm, buttery cruffins that are perfect for enjoying with friends, paired with a fresh salad, or simply devouring as a snack on your own. Not only are these cruffins a crowd-pleaser, but they also provide a wonderful opportunity to impress everyone with your homemade touch. Curious about how to make this irresistible snack? Let’s dive into the recipe!

Why are Cheesy Garlic Cruffins irresistible?
Heavenly aroma: The moment you pull them from the oven, the smell of warm garlic and melting cheese will have everyone gathering around the kitchen.
Flaky perfection: These cruffins boast layers that are light and flaky, reminiscent of your favorite pastries, but with a savory twist.
Simple steps: With just a few basic ingredients and a straightforward process, you can whip up these gourmet treats without any fuss.
Endless variations: Feeling adventurous? Mix in sundried tomatoes or try different cheeses like gouda for a unique spin!
Great for sharing: Perfect for brunch, snacks, or even as a side to a comforting soup, these cruffins are sure to impress. Pair them with a refreshing salad for a delightful meal that everyone will love!
Cheesy Garlic Cruffin Ingredients
For the Dough
- All-purpose flour – Provides structure for the cruffins; substitute with whole-wheat flour for added nutrition.
- Granulated sugar – Adds a hint of sweetness to balance flavors; can be reduced for a less sweet treat.
- Salt – Enhances flavors effectively; using sea salt can elevate the taste even more.
- Instant yeast – Leavens the dough ensuring a light texture; active dry yeast can work, but be sure to dissolve it in warm water first.
- Warm milk – Hydrates the dough and infuses richness; non-dairy milk can also be used as a substitute.
- Unsalted butter (melted) – Adds moisture and flavor; for a dairy-free option, coconut oil is a great choice.
- Warm water – Essential for hydrating the dough; ensure warmth to effectively activate the yeast.
- Large egg – Binds the mixture and enriches the dough; replace with a flax egg for a vegan alternative.
For the Filling
- Parmesan cheese – Infuses a savory depth of flavor; pecorino or nutritional yeast can substitute for a dairy-free version.
- Shredded mozzarella cheese – Creates that gooey texture we crave; feel free to mix in cheddar or gouda for variety.
- Minced garlic – Packs a punch of flavor; adjust the quantity based on your garlic-loving adventures!
- Softened unsalted butter – Elevates the richness of your filling; olive oil can replace it for a lighter choice.
- Fresh parsley – Brings a splash of color and freshness to the filling; dried parsley works if fresh isn’t available.
Optional Toppings
- Sesame seeds or poppy seeds – Sprinkle on top for added texture and visual appeal; they can also enhance the savory flavor.
Now that you have the essential ingredients gathered, you’re on your way to creating mouthwatering Cheesy Garlic Cruffins that are bound to delight!
Step‑by‑Step Instructions for Cheesy Garlic Cruffin
Step 1: Mix Dry Ingredients
In a large mixing bowl, combine 3 cups of all-purpose flour, 2 tablespoons of granulated sugar, 1 teaspoon of salt, and 2 teaspoons of instant yeast. Stir these dry ingredients together until evenly distributed, ensuring the yeast is well incorporated. This provides a great foundation for your Cheesy Garlic Cruffin, allowing the dough to rise beautifully.
Step 2: Add Wet Ingredients
Create a well in the center of the dry mixture and pour in 1 cup of warm milk, 1/4 cup of melted unsalted butter, and 1/4 cup of warm water. Crack in 1 large egg and mix together until everything is combined, ensuring a shaggy dough forms. The warmth of the liquids helps activate the yeast for perfect rising.
Step 3: Knead the Dough
Transfer the shaggy dough to a lightly floured surface and knead it for about 8-10 minutes until the dough is smooth and elastic. You’ll know it’s ready when it springs back after gently pressing it with your finger. This step is essential for creating the flaky structure in your Cheesy Garlic Cruffins.
Step 4: Let the Dough Rise
Place the kneaded dough into a greased bowl, cover it with a damp cloth, and let it rise in a warm area for approximately 1 hour or until it has doubled in size. This crucial rising period allows the yeast to work, creating air pockets that result in a light and airy cruffin texture.
Step 5: Prepare the Filling
While the dough is rising, prepare the filling by combining 4 tablespoons of softened unsalted butter, 3-4 cloves of minced garlic, and 2 tablespoons of chopped fresh parsley in a small bowl. Mix these ingredients until well blended, creating a flavorful garlic butter that will delightfully infuse your Cheesy Garlic Cruffins.
Step 6: Preheat the Oven and Prepare the Tin
Preheat your oven to 375°F (190°C) and grease a muffin tin to prevent the cruffins from sticking. The heat will be essential in achieving that beautiful golden color, while the greased muffin tin allows for easy removal once baked.
Step 7: Shape the Dough
After the dough has risen, roll it out on a floured surface into a rectangle about 1/4 inch thick. Take your time with this step, as a consistent thickness will help create the flaky layers in your Cheesy Garlic Cruffin.
Step 8: Add Filling and Cheese
Evenly spread the garlic butter mixture over the surface of the rolled dough, leaving a small border around the edges. Next, sprinkle a generous amount of grated Parmesan and shredded mozzarella cheese over the butter. This combination will melt beautifully, resulting in that gooey, cheesy delight we crave in every bite.
Step 9: Roll and Slice the Dough
Carefully roll the dough tightly into a log starting from one long edge. Once rolled, slice the log into equal portions, about 1 inch thick. Their layered characteristics come from this rolling technique, perfect for achieving the signature look of a Cheesy Garlic Cruffin.
Step 10: Arrange and Let Rise Again
Place each sliced piece upright in the prepared muffin tin, allowing them to sit together snugly. Cover with a clean kitchen towel and let them rise for an additional 20 minutes. This second rise is crucial for that lovely puffiness and height when baked.
Step 11: Bake the Cruffins
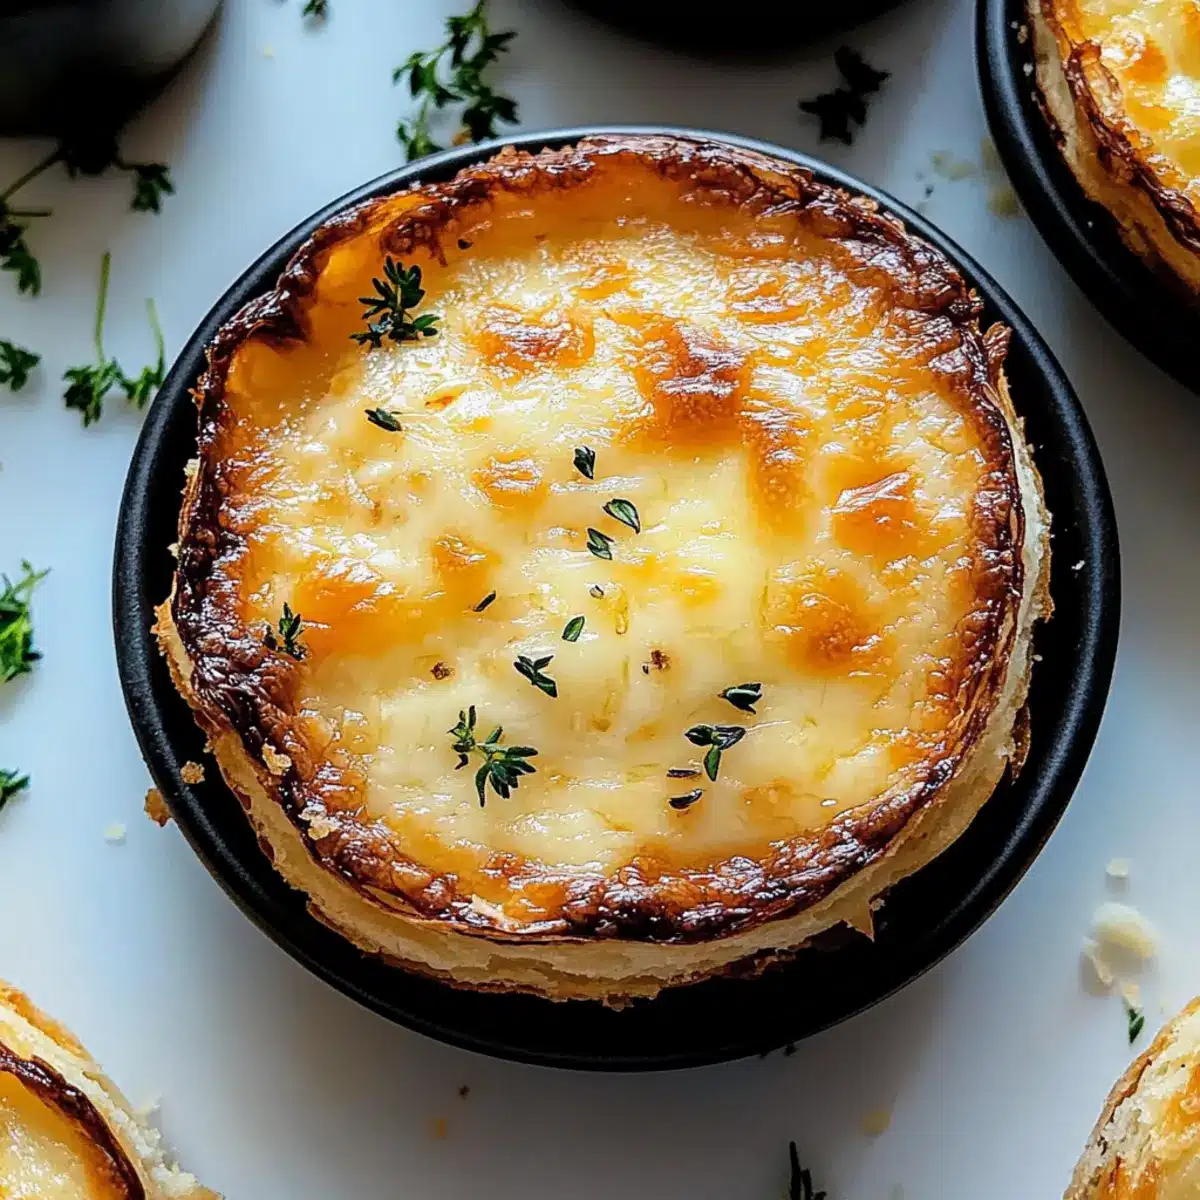
Once the second rise is complete, transfer the muffin tin to the preheated oven and bake for about 20-25 minutes, or until the cruffins are golden brown and puffed. They should look beautifully airy and fragrant when completed, filling your kitchen with an irresistible aroma.
Step 12: Cool and Serve
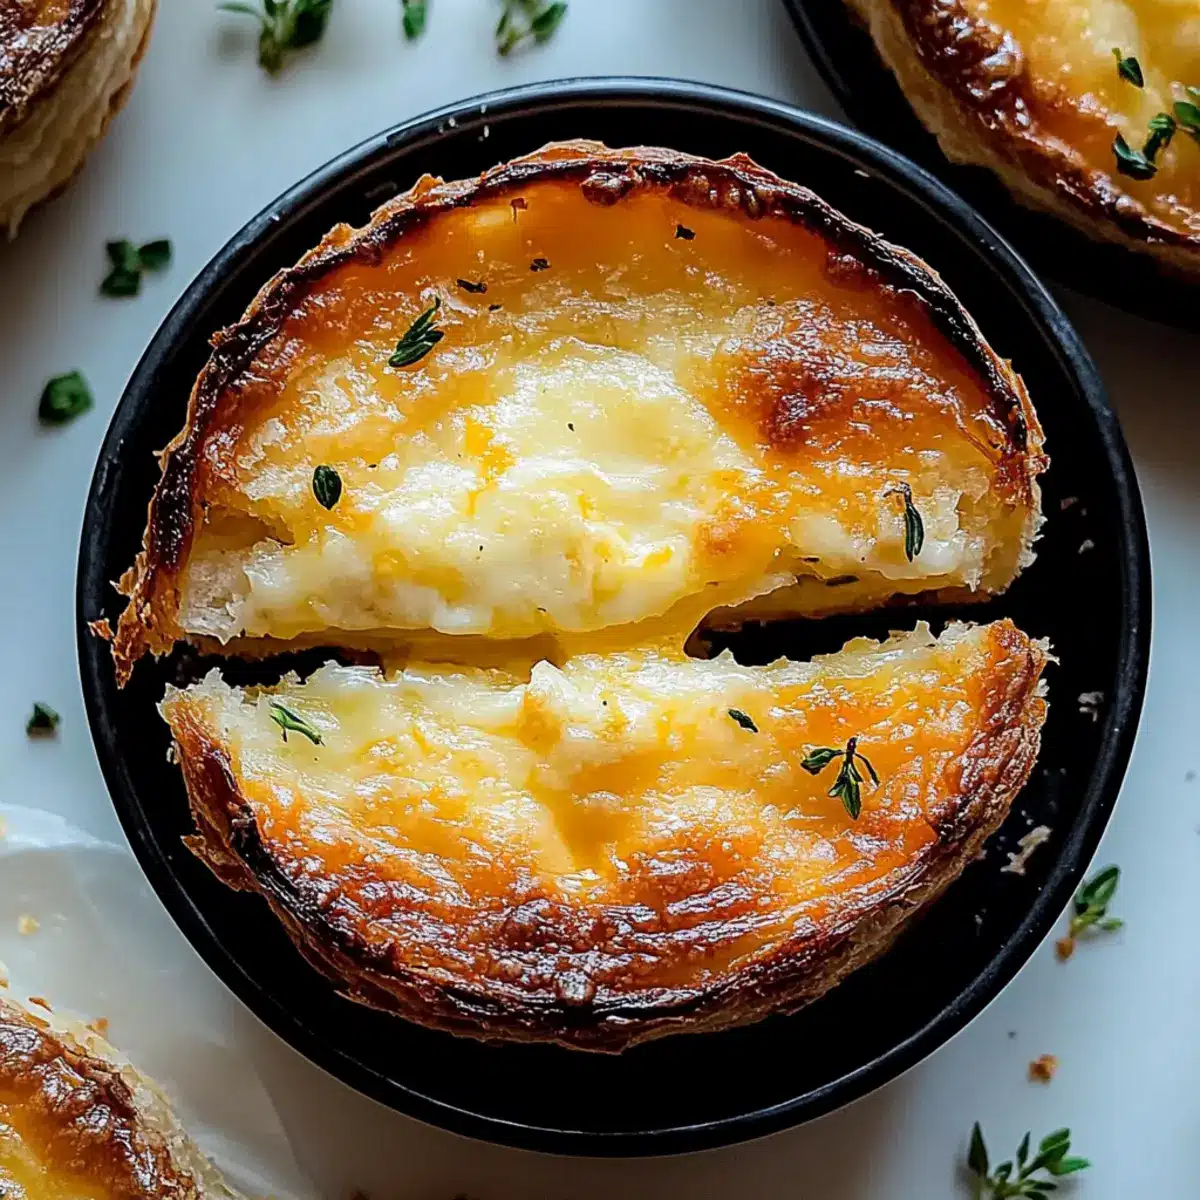
After baking, remove the cruffins from the oven and allow them to cool in the tin for about 5 minutes. Then, gently transfer them to a wire rack to cool slightly before enjoying them warm. The texture should be crisp on the outside while soft and cheesy on the inside—absolutely heavenly in your Cheesy Garlic Cruffin experience!
Make Ahead Options
These Cheesy Garlic Cruffins are a fantastic option for meal prep, allowing you to enjoy their incredible flavors with minimal last-minute effort! You can prepare the dough and fill it with the garlic butter mixture up to 24 hours in advance; simply cover the rolled dough or filled cruffins tightly with plastic wrap and refrigerate. To maintain quality, ensure they are well-sealed to prevent drying out. When you’re ready to bake, let the cruffins sit at room temperature for about 30 minutes to rise slightly before transferring them to the oven. This way, you’ll enjoy freshly baked, warm Cheesy Garlic Cruffins ready to impress your family or guests!
How to Store and Freeze Cheesy Garlic Cruffin
Room Temperature: Keep cooled Cheesy Garlic Cruffins in an airtight container at room temperature for up to 2 days. This preserves their flaky texture and delicious flavor.
Fridge: For prolonged freshness, you can refrigerate them in a sealed container for up to 3 days. Just remember to reheat gently to retain the crispiness.
Freezer: Wrap individual cruffins tightly in plastic wrap, then place them in a freezer bag. They can be frozen for up to 3 months.
Reheating: To reheat, simply place frozen Cheesy Garlic Cruffins directly in a preheated oven at 350°F (175°C) for about 10–15 minutes until warm and gooey again.
Cheesy Garlic Cruffin Variations
Feel free to explore different flavors and textures that will delight your taste buds while creating your Cheesy Garlic Cruffins!
-
Cheddar Twist: Swap in sharp cheddar for a bold, tangy flavor that pairs wonderfully with the garlic butter. The richness of cheddar takes each bite to a new level of indulgence.
-
Herb Infusion: Add fresh herbs like rosemary or thyme to the garlic filling for an aromatic twist. This simple addition can transport your cruffins to an herb garden, adding a tantalizing earthy note.
-
Spicy Kick: Mix in some red pepper flakes or diced jalapeños to create a spicy version that ignites your senses. The warmth of the heat beautifully complements the comforting garlic and cheese.
-
Sun-Dried Sundries: Toss in chopped sun-dried tomatoes for a burst of savory sweetness that plays beautifully against the cheese. This fusion creates a Mediterranean vibe that’s hard to resist!
-
Bacon Bliss: Incorporate crispy, crumbled bacon into your filling for a hearty, umami-rich addition. The salty crunch of bacon brings a delightful contrast to the gooey cheese and crispy layers.
-
Vegan Delight: Use plant-based cheeses and a flax egg for a fully vegan version of these cruffins. The alternative ingredients don’t skimp on flavor; they provide a deliciously creamy and savory experience.
-
Nutty Flavor: Replace some of the butter in the filling with toasted pine nuts for a delightful crunch and nuttiness. This twist introduces an unexpected texture and depth to each bite.
-
Mushroom Medley: Add sautéed mushrooms to the filling for an earthy richness that pairs beautifully with garlic and cheese. The mushrooms infuse the cruffins with a meaty quality that’s incredibly satisfying.
As you experiment with these variations, consider enjoying these cruffins alongside a simple salad or a comforting bowl of creamy soup to create a well-rounded meal—just like with Cheesy Beef Burritos or Garlic Parmesan Chicken!
Tips for the Best Cheesy Garlic Cruffin
Fresh Yeast: Ensure your yeast is fresh and active. Old yeast can lead to disappointing results and dense cruffins.
Kneading Technique: Avoid over-kneading the dough; keep it soft and elastic for the best flaky texture.
Warm Environment: Let the dough rise in a warm, draft-free area. This helps achieve a light, airy Cheesy Garlic Cruffin.
Layering Love: When spreading the filling, use a light hand. Ensure even coverage without overloading, allowing for perfect cheesy pockets!
Watch the Oven: Keep an eye on the baking time; cruffins should be golden brown. Overbaking can lead to dryness, while underbaking means missed doughy goodness.
Serve Warm: For the ultimate experience, serve your Cheesy Garlic Cruffins warm. The gooey cheese and fragrant garlic are at their best straight from the oven!
What to Serve with Cheesy Garlic Cruffin
Indulge in a delightful meal experience that elevates your Cheesy Garlic Cruffin from mere snack to a full culinary delight.
- Mixed Green Salad: A light, fresh salad drizzled with lemon vinaigrette perfectly balances the rich, cheesy flavors of the cruffin.
- Creamy Tomato Soup: The velvety texture complements the cruffin’s layers, making every bite a warm hug for your taste buds.
- Garlic Herb Butter Pasta: Pairing this savory dish brings delightful garlicky notes that play well with the cruffin’s flavor, enhancing your meal.
- Roasted Vegetables: The earthy flavors and caramelized sweetness of roasted veggies create a delightful contrast to the cheesy, buttery goodness.
- Savory Quinoa Salad: A protein-packed, zesty quinoa salad includes textures that meld beautifully with the flakiness of the cruffin.
- Chardonnay or Light White Wine: A crisp glass of wine cuts through the richness, enhancing your dining experience with every sip.
- Fresh Fruit Platter: Bright fruits like berries or melon add a refreshing touch and a pop of color, rounding out your dish beautifully.
- Chocolate Fondue: For a sweet finale, the rich, melted chocolate pairs surprisingly well with the savory cruffin, creating a unique dessert experience.

Cheesy Garlic Cruffin Recipe FAQs
What type of garlic should I use for the filling?
You can use fresh garlic cloves for the filling, as they will give you an intense and vibrant flavor. If you’re short on time, minced garlic from a jar is a great alternative, although fresh garlic offers a greater depth and aroma. Make sure to adjust the amount according to your taste—if you prefer a milder garlic flavor, use fewer cloves.
How should I store leftover Cheesy Garlic Cruffins?
Once your Cheesy Garlic Cruffins are cooled, place them in an airtight container at room temperature for up to 2 days. If you wish to keep them longer, you can refrigerate them for up to 3 days, but be sure to reheat them in the oven to regain their delightful crispness. For even longer storage, freeze them individually wrapped in plastic wrap for up to 3 months!
Can I freeze Cheesy Garlic Cruffins?
Absolutely! To freeze your Cheesy Garlic Cruffins, wrap each one tightly in plastic wrap and then place them in a freezer bag to prevent freezer burn. When you’re ready to enjoy them again, you can reheat them directly from the freezer. Preheat your oven to 350°F (175°C) and bake for about 10-15 minutes until they are warmed through and the gooey cheese is melty again.
What can I do if my cruffins turn out dense?
If your cruffins end up dense, it could be due to inactive yeast. Always check the freshness of your yeast before starting. If you suspect that your dough hasn’t risen enough, you can let it rise again until it doubles in size. Also, knead the dough just until smooth; over-kneading can develop the gluten too much, resulting in a tougher texture. Make sure to create a warm environment for rising and avoid drafts.
Are Cheesy Garlic Cruffins suitable for pets?
The ingredients in Cheesy Garlic Cruffins, especially garlic and certain cheeses, are not suitable for pets. Garlic can be toxic to dogs and cats, so it’s advisable to keep these treats away from your furry friends and ensure they have their own pet-friendly snacks instead.
Can I make these cruffins vegan?
Yes! To make your Cheesy Garlic Cruffins vegan, simply substitute the egg with a flax egg (1 tablespoon ground flaxseed mixed with 2.5 tablespoons water, let sit for 5 minutes until thick) and replace the butter with coconut oil or a dairy-free butter alternative. You can also use non-dairy milk and nutritional yeast instead of Parmesan for a deliciously cheesy flavor.
Cheesy Garlic Cruffin: Warm, Gooey Joy in Every Bite
Ingredients
Equipment
Method
- In a large mixing bowl, combine dry ingredients: flour, sugar, salt, and yeast. Stir until evenly distributed.
- Create a well in the center and pour in milk, melted butter, warm water, and add the egg. Mix until a shaggy dough forms.
- Transfer the shaggy dough to a floured surface and knead for about 8-10 minutes until smooth and elastic.
- Place the kneaded dough in a greased bowl, cover with a damp cloth, and let it rise for approximately 1 hour or until doubled.
- Prepare the filling by mixing softened butter, minced garlic, and parsley in a small bowl until well combined.
- Preheat the oven to 375°F (190°C) and grease a muffin tin.
- Roll the dough out into a rectangle about 1/4 inch thick.
- Spread the garlic butter mixture over the dough, leaving a border, then sprinkle with cheeses.
- Roll the dough tightly into a log and slice into equal portions, about 1 inch thick.
- Place each slice upright in the muffin tin, cover, and let rise for an additional 20 minutes.
- Bake for 20-25 minutes, or until golden brown and puffed.
- Allow to cool in the tin for 5 minutes before transferring to a wire rack to cool slightly.