

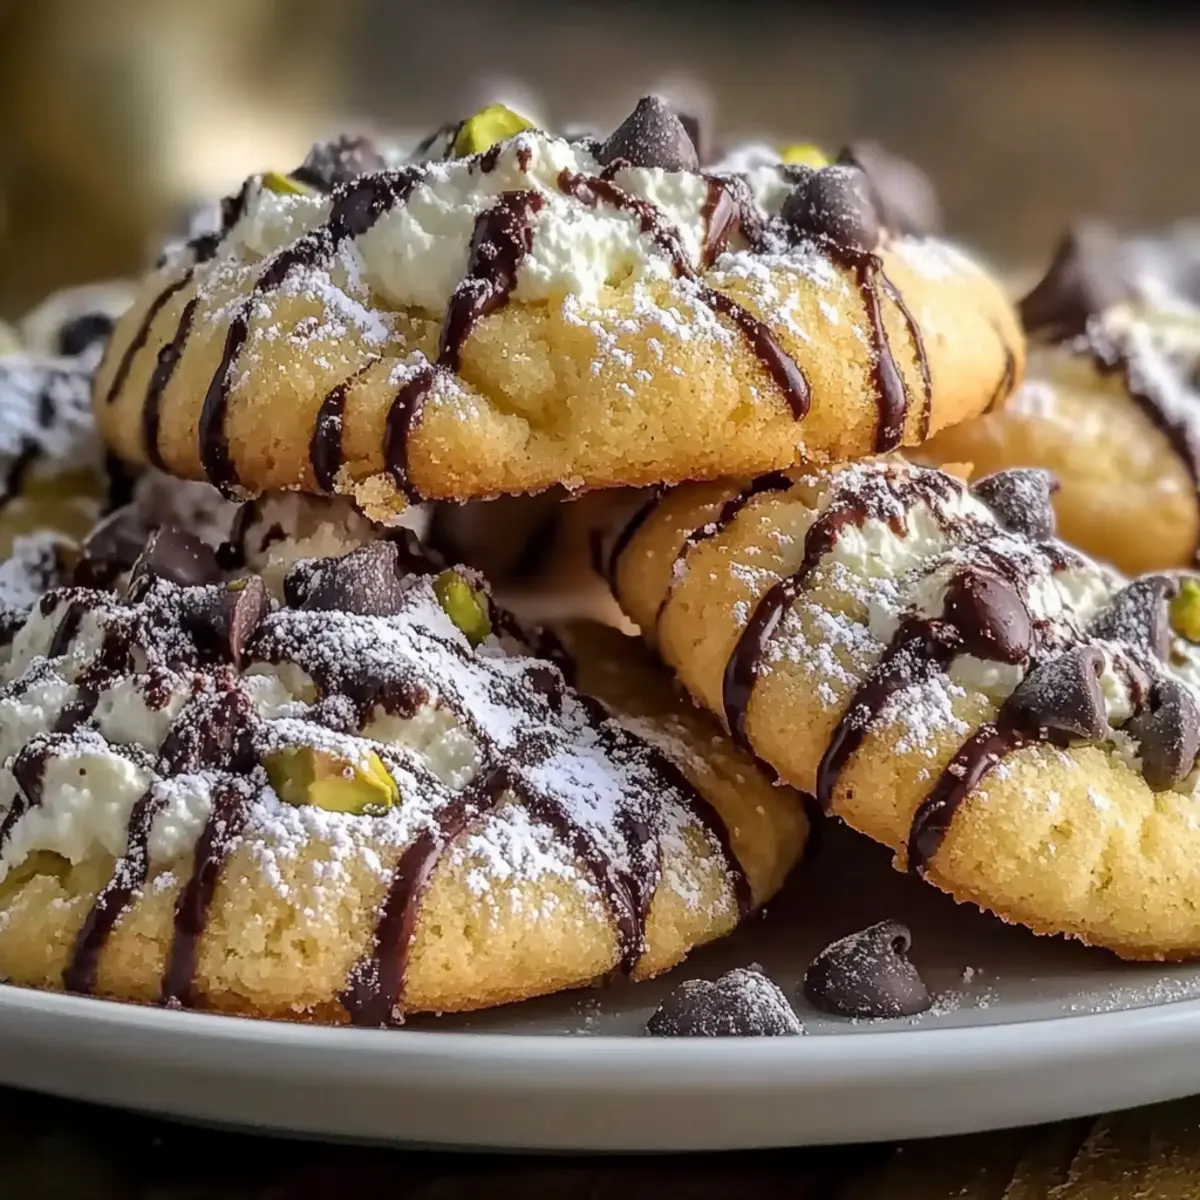
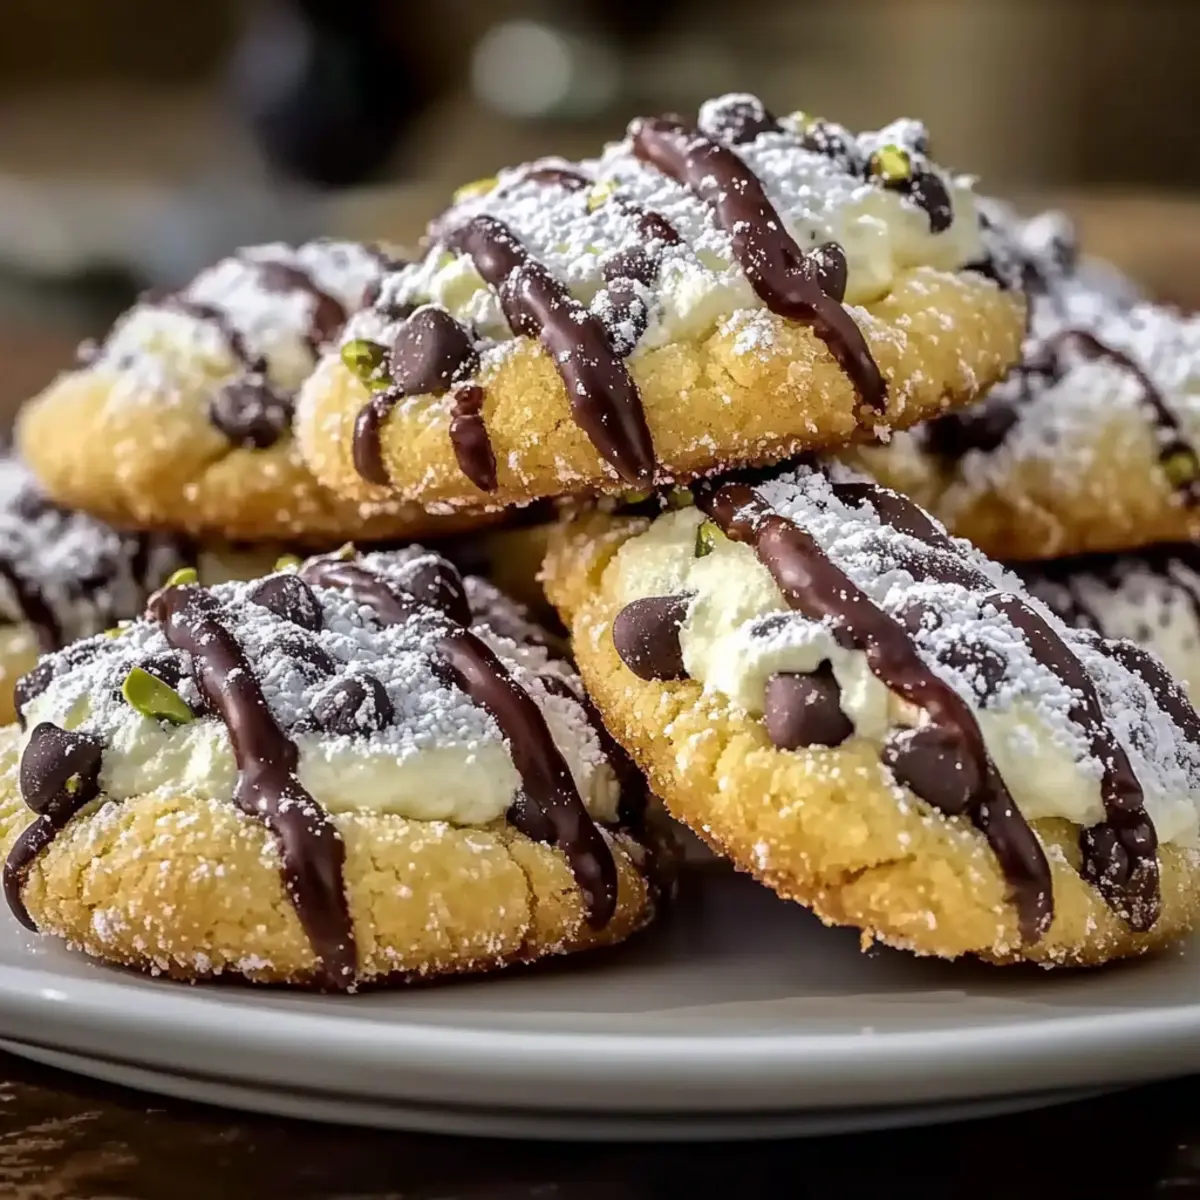
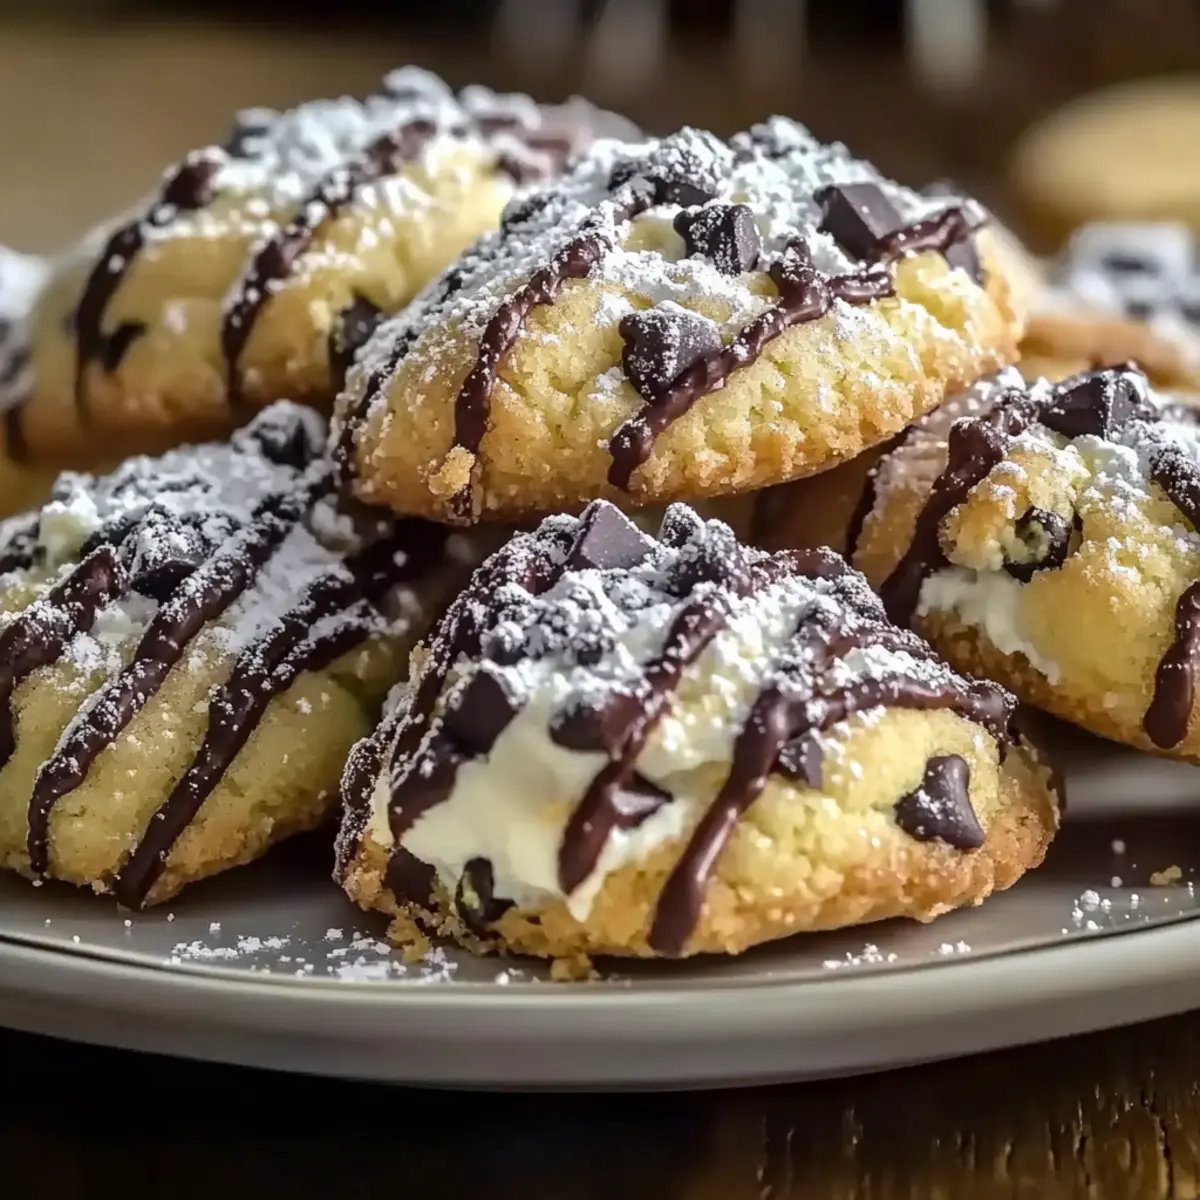
As I glanced at the cookie tray, my heart raced—those golden-brown Cannoli Cookies looked like they’d just been pulled from an Italian bakery. Imagine a crisp shell that crumbles with the slightest bite, revealing a creamy ricotta filling that sings of sweet memories. These delightful treats are quick to whip up with just six simple steps, making them perfect for any gathering or cozy night in. Not only do they satisfy a sweet tooth, but they also wrap traditional Italian flavors into every mouthful, offering a comforting reminder of family get-togethers. Ready to elevate your dessert game? Let’s dive into the world of Cannoli Cookies and bring a touch of Italy to your kitchen!
Why Are Cannoli Cookies So Irresistible?
Crispy Texture: Experience the delightful crunch of the golden exterior that perfectly contrasts the soft, creamy center.
Traditional Flavor: Infused with classic Italian notes, these cookies carry the beloved essence of traditional cannoli.
Quick and Easy: With only six straightforward steps, you’ll have homemade delights without the hassle.
Crowd-Pleasing Treat: These cookies are sure to impress family and friends, making them a fantastic addition to any gathering!
Versatile Ingredients: Customize with chocolate chips or nuts—each bite can be uniquely yours. Pair them with espresso for a truly Italian experience!
Cannoli Cookies Ingredients
For the Cookie Dough
- All-Purpose Flour – Provides structure to the cookies; can use gluten-free flour for a gluten-free version.
- Granulated Sugar – Adds sweetness and helps achieve a golden color when baked.
- Ricotta Cheese – Contributes moisture and creaminess; you’ll need ¼ cup in the dough.
- Large Egg – Acts as a binder for the ingredients, ensuring the cookie holds together.
- Vanilla Extract – Enhances flavor with warm, sweet notes; substitute with almond extract for a nuttier aroma.
- Lemon Zest – Adds brightness and a citrusy aroma to balance sweetness; for a different flavor, try orange zest.
For the Filling
- Ricotta Cheese – Use another ¼ cup in the filling for a decadent, creamy center.
- Mini Chocolate Chips – Provide a pop of sweetness and texture; these can be replaced with chopped dark chocolate as desired.
- Chopped Pistachios – Adds crunch and a hint of nuttiness; substitute with walnuts or almonds if preferred.
For the Finishing Touch
- Powdered Sugar – For dusting, adding a sweet finish and visual appeal to your Cannoli Cookies.
Step‑by‑Step Instructions for Cannoli Cookies
Step 1: Preheat Your Oven
Begin by preheating your oven to 350°F (175°C). This temperature ensures that your Cannoli Cookies bake evenly to a beautiful golden brown. While the oven warms up, gather your baking sheets and line them with parchment paper, preparing them for the cookies to come.
Step 2: Mix the Dry Ingredients
In a large mixing bowl, combine all-purpose flour and granulated sugar. Whisk these ingredients together until they are well integrated and free of lumps. This mixture will form the base of your dough, contributing to the structure and sweetness of the Cannoli Cookies.
Step 3: Blend the Wet Ingredients
In a separate bowl, blend together the ricotta cheese, egg, vanilla extract, and lemon zest until the mixture is smooth and creamy. This step infuses the dough with moisture and flavor, making it rich. Ensure the ricotta is at room temperature for the best results in smoothing them together.
Step 4: Combine Wet and Dry Ingredients
Gradually add the flour and sugar mixture into the ricotta blend, stirring gently with a spatula or wooden spoon. Continue to mix until a soft dough forms, ensuring not to overmix, as this will keep your Cannoli Cookies tender and light.
Step 5: Rest the Dough
Cover the dough with a clean kitchen towel or plastic wrap, allowing it to rest for about 30 minutes. This resting period helps the gluten relax and makes the dough easier to roll out evenly, leading to a better texture in your Cannoli Cookies.
Step 6: Roll Out the Dough
Once rested, lightly flour your work surface and roll out the dough to about ¼ inch thick. Cut the rolled dough into rectangles approximately 2×3 inches in size. Use a sharp knife or a pizza cutter for clean edges, and gather any scraps to re-roll as needed.
Step 7: Prepare the Filling
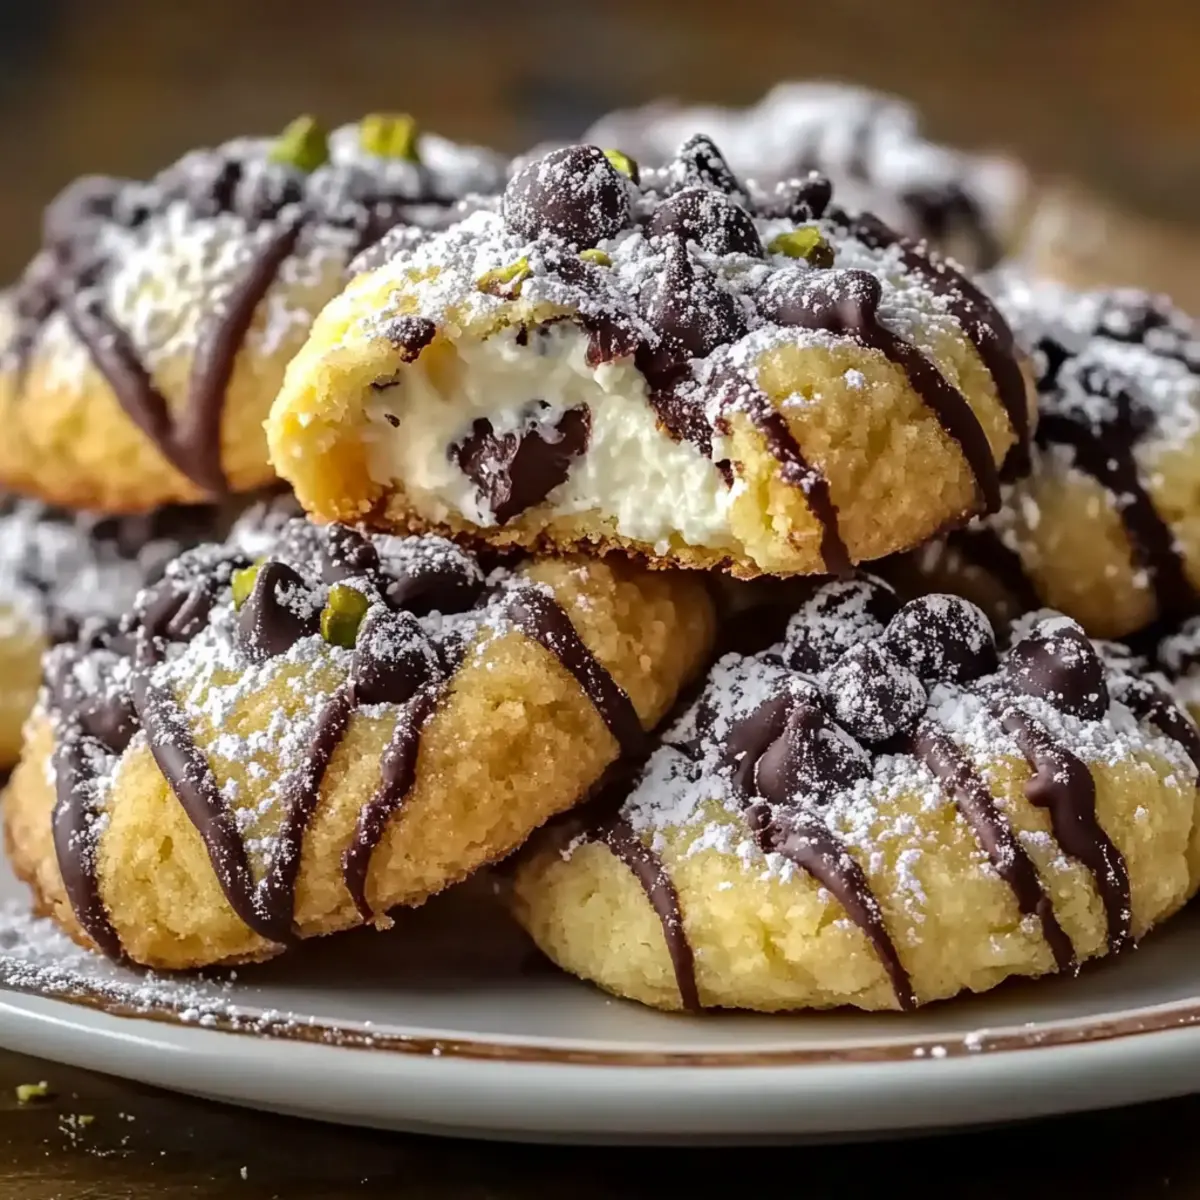
In a small bowl, mix the remaining ricotta cheese with mini chocolate chips and chopped pistachios. This creamy filling is the heart of your Cannoli Cookies, offering a sweet and nutty flavor that balances perfectly with the crisp cookie shell.
Step 8: Assemble the Cookies
Place a spoonful of the filling onto the center of each dough rectangle. Fold the rectangle over the filling and pinch the edges securely to seal them. This step ensures your filling remains nestled within the cookie during baking, creating that delightful surprise when you bite in.
Step 9: Bake the Cookies
Arrange the filled cookies on the prepared baking sheets, ensuring they have space to spread. Bake in the preheated oven for 15-18 minutes or until they turn a beautiful golden brown. Keep an eye on them to prevent over-browning; they should look crisp and inviting.
Step 10: Cool and Dust
After baking, allow the Cannoli Cookies to cool for a few minutes on the baking sheet before transferring them to a wire rack. Once they are cool to the touch, dust them lightly with powdered sugar to finish. This touch adds sweetness and a lovely visual appeal, making them irresistible!
What to Serve with Cannoli Cookies?
Indulging in Cannoli Cookies opens the door to delightful pairings that enhance every sweet bite, creating a truly memorable experience.
-
Espresso: The rich, bold flavors of espresso perfectly complement the sweet creaminess of the cookies, making for a delightful after-dinner treat.
-
Vanilla Ice Cream: A scoop of smooth vanilla ice cream adds a creamy contrast, enhancing the cookies’ textures and flavors for a comforting dessert.
-
Fresh Berries: Sweet, juicy berries bring a burst of freshness, cutting through the richness of the filling while adding a pop of color to your plate.
-
Chocolate Sauce Drizzle: Drizzling warm chocolate sauce over your Cannoli Cookies creates a luscious and decadent finish that will satisfy any chocolate lover.
-
Whipped Cream: A dollop of light, fluffy whipped cream adds a touch of elegance and balances the crispiness of the cookie with its airy softness.
-
Pistachio Crumble: Sprinkle some chopped pistachios on top of the cookies for an added crunch and nutty flavor that enhances the cookie’s filling.
-
Italian Lemonade: A refreshing glass of zesty Italian lemonade pairs well, providing a vibrant citrusy contrast to the sweet cookies.
-
Mint Tea: Inviting and herbaceous, mint tea can soothe the palate and elevate the experience with its aromatic notes alongside the delightful cookies.
These pairing suggestions are guaranteed to elevate your dessert spread, inviting sweet moments to savor with family and friends.
Storage Tips for Cannoli Cookies
Room Temperature: Store Cannoli Cookies in an airtight container at room temperature for up to 3 days. This keeps them crisp and fresh for the perfect sweet treat.
Freezer: For longer storage, wrap the cookies well and freeze them for up to 1 month. Thaw at room temperature before serving to retain their delicious texture.
Avoid Moisture: To prevent sogginess, ensure the cookies are completely cooled before storing. This helps maintain their crispy shell and creamy filling.
Reheating: If you prefer warm cookies, reheat in a 350°F (175°C) oven for about 5-7 minutes. This will bring back that delightful crunch while warming the filling!
Cannoli Cookies Variations & Substitutions
Feel free to take your Cannoli Cookies on a delightful adventure by customizing these sweet treats to suit your taste!
-
Orange Zest: Substitute lemon zest with orange for a sweeter, tangy twist that brightens the flavor profile.
-
Almond Extract: Switch out vanilla for almond extract to infuse your cookies with a subtle, nutty aroma that’s simply irresistible.
-
Chopped Walnuts: Use chopped walnuts in the filling instead of pistachios to add a warm, earthy crunch that harmonizes perfectly with the creamy ricotta.
-
Dark Chocolate: Replace mini chocolate chips with chopped dark chocolate for a richer, deeper flavor that enhances the sweetness of the filling.
-
Fortune Cookie Crumble: Add crushed fortune cookies into the filling for an unexpected crunch that delivers a unique texture and an exciting element of surprise.
-
Spicy Kick: Mix in a dash of cinnamon or a pinch of cayenne pepper in the dough for a subtle warmth that elevates traditional flavors to a whole new level.
-
Mini Pastry Shells: Instead of cookies, transform your batter into mini cannoli pastry shells using the same filling for a fun twist on presentation.
-
Nut-Free Option: Use sunflower seed butter in place of ricotta to create a nut-free filling that still maintains creaminess and flavor, perfect for school-safe treats!
Once you’ve perfected these Cannoli Cookies, why not explore other delightful recipes like Cookies Cream Cookies or indulge in the richness of Chocolate Stuffed Cookies? There’s a whole world of flavors waiting to be uncovered!
Expert Tips for Cannoli Cookies
- Room Temperature Ricotta: Ensure your ricotta is at room temperature for easy mixing, resulting in a smooth filling that blends effortlessly into the dough.
- Sift Your Flour: Sifting the flour before adding it to the mixture promotes lightness in your Cannoli Cookies, preventing them from becoming dense and tough.
- Mind the Baking Time: Keep a close eye on the baking time; cookies can quickly go from perfectly golden to over-browned. Check them at the 15-minute mark.
- Avoid Sticky Dough: If your dough becomes sticky while rolling, add small amounts of flour to achieve a manageable consistency.
- Creative Fillings: Don’t hesitate to experiment with your filling—substituting chocolate or nuts offers a unique twist, making each batch uniquely delicious!
Make Ahead Options
Cannoli Cookies are a fantastic choice for busy home cooks looking to save time! You can prepare the cookie dough up to 24 hours in advance by covering it tightly and refrigerating it, which helps the flavors meld beautifully. The filling can also be made ahead—refrigerate it for up to 3 days in an airtight container, ensuring it stays fresh and creamy. When ready to bake, simply roll out the chilled dough, fill it with the prepared filling, and bake according to the instructions. This approach allows you to whip up these delightful Cannoli Cookies when you’re short on time, ensuring they remain just as delicious as when freshly made!
Cannoli Cookies Recipe FAQs
What type of ricotta cheese should I use?
Absolutely! For the best results, use whole milk ricotta cheese. It provides the creaminess and moisture needed for both the dough and filling. Make sure it’s at room temperature to blend smoothly without lumps. Avoid using ricotta packed in water, as it can make the mixture too wet.
How should I store leftover Cannoli Cookies?
You can store your Cannoli Cookies in an airtight container at room temperature for up to 3 days. This keeps them fresh and the outer shell crunchy. If you want to keep them for a longer time, wrap them securely in plastic wrap and freeze them for up to 1 month. Just remember to thaw them at room temperature before enjoying!
Can I freeze Cannoli Cookies?
Absolutely! To freeze your Cannoli Cookies, wrap each cookie tightly in plastic wrap, then place them in a freezer-safe bag or container. They can be stored this way for up to 1 month. When you’re ready to indulge, simply thaw them at room temperature. You can also reheat them in a 350°F (175°C) oven for about 5-7 minutes to regain that delightful crunch.
What if my cookie dough is too sticky?
Very commonly, you may encounter sticky dough! If this happens, simply sprinkle in small amounts of flour, mixing gently until the dough becomes manageable. Make sure to avoid overmixing, as it’s key to keeping your cookies light and airy. Remember, a bit of stickiness can be normal, but it should roll out without too much trouble!
Are Cannoli Cookies suitable for people with nut allergies?
Indeed! While the traditional Cannoli Cookies can include nuts like pistachios or almonds, you can easily make them nut-free by omitting these ingredients. Ensure to check chocolate chips for any allergy warnings, too. For a rich flavor without nuts, consider adding a bit more chocolate or enhancing the spices in your filling!
How do I know when the cookies are done baking?
You’ll know your Cannoli Cookies are done baking when they turn a beautiful golden brown color, typically between 15-18 minutes. It’s essential to keep an eye on them after the 15-minute mark, as they can go from perfectly golden to overdone quite quickly. Look for a lightly crisp exterior and a tender texture when you gently press them. Enjoy your baking journey!
Cannoli Cookies: Sweet Italian Goodness in Every Bite
Ingredients
Equipment
Method
- Preheat your oven to 350°F (175°C). Prepare baking sheets with parchment paper.
- In a large mixing bowl, combine all-purpose flour and granulated sugar, and whisk until free of lumps.
- In a separate bowl, blend ricotta cheese, egg, vanilla extract, and lemon zest until smooth and creamy.
- Gradually add the flour mixture into the ricotta blend and stir gently until a soft dough forms.
- Cover the dough with a towel or plastic wrap and let it rest for about 30 minutes.
- Roll out the dough to about ¼ inch thick and cut into rectangles (approximately 2x3 inches).
- Mix the filling with remaining ricotta cheese, mini chocolate chips, and chopped pistachios.
- Place a spoonful of filling on each dough rectangle, fold over and pinch edges to seal.
- Arrange filled cookies on baking sheets, bake for 15-18 minutes until golden brown.
- Allow cookies to cool, then dust lightly with powdered sugar before serving.