

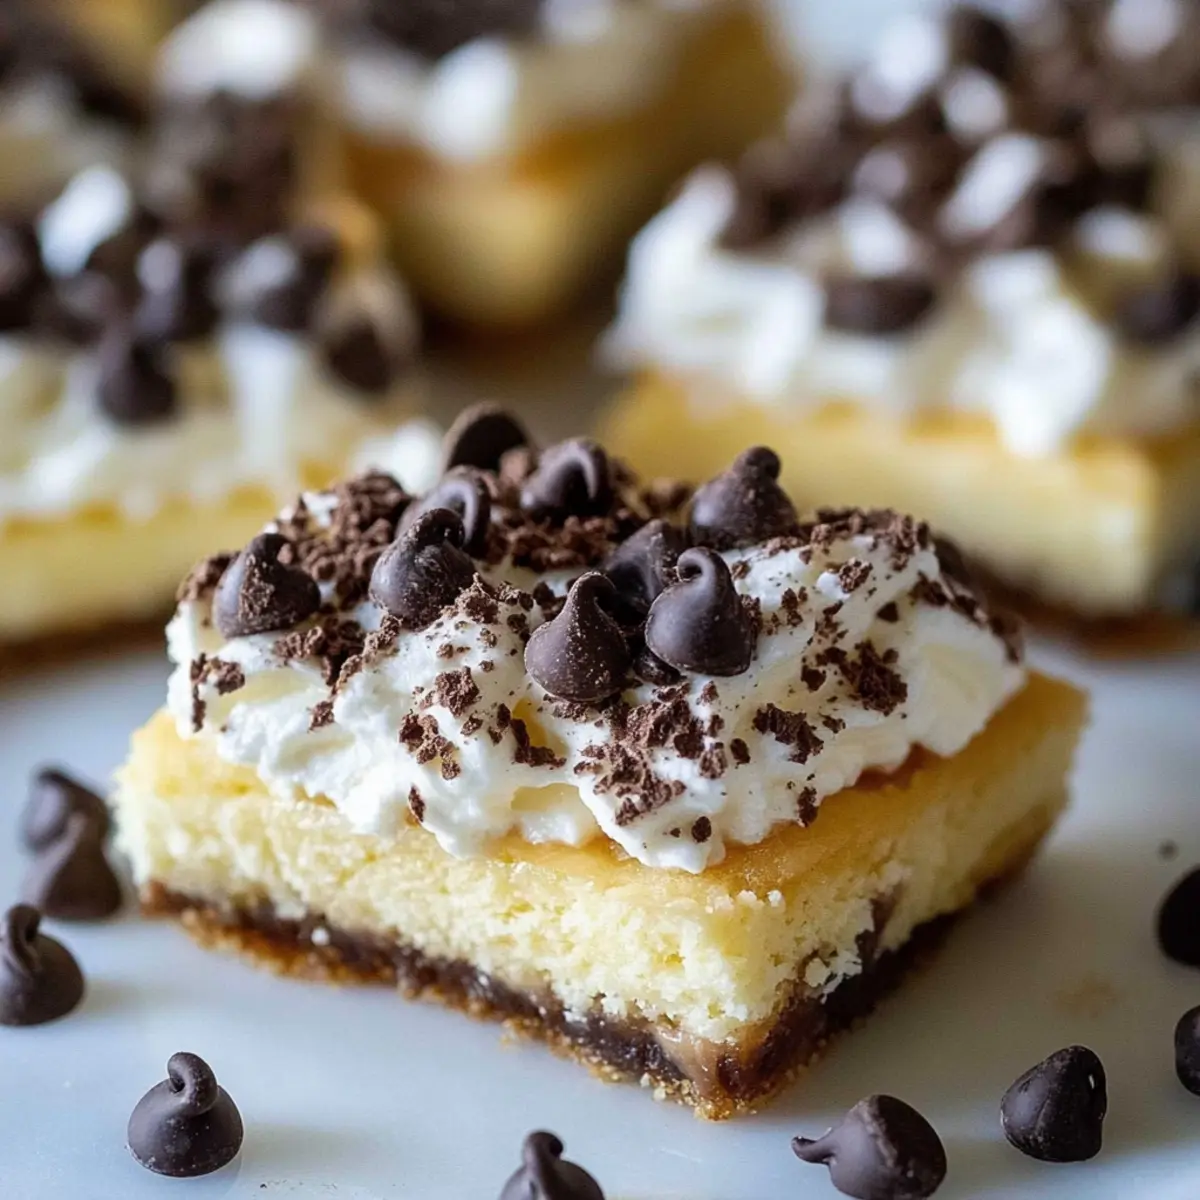
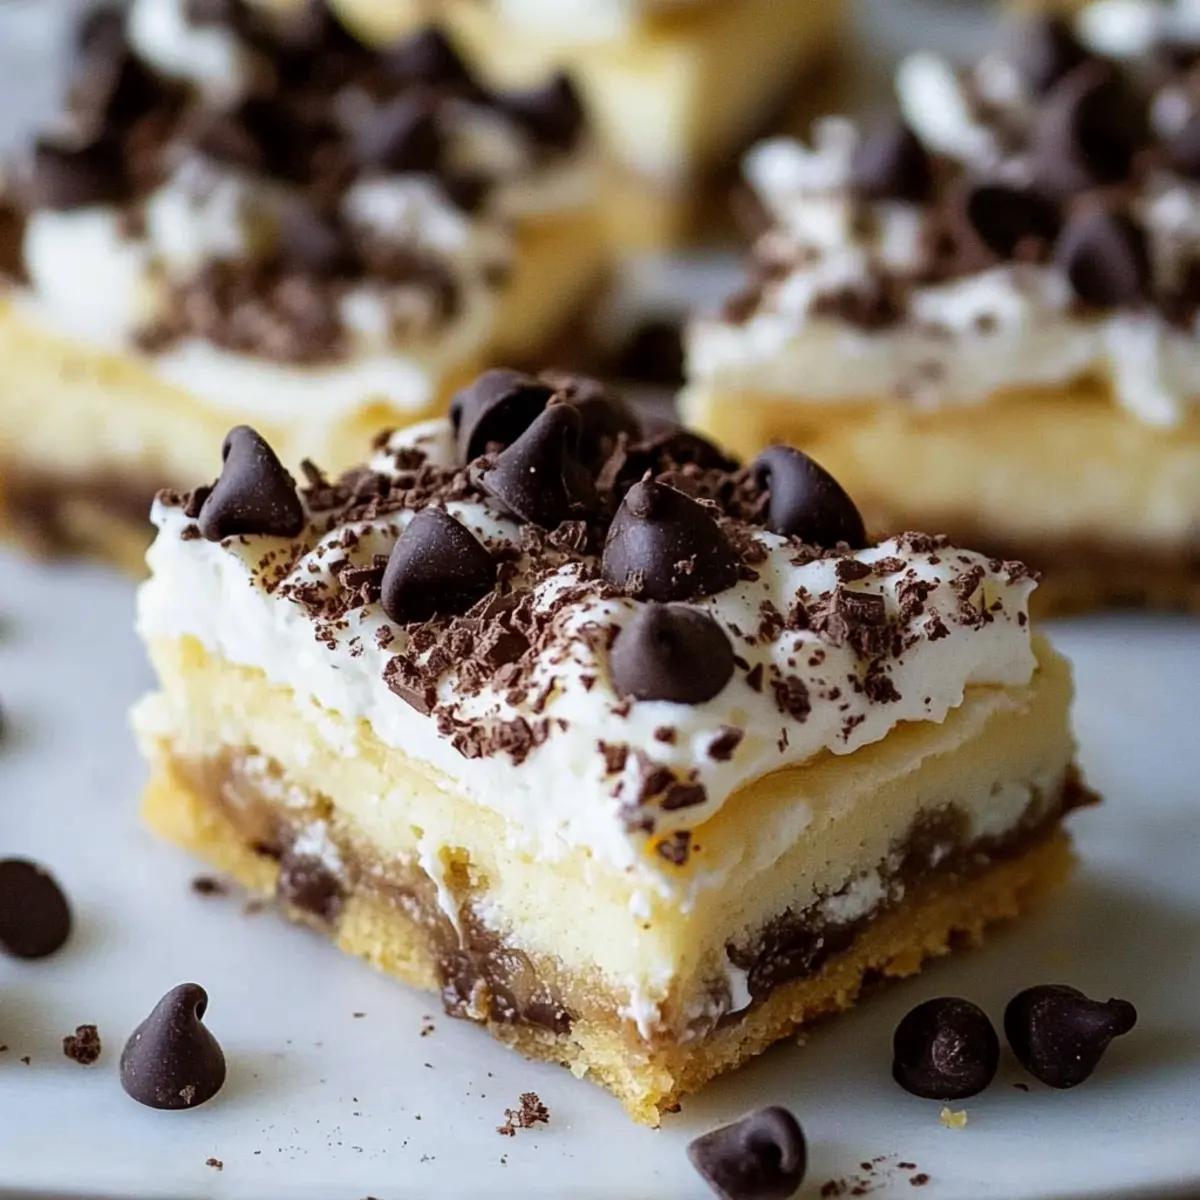
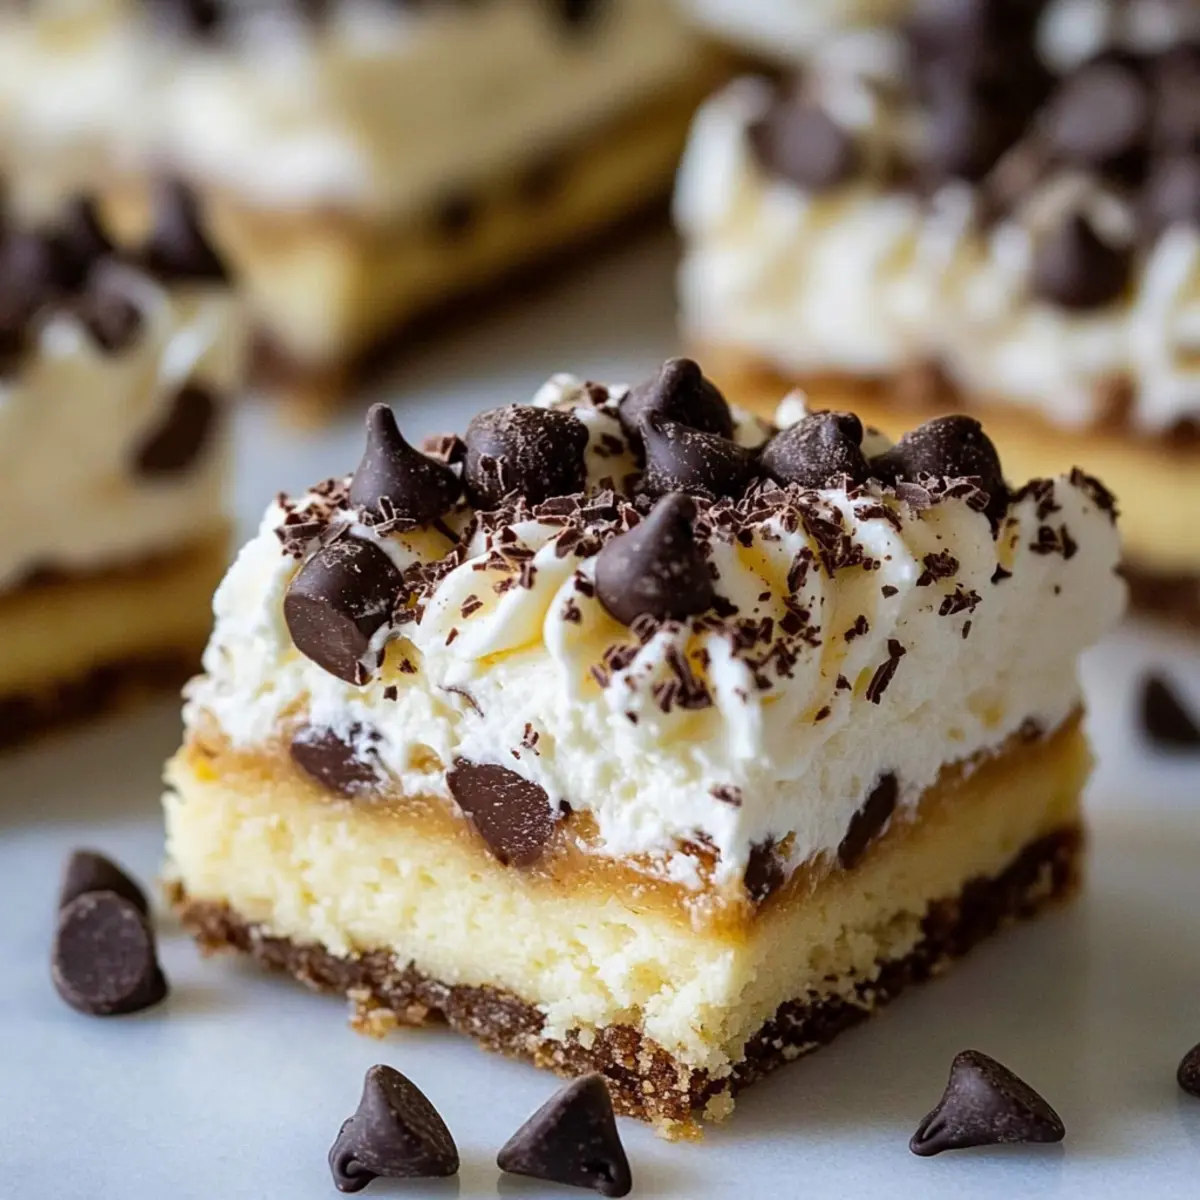
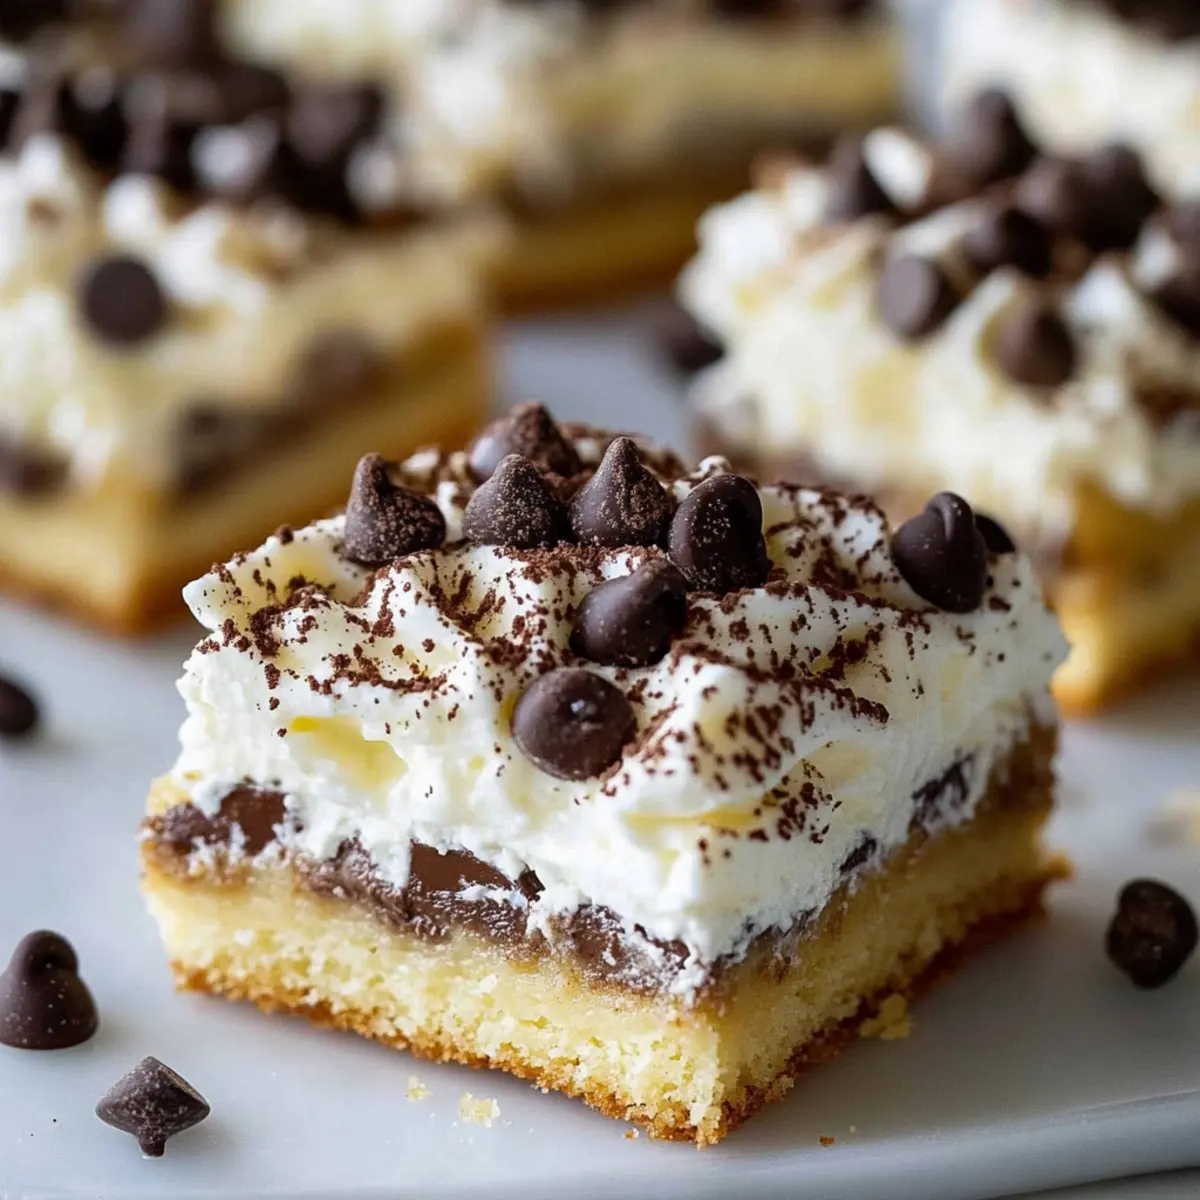
Caught in a whirlwind of cravings for something delightfully sweet yet uncomplicated? These Cannoli Bars are your answer! Bringing all the classic Italian dessert flavors straight to your home, they combine creamy ricotta, mini chocolate chips, and a buttery cookie crust into a beautiful baked bar. What amps up the excitement is that this no-fry recipe is a true crowd-pleaser, perfect for celebrations or a cozy afternoon treat. You’ll feel like you’ve just stepped into a charming Italian pastry shop, but with the joy of knowing you whipped it up in your very own kitchen. So why not create these luscious bars and indulge yourself or share them with loved ones? Get ready for a delightful surprise!
Why are Cannoli Bars irresistible?
Simplicity at Its Best: These Cannoli Bars are baked, not fried, making the process simpler and cleaner for home cooks of all skill levels.
Rich, Creamy Filling: The luscious combination of ricotta and cream cheese results in a decadent filling that melts in your mouth.
Crowd-Pleasing Delight: Perfect for gatherings or an afternoon pick-me-up, these bars will have everyone asking for seconds.
Versatile Options: Feel free to mix in your favorite nuts or different chocolate to customize each batch, just like in my Raspberry Crumble Bars recipe!
Time-Saving Treat: With minimal prep and baking time, these bars will satisfy your sweet tooth without taking all day.
Take a step into the world of homemade Italian desserts with these delightful Cannoli Bars and make any occasion extra special!
Cannoli Bars Ingredients
• Get ready to indulge!
For the Cookie Crust
- All-purpose flour – Provides structure for the cookie crust; can be substituted with gluten-free flour if needed.
- Granulated sugar – Sweetens the cookie crust and filling; honey or maple syrup can alter texture, so be cautious.
- Unsalted butter – Adds richness and flavor; swap with coconut oil or vegan butter for a dairy-free version.
- Kosher salt – Enhances flavor; use regular salt if that’s what you have on hand.
- Vanilla extract – Infuses warmth; almond extract can be used for a different flavor profile.
- Ground cinnamon – Adds a hint of spice; you can omit it for a plain taste.
For the Creamy Filling
- Whole milk ricotta cheese – Creates the creamy filling but make sure to drain if excessively wet for best texture.
- Cream cheese – Helps the bars set and adds richness; it can be omitted for a lighter filling, but results may vary.
- Powdered sugar – Sweetens the ricotta filling; no substitutions recommended for the best texture.
- Large eggs – Binds the filling ingredients; ensure they’re at room temperature for better incorporation.
- Almond extract (optional) – Adds a distinct flavor to the filling; feel free to replace with hazelnut extract.
- Orange or lemon zest – Adds a bright citrus note; choose whichever you prefer for a personal touch.
- Mini chocolate chips – Adds sweetness and texture to the filling; dark chocolate chunks can be a delightful alternative or omit entirely.
- Chopped pistachios (optional) – For topping, they add crunch and color; you can use other nuts or skip this altogether.
For Baking
- Parchment paper – Essential for lining the baking pan for easy removal of bars; don’t skip this crucial step!
- Nonstick spray or butter – Optional for greasing under the parchment paper to ensure the crust doesn’t stick.
Indulge in the art of homemade Cannoli Bars and transform your kitchen into a slice of Italy!
Step‑by‑Step Instructions for Cannoli Bars
Step 1: Preheat the Oven
Begin by preheating your oven to 350°F (175°C). While the oven warms up, take a 9×9-inch baking pan and line it with parchment paper, allowing some overhang for easy removal later. Lightly grease the parchment with nonstick spray or butter to ensure your cannoli bars come out smoothly once baked.
Step 2: Make the Cookie Crust
In a mixing bowl, combine all-purpose flour, granulated sugar, ground cinnamon, and kosher salt. Stir in the melted unsalted butter and vanilla extract until the mixture becomes crumbly yet holds together when pressed. This buttery blend will form the delicious base of your Cannoli Bars, ensuring a perfect balance of sweetness and texture.
Step 3: Press in the Crust
Transfer the crumbly mixture into the prepared baking pan. Press the crust firmly and evenly with your fingers or the bottom of a glass to ensure it bakes uniformly. Slide the pan into the preheated oven and bake for 10-12 minutes, or until the crust is set but not browned, creating a lovely foundation for your creamy filling.
Step 4: Prepare the Filling
While the crust bakes, prepare the luscious filling for your Cannoli Bars. In a large mixing bowl, beat the cream cheese until fluffy. Gradually add in the drained ricotta cheese, mixing until completely smooth. This rich blend will be the star of your bars, offering that classic cannoli flavor we all adore.
Step 5: Add Flavor and Eggs
Mix in the powdered sugar, salt, vanilla extract, almond extract, and your choice of orange or lemon zest to the ricotta mixture. Once combined, add the large eggs one at a time, mixing on low speed after each addition. Finally, gently fold in the mini chocolate chips, ensuring they are evenly distributed throughout the filling.
Step 6: Assemble the Cannoli Bars
Once the crust has cooled slightly, pour the creamy filling over the warm crust. Use a spatula to spread the filling evenly to the edges. If desired, sprinkle chopped pistachios on top for added crunch and color. This layer of fillings will create a loving embrace around the delightful cookie crust.
Step 7: Bake the Cannoli Bars
Carefully return the pan to the oven and bake for 30-35 minutes. Keep an eye on them; you’ll know they’re ready when the edges are set, and the center has a slight jiggle. This baking process melds the edges and filling together, producing a delightful dessert that captures the charm of traditional cannoli.
Step 8: Cool and Chill
Once baked, remove the pan from the oven and let the Cannoli Bars cool to room temperature on a wire rack. After cooling, cover the pan tightly with plastic wrap and chill in the refrigerator for at least 3 hours. This chilling time allows the filling to firm up and makes slicing easier.
Step 9: Slice and Serve
After chilling, carefully lift the bars out of the pan using the parchment paper overhang. Slice into 16-20 pieces using a sharp knife for clean edges. Serve the chilled Cannoli Bars as a delightful dessert, perfect for gatherings or as a sweet treat to enjoy anytime!
What to Serve with Cannoli Bars
Indulging in Cannoli Bars creates a delightful opportunity to craft a full meal experience that celebrates the best of Italian flavors.
-
Espresso or Cappuccino: The rich coffee notes beautifully complement the creamy sweetness of the bars, making each bite feel like a luxurious café experience. A warm cup brings out the flavors and deepens the indulgence.
-
Fresh Berries: Tart raspberries or sweet strawberries provide a refreshing contrast, cutting through the richness of the bars while adding vibrant freshness and color to your dessert spread.
-
Whipped Cream: Light and fluffy whipped cream on the side adds a lovely lightness, enhancing the creaminess of the Cannoli Bars without overwhelming their flavor.
-
Pistachio Gelato: This nutty, creamy dessert enhances the pistachio topping of the bars, creating a harmonious nutty experience and cooling delight that’s perfect for warm days.
-
Chocolate Drizzle: A simple drizzle of melted chocolate can add a decadent touch. The extra layer of sweetness mingles beautifully with the ricotta filling, enhancing each bite.
-
Tiramisu: For a truly Italian feast, serve these bars alongside a light tiramisu. The coffee flavors and creamy textures complement each other, inviting guests to indulge in the ultimate Italian dessert experience.
-
Mint Tea: The refreshing herbal notes of mint tea cleanse the palate perfectly, leaving a refreshing finish after each sweet mouthful. It’s a lovely option for a cozy afternoon or elegant gathering.
How to Store and Freeze Cannoli Bars
Fridge: Keep the Cannoli Bars covered in an airtight container for up to 5 days. This ensures they stay fresh and the flavors meld beautifully.
Freezer: For long-term storage, freeze the bars for up to 2 months. Wrap them tightly in plastic wrap and then in aluminum foil to prevent freezer burn.
Thawing: To enjoy, thaw the Cannoli Bars in the refrigerator overnight before serving. This helps retain their delightful creamy texture.
Reheating: If desired, you can pop them in the microwave for a few seconds, but they’re best enjoyed chilled for the full flavor experience.
Make Ahead Options
These Cannoli Bars are a fantastic choice for meal prep enthusiasts looking to save time! You can prepare the cookie crust and filling up to 24 hours in advance. Simply make the crust and let it cool completely, then store it tightly covered in the fridge to maintain its freshness. The creamy filling can also be mixed ahead of time; just keep it in an airtight container for up to 3 days. When you’re ready to enjoy, pour the filling over the crust and bake as instructed. This way, you’ll have that delightful homemade dessert ready with minimal effort, just as delicious as fresh!
Cannoli Bars Variations & Substitutions
Feel free to explore these delicious twists and swaps that turn your Cannoli Bars into uniquely satisfying creations.
- Gluten-Free: Use gluten-free flour instead of all-purpose for a suitable option.
- Dairy-Free: Swap cream cheese with vegan cream cheese and use coconut oil for butter. The rich taste remains, minus the dairy!
- Nutty Delight: Add chopped almonds or hazelnuts to the filling for a wonderful crunch. It complements the creamy texture beautifully.
- Fruit Explosion: Toss in dried cranberries or cherries for a sweet, fruity kick that enhances the traditional flavors.
- Spiced Up: Incorporate a pinch of nutmeg or a dash of ginger for a warm, spiced flavor that dances with the ricotta.
- Flavor Extracts: Try different extracts like maple or coconut for a re-invented flavor twist. You’ll be surprised how these subtle changes can create new dimensions.
- Chocolate Lovers: Replace mini chocolate chips with chopped dark chocolate or even white chocolate for an extra level of indulgence.
- Zesty Appeal: Add more orange or lemon zest to amplify the citrus notes in the filling, creating a bright, refreshing flavor that’s a true delight.
These variations will not only delight your taste buds but also let you share the joy of homemade desserts, just like my Raspberry Crumble Bars! Enjoy making this delightful Italian treat your own!
Expert Tips for Cannoli Bars
- Drain Ricotta Well: Draining the ricotta prevents a soggy filling, which can ruin your Cannoli Bars’ texture.
- Room Temperature Eggs: Using eggs at room temperature allows for better incorporation into the filling, promoting a smoother consistency.
- Cool Before Chilling: Allowing the bars to cool to room temperature before chilling ensures they set correctly and makes slicing easier.
- Evenly Press Crust: Ensure the cookie crust is pressed evenly into the pan; unevenness can lead to uneven baking and texture.
- Store Properly: Keep leftover Cannoli Bars in an airtight container in the refrigerator for up to 5 days or freeze them for longer storage.
Cannoli Bars Recipe FAQs
How do I choose the right ricotta cheese for my Cannoli Bars?
Absolutely! When selecting ricotta cheese, I recommend choosing whole milk ricotta as it offers a creamier texture. Make sure to check that it’s not overly wet; draining it before using will help avoid a soggy filling and ensure the best results for your bars.
How should I store my Cannoli Bars, and how long will they last?
You can store your Cannoli Bars covered in an airtight container in the refrigerator for up to 5 days. This keeps them fresh while flavors meld beautifully. If you want to keep them longer, they can be frozen for up to 2 months. Just wrap them tightly in plastic wrap and then in aluminum foil to prevent freezer burn.
Can I freeze Cannoli Bars, and how do I do it?
Of course! To freeze your Cannoli Bars, first ensure they are completely cooled and sliced. Wrap each piece tightly in plastic wrap, then place them in a freezer-safe bag or container. They can be kept in the freezer for up to 2 months. When you want to enjoy them, simply transfer the bars to the refrigerator overnight to thaw.
What should I do if my filling seems too runny?
If your filling is too runny, it could be due to not draining the ricotta thoroughly or using ricotta that’s too wet. To salvage it, add a bit more powdered sugar or consider folding in more cream cheese to thicken it. Another option is to bake the bars a little longer to help set the filling, but keep an eye on them to avoid overcooking.
Are Cannoli Bars safe for those with nut allergies?
Yes, they can be made nut-free easily! Just omit the chopped pistachios, and if you’re using flavored extracts, check for nut-based additives. The Cannoli Bars will still be delightful without nuts!
Can I make Cannoli Bars gluten-free?
Absolutely! To make Cannoli Bars gluten-free, simply substitute the all-purpose flour with a gluten-free flour blend. Just make sure to check that your other ingredients, like baking powder, are also gluten-free. This way, you can enjoy the same scrumptious flavors without any gluten!
Irresistible Cannoli Bars – Easy Homemade Italian Delight
Ingredients
Equipment
Method
- Preheat your oven to 350°F (175°C) and line a 9×9-inch baking pan with parchment paper, lightly greasing it.
- In a mixing bowl, combine flour, sugar, ground cinnamon, and salt. Stir in melted butter and vanilla until crumbly.
- Press the crust mixture firmly into the baking pan and bake for 10-12 minutes until set but not browned.
- In a large bowl, beat the cream cheese until fluffy, then gradually mix in drained ricotta until smooth.
- Add powdered sugar, salt, vanilla, almond extract, and zest to the mixture. Incorporate eggs one at a time, then fold in chocolate chips.
- Pour the filling over the warm crust, spreading evenly. Optionally, sprinkle pistachios on top.
- Return to the oven and bake for 30-35 minutes until edges are set and center has a slight jiggle.
- Let the bars cool to room temperature on a wire rack, then chill in the refrigerator for at least 3 hours.
- Once chilled, lift the bars from the pan using parchment overhang and slice into 16-20 pieces.