

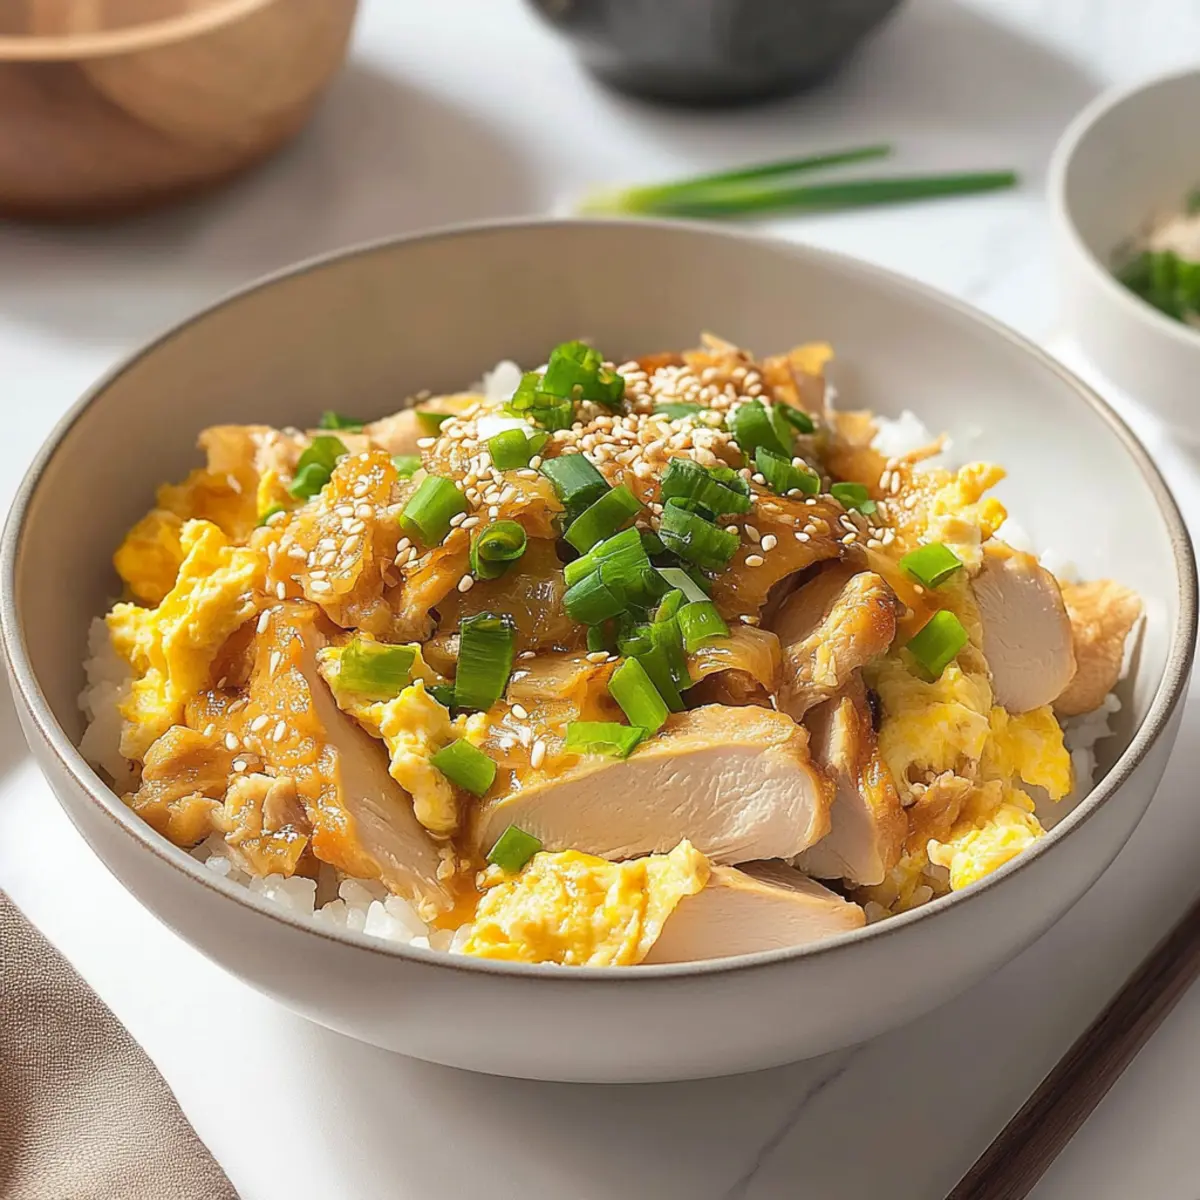
The aroma of sizzling onions mingled with tender chicken fills the kitchen as I prepare a delightful bowl of Oyakodon. This incredible 15-Minute Oyakodon is not just a meal; it’s a comforting embrace on a plate. Packed with succulent chicken and fluffy eggs simmered in a savory dashi broth, this quick and easy Japanese chicken and egg rice bowl has quickly become my go-to on hectic weeknights. Not only does it come together in just 15 minutes, but it also offers a wholesome, heartwarming experience that rivals any takeout. Trust me; once you try this comforting dish, you’ll wonder why it took so long to bring Japan’s best home. Curious about how to whip up this savory goodness? Let’s dive in!

Why is Oyakodon a must-try?
Quick, Enjoyable Prep: This 15-Minute Oyakodon comes together in just a flash—perfect for busy evenings when time is of the essence.
Comforting Indulgence: The combination of tender chicken, rich broth, and fluffy eggs creates a satisfying experience that warms both the heart and the soul.
Flavorful Depth: With umami-rich dashi and a touch of sweetness from onions, each bite offers a complex flavor that dances on your palate.
Versatile Dish: Easy to customize with alternate proteins or grains, you can make this recipe your own, catering to various dietary preferences effortlessly.
Crowd-Pleaser: Whether for a family dinner or a cozy gathering, this hearty bowl is bound to be a hit at the table. Give it a try alongside my other favorites like Teriyaki Chicken.
15-Minute Oyakodon Ingredients
For the Chicken and Broth
- Boneless Skinless Chicken Thigh – Main protein providing succulence; swap for chicken breast for a leaner option.
- Sake – Adds depth and umami flavor; omit for a non-alcoholic version or replace with rice vinegar.
- Salt – Enhances flavors; adjust based on taste preference or use low-sodium options for less sodium intake.
- White Pepper – Provides mild heat and additional flavor; black pepper can be substituted.
- Dashi (Japanese Soup Stock) – Gives authentic umami taste; can use homemade or instant dashi powder mixed with water.
- Soy Sauce – Adds saltiness and color; choose low-sodium soy sauce for a healthier option.
- Mirin – A sweet rice wine that deepens flavor; substitute with a mix of sugar and vinegar if unavailable.
- Sugar – Balances savory flavors; maple syrup or honey can serve as alternatives.
For the Eggs and Rice
- Eggs – Create the luscious, creamy texture; opt for fresh eggs for best results or use egg substitute products.
- Yellow Onion – Contributes sweetness and depth; shallots can serve as an alternative.
- Cooked White Rice – Acts as the hearty base; replace with brown rice or quinoa for a nutritious twist.
For the Garnish
- Green Onion – Adds a fresh crunch and flavor; feel free to adjust based on your preference.
- Sesame Seeds – Provide a nutty enrichment to the dish; you can toast them for extra flavor.
- Togarashi – A spicy Japanese seasoning for a flavor punch; customize based on your spice level.
This 15-Minute Oyakodon is a delightful and customizable dish perfect for busy weeknights!
Step‑by‑Step Instructions for 15-Minute Oyakodon
Step 1: Marinate Chicken
Begin by cutting your boneless skinless chicken thighs into bite-sized pieces. In a mixing bowl, combine the chicken with sake, salt, and white pepper, ensuring the pieces are well-coated. Allow the chicken to marinate for about 10 minutes. You’ll know it’s ready when the chicken absorbs the flavors and becomes slightly more fragrant.
Step 2: Prepare Broth
In a separate bowl, whisk together the dashi, soy sauce, mirin, and sugar until the sugar fully dissolves. This savory mixture is key to the umami flavor in your 15-Minute Oyakodon. Set this broth aside until it’s needed later, ensuring you have it easily accessible to add to the pan.
Step 3: Mix Eggs
Crack the eggs into a clean bowl, taking care not to break the yolks fully. Gently whisk the eggs until the whites and yolks are slightly combined, creating a marbled effect. This step adds a lovely texture to your dish. Set the egg mixture aside, ready to enhance your Oyakodon with its creamy goodness.
Step 4: Cook Onions
Heat a medium-sized pan over medium heat and add a splash of oil. Once hot, add the sliced yellow onion and sauté for about 1-2 minutes until they become translucent and fragrant. This light caramelization will bring out the natural sweetness of the onions, setting a perfect base for the Oyakodon broth.
Step 5: Add Chicken
Carefully incorporate the marinated chicken into the pan with the sautéed onions. Increase the heat slightly and cook for about 5 minutes, stirring occasionally until the chicken is no longer pink and starts to brown. This ensures the chicken is tender and juicy, infusing the dish with rich flavors.
Step 6: Add Eggs
Once the chicken is cooked through, pour the prepared egg mixture over the chicken and onions. Gently scramble everything together with a spatula, allowing the eggs to cook just until they are softly set with a slightly runny top. This will take approximately 2 minutes, giving your Oyakodon a luscious texture.
Step 7: Serve
Spoon the chicken and egg mixture over bowls of warm cooked white rice, making sure each bowl is generously filled. Garnish with chopped green onions, a sprinkle of sesame seeds, and a dash of togarashi for added flavor and visual appeal. Serve immediately, embracing the warm, comforting flavors of your homemade 15-Minute Oyakodon.

Storage Tips for 15-Minute Oyakodon
- Fridge: Store leftovers in an airtight container for up to 3 days. Make sure the dish is fully cooled before sealing to preserve freshness and prevent condensation.
- Freezer: For longer storage, freeze cooked Oyakodon in a freezer-safe container for up to 2 months. Ensure it’s cooled completely before freezing.
- Reheating: To reheat, thaw in the fridge overnight, then warm gently on the stove with a splash of water to maintain moisture, or microwave in short intervals until heated through.
- Reminder: When storing, separate rice from the chicken and eggs if possible, as this keeps the textures intact and enhances the enjoyment of your 15-Minute Oyakodon when reheated.
Expert Tips for 15-Minute Oyakodon
- Quality Ingredients: Use high-quality, fresh ingredients—especially chicken and eggs—to elevate the flavor and overall experience of your 15-Minute Oyakodon.
- Right Timing: Prep your ingredients before cooking to ensure everything goes smoothly and fits within the 15-minute timeframe.
- Don’t Overcrowd the Pan: Cook the chicken in a single layer for even cooking and browning, which will enhance the dish’s flavor.
- Watch the Eggs: Remove from heat when the eggs are still slightly runny on top; they’ll continue to cook from residual heat, keeping them soft and creamy.
- Adjust Seasoning: Taste the broth before adding it to the pan and adjust the soy sauce and salt levels based on your preference to achieve a balanced flavor.
What to Serve with 15-Minute Oyakodon?
Get ready to elevate your meal experience with delightful sides that perfectly balance this comforting bowl of savory goodness.
-
Pickled Vegetables: The tangy crunch of pickled veggies cuts through the richness, adding a refreshing bite to each mouthful.
-
Miso Soup: A warm bowl of miso soup complements the Oyakodon beautifully, wrapping your meal in a cozy, umami embrace.
-
Steamed Edamame: Lightly salted edamame makes for a protein-packed side that adds texture and nutrition to your plate.
-
Japanese Cucumber Salad: This crisp salad provides a cool contrast, enhancing the overall flavor profile with a touch of sweetness.
-
Seaweed Salad: Earthy and umami-rich, seaweed salad adds a delightful twist and depth, making your dining experience even more authentic.
-
Sake or Green Tea: Pairing your Oyakodon with a glass of chilled sake or a warm cup of green tea elevates the meal, enhancing the comforting ambiance.
-
Chocolate Mochi: For dessert, sweet, chewy chocolate mochi offers a delightful finish that balances out the savory elements of your Oyakodon beautifully.
15-Minute Oyakodon: Flavorful Variations
Feel free to personalize your 15-Minute Oyakodon with these delicious twists that will keep your taste buds dancing!
- Vegetarian: Swap chicken for tofu or tempeh and add extra vegetables. This vegetarian version is just as hearty!
- Spicy Kick: Add sliced fresh chili or a dash of chili oil to the broth for a spicy enhancement.
- Crispy Protein: For texture, pan-fry the chicken with a light coating of cornstarch before adding to the broth.
- Quinoa Base: Replace white rice with quinoa for a protein-packed, nutritious alternative that brings a nutty flavor.
- Herbed Oyakodon: Stir in fresh herbs like cilantro or basil before serving to add a refreshing burst of flavor.
- Garlic Infusion: Sauté minced garlic with the onions for an aromatic kick that elevates the umami profile.
- Mushroom Medley: Add a mix of shiitake or enoki mushrooms for an earthy flavor and added texture. They pair beautifully with the broth.
Explore these variations and discover how to make this comforting dish uniquely yours! For more easy swaps, check out my guide on substituting chicken in recipes or try my Savory Mushroom Rice Bowl for another delightful meal.
Make Ahead Options
These 15-Minute Oyakodon are a meal prep dream! You can marinate the chicken with sake, salt, and white pepper up to 24 hours in advance; this allows the flavors to develop while saving you precious time on busy nights. Additionally, the dashi broth can also be prepared and refrigerated for up to 3 days; just make sure to store it in an airtight container to maintain freshness. When you’re ready to serve, simply sauté the onions, add the chicken, and finish with the egg mixture for that creamy touch—ensuring your dish is just as delicious as if made fresh. Enjoy your comforting bowl of Oyakodon with minimal effort and maximum warmth!

15-Minute Oyakodon Recipe FAQs
How do I select the best chicken for Oyakodon?
Absolutely! For the best flavor and tenderness, I recommend using boneless skinless chicken thighs, as they provide a juicy texture. If you’re looking for a leaner option, chicken breasts work too, but they may be less succulent. Look for chicken that is pale pink without dark spots.
How should I store leftovers of Oyakodon?
Store your leftovers in an airtight container in the refrigerator for up to 3 days. It’s important to let the dish cool completely before sealing to maintain freshness and prevent moisture buildup. When you’re ready to enjoy it again, reheat gently on the stove or in the microwave until heated through.
Can I freeze Oyakodon for later?
Yes, you can freeze Oyakodon! Allow it to cool, then transfer it into a freezer-safe container, separating the rice from the chicken and eggs to maintain texture. It can be frozen for up to 2 months. When ready to eat, thaw in the fridge overnight, then reheat on the stove with a splash of water, or microwave until warm.
What if my eggs overcook while making Oyakodon?
Very! If that happens, don’t fret. Just remember to remove the mixture from heat when the eggs are slightly runny on top—the residual heat will finish cooking them gently. If you find they still overcooked, try to adjust your cooking time next time by monitoring closely to achieve that perfect creamy consistency.
Is Oyakodon suitable for people with dietary restrictions?
Of course! This dish can easily be adapted for various dietary preferences. Use tofu or shrimp instead of chicken for a vegetarian or seafood variation. Additionally, substitute low-sodium soy sauce and adjust the sugar for gluten-free or reduced-sugar options. Always check for possible allergens based on the ingredients!
How can I achieve a more authentic flavor in my Oyakodon?
To enhance the umami flavor, seek out high-quality dashi and soy sauce, and consider using fresh, local eggs for the best texture and taste. Don’t overheat the onions; instead, sauté them until translucent to unleash their natural sweetness. This attention to detail will elevate your 15-Minute Oyakodon and capture a more traditional essence!
15-Minute Oyakodon: A Heartwarming Japanese Comfort Bowl
Ingredients
Equipment
Method
- Cut the boneless skinless chicken thighs into bite-sized pieces. In a mixing bowl, combine the chicken with sake, salt, and white pepper, ensuring the pieces are well-coated. Allow the chicken to marinate for about 10 minutes.
- In a separate bowl, whisk together the dashi, soy sauce, mirin, and sugar until the sugar fully dissolves. Set this broth aside until it’s needed later.
- Crack the eggs into a clean bowl and gently whisk the eggs until the whites and yolks are slightly combined. Set the egg mixture aside.
- Heat a medium-sized pan over medium heat and add a splash of oil. Add the sliced yellow onion and sauté for about 1-2 minutes until they become translucent and fragrant.
- Incorporate the marinated chicken into the pan with the sautéed onions. Cook for about 5 minutes, stirring occasionally until the chicken is cooked and starts to brown.
- Pour the prepared egg mixture over the chicken and onions, gently scrambling with a spatula until the eggs are softly set with a slightly runny top. This will take approximately 2 minutes.
- Spoon the chicken and egg mixture over bowls of warm cooked white rice, garnish with green onions, sesame seeds, and togarashi. Serve immediately.