

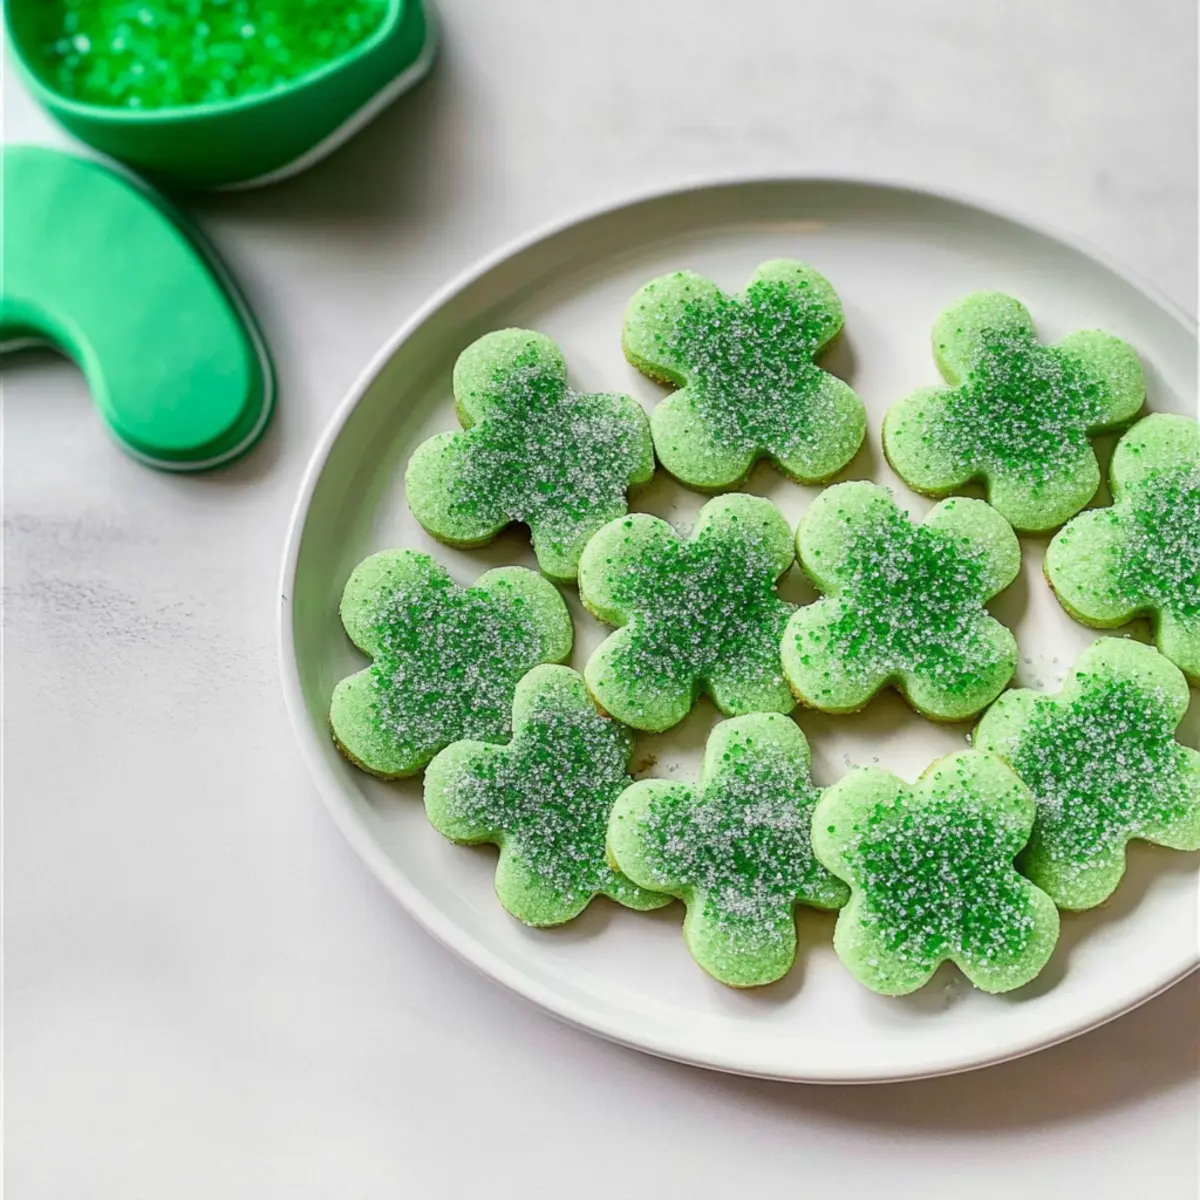
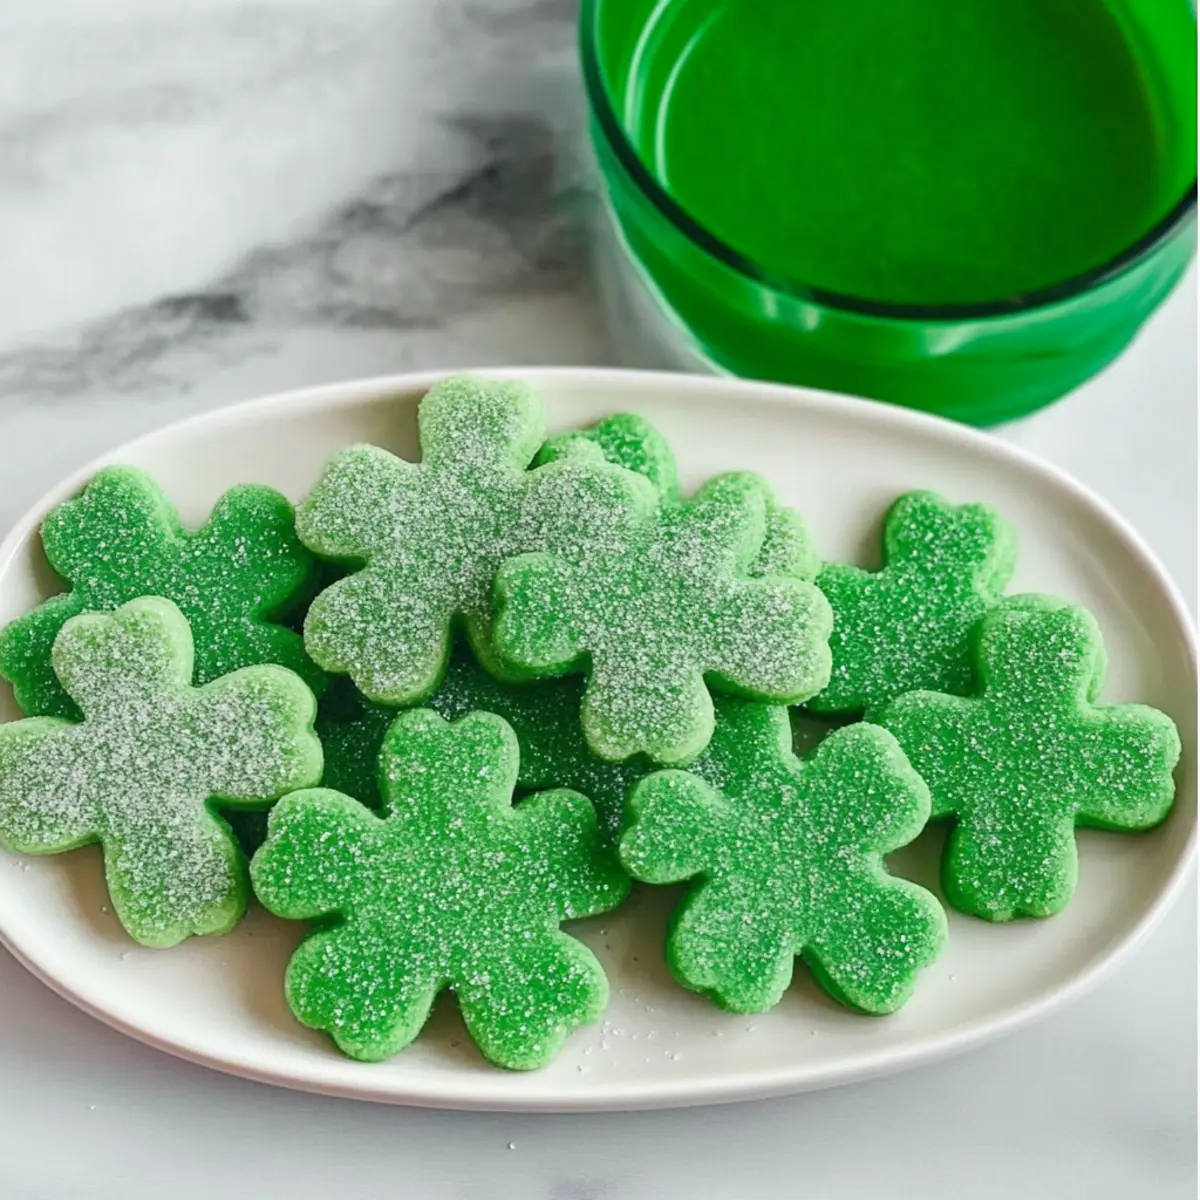
As I watched the cheerful chaos of St. Patrick’s Day festivities unfold, a thought struck me: could a cookie truly capture the spirit of the celebration? Enter my Shamrock Cookies, a delightful mint-flavored treat that not only brings a pop of vibrant green to the table but is also incredibly easy to whip up! These charming cookies are sure to impress your friends and family, making them a festive delight that’s perfect for any gathering. They’re soft and buttery, pairing perfectly with a cozy cup of cocoa or a glass of chilled milk. Plus, with a little creativity, you can modify their colors and shapes to make them a year-round favorite. Are you ready to bake some magic this St. Patrick’s Day?

Why Are Shamrock Cookies So Special?
Festive Appeal: These Shamrock Cookies are more than just a treat; they bring joy and a splash of green to your St. Patrick’s Day celebrations.
Minty Delight: The mint flavor adds an exciting twist, making them stand out from traditional cookies, while the soft, buttery texture melts in your mouth.
Easy to Make: With simple ingredients and straightforward steps, even novice bakers can create these festive delights without a hitch.
Creative Variations: Whether you want to switch up the colors for different occasions or shape them into whimsical figures, these cookies offer endless opportunities for creativity.
Perfect Pairing: Enjoy them alongside a warm cup of cocoa or cold milk, making every bite a delightful experience.
Why stop at just Shamrock Cookies? Check out my scrumptious Chocolate Stuffed Cookies or Raspberry Thumbprint Cookies for more delightful treats!
Shamrock Cookies Ingredients
For the Cookie Dough
• Shortening – Provides tenderness and richness to the cookies; you can substitute with softened butter for a similar outcome.
• Confectioners’ Sugar – Adds sweetness and contributes to a delicate texture, ensuring your Shamrock Cookies are light and airy.
• Large Egg – Binds ingredients together and adds moisture; remember to use it at room temperature for better mixing.
• Peppermint Extract – Infuses the cookies with a refreshing mint flavor; try swapping with vanilla extract for a different taste experience.
• All-Purpose Flour – Forms the structure of the cookies; no substitutes needed unless you prefer gluten-free options.
• Salt – Enhances the flavor and balances the sweetness, creating a delightful contrast in your cookies.
• Green Paste Food Coloring – Used to achieve the vibrant green color of your Shamrock Cookies; feel free to omit this for classic sugar cookies.
For Decoration (Optional)
• Green Colored Sugar – Adds visual appeal and a touch of extra sweetness; sprinkle it on top for a festive finish!
Step‑by‑Step Instructions for Shamrock Cookies
Step 1: Preheat the Oven
Begin by preheating your oven to 375°F (190°C). This is the perfect temperature for baking your Shamrock Cookies, ensuring they turn out soft and slightly crisp on the edges. While the oven heats up, gather your mixing bowls and measuring cups to streamline the process.
Step 2: Cream Shortening and Sugar
In a large mixing bowl, combine shortening and confectioners’ sugar. Use a hand mixer or stand mixer to cream them together for about 3-4 minutes until the mixture is light and fluffy. This step is crucial as it gives your Shamrock Cookies their tender texture, so don’t rush through it!
Step 3: Add Egg and Extract
Next, crack a large egg into the bowl and pour in peppermint extract. Mix on low speed until everything is well integrated and smooth, roughly 1-2 minutes. The egg helps bind your cookie dough together, while the peppermint extract will provide that refreshing minty flavor essential to your Shamrock Cookies.
Step 4: Incorporate Dry Ingredients
Gradually add all-purpose flour and salt to the creamed mixture, mixing on low speed until a cohesive dough begins to form. This should take about 2-3 minutes. Avoid over-mixing, as this can lead to tougher cookies. The dough may be soft but should hold its shape as you prepare to color it.
Step 5: Tint the Dough
To achieve that iconic green color, add a few drops of green paste food coloring to the dough. Mix thoroughly until the color is evenly distributed, ensuring your Shamrock Cookies are vibrant and festive. After coloring, cover the dough in plastic wrap and refrigerate for about 1 hour to firm it up for easier handling.
Step 6: Roll Out the Dough
Once the dough has chilled, dust a clean, floured surface with flour to prevent sticking. Roll out the dough to approximately 1/4-inch thickness using a rolling pin. This thickness is ideal for achieving that soft, chewy texture you desire in your Shamrock Cookies.
Step 7: Cut Out Shapes
Using a floured shamrock-shaped cookie cutter, carefully cut out shapes from the rolled dough. Place each cookie on ungreased baking sheets, ensuring they are spaced about an inch apart. This space allows them to expand without merging while baking, giving your Shamrock Cookies their distinct shapes.
Step 8: Decorate
If desired, sprinkle the cut-out shapes with green colored sugar for an extra festive touch. This step is optional, but it adds a delightful crunch and additional sweetness to your Shamrock Cookies, making them more visually appealing on your festive table.
Step 9: Bake the Cookies
Place your baking sheets in the preheated oven and bake the cookies for 10-12 minutes. Keep an eye on them, as you want the edges to turn lightly golden while the centers remain soft. Checking them closely ensures you don’t overbake and lose that tender texture.
Step 10: Cool the Cookies
Once baked, remove the sheets from the oven and allow the cookies to cool for about 1 minute on the sheets. After this, gently transfer the Shamrock Cookies to wire racks using a spatula to cool completely. This helps them set perfectly while still retaining that lovely softness we all adore.
How to Store and Freeze Shamrock Cookies
Airtight Container: Store your Shamrock Cookies in an airtight container at room temperature for up to 3-5 days to maintain their freshness and softness.
Refrigeration: If you opt for chilling, keep the cookies in the fridge for 5-7 days; however, they may lose some softness.
Freezer: For longer storage, place the cookies in a single layer in a freezer-safe bag or container for up to 3 months. Thaw at room temperature before enjoying.
Raw Dough Storage: You can also freeze the raw Shamrock Cookies dough. Roll it into a log, wrap securely, and freeze for up to 2 months. Thaw it in the fridge overnight before baking!
Shamrock Cookies Variations & Substitutions
Feel free to make these Shamrock Cookies your own with these fun and tasty substitutions!
-
Dairy-Free: Substitute shortening with coconut oil or vegan butter for a delicious dairy-free version.
-
Sugar-Free: Use a sugar alternative like Stevia or erythritol to enjoy a lower-calorie treat with the same sweetness.
-
Flavored Twist: Swap peppermint extract for almond or vanilla extract for a new flavor adventure while maintaining that lovely softness.
-
Colorful Cookies: Change the food coloring to pastels for baby showers or various seasonal holidays; just imagine strawberry pink or sunny yellow!
-
Nutty Variation: Add chopped nuts like walnuts or pecans to the dough for an added crunch, making each bite delightful and unexpected.
-
Creative Shapes: Instead of shamrocks, use a heart or star cookie cutter to celebrate any occasion—these cookies will shine bright at any gathering.
-
Frosted Fun: Top your cookies with a light glaze or buttercream frosting after baking for an extra special treat.
Feeling inspired? While you’re at it, explore other delightful desserts such as my Pistachio Shortbread Cookies or the irresistible Cookies Cream Cookies for more flavor-packed experiences!
What to Serve with Shamrock Cookies?
Delightfully vibrant and minty, these Shamrock Cookies can elevate any celebration when paired with the right complements.
-
Creamy Hot Cocoa: The rich chocolate flavor balances the minty notes, creating a cozy pairing for a festive experience.
-
Chilled Milk: A classic choice, a glass of cold milk enhances the cookie’s sweetness, making each bite even more enjoyable.
-
Minty Milkshake: Blend up a refreshing mint-flavored milkshake that echoes the cookie’s taste, perfect for a sweet treat on warm days.
-
Fruit Salad: Bright, fresh fruits provide a juicy contrast to the cookies’ sweetness, adding vibrant colors and textures to your spread.
-
Chocolate-Dipped Strawberries: The decadent pairing of sweet strawberries and rich chocolate creates an irresistible combination with minty cookies.
-
Vanilla Ice Cream: A scoop of vanilla ice cream adds creaminess and a cool contrast, perfect for indulging during St. Patrick’s Day festivities.
-
Coconut Macaroons: These chewy bites contrast with the soft texture of Shamrock Cookies, adding an exotic touch with their delicate coconut flavor.
-
Chocolate Milk: Pairing these cookies with a glass of rich chocolate milk makes for a nostalgic treat, evoking sweet childhood memories.
-
Lemonade: The refreshing citrus tang of freshly squeezed lemonade cuts through the sweetness, offering a bright and balancing flavor.
-
Rainbow Spritzers: Light, fizzy drinks with fruity flavors provide a bubbly lift, making your dessert table festive and fun!
Expert Tips for Shamrock Cookies
-
Creaming Matters: Ensure the shortening and sugar are creamed well for 3-4 minutes to achieve a light and fluffy texture in your Shamrock Cookies.
-
Check the Color: Keep an eye on the cookie edges as they bake; they should be lightly browned but the centers should remain soft to maintain that perfect bite.
-
Flour Up: Prevent sticking by keeping your rolling surface, cookie cutter, and dough well-floured throughout the process.
-
Chill for Success: Don’t skip the refrigeration step! Chilling the dough for an hour makes it easier to handle and shapes more defined cookies.
-
Freeze for Later: If you have extra dough, freeze it! This way, you can bake fresh Shamrock Cookies whenever the craving strikes.
-
Get Creative: Have fun with colors and shapes! Use different cookie cutters or swap the green food coloring for festive colors to match any occasion.
Make Ahead Options
These Shamrock Cookies are perfect for meal prep enthusiasts! You can prepare the dough up to 24 hours in advance by mixing all the ingredients and then refrigerating it, which helps to enhance the flavor while making handling the dough easier. Alternatively, if you’re short on time, you can cut out the cookie shapes and place them on a baking sheet lined with parchment paper, then cover them and refrigerate for up to 3 days. When you’re ready to bake, simply preheat the oven and bake straight from the fridge; this ensures they come out just as delicious with a soft interior and slightly crisp edges. Enjoy the convenience of having these festive treats ready to go for your St. Patrick’s Day celebrations!

Shamrock Cookies Recipe FAQs
How do I choose the right ripeness of ingredients?
Absolutely! For the best results, use a large egg at room temperature. This helps it incorporate better into the dough. The shortening should be soft but not melting, ensuring it creams well with the sugar. Fresh and ideally powdered confectioners’ sugar will give your cookies that light, airy texture we all love.
How do I store Shamrock Cookies?
To keep your Shamrock Cookies fresh and delicious, store them in an airtight container at room temperature for up to 3-5 days. If you live in a particularly humid area, you might want to refrigerate them, which can extend their life to about 5-7 days, though they may lose a bit of softness.
Can I freeze Shamrock Cookies?
Very! You can definitely freeze both the baked Shamrock Cookies and the raw cookie dough. For baked cookies, place them in a single layer in a freezer-safe container for up to 3 months. When you’re ready to enjoy, simply thaw at room temperature. For raw dough, roll it into a log, wrap tightly in plastic wrap, and freeze for up to 2 months. Thaw it in the fridge overnight before rolling and cutting into shapes!
What should I do if my dough is too sticky?
No worries! If your Shamrock Cookie dough feels too sticky, it may need a little more flour. Start by adding a tablespoon at a time until it reaches a workable consistency. If you’ve followed the recipe closely, you can also try chilling it for another 15-20 minutes; this often helps firm it up for easier handling.
Are Shamrock Cookies suitable for people with allergies?
Definitely! These cookies are primarily made with basic baking ingredients, but if you or your guests have dietary restrictions, consider substituting the egg with a flaxseed meal (1 tablespoon ground flaxseed mixed with 3 tablespoons water) for egg-free options. Always check labels for allergens, especially with extracts, as they can sometimes contain hidden ingredients.
Shamrock Cookies: Minty Delights for St. Patrick's Day Fun
Ingredients
Equipment
Method
- Preheat the oven to 375°F (190°C). Gather your mixing bowls and measuring cups.
- Cream shortening and confectioners' sugar together for 3-4 minutes until light and fluffy.
- Add the large egg and peppermint extract, mixing on low speed until smooth.
- Gradually add all-purpose flour and salt, mixing until a cohesive dough forms.
- Add green paste food coloring to the dough and mix thoroughly. Refrigerate for 1 hour.
- Roll out the dough to 1/4-inch thickness on a floured surface.
- Use a shamrock-shaped cookie cutter to cut out shapes and place on ungreased baking sheets.
- Optional: Sprinkle with green colored sugar for decoration.
- Bake in the preheated oven for 10-12 minutes until the edges are lightly golden.
- Cool on sheets for 1 minute before transferring to wire racks to cool completely.