

As the crisp autumn breeze sweeps in, my kitchen transforms into a sanctuary of warmth and comfort, inviting the rich, earthy aromas of seasonal delights. This is the perfect time for our Roasted Winter Squash Wedges with Maple Glaze—an irresistible vegetarian, gluten-free side dish that melds simplicity with elegance. You’ll discover how easy it is to elevate humble squash into a stunning centerpiece on your table! With minimal prep time and maximum taste, these wedges offer a satisfyingly crispy exterior while remaining tender and sweet inside. Whether you’re serving them alongside festive mains or enjoying them as a hearty snack, they promise to be a hit for any gathering. Ready to bring the cozy flavors of fall into your home? Let’s dive into the delightful world of roasted winter squash!
Why Are These Wedges So Irresistible?
Crispy, Caramelized Perfection: Each wedge is roasted to golden-brown glory, offering a satisfying crunch that contrasts beautifully with its tender, sweet interior.
Maple Magic: The maple syrup glaze adds a delightful sweetness that caramelizes during roasting, making every bite an explosion of flavor!
Versatile Serving Options: Pair them with roasted meats or toss them into grain salads for a unique twist. You can even snack on these tasty wedges straight from the oven!
Quick to Prepare: With just a little prep and a hot oven, you’ll have an impressive and nutritious side dish ready to impress. For a complete meal, try serving them with Balsamic Chicken Roasted or alongside a comforting bowl of Butternut Squash Apple.
Seasonal Delight: Celebrate fall and winter flavors with this glowing side dish that embodies the essence of cozy gatherings and family dinners.
Roasted Winter Squash Wedges Ingredients
For the Wedges
• Winter Squash (Acorn, Buttercup, Delicata) – Aim for 2-3 pounds of your preferred squash variety for optimal roasting and flavor.
• Olive Oil – Use a generous amount for even cooking and to achieve that beautiful golden-brown crust.
• Maple Syrup (or Honey) – Adds natural sweetness and helps create a caramelized surface; can swap with agave nectar for a different flavor.
• Salt – Essential for enhancing the natural sweetness of the squash, balancing the overall flavor.
• Black Pepper – Adds mild spiciness; feel free to adjust according to your taste preferences.
For Serving
• Parmesan Cheese – Grate for a savory umami boost; omit for a vegan option or substitute with nutritional yeast.
• Fresh Parsley – Chopped to add a pop of color and a fresh herbal note to your delicious roasted winter squash wedges.
Step‑by‑Step Instructions for Perfectly Roasted Winter Squash Wedges with Maple Glaze
Step 1: Preheat the Oven
Begin by preheating your oven to 425°F (220°C). This high temperature is key for achieving those wonderfully caramelized edges on your Roasted Winter Squash Wedges. While the oven warms up, gather your equipment: you’ll need a large mixing bowl and a couple of baking sheets lined with parchment paper to prevent sticking.
Step 2: Prepare the Squash
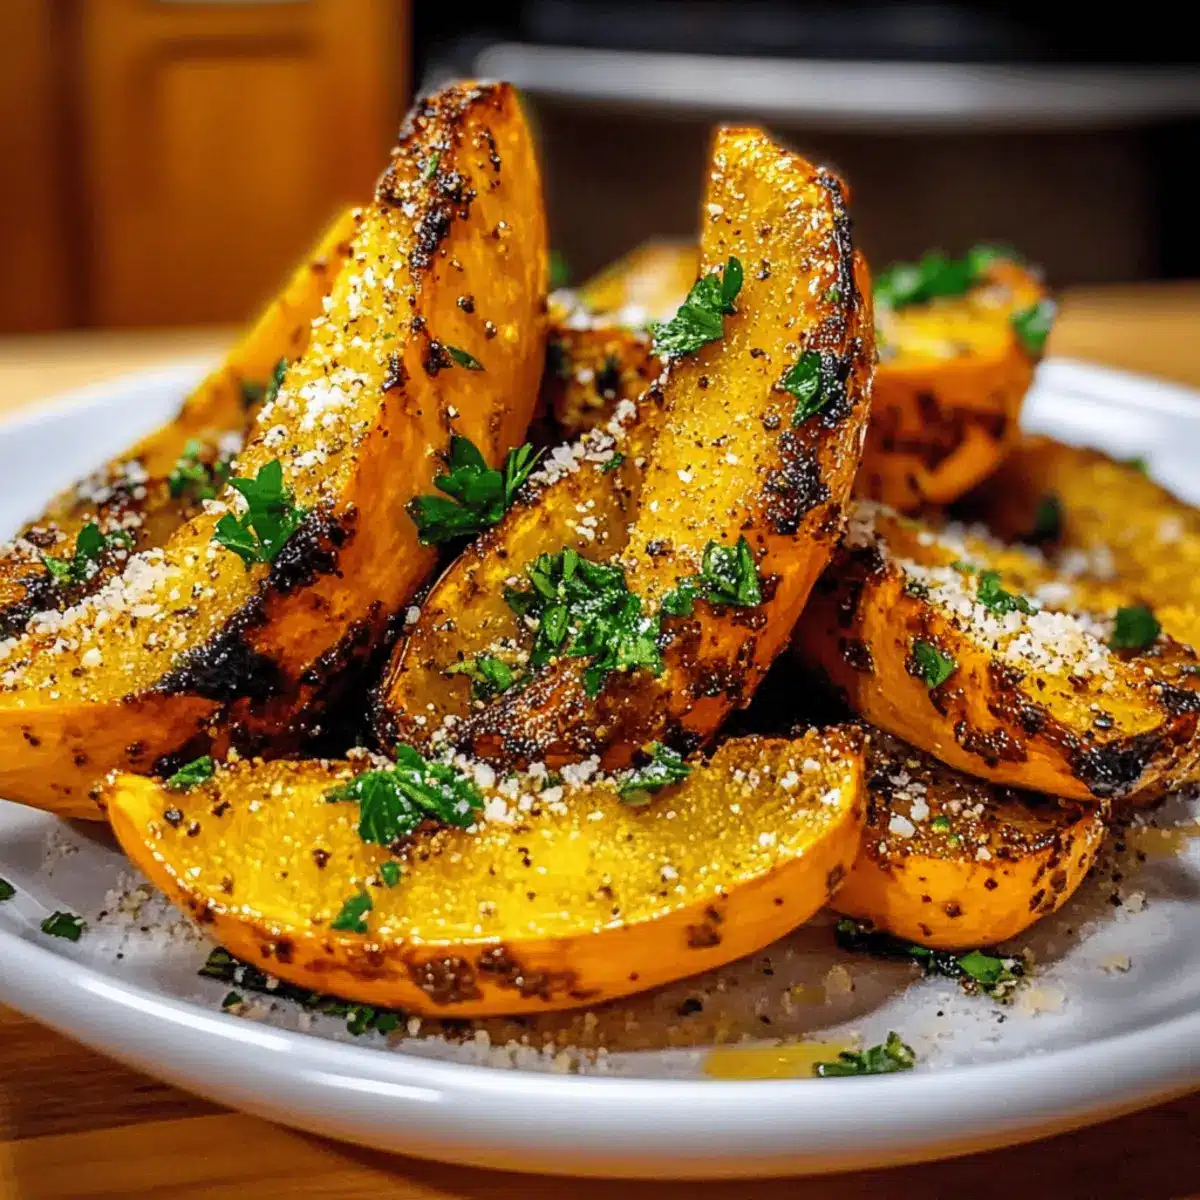
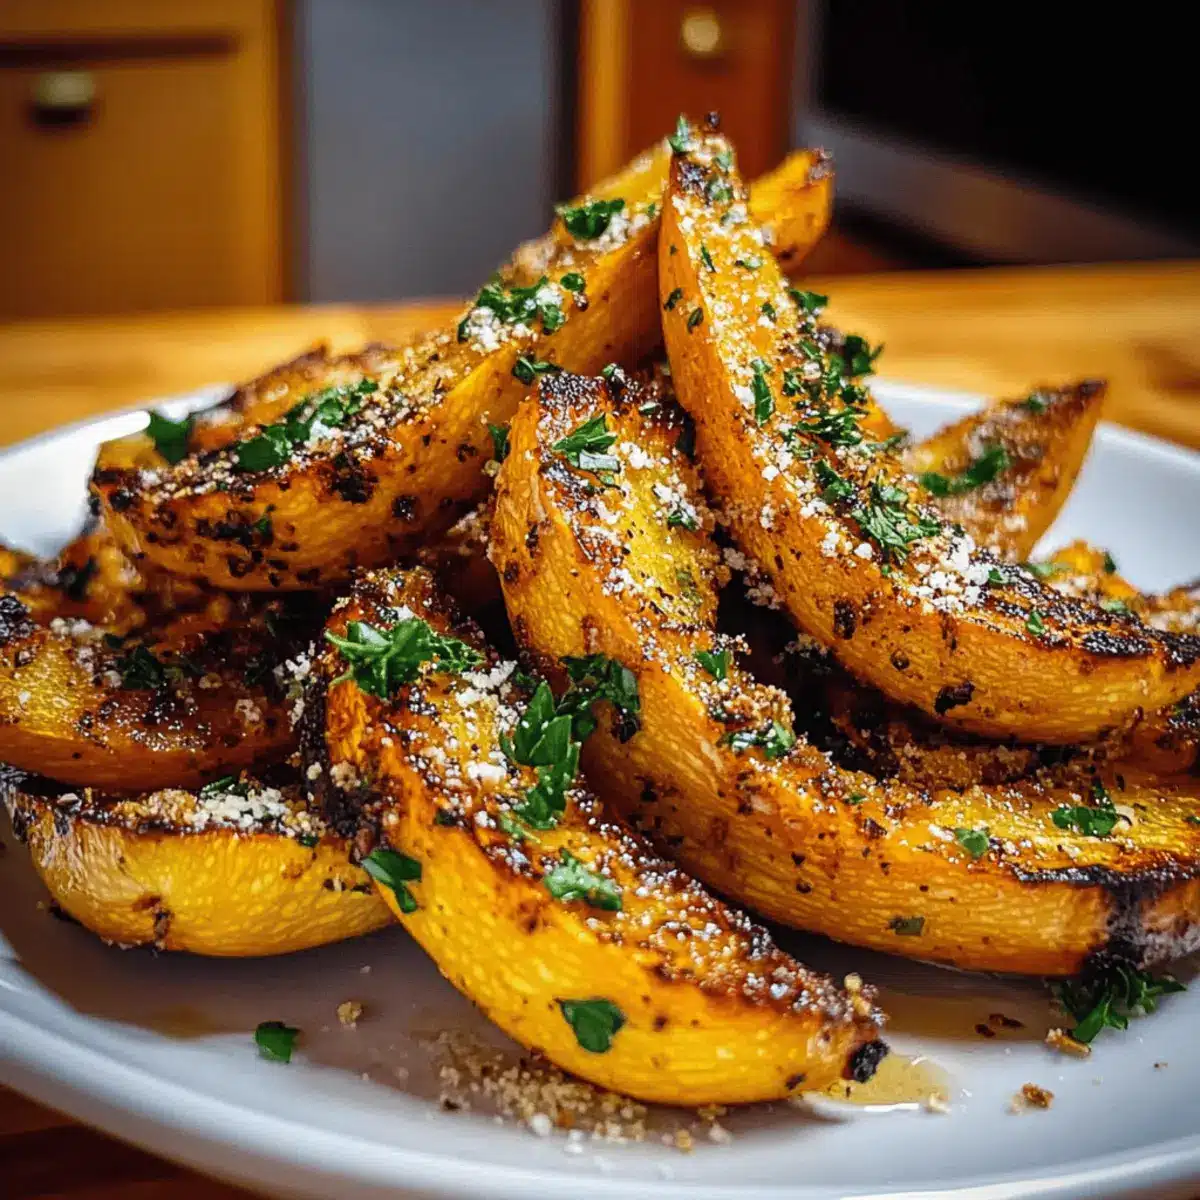
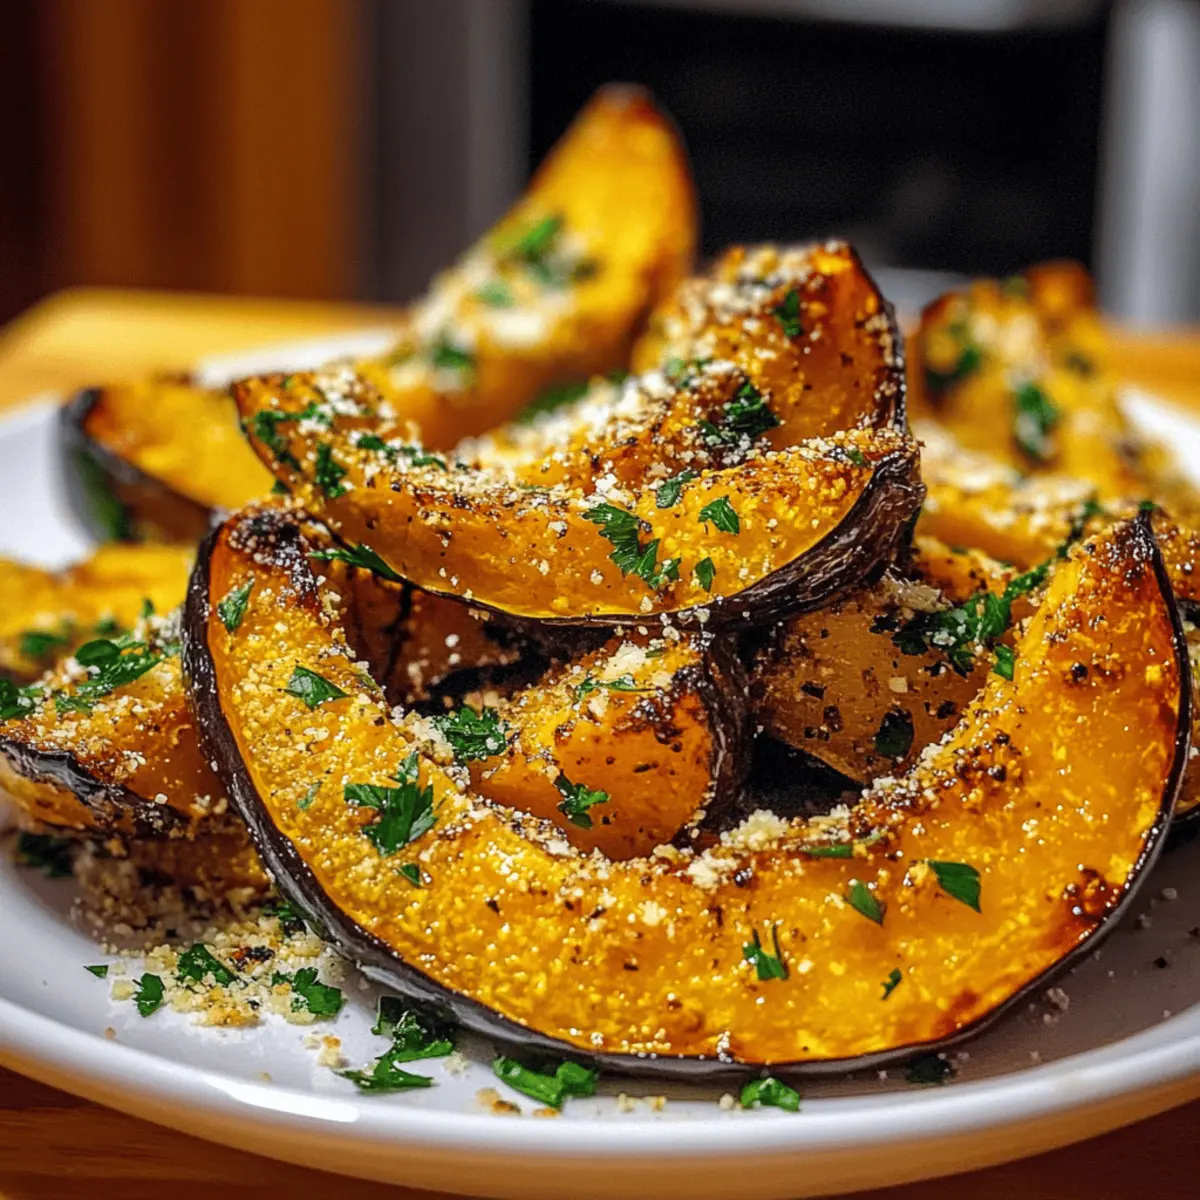
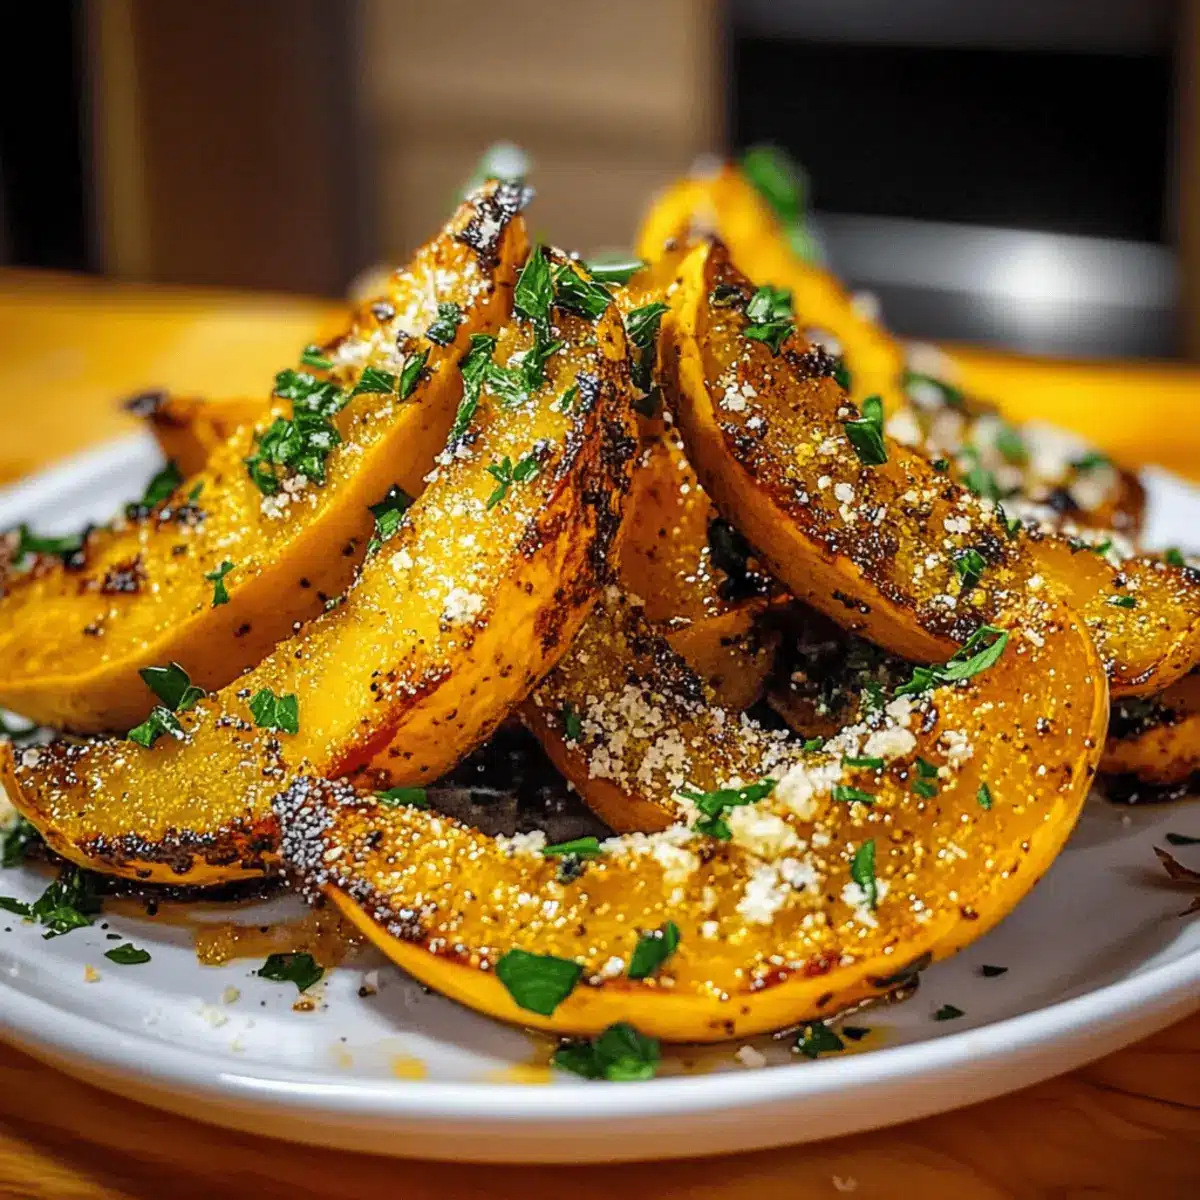
Next, take your chosen winter squash—be it acorn, buttercup, or delicata—and cut it in half lengthwise. Scoop out the seeds with a spoon, then slice each half into 1-inch wedges. Peeling is optional; leave the skin on for a heartier bite. The visual appeal of these colorful wedges will enhance your dish’s presentation.
Step 3: Coat the Wedges
In a large mixing bowl, toss the squash wedges with olive oil, maple syrup, salt, and black pepper until they’re fully coated. This step is essential for infusing the wedges with flavor while ensuring a beautiful glaze develops during roasting. The result will be glossy and inviting.
Step 4: Arrange for Roasting
Spread the squash wedges out on the prepared baking sheets in a single layer, making sure not to overcrowd them; this helps each piece roast evenly. For optimum results, leave space between the wedges to encourage caramelization. Your oven will soon transform them into perfectly tender delights.
Step 5: Roast the Wedges
Place the baking sheets in the preheated oven and roast the Roasted Winter Squash Wedges for 20 minutes. After this time, flip each wedge to promote even browning and return them to the oven for another 10-15 minutes. Keep an eye on them; you’re looking for that lovely golden-brown color and fork-tender consistency.
Step 6: Serve and Garnish
Once the wedges are beautifully roasted, remove them from the oven and allow them to cool for a few minutes. To elevate their flavor, sprinkle grated Parmesan cheese and chopped fresh parsley over the warm wedges. This adds a delightful finishing touch, both enhancing the taste and making your dish visually spectacular!
Roasted Winter Squash Wedges Variations
Feel free to get creative and tailor this recipe to your taste buds and dietary needs!
-
Vegan Option: Skip the Parmesan cheese or substitute with nutritional yeast for a cheesy flavor without dairy.
-
Sweet & Spicy: Add a pinch of cayenne pepper to the seasoning for a subtle heat that beautifully contrasts the sweetness of the maple syrup.
-
Herb Infusion: Mix in dried herbs like thyme or rosemary. Their earthy fragrances will elevate the flavor profile of your wedges.
-
Root Veggie Medley: Toss in other root vegetables like carrots or sweet potatoes for an eye-catching roast that offers varied textures and tastes.
-
Cinnamon Twist: Dust the wedges lightly with cinnamon before roasting to introduce a warm, cozy flavor that’s perfect for autumn.
-
Balsamic Drizzle: Finish with a sprinkle of balsamic reduction after roasting for a tangy sweetness that complements the caramelization.
-
Honey Swap: Replace maple syrup with honey or agave nectar for a different sweetness, tailoring the flavor to your liking.
-
Cheese Varieties: Experiment with other cheeses like feta or goat cheese for a unique twist that brings a different tang and creaminess to the dish.
These adaptations can turn your roasted winter squash wedges into a delightful showcase of flavors! Whether enjoyed alone or paired with other dishes like Balsamic Chicken Roasted, there’s always a new way to savor this seasonal treat.
What to Serve with Perfectly Roasted Winter Squash Wedges
Enhance your dining experience by complementing the beautiful flavors of roasted winter squash with comforting and delicious pairings.
- Creamy Mashed Potatoes: The silky texture of mashed potatoes pairs wonderfully with the crispy squash wedges, creating a cozy contrast.
- Herbed Quinoa Salad: Fresh herbs and lemon juice in the salad brighten up the dish and add a wholesome, nutritious element.
- Cranberry Sauce: A sweet-tart cranberry sauce provides a vibrant, festive touch and balances out the savory squash beautifully.
- Grilled Chicken: Juicy, herb-marinated chicken makes for a heartier meal, with the squash adding a seasonal flair to the plate.
- Roasted Brussels Sprouts: Their crispy edges and nutty flavor complement the sweetness of the squash, creating a delightful autumnal medley.
- Mixed Green Salad: A fresh salad with apples and walnuts brings crunch and acidity, enhancing the rich flavors of the roasted wedges.
Pair any of these options with a glass of white wine or a spiced cider for a truly inviting meal perfect for family gatherings or cozy dinners!
How to Store and Freeze Roasted Winter Squash Wedges
Fridge: Store leftover roasted winter squash wedges in an airtight container for up to 3-4 days. This will keep them fresh while preserving their flavor.
Freezer: For longer storage, freeze the wedges in a single layer on a baking sheet until solid, then transfer to a freezer-safe bag. They can be stored for up to 2 months.
Reheating: Reheat in the oven or air fryer to regain that beloved crispy texture. Bake at 375°F (190°C) for about 10-15 minutes or until warmed through.
Prep Tip: If you know you’ll have leftovers, consider making extra batches to freeze. This way, you can enjoy your delicious roasted winter squash wedges anytime!
Expert Tips for Roasted Winter Squash Wedges
• Spacing is Key: Ensure wedges are spread out on the baking sheet to prevent steaming. Overcrowding can lead to softer, less crispy edges!
• Halfway Flip: Don’t forget to flip the wedges halfway through roasting. This promotes even browning and perfect caramelization on your Roasted Winter Squash Wedges.
• Variety Adjustments: Different squash types have varying densities. If you’re roasting multiple types, check for doneness separately and adjust cooking times as needed.
• Prep Ahead: Cut and store squash wedges in an airtight container the day before. This makes meal prep a breeze and keeps the flavors fresh for roasting!
Make Ahead Options
These Roasted Winter Squash Wedges are perfect for meal prep enthusiasts! You can cut the squash into wedges and toss them with olive oil, maple syrup, salt, and black pepper up to 24 hours in advance. Store the coated wedges in an airtight container in the fridge to maintain their quality; this prevents browning and saves time during busy weeknights. When you’re ready to roast, simply spread the wedges on a baking sheet and cook them directly from the fridge. Follow the roasting instructions as usual, aiming for that delicious golden-brown finish—effortlessly serving a crowd-pleasing side dish with minimal last-minute hassle!
Roasted Winter Squash Wedges Recipe FAQs
What is the best way to choose ripe winter squash?
Absolutely! When selecting winter squash, look for smooth, firm skin without dark spots or blemishes. The stems should be dry and tough. Generally, choose squash that feels heavy for its size. For acorn squash, you’ll want deep green or golden-yellow coloring, while buttercup squash should have a rich, dark green hue.
How should I store leftover roasted winter squash wedges?
After enjoying your delicious wedges, store any leftovers in an airtight container in the fridge. They’ll last for up to 3-4 days. To keep them crispy during reheating, I recommend using an oven or air fryer instead of a microwave.
Can I freeze roasted winter squash wedges?
Certainly! Freezing is a great option. Prepare the wedges as usual, then place them in a single layer on a baking sheet. Freeze until solid, about 1-2 hours, then transfer to a freezer-safe bag. They can last up to 2 months in the freezer. To enjoy them later, simply reheat directly from frozen.
What if my roasted squash wedges are soggy?
Don’t worry! If your wedges turned out soggy, it might be due to overcrowding on the baking sheet. Be sure to space them evenly in a single layer to let them roast, not steam. If it happens again, you can return them to the oven at a higher temp (425°F) for a few extra minutes, watching closely to crisp them up.
Are there any dietary considerations I should keep in mind?
Very good question! This recipe is naturally vegetarian and gluten-free, making it suitable for many diets. If you’re concerned about allergens, simply omit the Parmesan cheese or substitute with nutritional yeast for a dairy-free option. Remember to check the labels of any pre-packaged ingredients for added allergens.
Is there a way to prep the winter squash wedges ahead of time?
Absolutely! You can cut the squash wedges a day in advance and store them in an airtight container in the fridge. Just coat them with olive oil and seasonings right before roasting to keep them fresh. This makes it super easy to whip up a side dish even on busy days!
Irresistibly Crispy Roasted Winter Squash Wedges Recipe
Ingredients
Equipment
Method
- Preheat your oven to 425°F (220°C). Gather your equipment: a large mixing bowl and baking sheets lined with parchment paper.
- Cut the squash in half lengthwise, scoop out the seeds, and slice each half into 1-inch wedges. Peeling is optional.
- In a large mixing bowl, toss the squash wedges with olive oil, maple syrup, salt, and black pepper until fully coated.
- Arrange the wedges in a single layer on the prepared baking sheets, ensuring adequate space between them.
- Roast the wedges for 20 minutes, then flip and roast for an additional 10-15 minutes until golden brown and fork-tender.
- Allow wedges to cool slightly, then sprinkle with grated Parmesan cheese and chopped fresh parsley before serving.