

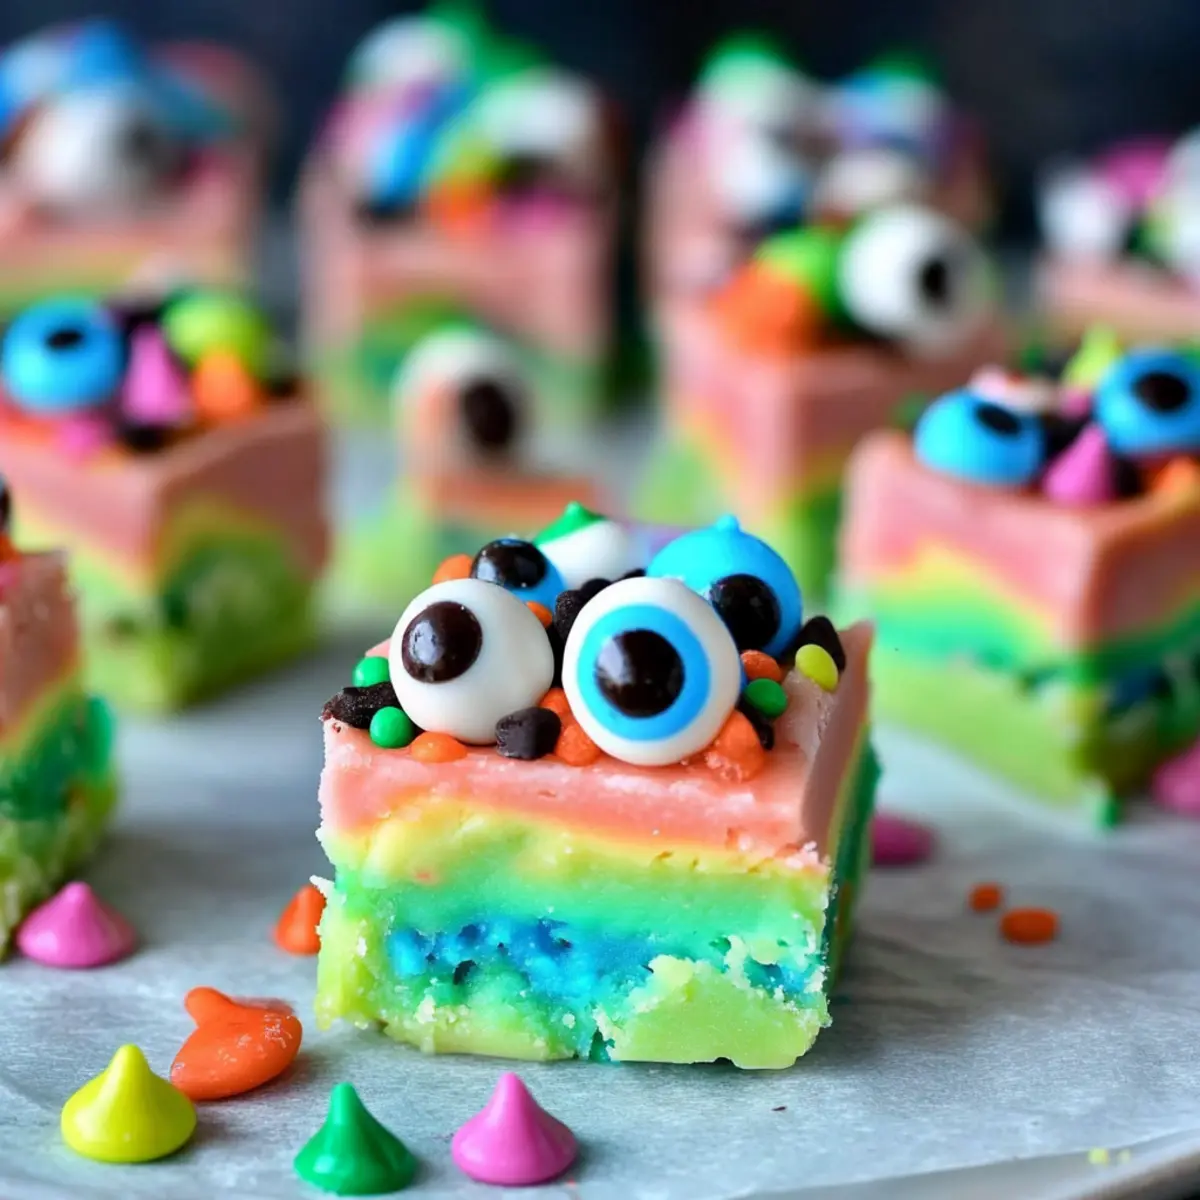
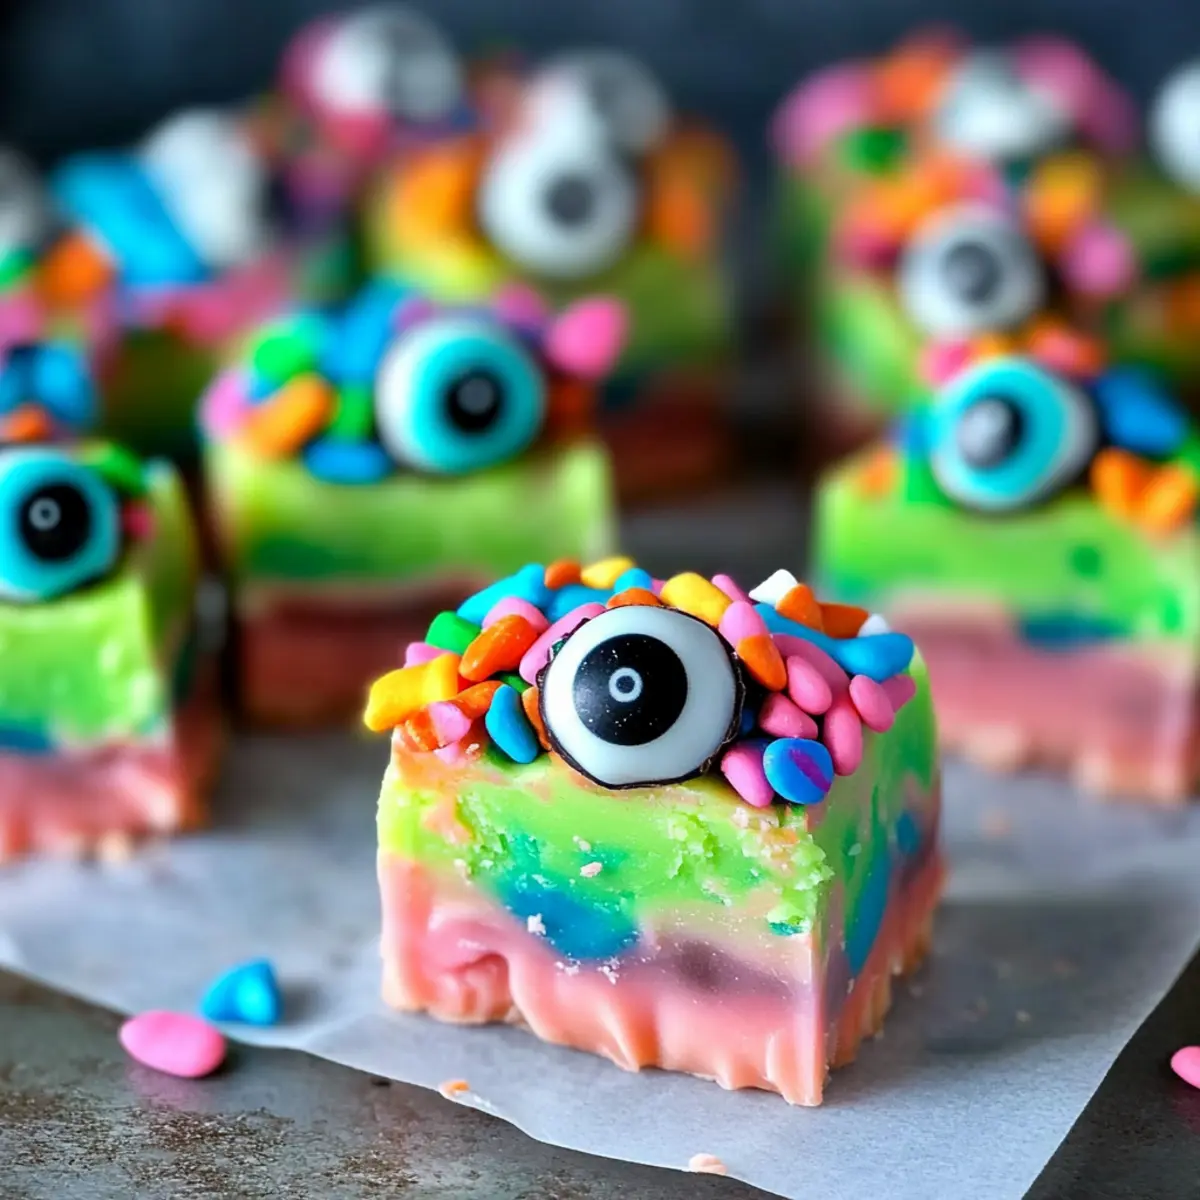
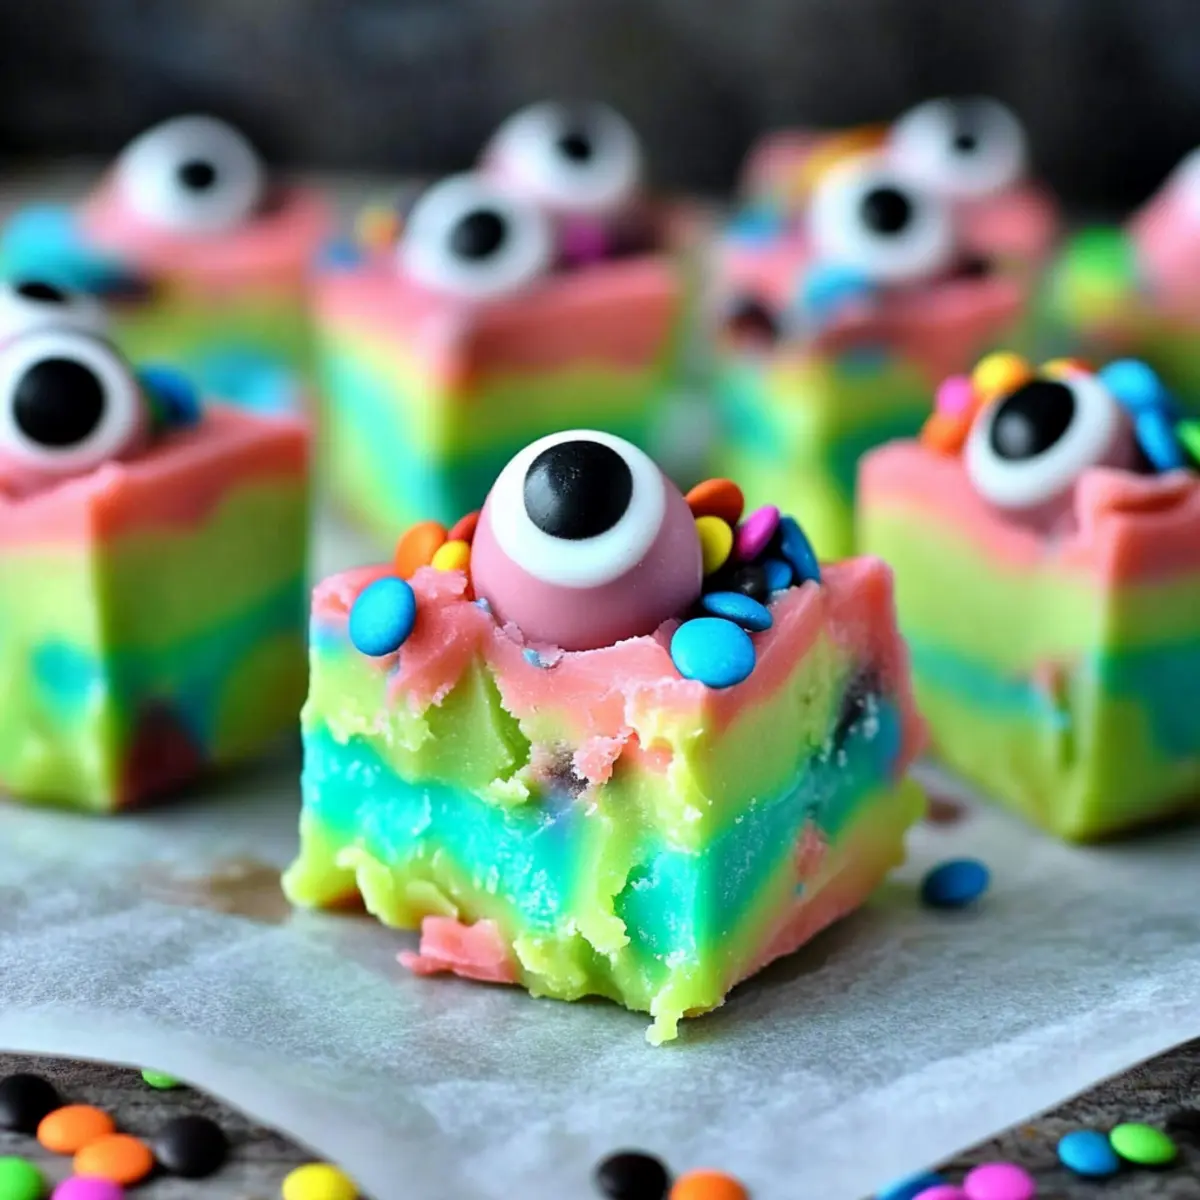
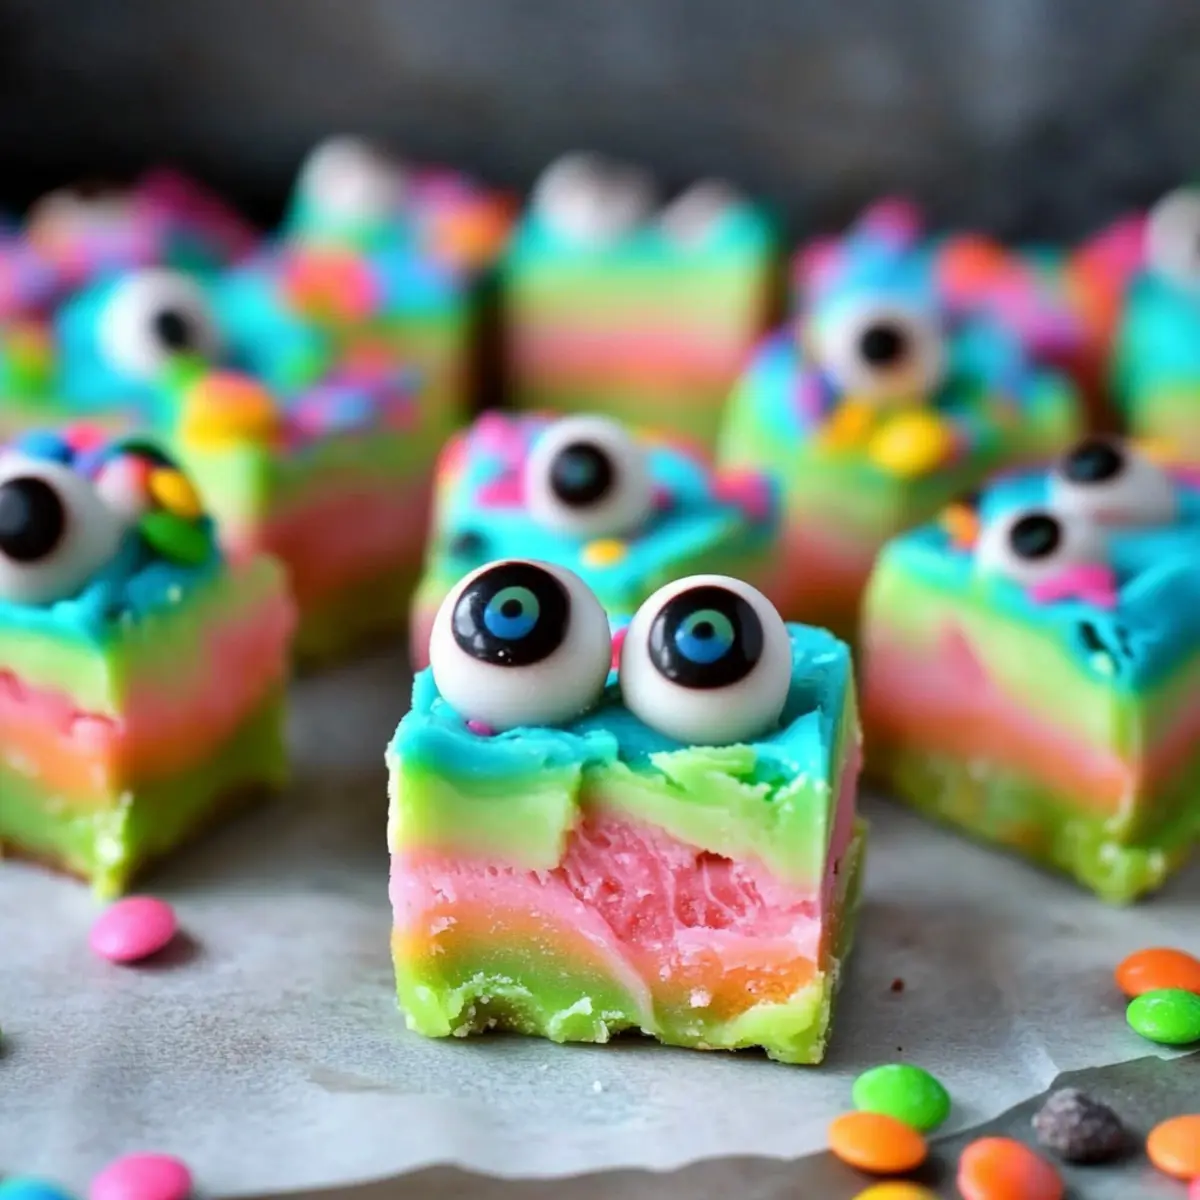
It’s just a typical Saturday morning, but the kids are buzzing with excitement over our upcoming Halloween celebrations. Inspired by their energy, I decided to whip up a batch of Monster Fudge! This festive no-bake delight is as enjoyable to make as it is to eat, and it’s a fantastic opportunity for little hands to help (and possibly get a bit messy!). Crafted with creamy layers of chocolate and adorned with whimsical candy eyeballs, this recipe transforms simple ingredients into a colorful treat that’s perfect for any spooky occasion. Not only is it incredibly quick to prepare, but it’s also fully customizable—add your favorite mix-ins or colors to make it uniquely yours! Who wouldn’t want to dive into a square of this eerie goodness? Ready to scare up some fun in your kitchen? Let’s get started!
Why is Monster Fudge a must-make?
Irresistibly Fun: This dessert is as delightful to create as it is to devour, making it a perfect family activity. No-Bake Convenience: Say goodbye to ovens—this recipe comes together quickly and requires no baking, fitting perfectly into your busy schedule. Colorful and Customizable: Whether it’s Halloween or any festivity, tailor it with your favorite colors and mix-ins for a unique twist. Kid-Friendly: Let the little ones join the fun! They can help add toppings and mix ingredients, ensuring memorable kitchen moments. Crowd-Pleasing Treat: With its whimsical presentation, Monster Fudge is bound to be a hit at parties—everyone will be clamoring for their slice of spooky sweetness!
Monster Fudge Ingredients
• The secret to your Halloween delight!
For the Base
- Semi-sweet chocolate chips – This main ingredient offers a rich chocolate flavor; consider using milk or dark chocolate chips for a different taste.
- Sweetened condensed milk – Essential for creaminess and sweetness, helping to bind the fudge.
- Butter – Provides that smooth, rich texture; swap with coconut oil for a dairy-free version.
- Vanilla extract – Adds a warm aroma and enhances the overall flavor profile.
For the Color and Decoration
- Green food coloring – Creates a vibrant monster appearance; feel free to omit it for a more classic look.
- Orange and black decorating gel – Perfect for spooktacular designs on your fudge.
- Candy eyeballs – These fun decorations give your fudge the monster look; mini marshmallows with chocolate chips can be used instead.
- Halloween sprinkles – Add a festive touch to elevate the holiday theme!
Optional Mix-ins
- Mini marshmallows – Use as a delightful mix-in or topping for added texture.
- Crushed chocolate cookies – Provides crunch and flavor contrast; graham cracker crumbs work for a different twist.
With these ingredients, you’re all set to create your own colorful Monster Fudge!
Step‑by‑Step Instructions for Monster Fudge
Step 1: Melt Ingredients
In a large pot, combine 2 cups of semi-sweet chocolate chips, 1 can of sweetened condensed milk, and 3 tablespoons of butter. Heat over low flame, stirring continuously for about 5 minutes until smooth and fully melted. Make sure the mixture is free of lumps and glossy, creating a delicious base for your Monster Fudge.
Step 2: Color the Fudge
Once melted, remove the pot from heat and stir in 1 teaspoon of vanilla extract for flavor. To give the fudge its monster appearance, add a few drops of green food coloring and mix until you reach your desired hue. The vibrant color should be evenly distributed, adding a playful twist to your fudge.
Step 3: Fold in Mix-ins
Next, gently fold in 1 cup of crushed chocolate cookies into the fudge mixture. Use a spatula to ensure even distribution, creating a delightful texture with crunchy bits throughout. This step not only enhances flavor but also adds an exciting element to your Monster Fudge.
Step 4: Set in Baking Dish
Prepare a lined 8×8-inch baking dish with parchment paper for easy removal. Pour the fudge mixture into the dish, using a spatula to spread it evenly across the surface. The fudge should be smooth and level, making way for the whimsical toppings that will come next.
Step 5: Add Toppings
Before the fudge sets, decorate the top with candy eyeballs and Halloween sprinkles. Press them gently into the surface to ensure they stay put as it cools. The vibrant colors and fun shapes will give your Monster Fudge a spooktacular look, perfect for entertaining guests at any Halloween gathering.
Step 6: Chill Until Firm
Place the baking dish in the refrigerator and chill for at least 2 hours or until the fudge is completely set and firm to the touch. You’ll know it’s ready when you can cut it cleanly into squares without it falling apart. This chilling period is crucial for achieving that perfect fudge texture.
Step 7: Cut and Serve
Once chilled, remove the Monster Fudge from the dish using the parchment paper. Place it on a cutting board and slice it into 1-inch squares using a sharp knife. The colorful layers will be a fun surprise, making this treat not just delicious but visually delightful as well!
Monster Fudge Variations & Substitutions
Feel free to get creative and make this Monster Fudge your own with these fun twists and tweaks!
-
Dairy-Free: Use dairy-free chocolate chips and coconut oil instead of butter for a creamy, allergy-friendly option.
This allows everyone to enjoy the festive treat without missing out on taste. -
Flavor Boost: Try flavored chocolate chips like peppermint or butterscotch for a delightful surprise.
Each bite will bring an unexpected pop of flavor that makes your fudge stand out. -
Nutty Crunch: Fold in some chopped nuts, such as pecans or almonds, for an added crunch and flavor depth.
The mix of nutty goodness with chocolate creates a satisfying texture that’s truly delicious. -
Reduced Sugar: Swap out the sweetened condensed milk for a sugar-free version or use coconut cream.
This keeps the indulgence while making it a little more health-conscious! -
Holiday Themes: Switch up the food coloring to red and white for Christmas or pastels for Easter festivities.
These vibrant hues make it adaptable for any celebration, making every occasion feel special. -
Texture Twist: Use crispy rice cereal instead of crushed cookies for a fun, chewy texture.
This twist adds an enjoyable crunch that’s sure to delight both kids and adults alike. -
Extra Heat: If you enjoy a little kick, add a pinch of cayenne pepper or chili powder to the base for a spicy surprise.
The heat mingles beautifully with the sweetness, creating a complex flavor experience. -
Mix-and-Match Toppings: Experiment with different toppings like crushed candy corn or gummy worms for a whimsical touch.
These fun additions can elevate your fudge, making it not just a treat, but a decorated masterpiece.
Whichever variations you choose, Monster Fudge has the potential to become your go-to festive delight! For more delicious inspiration, you can check out our No-Bake Treats or explore how to Make Holiday Desserts.
Expert Tips for Monster Fudge
• Mix Thoroughly: Ensure all ingredients are blended well to prevent any chocolate from seizing up during melting. Proper mixing creates a smooth fudge.
• Chill Correctly: Refrigerate the fudge sooner rather than later for better setting. A longer chill time helps it become firmer and easier to cut.
• Use Sharp Tools: Use a sharp knife to cut your Monster Fudge into squares after chilling. This ensures clean edges for a more appealing presentation.
• Get Creative: Personalize your Monster Fudge by experimenting with different colors and mix-ins. It’s a fun way to bring your unique flair to this festive treat!
• Kid Participation: Let kids help with adding toppings and stirring. It makes for a fun bonding activity and gives them a sense of involvement in creating this spooky delight.
How to Store and Freeze Monster Fudge
Fridge: Keep leftover Monster Fudge in an airtight container in the refrigerator for up to 1 week. This will maintain its freshness and creamy texture.
Freezer: For longer storage, wrap individual squares in plastic wrap and place them in a freezer-safe container. The fudge can be frozen for up to 3 months without losing its delightful flavor.
Thawing: To enjoy frozen fudge, simply remove it from the freezer and let it thaw in the fridge for a few hours or at room temperature for about 30 minutes.
Serving Tip: For the best experience, serve chilled or slightly at room temperature, ensuring the creamy layers hold their shape and deliciousness.
Make Ahead Options
These Monster Fudge treats are perfect for meal prep enthusiasts looking to save time during the busy lead-up to Halloween! You can prepare the fudge mixture up to 24 hours in advance by following steps 1 through 4, then store it in the refrigerator. Simply pour it into your lined baking dish, cover it tightly with plastic wrap, and refrigerate to maintain its delicious flavor and creamy texture. When ready to serve, add the candy eyeballs and sprinkles (step 5), and chill the fudge for at least 2 hours to ensure it sets properly. This way, you’ll have spooky and festive Monster Fudge ready to enjoy when the celebrations begin, all with minimal effort on the day of your gathering!
What to Serve with Monster Fudge?
If you’re crafting this playful treat for a Halloween gathering, consider these delightful accompaniments to complete your spooky spread.
- Pumpkin Spice Hot Chocolate: A warm, cozy drink that complements the chocolatey flavor of the fudge while adding a festive fall spice.
- Apple Slices with Caramel Dip: Crisp and juicy, the refreshing apples offset the richness of the fudge, offering a delightful textural contrast with each bite.
- Ghost-shaped Sugar Cookies: These sweet, lightly flavored cookies add a fun thematic element to your dessert table, charming guests of all ages.
Imagine serving the Monster Fudge alongside these treats, creating a whimsical treat table that sparks the joy of the season. The flavors all work harmoniously, making your gathering memorable and festive!
- Milkshakes with Whipped Cream: Creamy and indulgent, a milkshake paired with your fudge adds a luscious twist that both kids and adults will love!
- Toasted Marshmallow Sundae: With warm, gooey marshmallows and a scoop of ice cream, this dessert is sure to complement the fudgy richness while bringing a unique twist.
- Spooky Fruit Salad: A colorful mix of seasonal fruits offers a fresh, vibrant contrast to the Monster Fudge, balancing the richness of the chocolates while delighting the eyes.
- Candy Corn Cupcakes: These cheerful cupcakes enhance the festive theme and tie in with Halloween, making them a sweet pairing with the visual fun of the fudge.
Monster Fudge Recipe FAQs
What type of chocolate chips should I use for Monster Fudge?
I recommend using semi-sweet chocolate chips as the base for a rich chocolate flavor. However, you can absolutely switch it up by using milk or dark chocolate chips depending on your taste preferences.
How should I store Monster Fudge?
Store any leftover Monster Fudge in an airtight container in the refrigerator for up to a week. This keeps it fresh and creamy, so you can enjoy it day after day. If you plan on keeping it longer, freezing is an excellent option!
Can I freeze Monster Fudge?
Yes, you can freeze Monster Fudge! Simply wrap individual squares in plastic wrap and place them in a freezer-safe container. It can be frozen for up to 3 months without losing its delicious flavor. When you’re ready to enjoy, let it thaw in the fridge for a few hours or at room temperature for about 30 minutes.
What if my chocolate seizes while melting?
Absolutely! If your chocolate starts to seize, it’s likely due to moisture. Make sure to keep your pot and utensils completely dry. If this happens, you can add a tablespoon of vegetable oil to help smooth it out again. Remember to mix thoroughly to achieve a smooth texture.
Is Monster Fudge safe for kids with allergies (like nuts or dairy)?
It’s important to check specific ingredient labels, as some chocolate chips and toppings may contain allergens like nuts or dairy. For a dairy-free version, you can replace butter with coconut oil and use dairy-free chocolate chips. Make sure to choose allergy-friendly decorations too, like nut-free sprinkles and eyeballs!
Can I customize the colors in my Monster Fudge?
Very much so! Feel free to get creative with the colors of the food coloring you use. You can create a spooky green fudge, a vibrant blue, or even a classic brown if you prefer. Tailor it to fit your party or themed event, and let your imagination run wild!
Monster Fudge: Colorful No-Bake Treats for Halloween Fun
Ingredients
Equipment
Method
- In a large pot, combine the semi-sweet chocolate chips, sweetened condensed milk, and butter. Heat over low flame, stirring continuously for about 5 minutes until smooth and fully melted.
- Once melted, remove the pot from heat and stir in the vanilla extract. To give the fudge its monster appearance, add a few drops of green food coloring and mix until evenly distributed.
- Gently fold in the crushed chocolate cookies into the fudge mixture.
- Prepare a lined 8x8-inch baking dish with parchment paper. Pour the fudge mixture into the dish, smoothing it evenly.
- Before the fudge sets, decorate the top with candy eyeballs and Halloween sprinkles.
- Place the baking dish in the refrigerator and chill for at least 2 hours or until the fudge is completely set.
- Once chilled, remove the fudge from the dish using the parchment paper and slice it into 1-inch squares.