

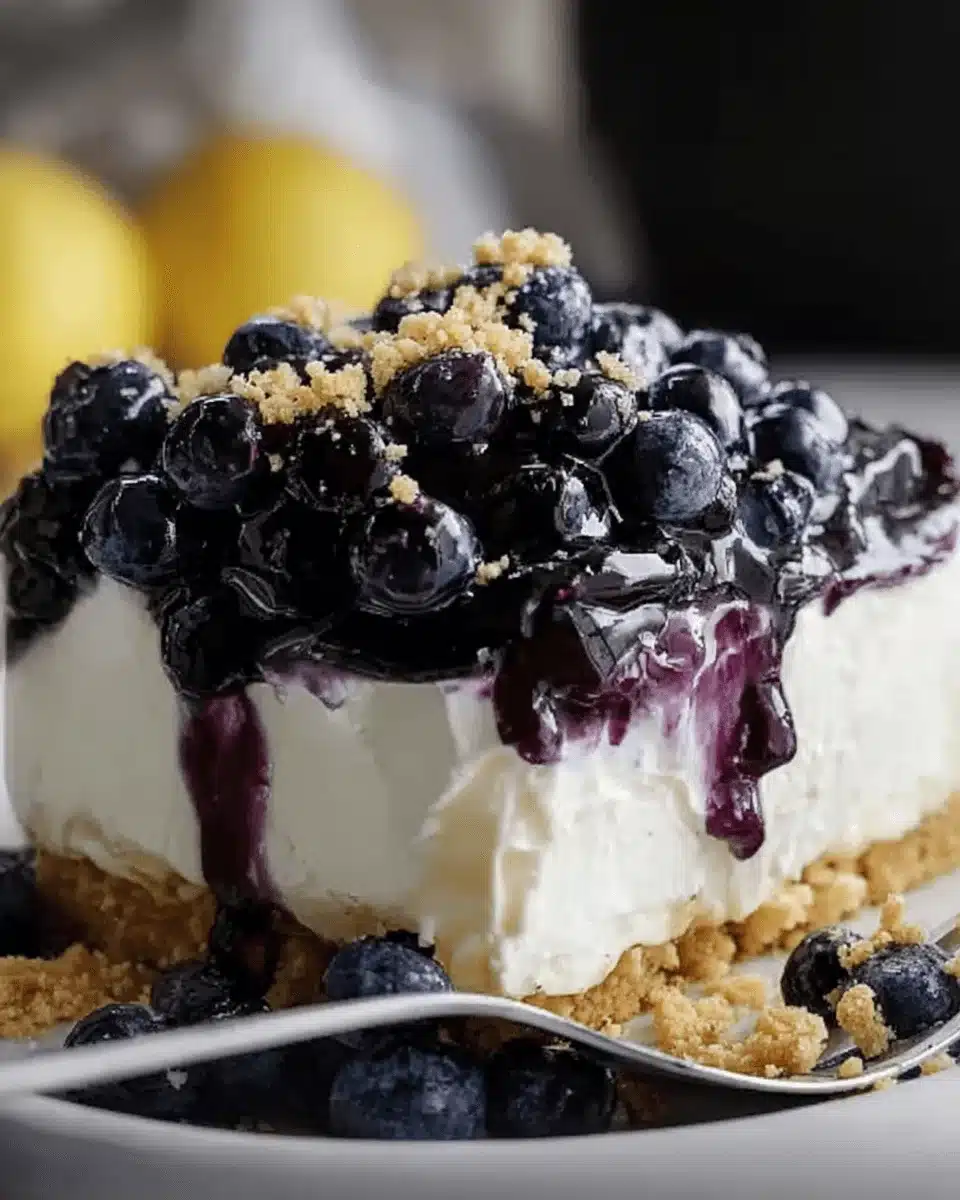
Lemon Blueberry No-Bake Cheesecake
There’s something magical about a dessert that requires no baking, especially when it’s a Lemon Blueberry No-Bake Cheesecake.
I remember the first time I made this delightful treat; it was a hot summer day, and the last thing I wanted was to turn on the oven.
This cheesecake is not just easy to whip up; it’s also a refreshing way to impress your friends and family.
Whether you’re hosting a gathering or just treating yourself, this recipe is a quick solution for a busy day.
Let’s dive into the creamy, zesty goodness that awaits!
Why You’ll Love This Lemon Blueberry No-Bake Cheesecake
This Lemon Blueberry No-Bake Cheesecake is a game-changer for dessert lovers.
It’s incredibly easy to make, requiring no baking skills whatsoever.
In just 30 minutes of prep, you’ll have a stunning dessert ready to chill.
The bright, zesty lemon flavor paired with sweet blueberries creates a refreshing taste that’s perfect for any occasion.
Plus, it’s a crowd-pleaser that will leave your guests asking for seconds!
Ingredients for Lemon Blueberry No-Bake Cheesecake
Creating this Lemon Blueberry No-Bake Cheesecake is a breeze, thanks to a handful of simple ingredients.
Here’s what you’ll need:
- Graham cracker crumbs: These form the base of your crust, providing a sweet and crunchy texture.
- Unsalted butter: Melted butter binds the crumbs together, adding richness to the crust.
- Cream cheese: The star of the show! Softened cream cheese gives the cheesecake its creamy, smooth texture.
- Powdered sugar: This sweetens the filling without the graininess of granulated sugar, ensuring a silky finish.
- Vanilla extract: A splash of vanilla enhances the overall flavor, making it even more delightful.
- Sour cream: Adds a tangy flavor and creaminess that balances the sweetness perfectly.
- Fresh blueberries: These juicy gems not only add flavor but also a pop of color to your cheesecake.
- Lemon juice: Freshly squeezed lemon juice brings a bright, zesty kick that elevates the dessert.
- Lemon zest: The zest adds an aromatic citrus flavor that complements the lemon juice beautifully.
- Heavy whipping cream: Whipped to stiff peaks, this ingredient lightens the filling, making it airy and luscious.
For those looking to mix things up, consider adding a layer of blueberry compote on top before serving.
You can also swap out the blueberries for strawberries or raspberries for a different flavor twist.
Exact measurements for each ingredient can be found at the bottom of the article, ready for printing!
How to Make Lemon Blueberry No-Bake Cheesecake
Making this Lemon Blueberry No-Bake Cheesecake is a straightforward process that anyone can master.
Follow these simple steps, and you’ll be on your way to a delicious dessert that will impress everyone.
Step 1: Prepare the Crust
Start by combining graham cracker crumbs and melted butter in a medium bowl.
Mix until the crumbs are fully coated and resemble wet sand.
Press this mixture firmly into the bottom of a 9-inch springform pan.
Make sure it’s even and compact.
Refrigerate the crust for about 30 minutes to set.
This step is crucial for a sturdy base!
Step 2: Make the Cream Cheese Mixture
In a large mixing bowl, beat the softened cream cheese with an electric mixer until it’s smooth and creamy.
Gradually add in the powdered sugar and vanilla extract.
Mix until everything is well combined.
This mixture should be velvety and free of lumps.
It’s the heart of your cheesecake!
Step 3: Combine Sour Cream and Lemon
In a separate bowl, whisk together the sour cream, lemon juice, and lemon zest.
Make sure it’s smooth and well blended.
This mixture adds a tangy flavor that balances the sweetness of the cream cheese.
Once combined, gently fold this into the cream cheese mixture until fully incorporated.
You’ll love the bright aroma!
Step 4: Whip the Cream
In another bowl, whip the heavy cream until stiff peaks form.
This means when you lift the whisk, the cream holds its shape.
Gently fold the whipped cream into the lemon and cream cheese mixture.
Be careful not to deflate the whipped cream; you want it light and airy.
This step is what makes your cheesecake fluffy!
Step 5: Fold in Blueberries
Now, it’s time to add the fresh blueberries.
Gently fold them into the mixture, reserving a few for garnish later.
The blueberries will add bursts of flavor and color to your cheesecake.
Make sure they’re evenly distributed throughout the filling.
Step 6: Assemble and Chill
Pour the creamy filling over the chilled crust, spreading it evenly.
Cover the cheesecake with plastic wrap and refrigerate for at least 4 hours, or until set.
The longer it chills, the better the flavors meld together.
Once set, carefully remove the cheesecake from the springform pan.
Garnish with the reserved blueberries and a sprinkle of lemon zest if desired.
Slice and serve chilled for a refreshing treat!
Tips for Success
- Use room temperature cream cheese for a smoother filling.
- Don’t skip chilling the crust; it ensures a sturdy base.
- Gently fold in the whipped cream to maintain that airy texture.
- For a sweeter cheesecake, adjust the powdered sugar to your taste.
- Let the cheesecake chill overnight for the best flavor and texture.
Equipment Needed
- 9-inch springform pan: Essential for easy removal; a regular pie dish works too.
- Mixing bowls: Use various sizes for different mixtures; any bowl will do.
- Electric mixer: Ideal for smooth cream cheese; a whisk can work in a pinch.
- Rubber spatula: Perfect for folding ingredients; a wooden spoon is a good alternative.
- Whisk: Handy for mixing; you can use a fork if needed.
Variations
- Berry Medley: Swap out blueberries for a mix of strawberries, raspberries, and blackberries for a colorful twist.
- Chocolate Drizzle: Drizzle melted dark chocolate over the top before serving for a decadent touch.
- Nutty Crust: Use crushed almonds or pecans mixed with the graham cracker crumbs for a nutty flavor.
- Vegan Option: Substitute cream cheese with a vegan alternative and use coconut cream instead of heavy cream.
- Herbal Infusion: Add a hint of fresh mint or basil to the filling for a unique flavor profile.
Serving Suggestions
- Pair with a light, refreshing iced tea or lemonade to complement the zesty flavors.
- Serve alongside a scoop of vanilla ice cream for an extra indulgent treat.
- Garnish with fresh mint leaves for a pop of color and added freshness.
- Present on a colorful platter to make the dessert visually appealing.
- Consider adding a drizzle of honey or a sprinkle of crushed nuts for texture.
FAQs about Lemon Blueberry No-Bake Cheesecake
Can I make this cheesecake ahead of time?
Absolutely! This Lemon Blueberry No-Bake Cheesecake is perfect for making ahead. Just prepare it the day before and let it chill overnight. The flavors will meld beautifully, making it even more delicious!
How long does the cheesecake last in the fridge?
Stored properly in an airtight container, your cheesecake can last up to 5 days in the fridge. Just be sure to keep it covered to maintain its freshness.
Can I use frozen blueberries instead of fresh?
Yes, you can! Frozen blueberries work well in this recipe. Just make sure to thaw and drain them before folding them into the mixture to avoid excess moisture.
What can I substitute for cream cheese?
If you’re looking for a lighter option, you can use Greek yogurt or a vegan cream cheese alternative. Both will give you a creamy texture while keeping the flavor intact.
Is this cheesecake gluten-free?
To make this Lemon Blueberry No-Bake Cheesecake gluten-free, simply use gluten-free graham crackers for the crust. The rest of the ingredients are naturally gluten-free!
Final Thoughts
Creating a Lemon Blueberry No-Bake Cheesecake is more than just following a recipe; it’s about crafting a moment of joy.
The creamy texture, zesty lemon, and sweet blueberries come together to create a dessert that feels like a celebration.
Whether you’re sharing it with friends at a summer barbecue or enjoying a quiet evening at home, this cheesecake brings smiles all around.
It’s a reminder that sometimes, the simplest recipes can create the most delightful memories.
So, roll up your sleeves, gather your ingredients, and let this cheesecake be the star of your next gathering!