

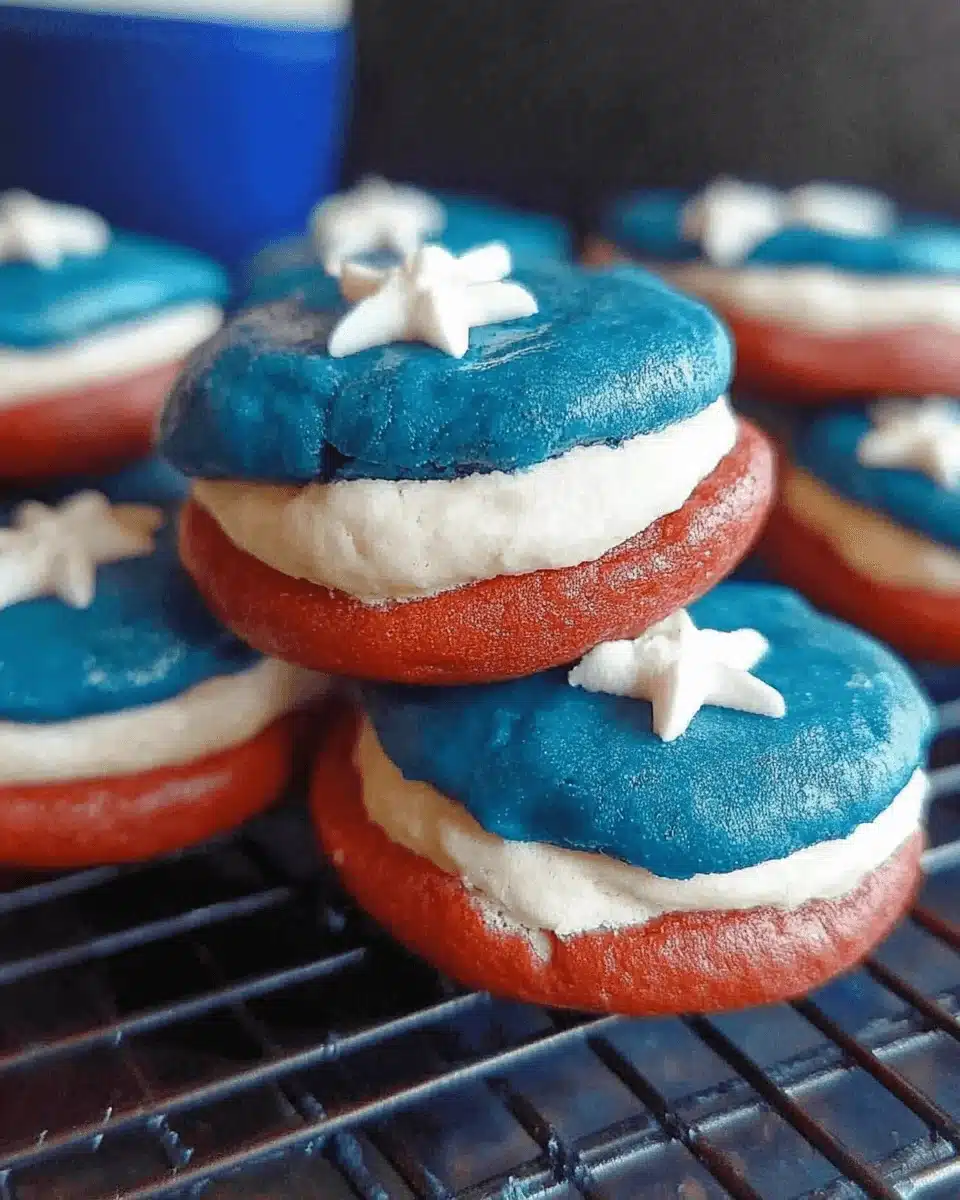
Fourth of July Whoopie Pies
As the Fourth of July approaches, I can’t help but feel a wave of nostalgia wash over me. The smell of barbecues, the sound of fireworks, and the laughter of friends and family fill the air. What better way to celebrate than with a batch of delightful Fourth of July Whoopie Pies? These sweet treats are not only a quick solution for a busy day, but they also bring a festive flair to your holiday table. With their vibrant colors and rich flavors, they’re sure to impress your loved ones and create lasting memories.
Why You’ll Love This Fourth of July Whoopie Pies
These Fourth of July Whoopie Pies are a game-changer for your holiday celebrations. They’re incredibly easy to whip up, making them perfect for busy schedules. The rich chocolate flavor combined with the fluffy marshmallow filling creates a taste explosion that will have everyone coming back for seconds. Plus, their vibrant colors add a festive touch to any gathering, ensuring your dessert table stands out this Independence Day.
Ingredients for Fourth of July Whoopie Pies
Gathering the right ingredients is the first step to creating these festive Fourth of July Whoopie Pies. Here’s what you’ll need:
- All-purpose flour: The backbone of your whoopie pies, providing structure and texture.
- Cocoa powder: Adds a rich chocolate flavor that pairs perfectly with the sweet filling.
- Baking soda: This leavening agent helps the cookies rise, giving them a light and fluffy texture.
- Salt: Just a pinch enhances the flavors and balances the sweetness.
- Unsalted butter: Softened butter creates a creamy base, adding richness to the cookies.
- Granulated sugar: Sweetens the batter and contributes to the cookies’ delightful texture.
- Large egg: Acts as a binder, helping to hold everything together.
- Vanilla extract: A splash of vanilla adds warmth and depth to the flavor profile.
- Milk: Keeps the batter moist and helps achieve the perfect consistency.
- Red and blue food coloring: Essential for that festive look, making your whoopie pies pop with color.
- Marshmallow fluff: The star of the filling, providing a sweet and gooey texture.
- Powdered sugar: Sweetens the filling and helps it hold its shape.
For those looking to customize, feel free to experiment with different colors or even flavors. You can find the exact measurements for each ingredient at the bottom of the article, ready for printing!
How to Make Fourth of July Whoopie Pies
Creating these Fourth of July Whoopie Pies is a delightful journey that’s as fun as it is delicious. Follow these simple steps, and you’ll have a batch of festive treats ready to impress your friends and family.
Step 1: Preheat and Prepare
Start by preheating your oven to 350°F (175°C). While it warms up, line a baking sheet with parchment paper. This will prevent your whoopie pies from sticking and make cleanup a breeze.
Step 2: Mix Dry Ingredients
In a medium bowl, whisk together the all-purpose flour, cocoa powder, baking soda, and salt. This step is crucial as it ensures that your dry ingredients are evenly distributed, leading to perfectly baked cookies.
Step 3: Cream Butter and Sugar
In a large mixing bowl, cream the softened unsalted butter and granulated sugar together until the mixture is light and fluffy. This process incorporates air, giving your whoopie pies a delightful texture.
Step 4: Combine Wet Ingredients
Add the large egg and vanilla extract to the butter-sugar mixture. Mix until everything is well combined. The egg acts as a binder, helping to hold your cookies together.
Step 5: Combine Wet and Dry Mixtures
Gradually add the dry ingredients to the wet mixture, alternating with the milk. Start and end with the dry ingredients. This method helps maintain a smooth batter without overmixing.
Step 6: Color the Batter
Divide the batter into two bowls. Add red food coloring to one bowl and blue to the other. Stir until you achieve vibrant colors. This is where the fun begins—creating a festive look for your whoopie pies!
Step 7: Bake the Cookies
Using a spoon, drop dollops of each colored batter onto the prepared baking sheet, creating a marbled effect. Bake for 10-12 minutes, or until the cookies spring back when lightly pressed. Let them cool completely on a wire rack.
Step 8: Prepare the Filling
In a separate bowl, mix the marshmallow fluff and powdered sugar until smooth. This sweet filling is what makes whoopie pies so irresistible, adding a gooey texture that complements the cookies perfectly.
Step 9: Assemble the Whoopie Pies
Once the cookies are cool, spread a generous amount of the marshmallow filling between two cookies to form a whoopie pie. Press them gently together, and voilà! You’ve created a festive treat that’s ready to be enjoyed.
Tips for Success
- Make sure your butter is softened for easy creaming with sugar.
- Don’t skip the cooling step; it helps the filling set perfectly.
- Use gel food coloring for more vibrant hues.
- For a fun twist, add sprinkles to the filling before assembling.
- Store whoopie pies in an airtight container to keep them fresh.
Equipment Needed
- Baking sheet: A standard sheet works, but a silicone mat can prevent sticking.
- Parchment paper: Great for easy cleanup; aluminum foil is a good alternative.
- Mixing bowls: Use any size, but a large bowl is ideal for creaming.
- Whisk: A hand whisk or electric mixer will do the job.
- Spoon or cookie scoop: For portioning the batter, a scoop ensures uniformity.
Variations
- For a fruity twist, add a layer of strawberry or raspberry jam in the filling.
- Try using peanut butter fluff instead of marshmallow for a nutty flavor.
- Swap out the cocoa powder for vanilla or lemon zest for a lighter version.
- Make them gluten-free by using a gluten-free flour blend in place of all-purpose flour.
- For a dairy-free option, use coconut cream instead of marshmallow fluff and a dairy-free butter substitute.
Serving Suggestions
- Pair your whoopie pies with a scoop of vanilla ice cream for a delightful dessert combo.
- Serve alongside fresh fruit, like strawberries or blueberries, to balance the sweetness.
- For drinks, consider iced tea or lemonade to keep things refreshing.
- Display on a festive platter, garnished with sprigs of mint for a pop of color.
FAQs about Fourth of July Whoopie Pies
Can I make Fourth of July Whoopie Pies ahead of time?
Absolutely! You can bake the cookies a day in advance and store them in an airtight container. Just add the filling on the day you plan to serve them for the best texture.
What can I use instead of marshmallow fluff?
If you’re looking for alternatives, you can use whipped cream or a cream cheese frosting. Both options will give you a delicious filling, though the texture will differ slightly.
How do I store leftover whoopie pies?
Store your whoopie pies in an airtight container at room temperature for up to three days. If you want to keep them longer, consider refrigerating them for up to a week.
Can I customize the colors for other holidays?
<pDefinitely! You can use different food coloring to match any holiday theme. Think green for St. Patrick’s Day or pastels for Easter—your creativity is the limit!
Are these whoopie pies suitable for kids?
<pYes! These Fourth of July Whoopie Pies are a hit with kids. They love the fun colors and the sweet marshmallow filling. Just be mindful of any allergies when serving!
Final Thoughts
Creating these Fourth of July Whoopie Pies is more than just baking; it’s about bringing joy to your holiday celebrations. The vibrant colors and rich flavors evoke a sense of nostalgia, reminding me of summer gatherings filled with laughter and love. Each bite is a delightful explosion of sweetness, perfect for sharing with family and friends. Whether you’re hosting a barbecue or enjoying a quiet evening, these whoopie pies add a festive touch to any occasion. So roll up your sleeves, gather your loved ones, and let the sweet memories unfold with every delicious bite!
Fourth of July Whoopie Pies: Celebrate with a Sweet Twist!
Ingredients
Method
- Preheat the oven to 350°F (175°C) and line a baking sheet with parchment paper.
- In a bowl, whisk together flour, cocoa powder, baking soda, and salt.
- In another bowl, cream the butter and sugar until light and fluffy.
- Add the egg and vanilla extract, mixing until combined.
- Gradually add the dry ingredients to the wet mixture, alternating with milk.
- Divide the batter into two bowls and add red food coloring to one and blue to the other.
- Drop spoonfuls of each color onto the prepared baking sheet, creating a marbled effect.
- Bake for 10-12 minutes, then let cool completely.
- In a separate bowl, mix marshmallow fluff and powdered sugar to create the filling.
- Spread the filling between two cooled cookies to form the whoopie pies.
Nutrition
Notes
- For a more festive look, sprinkle edible glitter on top of the whoopie pies.
- Store in an airtight container for up to 3 days.
- Feel free to customize the colors for other holidays or occasions.