

As I sat in a cozy Japanese bistro, the aroma of savory teriyaki chicken drifted through the air, whisking me into a culinary dream. It was in that moment I discovered the beauty of Chicken Onigiri—a charming blend of flavors, where tender, glazed chicken meets perfectly sticky sushi rice. This easy-to-make appetizer not only transports me to Japan with every bite but also serves as a delightful option for snacking on the go or enjoying at home. With just a handful of ingredients and minimal prep time, you can whip up these delectable Chicken Onigiri for a satisfying snack or a crowd-pleasing treat at your next gathering. Ready to elevate your homemade meals? Let’s dive into this delightful recipe and explore the wonderful world of Japanese cuisine!
Why You’ll Love Chicken Onigiri
Quick and Easy: This recipe is perfect for those hectic days when you crave something homemade without spending hours in the kitchen.
Savory Goodness: The blend of tender teriyaki chicken and sticky sushi rice delivers an explosion of flavor that your taste buds will adore.
Versatile Snack: Whether you’re hosting a party or just in need of a satisfying bite on the go, Chicken Onigiri is your go-to solution that appeals to everyone.
Customizable Delight: Feel free to swap in your favorite ingredients, like spicy mayo or fresh veggies, for a unique spin every time.
Culinary Adventure: With every bite, you’ll experience a taste of Japan, bringing excitement to your meal routine—just like my favorite Marry Chicken Pasta and Garlic Parmesan Chicken dishes!
In just a few simple steps, you’ll enjoy a delicious snack that delights the senses and satisfies your cravings.
Ingredients for Chicken Onigiri
• Discover the simple components that make Chicken Onigiri a delightful snack!
For the Onigiri Rice
- Cooked Sushi Rice – Essential for achieving that perfect sticky texture; short-grain rice is recommended.
- Salt – Enhances the flavor of the rice; opt for fine salt to ensure even mixing.
- Furikake (optional) – A crunchy sprinkle that adds umami and depth; feel free to skip if you don’t have it on hand.
For the Teriyaki Chicken Filling
- Boneless Skinless Chicken (drumsticks preferred) – The star protein; drumsticks keep it juicy and tender.
- Soy Sauce – The key ingredient for marinating, delivering a savory umami punch.
- Sake (or Water) – Perfect for adding depth to the marinade, though water works in a pinch.
- Baking Soda – Tenderizes the chicken, ensuring it remains succulent.
- Cornstarch – Helps create a crispy texture when the chicken is cooked.
- Mirin – A sweet rice wine that balances the chicken filling with flavor.
- Brown Sugar – Adds sweetness to your teriyaki sauce, harmonizing the flavors.
- Oil – Keeps the chicken from sticking to the pan while cooking.
- Minced Garlic – Infuses the dish with aromatic richness, amplifying the deliciousness.
For the Wrapping
- Nori – Seaweed sheets that bring flavor and a delightful crunch to your Chicken Onigiri.
Step‑by‑Step Instructions for Chicken Onigiri
Step 1: Prepare the Sushi Rice
Begin by rinsing 1 cup of short-grain sushi rice under cold water until the water runs clear. Cook the rice according to package instructions, typically using a rice cooker or stovetop, with about 1.2 cups of water. Once cooked, let the rice cool slightly, then mix in a pinch of fine salt and a sprinkle of furikake, if desired, to enhance its flavor.
Step 2: Marinate the Chicken
While the rice is cooling, cut 1 pound of boneless skinless chicken into small bite-sized pieces and place it in a bowl. Mix together 2 tablespoons of soy sauce, 1 tablespoon of sake, ½ teaspoon of baking soda, and 1 tablespoon of cornstarch, then pour this marinade over the chicken. Allow the chicken to marinate in the refrigerator for about 30 minutes to infuse the flavors and tenderize the meat.
Step 3: Make the Teriyaki Sauce
In a mixing bowl, combine 3 tablespoons of soy sauce, 2 tablespoons of brown sugar, and 2 tablespoons of mirin. Whisk these ingredients together until the sugar dissolves completely. This sweet and savory teriyaki sauce will add depth to your chicken filling, setting the stage for that delightful flavor in your Chicken Onigiri.
Step 4: Cook the Chicken
Heat 1 tablespoon of oil in a non-stick skillet over medium-high heat. Once the oil is shimmering, add the marinated chicken pieces, stirring frequently for about 2-3 minutes until they are golden brown and cooked through. In the last 30 seconds of cooking, add 1 clove of minced garlic and pour in the teriyaki sauce, stirring until it thickens and coats the chicken evenly.
Step 5: Shape the Onigiri
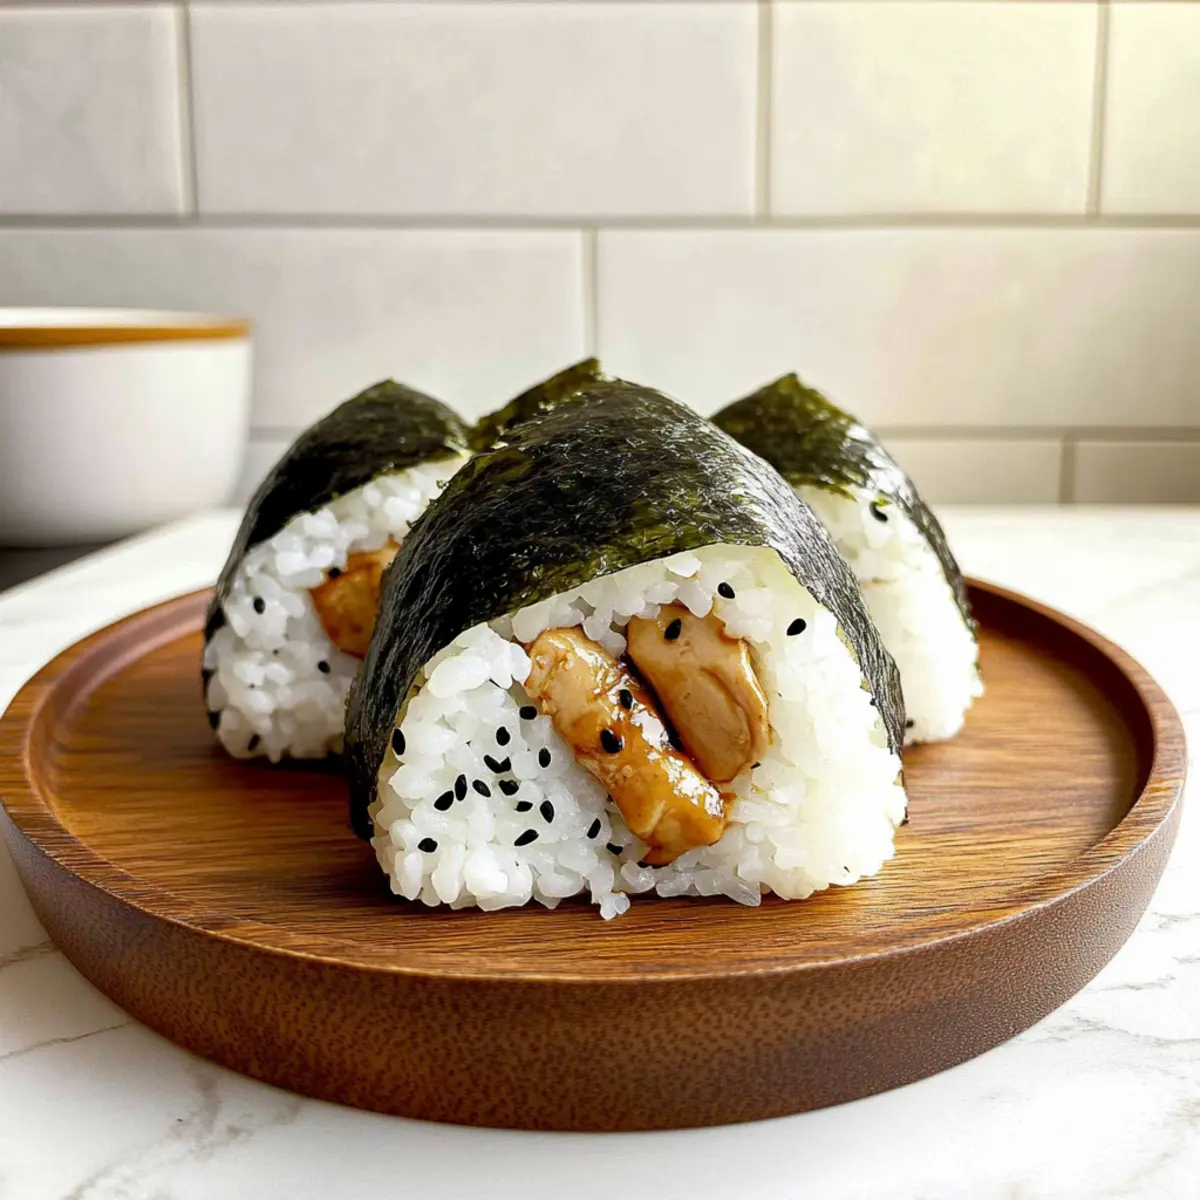
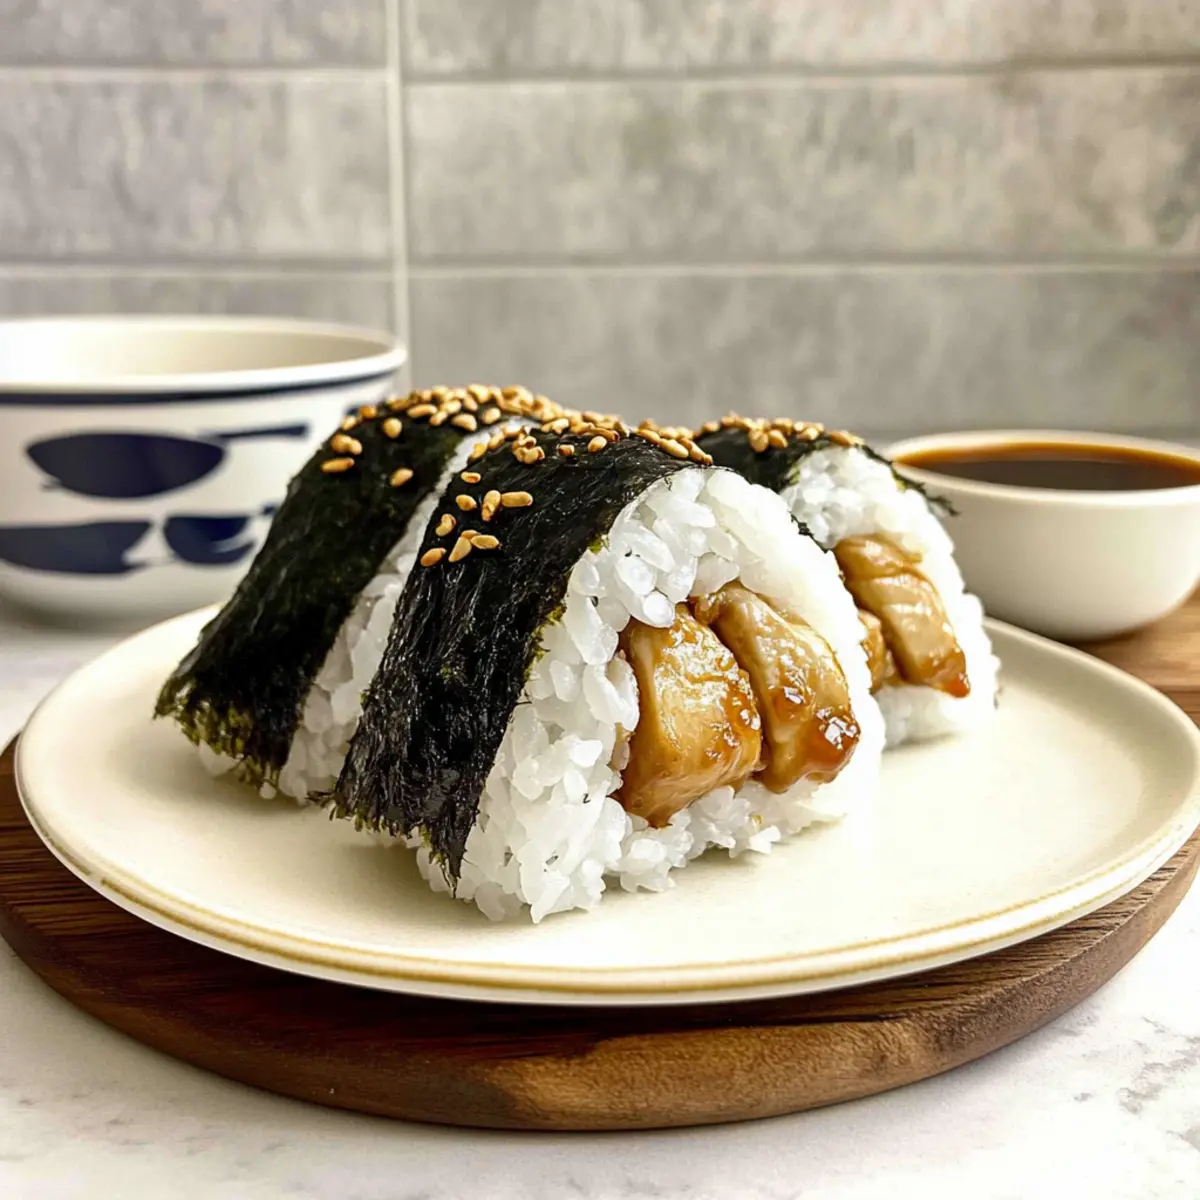
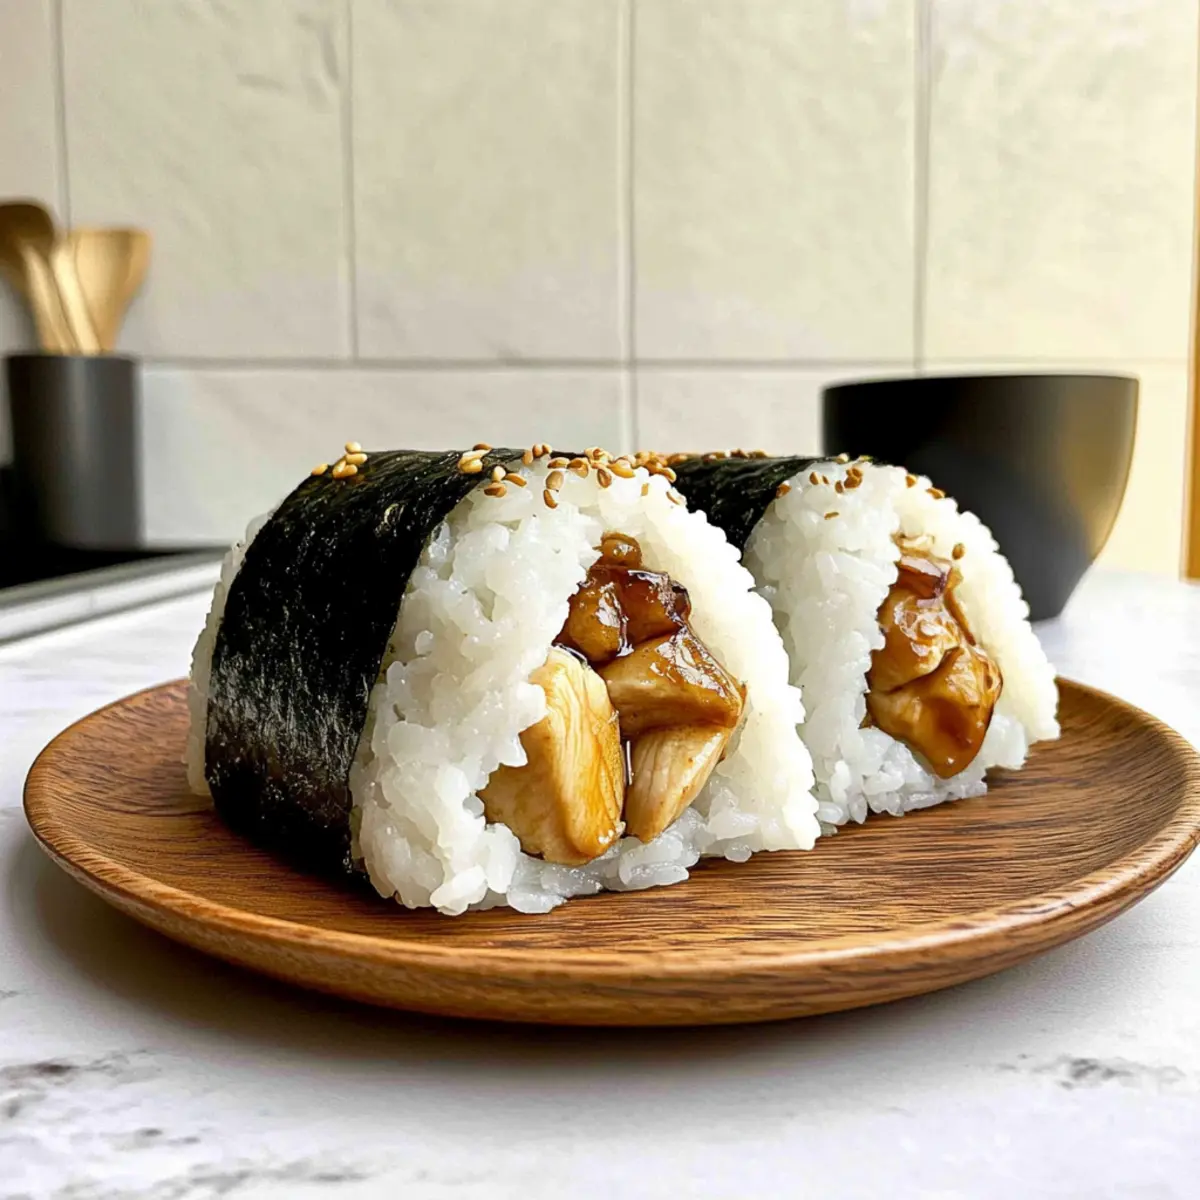
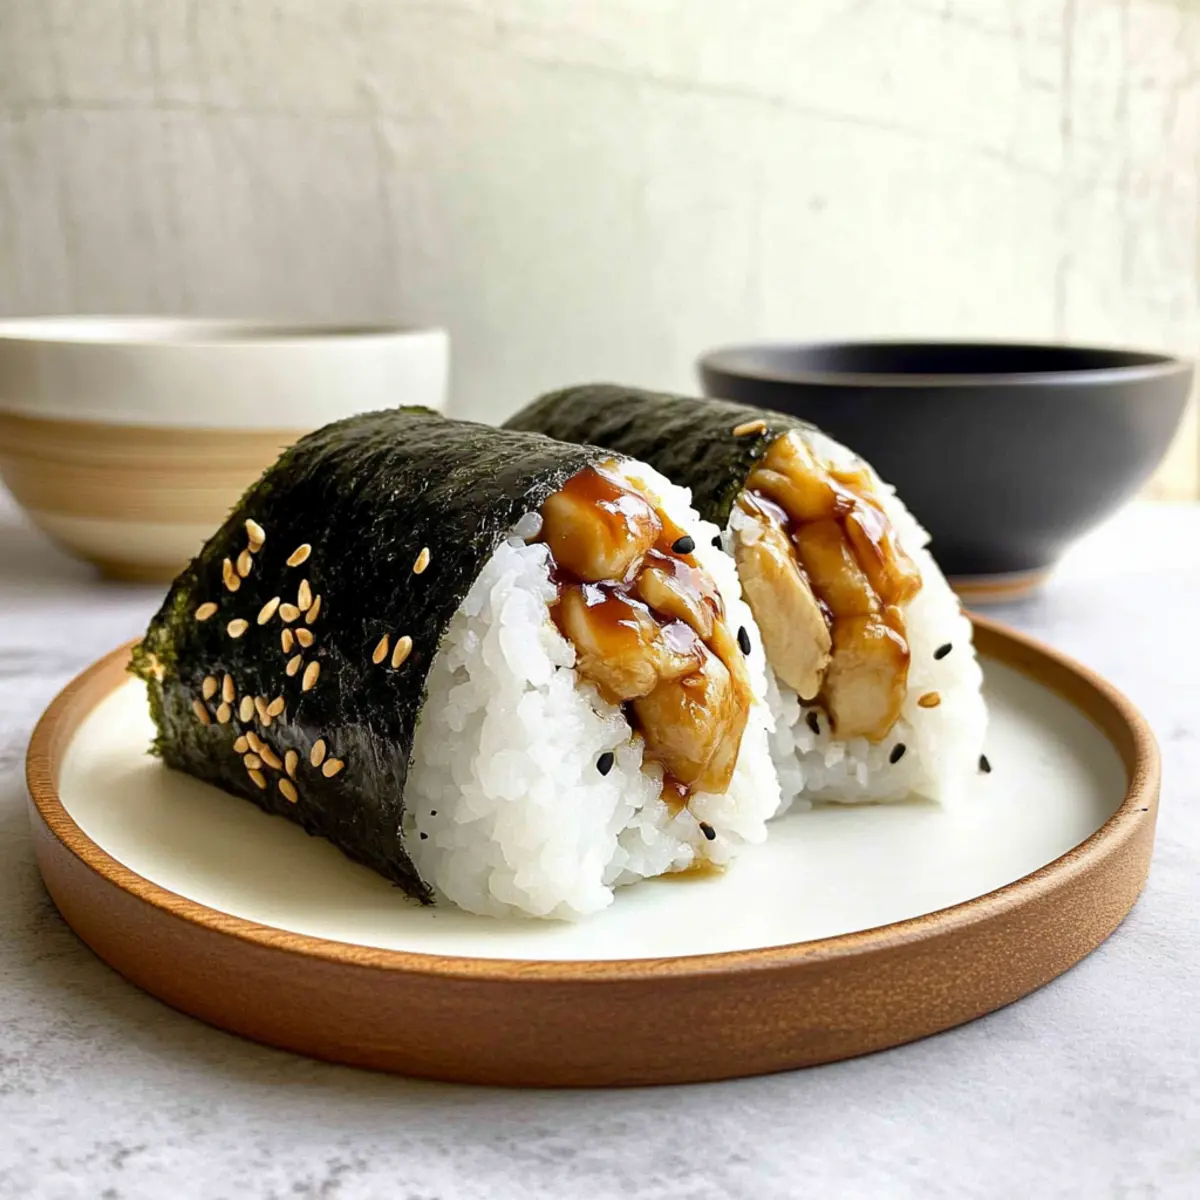
Now it’s time to shape your Chicken Onigiri! Wet your hands to prevent sticking, then take about ⅓ cup of sushi rice and flatten it into a small disk in your palm. Create a well in the center and spoon in 1 tablespoon of the cooked teriyaki chicken. Top with another ⅓ cup of rice to cover the filling, and gently mold it into a triangle, firmly pressing to hold its shape.
Step 6: Wrap in Nori
To finish your Chicken Onigiri, cut sheets of nori into strips. Take one triangle-shaped rice ball and wrap a strip of nori around the bottom third, leaving the top exposed. This adds a delicious ocean flavor and a delightful crunch to each bite of your Chicken Onigiri. Repeat the process with the remaining rice and chicken for delightful handheld snacks!
Make Ahead Options
These Chicken Onigiri are an ideal choice for meal prep enthusiasts! You can prepare the sushi rice and marinate the chicken up to 24 hours in advance. Simply cook the rice, then let it cool, mixing in salt and furikake (if using) before storing it in an airtight container. For the chicken, follow the marination steps and refrigerate until you’re ready to cook. When you’re ready to serve, quickly sauté the marinated chicken and shape your onigiri with the prepped rice. By prepping ahead, you’ll have a delightful snack ready with minimal effort, ensuring your Chicken Onigiri taste just as delicious as when made fresh!
Expert Tips for Chicken Onigiri
Perfectly Sticky Rice: Ensure your sushi rice is adequately sticky; adjust the water ratio to include about 15% more than usual for best results.
Marinate for Flavor: Always allow the chicken to marinate for at least 30 minutes; this enhances both flavor and tenderness—don’t skip this step!
Non-Stick Cooking: Using a non-stick pan is crucial to prevent the chicken from sticking while it cooks; this keeps it tender and juicy.
Wet Your Hands: Before shaping the onigiri, wet your hands to prevent the rice from sticking; a little water goes a long way in crafting beautiful shapes.
Storage Reminder: Chicken Onigiri is best consumed within 24 hours. Store any extras in the fridge, but enjoy them quickly to maintain texture and flavor.
Customization is Key: Feel free to experiment with fillings and toppings to create your own tasty variations of Chicken Onigiri!
What to Serve with Chicken Onigiri
Imagine a delightful spread that perfectly complements each savory bite, creating a feast of flavors and textures.
-
Soy Sauce: A classic dipping companion, it enhances the umami flavors of the chicken, adding depth to every mouthful.
-
Pickled Vegetables: Bright and tangy, pickled veggies provide a refreshing crunch that balances the rich teriyaki goodness of the onigiri.
-
Miso Soup: Warm and comforting, this traditional Japanese soup brings a soothing touch to your meal, making it feel complete.
-
Edamame: These lightly salted soybeans offer a fun snack that not only pairs well in flavor but adds a vibrant green to your plate.
-
Seaweed Salad: Refreshingly tangy, this dish heightens the experience with its unique texture and brings out the oceanic notes of the nori.
-
Sake or Green Tea: Both beverages perfectly complement the savory components of your meal, enhancing the overall dining experience through a warm or refreshing sip.
For a truly memorable occasion, combine several of these elements, ensuring a burst of flavor with every experience!
How to Store and Freeze Chicken Onigiri
Fridge: Store Chicken Onigiri in an airtight container for up to 2 days. For the best texture, consume within 24 hours.
Freezer: To freeze, wrap each onigiri individually in plastic wrap and place them in a freezer-safe bag. They can be stored for up to 2 months.
Reheating: Thaw frozen onigiri in the refrigerator overnight, then microwave for about 30 seconds or until heated through.
Enjoy Freshness: For optimal taste and texture, enjoy Chicken Onigiri fresh when possible, as the rice tends to harden after freezing.
Chicken Onigiri Variations & Substitutions
Feel free to personalize your Chicken Onigiri with these delightful twists that will tantalize your taste buds!
- Lean Chicken: Substitute chicken breast for drumsticks for a healthier, leaner option without sacrificing flavor.
- Spicy Kick: Swap teriyaki sauce for spicy mayo for a tangy twist that adds a delicious heat to your onigiri.
- Crunchy Veggies: Add diced carrots or cucumbers to the chicken filling for a pop of freshness and extra crunch.
- Herb-Infused Rice: Mix in chopped green onions or cilantro into the sushi rice for added flavor and a colorful look.
- Umami Boost: Try using a dash of miso paste in the marinade for a deeper, more complex flavor that truly elevates your dish.
- Sweet and Savory: Blend in a teaspoon of sesame oil with the teriyaki sauce for a fragrant flavor infusion that enriches every bite.
- Seaweed Alternatives: Instead of nori, use thinly sliced lettuce leaves for a fresh, low-carb wrapping option; adventure awaits with each crisp bite!
- Vegetarian Delight: Substitute the chicken with marinated tofu or mushrooms, making it a perfect vegetarian treat without losing the essence of flavor.
Explore these variations to create your unique version of Chicken Onigiri. Enjoy a taste adventure that brings excitement to your cooking routine! And don’t forget, you can always reach for other delightful recipes like Balsamic Chicken with Roasted Vegetables or a comforting bowl of Creamy Chicken and Wild Rice Soup for varied flavors on your culinary journey.
Chicken Onigiri Recipe FAQs
How do I know if my sushi rice is cooked properly?
Absolutely! When cooked properly, sushi rice should be sticky and slightly chewy. If you find that your rice isn’t sticky enough, you may need to adjust the water-to-rice ratio, adding about 15% more water than noted on the package. A good test is to take a clump of rice in your hands; it should hold together without crumbling.
How should I store leftovers?
Very! To store your Chicken Onigiri, place them in an airtight container in the refrigerator for up to 2 days. However, for the best texture, I recommend enjoying them within 24 hours. If you notice them becoming hard or dry, it’s a sign they should be consumed soon.
Can I freeze Chicken Onigiri?
Absolutely! To freeze, wrap each onigiri individually in plastic wrap and place them into a freezer-safe bag or container. They can be stored in the freezer for up to 2 months. When you’re ready to enjoy them, thaw the onigiri in the refrigerator overnight. For reheating, gently microwave for about 30 seconds or until heated through.
What if my chicken turns out tough?
Oh no! If your chicken ends up tough, it might be due to overcooking. To ensure tender chicken, always marinate it for at least 30 minutes before cooking and stir-fry it on medium-high heat for just 2-3 minutes. Additionally, using baking soda in the marinade helps tenderize the meat, so don’t skip that step!
Is Chicken Onigiri safe for kids?
Definitely! Chicken Onigiri is a great snack for children, but be mindful of the nori if your kids have allergies to seaweed. Make sure to cut the onigiri into smaller portions if you’re serving young children to avoid any risk of choking.
Can I customize the fillings in Chicken Onigiri?
The more the merrier! Feel free to swap in your favorite ingredients, such as different proteins, vegetables, or even a spicy mayo for an exciting twist. This recipe is wonderfully versatile, allowing you to get creative based on your taste and what you have on hand!
Taste the Best Chicken Onigiri: A Savory Snack Delight
Ingredients
Equipment
Method
- Rinse sushi rice under cold water until water runs clear, then cook with about 1.2 cups of water. Let cool, then mix in salt and furikake if desired.
- Cut chicken into bite-sized pieces. Mix soy sauce, sake, baking soda, and cornstarch, then marinate chicken for 30 minutes in the refrigerator.
- Combine soy sauce, brown sugar, and mirin in a bowl. Whisk until sugar is dissolved.
- Heat oil in a skillet over medium-high heat. Add marinated chicken and cook for 2-3 minutes. Add minced garlic and teriyaki sauce, stir until thickened.
- Wet hands to prevent sticking. Take about ⅓ cup of sushi rice, flatten into a disk, add 1 tablespoon of chicken filling, and cover with more rice, molding into a triangle.
- Wrap a strip of nori around the bottom third of each onigiri, leaving the top exposed. Repeat with remaining ingredients.