

The sizzle of corn cakes in the pan fills my kitchen with warmth, transporting me to the vibrant streets of Colombia. Today, I’m excited to share my version of Arepas con Queso, delicious cheese-filled delights that boast a crispy exterior and a soft, gooey heart. These gluten-free gems are not just a treat; they’re an experience you can whip up in no time, making them perfect for any meal of the day—from breakfast to dinner or even as a satisfying snack. With minimal ingredients and simple preparation, Arepas con Queso will quickly become a favorite in your cooking repertoire. Ready to discover why a little cornmeal goes a long way in creating comfort on a plate?

Why Arepas con Queso Are Amazing?
Gluten-Free Goodness: Arepas con Queso are naturally gluten-free, thanks to the use of masarepa, making them a perfect choice for those with dietary restrictions.
Quick to Make: With a simple preparation process that only takes 30 minutes, you can whip these up effortlessly, great for busy days!
Versatile Filling Options: While cheese is a classic choice, feel free to experiment with other fillings like meats or veggies for a personalized twist.
Crowd-Pleasing Snack: Whether you’re hosting friends or enjoying a solo snack, the cheesy, savory flavor is sure to please everyone’s palate.
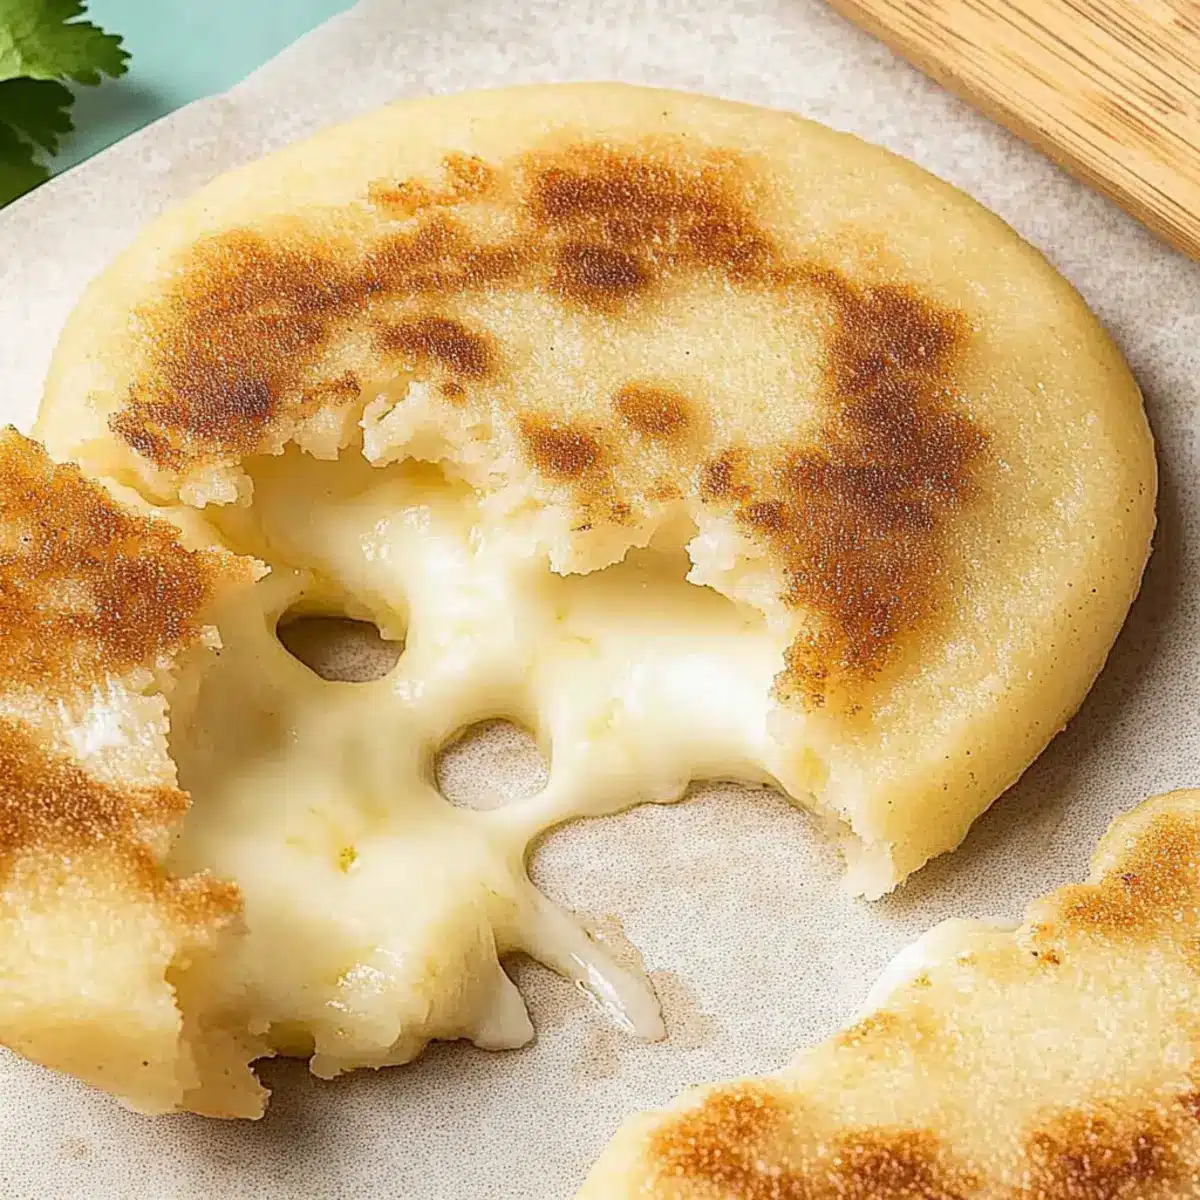
Perfectly Crispy: The delightful contrast between the crispy exterior and gooey interior is what makes arepas a must-try, elevating any meal.
You’ll love pairing these with sides like avocado or a fresh salad, just as I do with my Cheesy Bacon Breakfast dish!
Arepas con Queso Ingredients
• Discover the secrets to these cheese-filled delights!
For the Dough
- Masarepa – This precooked white cornmeal is essential for creating the ideal dough for your arepas; never use masa harina.
- Sea Salt/Kosher Salt – Enhances flavor, so feel free to adjust the amount based on your taste preferences.
- Cotija Cheese – Adds a delightful salty and crumbly texture; if unavailable, feta cheese works great as a substitute.
- Butter – Provides richness and aids in achieving a beautifully cooked arepa; margarine may be used if preferred.
- Warm Water – Hydrates the dough to reach just the right consistency; adjust until the dough is smooth and non-sticky.
For the Filling
- Shredded Mozzarella Cheese – This is a must for that melty interior; you can mix in other cheeses like cheddar or Monterey Jack for variety.
For Cooking
- Oil or Butter for Cooking – Use this to fry the arepas, ensuring an even coat for golden, crispy results.
With these simple ingredients, you’ll be on your way to creating delicious Arepas con Queso that are sure to impress!
Step‑by‑Step Instructions for Arepas con Queso
Step 1: Combine Ingredients
In a large mixing bowl, combine 2 cups of masarepa, 1 teaspoon of salt, 1 cup of crumbled Cotija cheese, and 2 tablespoons of softened butter. Gradually add about 1 to 1 ½ cups of warm water while mixing with your hands. Knead the mixture until a smooth, pliable dough forms; let it rest, covered, for 10 minutes for optimal texture.
Step 2: Check Dough Consistency
After resting, check the dough by forming a ball in your hands. It should feel soft and not crack at the edges. If the dough seems too dry, add a little more warm water, mixing until it reaches a smooth, play-dough-like consistency. This perfect texture is crucial for making your Arepas con Queso.
Step 3: Shape Arepas
Divide the dough into 8 equal portions and roll each into a ball, then flatten each ball gently to create a 5-inch circle. Sprinkle some shredded mozzarella cheese in the center of half the circles. Take the other half of the circles, cover the cheese-filled ones, and press the edges together, sealing them well to prevent leakage during cooking.
Step 4: Cook Arepas
Heat a skillet over medium heat or preheat your electric griddle to 325°F. Add a tablespoon of oil or butter to the skillet. Place the arepas on the skillet and cook for 4-5 minutes on each side. They should turn a lovely golden brown color, indicating they’re crispy on the outside while remaining soft and cheesy inside.
Step 5: Serve Warm
Once cooked, remove the Arepas con Queso from the heat and let them cool slightly. Serve them warm, either plain or with optional toppings like avocado slices or sour cream for an extra flavor kick. Enjoy the delightful, cheesy goodness of your homemade arepas!
Expert Tips for Arepas con Queso
-
Best Dough Consistency: Ensure the dough is soft and smooth, not too dry or too sticky. Adjust the water gradually to avoid common mistakes.
-
Cheese Choices: While Cotija is traditional, feel free to mix in other cheeses for added flavor. Just remember, it needs to melt well!
-
Cooking Temperature: Keep your skillet on medium heat. Too high heat can burn the arepas before they’re cooked through, ruining the gooey inside.
-
Seal Carefully: Make sure to seal the edges well to prevent any cheese from leaking during cooking. Press firmly but gently!
-
Crispy Finish: For extra crispy arepas, finish them in a hot oven for a few minutes after frying. This helps achieve that perfect contrast in texture.
Feel confident that with these tips, your Arepas con Queso will come out delicious every time!
Storage Tips for Arepas con Queso
-
Fridge: Store leftover cooked arepas con queso in an airtight container for up to 3 days to maintain freshness and flavor.
-
Freezer: For long-term storage, freeze the arepas individually, placing parchment paper between them to prevent sticking. They can last up to 2 months in the freezer.
-
Reheating: To enjoy your arepas again, reheat them in an oven at 350°F for about 10-15 minutes until crispy, or use a toaster oven for similar results.
Arepas con Queso Variations
Embrace your creativity with these delicious tweaks that can elevate your Arepas con Queso experience!
-
Dairy-Free: Substitute dairy products with plant-based cheese and vegan butter for a delightful alternative.
-
Spice It Up: Incorporate finely chopped jalapeños or a dash of cayenne pepper into the dough for an exciting kick. The heat will beautifully contrast with the creamy cheese.
-
Herbed Delight: Add fresh herbs like cilantro or parsley to the dough for a fragrant twist, enhancing the overall flavor profile. This adds a lovely freshness that harmonizes perfectly with the cheesiness.
-
Savory Stuffing: Fill with cooked, shredded chicken or beef mixed with spices for a hearty, protein-packed version. This transforms your arepas into a fulfilling meal that is both nourishing and satisfying.
-
Sweet Surprise: Try adding a bit of sugar to the dough and fill the arepas with sweetened cream cheese for a delightful dessert-style treat. Serve with fruit compote for a charming finish.
-
Veggie Boost: Stuff your arepas with sautéed veggies, such as bell peppers, onions, or spinach, creating a vibrant mix of flavors and textures inside. Each bite will burst with both color and taste!
-
Double Cheese: Boost the cheesy goodness by blending different types of cheeses like gouda or pepper jack for a melty, flavor-packed experience. A blend can really elevate the taste.
-
Vegan Pleaser: Make fully plant-based arepas by using mashed avocado or tofu as a filling, providing a creamy texture that pairs well with a crispy exterior. It’s a nourishing and satisfying option!
These variations allow you to adapt Arepas con Queso to your family’s tastes or dietary needs. You’ll be whipping them up like a pro in no time, and who knows, you might just stumble across your new favorite combo! If you’re looking for more ideas, consider trying them alongside a comforting dish like Chewy Coconut Oatmeal or pair them with Chocolate Pecan Coconut cookies for a delightful experience. Enjoy your cooking adventure!
Make Ahead Options
Planning ahead with Arepas con Queso can save you precious time during busy weeknights! You can prepare the dough up to 24 hours in advance; simply mix the masarepa, salt, Cotija cheese, butter, and warm water, then wrap the dough tightly and refrigerate. The shaped arepas can also be made ahead; form them and place them on a parchment-lined tray, covering with plastic wrap before refrigerating for up to 3 days. To maintain their delicious quality, ensure they’re sealed well to avoid drying out. When you’re ready to enjoy, simply heat oil in a skillet and cook the arepas as per instructions, resulting in perfectly crispy and cheesy delights, just like fresh out of the pan!
What to Serve with Arepas con Queso
Arepas con Queso are a delightful treat that shines even brighter when complemented by the right sides and beverages.
-
Fresh Avocado Slices: These creamy slices add richness and a refreshing contrast, balancing the savory flavors of the arepas.
-
Zesty Salsa: A vibrant salsa provides a zippy kick, enhancing the cheesy goodness while adding a fresh, tangy element to each bite.
-
Roasted Vegetables: A medley of roasted bell peppers, zucchini, and onions brings warmth and sweetness, making for a colorful and nutritious plate.
-
Corn Salad: A light corn salad with diced tomatoes and cilantro provides a sweet crunch, beautifully harmonizing with the texture of the arepas.
-
Black Beans: Hearty black beans are a protein-packed addition, offering a creamy texture and earthy flavors that complement the dish wonderfully.
-
Beverage Pairing – Iced Tea: Refreshing iced tea with a hint of lemon is a perfect drink to cleanse your palate between bites.
Whatever you choose to serve alongside, these pairings will elevate your Arepas con Queso experience to new heights!

Arepas con Queso Recipe FAQs
What is masarepa, and how do I choose the right one?
Masarepa is a precooked white cornmeal specifically for making arepas. It’s important to use masarepa, not masa harina, which is meant for tamales and tortillas. Look for bags labeled “masarepa” in your local grocery or specialty store, and opt for brands that have a fine texture for the best results.
How should I store leftover Arepas con Queso?
Absolutely! Store any leftover cooked Arepas con Queso in an airtight container in the refrigerator for up to 3 days. If you want to keep them longer, I recommend freezing them. Just place parchment paper between each arepa to prevent sticking, and they can be frozen for up to 2 months.
Can I freeze Arepas con Queso? If so, how?
Certainly! To freeze Arepas con Queso, first cool them completely after cooking. Then, layer them with parchment paper in a freezer-safe container or a zip-lock bag, ensuring they don’t stick together. When you’re ready to enjoy them, simply reheat in a 350°F oven for about 10-15 minutes or until heated through and crispy.
What if my arepas fall apart while cooking?
Very! If your arepas are falling apart during cooking, it might be due to the dough being too dry. Check that your dough has the right consistency—it should be soft and pliable. If it cracks when you shape it, gradually add a little warm water until it’s smooth and rolls easily without splitting. Always remember to seal the edges well when enclosing the cheese!
Are there any dietary considerations I should be aware of with Arepas con Queso?
Definitely! Arepas con Queso are gluten-free and can cater to various dietary needs. However, always double-check the cheese you are using, as some may contain rennet, which can be a concern for vegetarians. If you’re accommodating allergies, consider using plant-based butter and cheese alternatives, and always inform guests about the ingredients used to avoid any issues.

Delicious Arepas con Queso: Your New Favorite Snack
Ingredients
Equipment
Method
- In a large mixing bowl, combine 2 cups of masarepa, 1 teaspoon of salt, 1 cup of crumbled Cotija cheese, and 2 tablespoons of softened butter. Gradually add about 1 to 1 ½ cups of warm water while mixing with your hands. Knead the mixture until a smooth, pliable dough forms; let it rest, covered, for 10 minutes for optimal texture.
- After resting, check the dough by forming a ball in your hands. It should feel soft and not crack at the edges. If the dough seems too dry, add a little more warm water, mixing until it reaches a smooth, play-dough-like consistency.
- Divide the dough into 8 equal portions and roll each into a ball, then flatten each ball gently to create a 5-inch circle. Sprinkle some shredded mozzarella cheese in the center of half the circles. Take the other half of the circles, cover the cheese-filled ones, and press the edges together, sealing them well.
- Heat a skillet over medium heat or preheat your electric griddle to 325°F. Add a tablespoon of oil or butter to the skillet. Place the arepas on the skillet and cook for 4-5 minutes on each side until golden brown.
- Once cooked, remove the Arepas con Queso from the heat and let them cool slightly. Serve them warm, either plain or with optional toppings like avocado slices.