

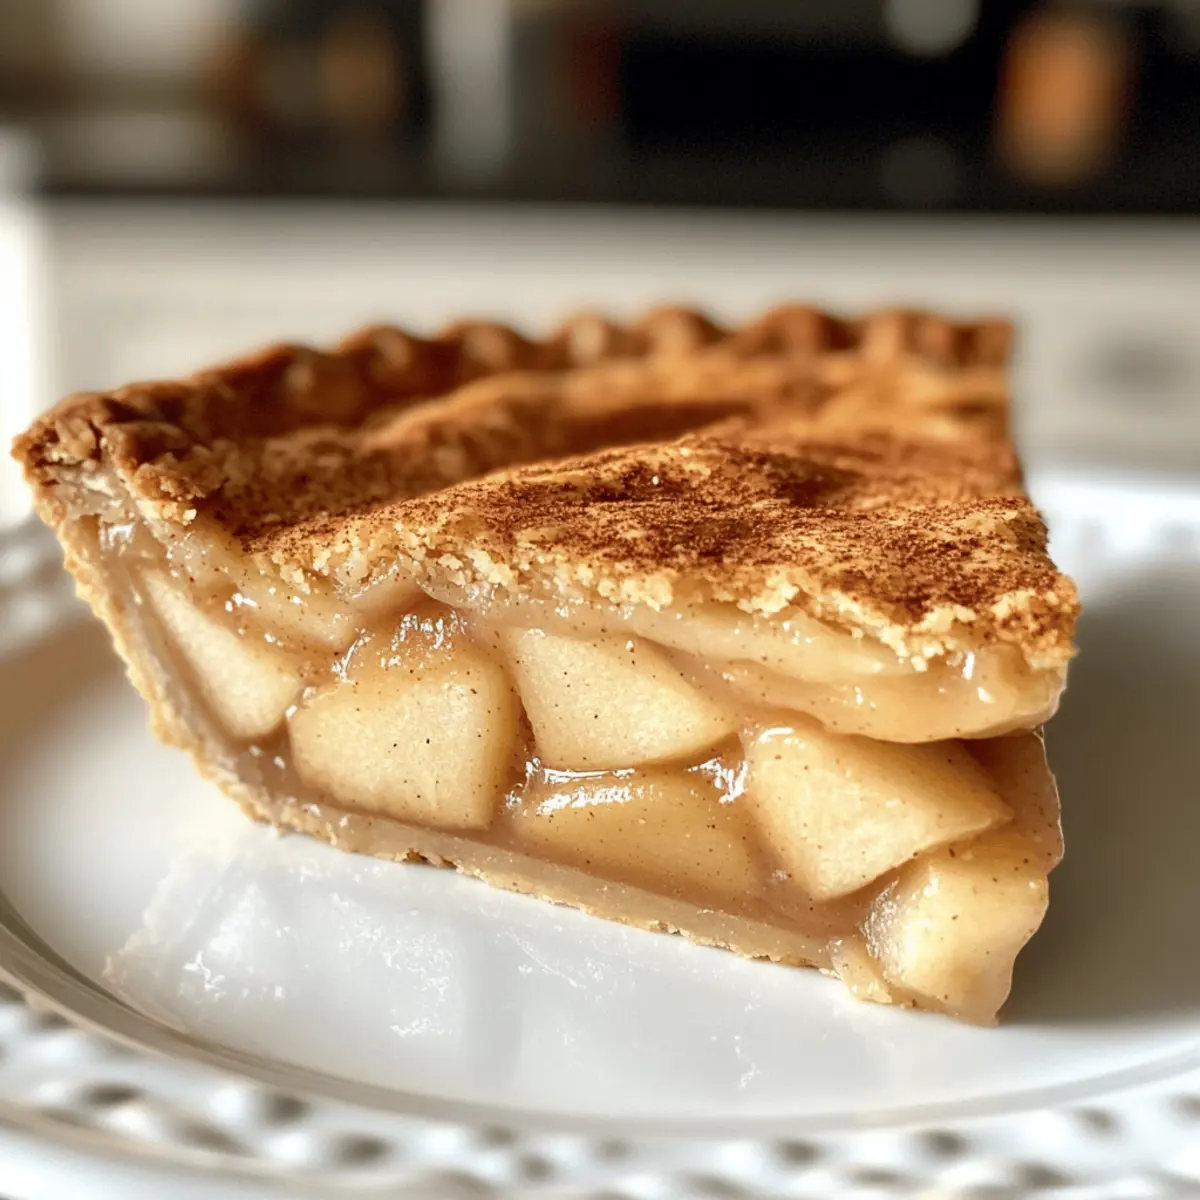
As the crisp autumn air begins to settle in, I can’t help but think of cozy nights and warm desserts that wrap us in comfort. If you’re like me, you know that nothing quite says “fall” like a slice of homemade Apple Butter Pie. This easy-to-make custard pie showcases the deep, spiced flavor of apple butter, elegantly nestled in a nutty spelt crust that adds a touch of wholesome goodness. Picture gatherings with friends and family, where this creamy delight becomes the centerpiece, effortlessly bringing smiles to everyone around the table. Bonus: It pairs beautifully with a dollop of Maple Whipped Cream that elevates the experience even further. Are you ready to dive into this delightful autumn treat?
Why is Apple Butter Pie a Must-Bake?
Irresistible Rewards: Nothing beats the joy of sharing a creamy, flavorful pie with loved ones, and this Apple Butter Pie is the perfect contender.
Unique Flavor: The rich apple butter filling, spiced with cinnamon and nutmeg, creates a cozy atmosphere ideal for fall gatherings.
Easy Prep: With just a handful of ingredients and simple steps, you’ll have a stunning dessert ready in no time.
Wholesome Crust: The nutty spelt crust adds a wholesome element that distinguishes it from standard pies and pairs beautifully with the filling.
Crowd-Pleasing Delight: Whether it’s an intimate dinner or a holiday celebration, this pie will surely impress everyone at the table! You could even try it alongside other favorites like Honey Butter Chicken for a full feast.
Apple Butter Pie Ingredients
• Gather these staples to delight in making your very own Apple Butter Pie!
For the Filling
- Apple Butter – A creamy, spiced base; choose homemade or store-bought for convenience.
- Eggs – These provide structure and richness, essential for a custard-like texture.
- Cream – Adds that luscious creaminess to your filling, making each bite heavenly.
- Sugar – Sweetens your pie; feel free to use granulated or brown sugar, based on your taste.
- Salt – A pinch balances the sweetness; use Diamond Crystal kosher salt for the best results.
- Spices (cinnamon, nutmeg) – Infuse seasonal flavors; adjust to suit your preference for warmth and spice.
For the Crust
- Spelt Flour – Creates a nutty, wholesome crust; if needed, all-purpose flour makes a fine substitute.
- Butter – Essential for flavor; it aids in creating a flaky and delicious pie crust.
Give this Apple Butter Pie a try this fall, and you won’t be disappointed!
Step‑by‑Step Instructions for Apple Butter Pie
Step 1: Prepare the Crust
Begin by preheating your oven to 375°F (190°C). Roll out the spelt flour and butter mixture into a circle, then fit it into a 9-inch pie pan. Prick the bottom with a fork to prevent bubbling. Blind bake your crust for 15 minutes, then remove the pie weights or beans and bake for an additional 5-10 minutes, until lightly golden and set aside to cool.
Step 2: Make the Filling
In a large mixing bowl, combine 1 cup of apple butter, 3 eggs, 1 cup of cream, ½ cup of sugar, and 1 teaspoon each of cinnamon and nutmeg. Whisk vigorously until the mixture is smooth and well blended, about 2-3 minutes. This creamy filling will form the delicious heart of your Apple Butter Pie, so be sure to incorporate all ingredients evenly.
Step 3: Fill the Crust
Carefully pour the luscious filling into the blind-baked spelt crust. Make sure to smooth out the top with a spatula to prevent any air bubbles from forming. The crust should feel firm, and the filling will look glossy and inviting, showcasing the gorgeous spices that signal a comforting dessert is on the way.
Step 4: Bake
Place the filled pie in the oven at 375°F (190°C) and bake for 45-55 minutes. During baking, watch for the edges to set while the center remains slightly wobbly, akin to a soufflé. If the top begins to brown excessively, you can tent it loosely with foil to prevent over-baking and ensure even coloring.
Step 5: Cool and Chill
Once the baking time is complete, remove the pie from the oven and let it cool at room temperature for at least 1 hour. After it has cooled, refrigerate the pie for at least 6 hours to allow it to set properly. This chilling time enhances the flavors and texture of your Apple Butter Pie, making it even tastier.
Step 6: Serve
After chilling, slice your Apple Butter Pie into wedges and serve with a generous dollop of Maple Whipped Cream on top. For an added decorative touch, you can use remaining pie crust dough to create beautiful cut-out shapes and place them on top. Enjoy this cozy fall dessert with family and friends!
Expert Tips for Apple Butter Pie
• Perfect Baking Time: Aim for 45-55 minutes of baking; the Apple Butter Pie should be set with a gently jiggly center for the best texture.
• Avoid Over-Baking: Keep an eye on the pie to prevent a spongy texture or unsightly cracks. If the edges brown too quickly, cover lightly with foil.
• Chill for Flavors: Allow the pie to cool completely before refrigerating for at least 6 hours; this helps the filling to set properly and enhances the flavor.
• Crust Considerations: If using spelt flour, you may need to adjust the liquid slightly; this flour can absorb more moisture than all-purpose flour.
• Decorative Options: Roll out any extra spelt dough to create decorative cut-outs for the top of your pie, adding a charming touch to your Apple Butter Pie.
Storage Tips for Apple Butter Pie
Fridge: Store your Apple Butter Pie in the refrigerator for up to 4 days. Cover it with plastic wrap or aluminum foil to keep it fresh.
Freezer: If you want to make it ahead of time, freeze the pie for up to 2 months. Wrap it tightly in plastic wrap and then in foil to prevent freezer burn.
Thawing: When you’re ready to enjoy, thaw the pie in the refrigerator overnight for the best texture and flavor retention.
Reheating: For a warm treat, reheat slices in the oven at 350°F (175°C) for about 10-15 minutes, or until warmed through, perfect for that comforting fall dessert vibe.
Make Ahead Options
These Creamy Apple Butter Pies are perfect for meal prep, making them an excellent choice for busy weeknights! You can prepare the spelt crust and blind bake it up to 24 hours in advance, then refrigerate it to maintain its flakiness. The filling, made from apple butter, eggs, cream, and spices, can be whisked together and stored in the refrigerator for up to 3 days. When ready to enjoy, simply pour the filling into the cooled crust and bake. This way, you’ll have a delightful dessert with minimal effort that tastes just as delicious as when made fresh, ensuring every slice is a cozy reminder of fall!
What to Serve with Creamy Apple Butter Pie
Indulging in a slice of this pie evokes warm memories of family gatherings and autumn afternoons, making your meal complete.
-
Maple Whipped Cream: Adds a rich, sweet layer that balances the pie’s spices perfectly, enhancing each creamy bite.
-
Caramel Sauce: Drizzling warm caramel over the pie creates a luscious contrast that amplifies its comfort and appeal.
-
Chilled Vanilla Ice Cream: The creamy texture melts into the warm pie, creating a delightful dance of flavors that your taste buds will adore.
-
Sparkling Cider: A bubbly drink that refreshes between bites, complementing the pie’s richness with its crisp and fruity notes.
-
Roasted Brussels Sprouts: Their savory flavor and crispy texture offer a delightful contrast to the pie’s sweetness, balancing your meal beautifully.
-
Apple Crisp: Celebrate fall flavors with this comforting dessert option. The crumbly topping pairs well with the soft filling of the pie, creating a lovely autumn harmony.
-
Herbal Tea: A soothing cup of chamomile or chai can wrap up your meal nicely, enhancing relaxation after enjoying this delightful dessert.
Apple Butter Pie Variations & Substitutions
Feel free to make this Apple Butter Pie your own with these fun and delicious twists!
-
Traditional Crust: Swap out the spelt crust for a classic pastry crust for a more traditional flavor, bringing back those familiar cozy memories.
-
Graham Cracker Crust: For a sweeter, crunchier base, use a Graham cracker crust instead, adding a delightful contrast to the creamy filling.
-
Gluten-Free Crust: Need a gluten-free option? Substitute spelt flour with a gluten-free all-purpose blend to create a deliciously inclusive dessert.
-
Pumpkin Spice Twist: Add a teaspoon of pumpkin spice to the filling for a warm, seasonal spin that heightens the autumn flavor profile perfectly.
-
Caramel Drizzle: Drizzle some homemade caramel sauce over the top before serving for a decadent touch that plays beautifully with the apple butter’s sweetness.
-
Nutty Crunch: Fold in chopped pecans or walnuts into the filling to introduce a delightful crunch that contrasts nicely with the smooth custard texture.
-
Cinnamon Sugar Top: Sprinkle cinnamon sugar on top of the pie before baking to give it a beautiful caramelized finish that enhances its inviting appearance.
-
Heated Flavors: For a spicy kick, add a pinch of cayenne or red pepper flakes to the filling for an unexpectedly delightful warmth in every bite.
Experimenting with these variations will add your personal flair to this cozy pie. For a complete fall feast, consider serving it alongside Honey Butter Chicken or complementing it with a perfect cup of spiced apple cider!
Creamy Apple Butter Pie Recipe FAQs
What should I look for when selecting apple butter?
Absolutely! When choosing apple butter, opt for varieties that are dark and rich in color, as these will typically have a deeper flavor. If making homemade apple butter, look for apples that are a bit overripe, as they will yield a sweeter and more flavorful spread. You can taste a spoonful before purchasing, ensuring it’s exactly what you want for your pie!
How should I store my Apple Butter Pie?
Very! Store your Apple Butter Pie in the refrigerator for up to 4 days. Simply cover it well with plastic wrap or aluminum foil to keep it fresh and prevent it from absorbing any fridge odors. It’s best enjoyed chilled, just take it out 10-15 minutes before serving to allow those delicious flavors to come to life!
Can I freeze my Apple Butter Pie?
Absolutely! To freeze your pie, wrap it tightly in plastic wrap and then in aluminum foil to prevent freezer burn. It will stay fresh for up to 2 months in the freezer. When you’re ready to enjoy it, thaw the pie in the refrigerator overnight to retain its creamy texture for the best experience.
What if my pie cracks or has a spongy texture?
Oh no! If your Apple Butter Pie cracks or appears spongy, it may be due to over-baking. To prevent this next time, keep an eye on the baking process and remove it when the edges are set but the center is still slightly wobbly, similar to a soufflé. Another tip is to cover the pie loosely with foil if the edges brown too quickly.
Are there any dietary considerations for this recipe?
Of course! This Creamy Apple Butter Pie contains dairy from cream and eggs, so if you or your guests have allergies or dietary restrictions, consider using alternatives like coconut cream and a flax egg (1 tablespoon ground flaxseed mixed with 2.5 tablespoons water) for the custard effect. Additionally, spelt flour is not gluten-free; however, it can be substituted with gluten-free all-purpose flour for those with gluten sensitivities.
What can I do with leftover spelt dough?
What a great question! If you have leftover spelt dough while making the crust, roll it out and create decorative cut-outs to place on top of your pie before baking. This not only adds a charming look but also a delightful crunch when baked. You can try making autumn leaf shapes or stars for a festive touch!
Creamy Apple Butter Pie: Your New Fall Favorite Dessert
Ingredients
Equipment
Method
- Preheat your oven to 375°F (190°C). Roll out the spelt flour and butter mixture into a circle, then fit it into a 9-inch pie pan. Prick the bottom with a fork to prevent bubbling. Blind bake for 15 minutes, then remove weights and bake for an additional 5-10 minutes until lightly golden and set aside to cool.
- In a large mixing bowl, combine 1 cup of apple butter, 3 eggs, 1 cup of cream, ½ cup of sugar, and 1 teaspoon each of cinnamon and nutmeg. Whisk vigorously until smooth and well blended, about 2-3 minutes.
- Carefully pour the filling into the blind-baked spelt crust. Smooth the top with a spatula to prevent air bubbles.
- Place the filled pie in the oven at 375°F (190°C) and bake for 45-55 minutes. Watch for the edges to set while the center remains slightly wobbly. Tent with foil if the top begins to brown excessively.
- Once baked, let the pie cool at room temperature for at least 1 hour. Then refrigerate for at least 6 hours to set properly.
- Slice the Apple Butter Pie into wedges and serve with a generous dollop of Maple Whipped Cream.