

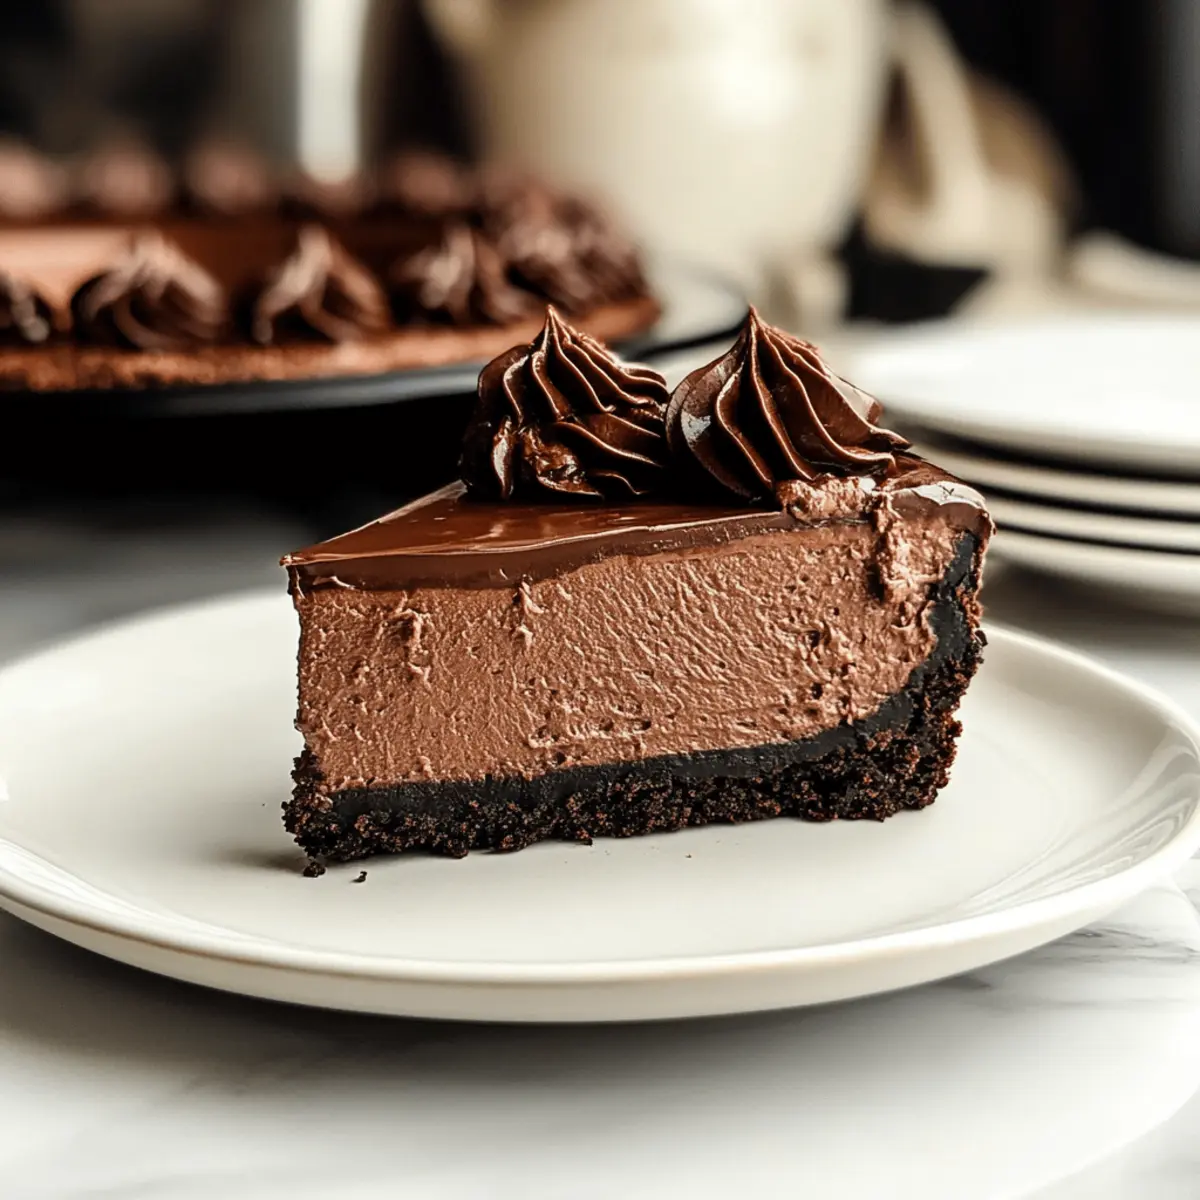
“You’re not going to believe how easy it is to make a show-stopping dessert without ever turning on the oven!” If that sentiment resonates with you, then you’re in for a treat with this Rich & Creamy Chocolate Cheesecake! Designed for chocolate aficionados who crave indulgence without the fuss, this no-bake delight features a luscious filling resting atop a crunchy Oreo crust, finished with a glossy ganache that looks as stunning as it tastes. One of the best perks? It comes together in a flash, allowing you to spend less time in the kitchen and more time indulging in life’s little pleasures. Plus, this dessert can be prepped ahead, making it the ideal sweet ending for busy nights or surprise gatherings. So, are you ready to create a creamy masterpiece that will leave your guests begging for seconds?
Why Is This Cheesecake So Irresistible?
Rich, Creamy Delight: This cheesecake’s smooth filling, made from high-quality chocolate, guarantees a decadent experience that melts in your mouth.
No Baking Required: Skip the heat and hassle! You can whip this up with minimal kitchen fuss, making it perfect for anyone craving homemade goodness.
Customizable Creations: The base can vary with flavored extracts or crust alternatives, like a graham cracker crust, to keep things interesting every time!
Impressive Presentation: Top with a glossy ganache, and you’ll have a stunning centerpiece for any gathering that looks as good as it tastes.
Perfect Make-Ahead Dessert: Prep it the night before for stress-free entertaining, so you can focus on enjoying your time with loved ones.
Crowd-Pleasing Flavor: Whether you serve it at a family dinner or a classy gathering, it’s bound to become everyone’s favorite dessert, just like the decadent Pecan Pie Cheesecake or the delightful Soft Chewy Chocolate Chip Cookies.
Rich & Creamy Chocolate Cheesecake Ingredients
Here’s everything you need for your no-bake chocolate cheesecake adventure!
For the Crust
- Oreo Cookies – Essential for a rich, chocolatey base; feel free to swap for your favorite chocolate cookie.
- Melted Butter – Helps bind the crust together; margarine can stand in if needed.
For the Filling
- Cream Cheese – Adds that signature creaminess; mascarpone offers an even richer flavor as a substitute.
- Powdered Sugar – Sweetens the filling to perfection; granulated sugar is an acceptable alternative.
- Vanilla Extract – Infuses depth and warmth; try almond extract for a delightful twist.
- Semi-Sweet/Dark Chocolate – The star of the show for rich flavor; invest in quality chocolate for the best outcome.
- Heavy Whipping Cream – Creates a light and airy filling; coconut cream works well for a dairy-free option.
For the Ganache
- Chopped Semi-Sweet Chocolate – Essential for the decadent ganache; dark chocolate can elevate the richness.
- Heavy Cream (for Ganache) – Ensures a smooth and luscious topping; full-fat coconut milk is a great dairy-free substitute.
This no-bake version of a rich and creamy chocolate cheesecake is bound to impress!
Step‑by‑Step Instructions for Rich & Creamy Chocolate Cheesecake
Step 1: Prepare the Crust
Start by crushing Oreo cookies into fine crumbs using a food processor or a rolling pin wrapped in a kitchen towel—this should take about 2-3 minutes. In a mixing bowl, combine the cookie crumbs with melted butter until thoroughly mixed. Press this mixture firmly into the bottom of a springform pan, forming an even layer. Chill the crust in the refrigerator for 30 minutes to solidify.
Step 2: Make the Filling
In a microwave-safe bowl, melt the semi-sweet or dark chocolate in 30-second intervals, stirring until smooth and glossy—this typically takes about 1-2 minutes. Allow the melted chocolate to cool slightly while you beat the cream cheese, powdered sugar, and vanilla extract together with an electric mixer until smooth and creamy, about 2 minutes. Gradually fold in the cooled chocolate until fully incorporated, blending well.
Step 3: Incorporate Whipped Cream
In a separate bowl, whip the heavy cream with an electric mixer until stiff peaks form, which usually takes 2-3 minutes. Carefully fold the whipped cream into the chocolate mixture, using a spatula to maintain its airy texture. Ensure no white streaks remain while creating a smooth, decadent filling for your rich & creamy chocolate cheesecake.
Step 4: Assemble and Chill
Once the filling is well mixed, pour it into the chilled Oreo crust, spreading it evenly with a spatula. Gently smooth the top for a beautiful finish, then cover the cheesecake with plastic wrap. Refrigerate for at least 6 hours, or preferably overnight, allowing the flavors to meld and the cheesecake to set perfectly.
Step 5: Prepare Ganache
To make the glossy ganache, heat the heavy cream in a small saucepan over medium heat until it just begins to simmer. Remove from heat and pour it over the chopped chocolate in a separate bowl. Let it sit for 5 minutes to soften before stirring until completely smooth and shiny. Allow this luxurious ganache to cool slightly before drizzling it over your chilled cheesecake.
Step 6: Final Chill
After drizzling the ganache over the cheesecake, return it to the refrigerator for an additional 30-60 minutes. This step lets the ganache set beautifully, ensuring it holds its shape when you slice into your rich & creamy chocolate cheesecake. Once set, slice carefully and garnish as desired before serving.

Expert Tips for Rich & Creamy Chocolate Cheesecake
- Room Temperature Cheese: Let the cream cheese sit out before using; room temperature blends more smoothly, avoiding lumps in your rich & creamy chocolate cheesecake.
- Short Chill Time: Be patient! Chill the cheesecake for at least 6 hours or overnight for the best texture—rushing this step can lead to a too-soft filling.
- Gentle Mixing: When folding in whipped cream, be gentle; over-mixing will deflate the air, causing your cheesecake to lose its dreamy lightness.
- Quality Chocolate: Invest in high-quality semi-sweet or dark chocolate for the filling and ganache. It truly makes a difference in flavor and texture.
- Creative Toppings: Don’t hesitate to get creative! Garnish with chocolate shavings, fresh berries, or even a sprinkle of sea salt for an elegant touch on your cheesecake.
Rich & Creamy Chocolate Cheesecake Variations
Feel free to let your imagination roam while making this delightful cheesecake!
- Dairy-Free: Substitute cream cheese with a vegan cream cheese and use coconut cream for the filling, perfect for lactose-intolerant friends.
- Flavor Boost: Experiment with flavored extracts like orange or mint to add a fun twist to the traditional chocolate flavor.
- Crust Alternative: Use a graham cracker or digestive biscuit crust instead of Oreos for a lighter, less chocolaty base that pairs beautifully with the filling.
- Fruit Topping: Top the ganache with fresh raspberries or strawberries for a bright and tangy contrast that enhances the richness of the chocolate.
- Nutty Crunch: Fold in crushed nuts like pecans or walnuts into the filling for an unexpected crunch. This adds a lovely texture and bursts of flavor!
- Spicy Kick: Add a pinch of cayenne pepper or cinnamon to the chocolate mixture for a delightful hint of warmth that tantalizes the taste buds.
- Frozen Treat: For a summer twist, turn this cheesecake into a frozen delight! Just freeze it after assembly for a creamy dessert perfect for warm days.
- Luxury Twist: Elevate your presentation by drizzling homemade caramel sauce over the ganache. This adds a sweet component that harmonizes beautifully with the chocolate.
With all these variations, your options are endless to create a cheesecake as unique as your celebrations, whether you pair it with a scrumptious Oreo Cheesecake or enjoy it alongside a slice of Caramel Swirl Cheesecake. Happy baking!
Storage Tips for Rich & Creamy Chocolate Cheesecake
Fridge: Store your cheesecake covered with plastic wrap or in an airtight container for up to 5 days, ensuring it stays fresh and delicious.
Freezer: For longer preservation, freeze the cheesecake without the ganache for up to 2 months. Wrap it tightly in plastic wrap and aluminum foil to prevent freezer burn.
Thawing: When ready to enjoy, thaw the frozen cheesecake overnight in the refrigerator. Allow it to chill completely before serving for the best flavor and texture.
Serving Freshness: For best results after freezing, consider adding the ganache fresh just before serving to maintain its glossy appearance on your rich & creamy chocolate cheesecake.
What to Serve with Irresistible No-Bake Chocolate Cheesecake
Treat yourself to a symphony of flavors and textures that will elevate your indulgent dessert experience.
-
Fresh Berries: A medley of strawberries and raspberries adds a delightful tartness, perfectly balancing the richness of the cheesecake.
-
Vanilla Ice Cream: The classic pairing of creamy vanilla ice cream offers a delightful contrast in temperature and texture, enhancing each decadent bite.
-
Chocolate Ganache Drizzle: For the ultimate chocolate lover, serve extra ganache on top. It adds a luxurious depth, turning any slice into a show-stopping experience.
-
Espresso or Coffee: A warm cup of rich coffee complements the sweetness of the cheesecake, while its bold flavors cut through the creaminess, making each sip and bite a perfect harmony.
-
Whipped Cream Topping: Fluffy whipped cream dolloped on top provides lightness and airy texture, making this dessert even more inviting and visually appealing.
-
Graham Cracker Crust Cookies: Serve alongside some buttery graham cracker cookies for additional crunch. They bring a nostalgic and comforting touch to the whole dessert spread.
-
Mint Leaves: Fresh mint not only adds a pop of color but also a refreshing fragrance that can brighten up each plate, making your dessert feel even more special.
Enjoy the perfect blend of flavors and textures that turn your No-Bake Chocolate Cheesecake into an unforgettable experience for family and friends!
Make Ahead Options
These Irresistible No-Bake Chocolate Cheesecakes are perfect for meal prep and can save you valuable time! You can easily make the crust and filling up to 24 hours in advance. Simply prepare the Oreo crust and press it into the springform pan, then refrigerate it. The filling can also be whipped and folded together ahead of time; just store it in an airtight container in the fridge. When ready to serve, pour the filling into the crust and allow it to chill for at least 6 hours, or preferably overnight, to enhance the flavors. For the ganache, prepare it just before serving to maintain its glossy finish, ensuring your cheesecake is just as delicious as the moment you made it!
Rich & Creamy Chocolate Cheesecake Recipe FAQs
What type of chocolate should I use for the filling?
I recommend using high-quality semi-sweet or dark chocolate to achieve the richest flavor in your cheesecake. Look for chocolate with at least 60% cocoa content for a deep, luxurious taste. Avoid chocolate chips as they may not melt as smoothly and can lead to a less creamy texture.
How should I store my cheesecake after making it?
To ensure your rich & creamy chocolate cheesecake stays fresh, cover it tightly with plastic wrap or store it in an airtight container in the refrigerator for up to 5 days. This helps keep it moist while preventing any odors from the fridge from affecting its flavor.
Can I freeze the cheesecake? If so, how?
Absolutely! You can freeze your cheesecake without the ganache for up to 2 months. First, wrap it tightly in plastic wrap, followed by aluminum foil to prevent freezer burn. When you’re ready to enjoy it, simply thaw the cheesecake overnight in the refrigerator. To maintain its glossy appearance, add the ganache fresh just before serving.
What should I do if my cheesecake filling is too runny?
If you find your filling has turned out runny, it could be due to insufficient chilling time or not enough whipped cream being added. Make sure to whip the cream to stiff peaks before folding it into the mixture, and ensure you chill the cheesecake for at least 6 hours to allow it to set properly. If it’s still too soft after chilling, you could try to stabilize it by adding a bit of gelatin (1 teaspoon) dissolved in water before folding in the whipped cream.
Can I substitute the cream cheese for a dairy-free option?
Yes! You can use dairy-free alternatives such as silken tofu or a dairy-free cream cheese product. Make sure to blend them well to achieve a smooth texture. Additionally, coconut cream serves as a fantastic substitute for the heavy whipping cream, giving you that luscious mouthfeel without the dairy.
What if I have nut allergies? Can I use nut-based alternatives?
If you or someone you’re serving has nut allergies, be sure to check the labels of your ingredients carefully. Most of the ingredients in this cheesecake are nut-free. Stick to substitutes like coconut cream for a dairy-free cheesecake, and avoid options like almond extract, instead using vanilla or mint for flavoring if you want to switch things up.
Decadent Rich & Creamy Chocolate Cheesecake You Can Make Today
Ingredients
Equipment
Method
- Start by crushing Oreo cookies into fine crumbs using a food processor or a rolling pin wrapped in a kitchen towel—this should take about 2-3 minutes.
- In a mixing bowl, combine the cookie crumbs with melted butter until thoroughly mixed. Press this mixture firmly into the bottom of a springform pan, forming an even layer.
- Chill the crust in the refrigerator for 30 minutes to solidify.
- In a microwave-safe bowl, melt the semi-sweet or dark chocolate in 30-second intervals, stirring until smooth and glossy—this typically takes about 1-2 minutes.
- Allow the melted chocolate to cool slightly while you beat the cream cheese, powdered sugar, and vanilla extract together with an electric mixer until smooth and creamy, about 2 minutes.
- Gradually fold in the cooled chocolate until fully incorporated, blending well.
- In a separate bowl, whip the heavy cream with an electric mixer until stiff peaks form, which usually takes 2-3 minutes.
- Carefully fold the whipped cream into the chocolate mixture, using a spatula to maintain its airy texture.
- Ensure no white streaks remain while creating a smooth, decadent filling for your cheesecake.
- Once the filling is well mixed, pour it into the chilled Oreo crust, spreading it evenly with a spatula.
- Cover the cheesecake with plastic wrap and refrigerate for at least 6 hours, or preferably overnight.
- To make the glossy ganache, heat the heavy cream in a small saucepan over medium heat until it just begins to simmer.
- Remove from heat and pour it over the chopped chocolate in a separate bowl. Let it sit for 5 minutes to soften before stirring until completely smooth and shiny.
- Allow this ganache to cool slightly before drizzling it over your chilled cheesecake.
- Return it to the refrigerator for an additional 30-60 minutes to allow the ganache to set.
- Once set, slice carefully and garnish as desired before serving.