

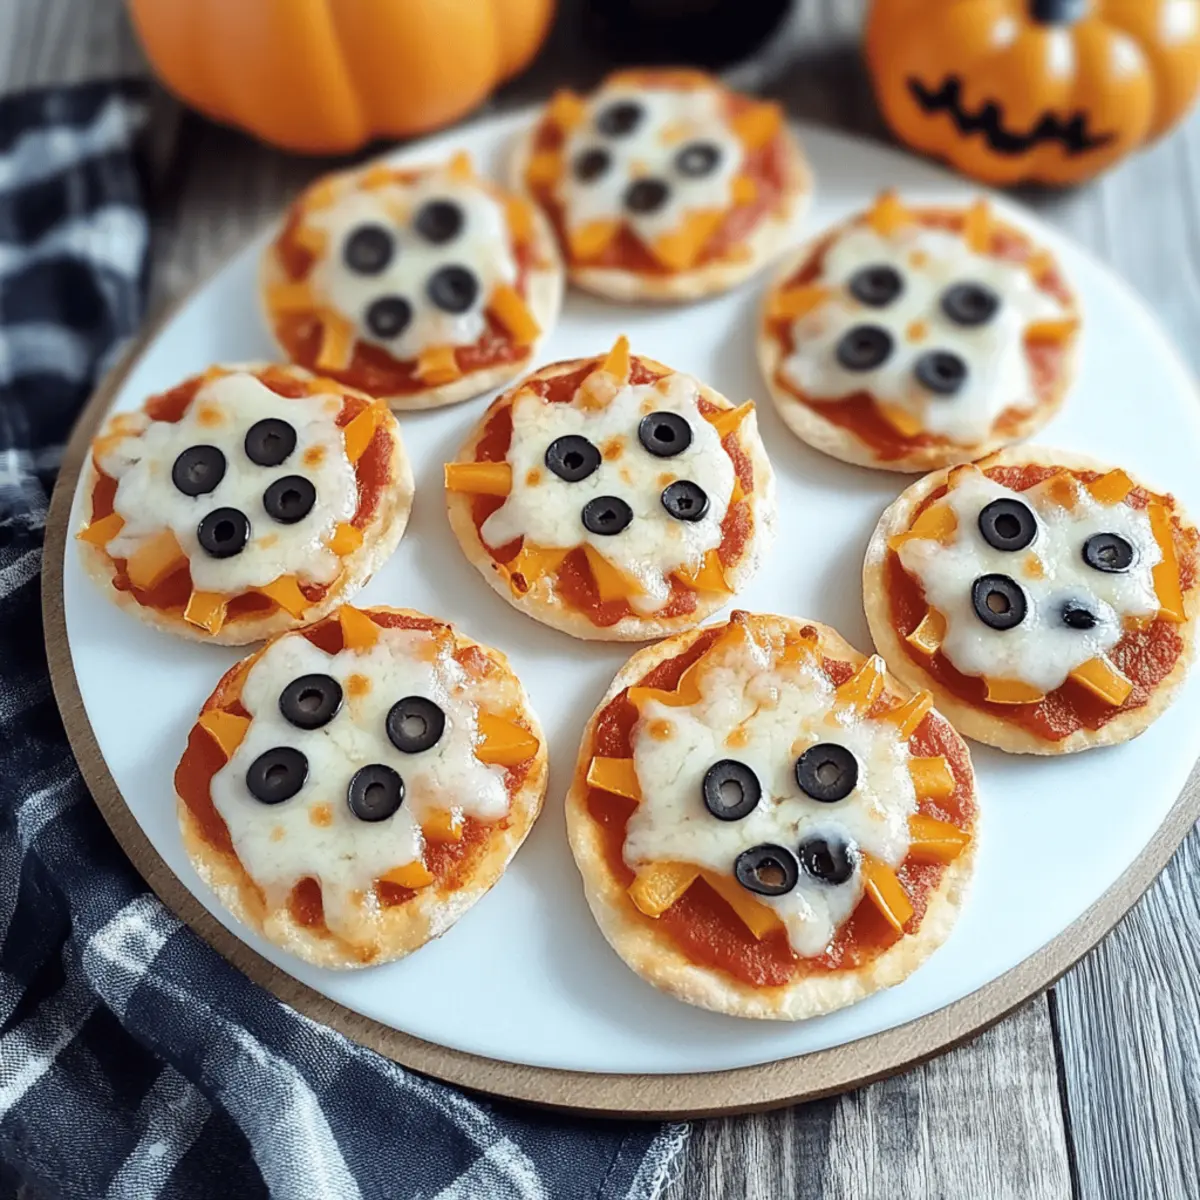
The kitchen echoed with excited giggles as I arranged the ingredients for our Halloween Mini Pizzas, transforming ordinary pizza night into a festive celebration. These bite-sized treats are not just a delicious illusion of creepy critters (hello, mummy faces and spooky spiders!), they also make for a super quick fix that the whole family can enjoy together. With the ability to customize toppings to your heart’s content, these mini pizzas surely bring everyone to the table, no matter their dietary preferences. Plus, they’re a fun way to get little ones involved in cooking—who wouldn’t love decorating their pizza like a Halloween masterpiece? Ready to dive into this spooky cooking adventure? Let’s create some magic!
Why are Mini Halloween Pizzas a must-try?
Kid-Friendly: These mini pizzas invite little chefs into the kitchen, making cooking a fun, hands-on experience for all ages.
Quick to Prepare: With just a handful of ingredients and simple steps, you’ll have these tasty treats ready in no time—perfect for busy weeknights or last-minute Halloween plans.
Customizable Toppings: Every family member can create their own spooky design! From veggie ghosts to cheese mummies, the possibilities are endless, catering to both kids and adults.
Healthy Options: Including fresh vegetables not only adds color but also brings in nutrients, making these treats a bit healthier alongside pizza fun!
Festive Fun: These Halloween-inspired bites create an exciting atmosphere, perfect for gatherings. Pair them with crispy veggies for an appealing spread!
Mini Halloween Pizzas Ingredients
For the Crusts
• Mini Pizza Crusts – Store-bought is quick and easy, or you can make your own for a personal touch.
• Olive Oil Spray – A light mist keeps the crusts from sticking and ensures even baking.
For the Sauce and Cheese
• Pizza Sauce – 3/4 cup adds moisture and flavor; marinara works in a pinch too!
• Mozzarella Cheese – 1 cup shredded delivers that classic, gooey cheese goodness.
• Part-Skim String Cheese – 4 sticks create those cute mummy decorations when pulled apart.
For the Toppings
• Black Olives – 1/4 cup sliced assists in creating fun spider decorations and adds a nice flavor.
• Mini Pepperoni – Optional, 1/4 cup brings a savory element that everyone loves.
• Orange & Green Bell Peppers – 1 cup thin strips for decorating add both color and a touch of sweetness.
For the Garnish
• Fresh Basil – 2 tbsp chiffonade gives a lovely aromatic finish to your pizzas before serving!
Feel free to mix and match these ingredients for your own version of Mini Halloween Pizzas that will delight both the kids and the grown-ups alike!
Step‑by‑Step Instructions for Mini Halloween Pizzas
Step 1: Preheat the Oven
Begin by preheating your oven to 425°F (220°C). This ensures a hot cooking environment for your Mini Halloween Pizzas. While the oven warms up, grab a baking sheet and lightly mist it with olive oil spray to prevent the crusts from sticking during baking.
Step 2: Add Pizza Sauce
Once the oven is ready, take your mini pizza crusts and place them on the prepared baking sheet. Spread 1-2 tablespoons of pizza sauce evenly across each crust, leaving a small border around the edges for a nice crust. The vibrant red sauce adds flavor and a spooky touch to your Halloween mini pizzas.
Step 3: Sprinkle Cheese
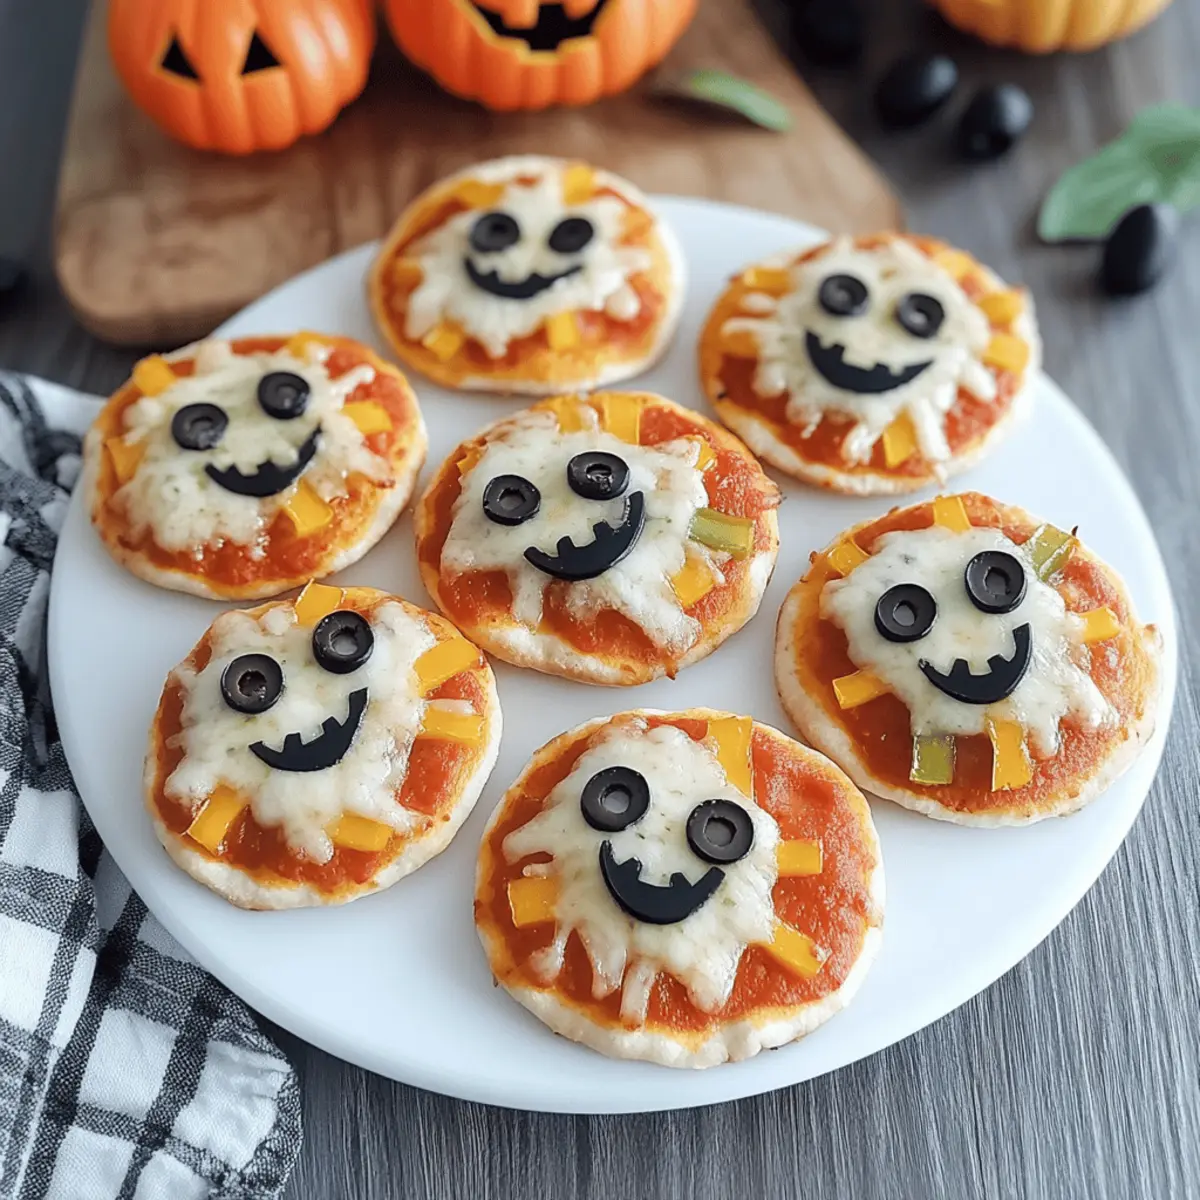
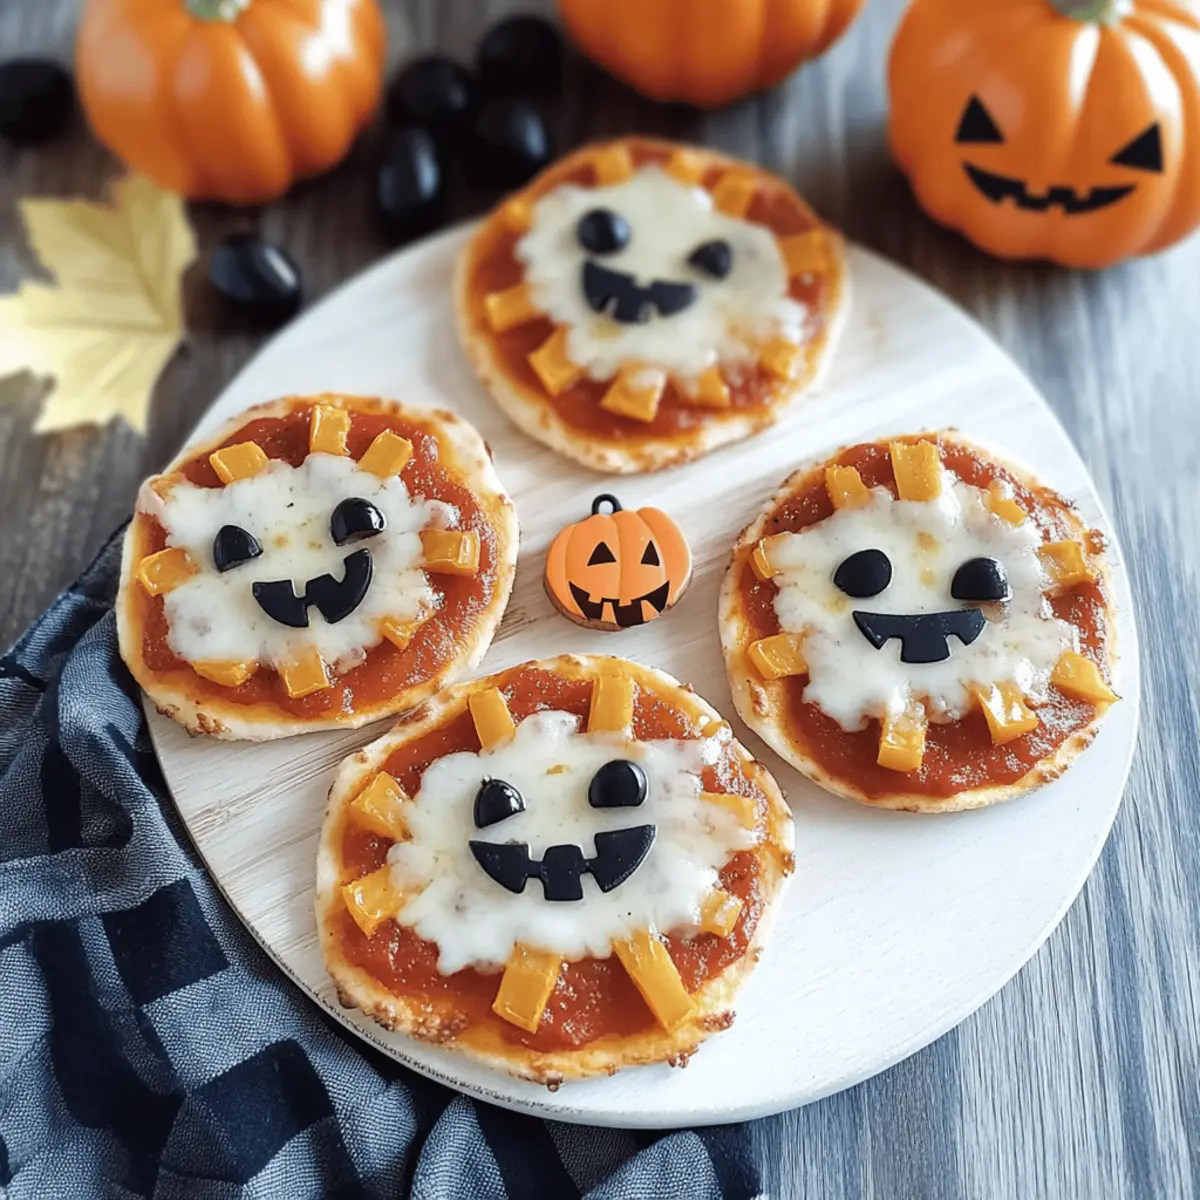
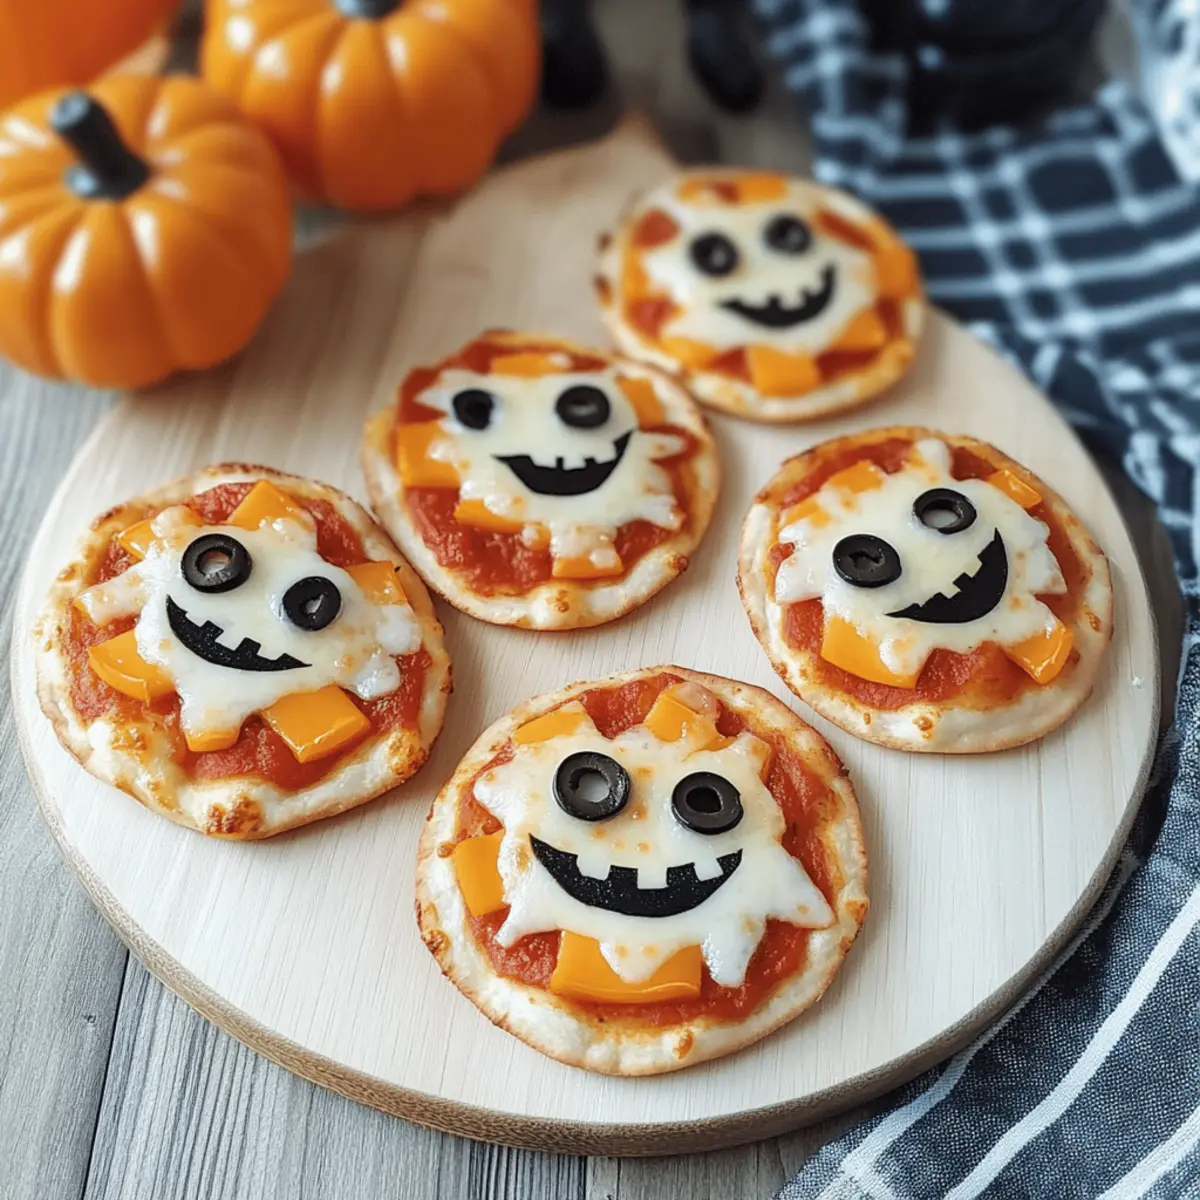
Now, it’s time to add cheese! Sprinkle shredded mozzarella generously over half of the pizzas, ensuring a good coverage to achieve that melty goodness. For the mummies, use pulled-apart string cheese to create fun, spooky layers. This step will add an enticing aroma as the pizza bakes.
Step 4: Decorate with Toppings
Get creative with your toppings! Decorate the mini pizzas with sliced black olives to form spider bodies, adding a fun thematic flair. Use thin strips of orange and green bell peppers to make them even more festive. If desired, sprinkle mini pepperoni on some pizzas for an extra layer of flavor.
Step 5: Bake to Perfection
Place your decorated mini pizzas into the preheated oven and bake them for 10-12 minutes. Keep an eye on them; you’re looking for a golden-brown crust and bubbling cheese that melts beautifully. The aroma wafting through your kitchen will get everyone excited for this Halloween treat!
Step 6: Cool and Garnish
Once the mini pizzas are done baking, remove them from the oven and let them cool for about 2 minutes. This cooling period makes them safer to eat. Before serving, top them off with freshly chiffonaded basil for an aromatic touch that completes your Mini Halloween Pizzas beautifully!
How to Store and Freeze Mini Halloween Pizzas
Fridge: Store leftover mini Halloween pizzas in an airtight container for up to 3 days. Layer parchment paper between pizzas to prevent sticking.
Freezer: For longer storage, freeze unbaked mini Halloween pizzas for up to two months. Wrap each pizza tightly in plastic wrap and then foil to maintain freshness.
Reheating: To reheat frozen mini pizzas, bake them straight from the freezer at 425°F (220°C) for about 15-20 minutes until heated through and crispy. Enjoy that gooey goodness again!
Mini Halloween Pizzas Variations
Feel free to get creative and personalize your mini Halloween pizzas to suit every taste and preference!
-
Dairy-Free: Use dairy-free cheese alternatives to keep it accessible for lactose-intolerant friends and family members. You won’t sacrifice flavor with all those toppings!
-
Veggie Lovers: Swap out any meat for a variety of colorful vegetables, like spinach, zucchini, or roasted red peppers. Every slice becomes a garden of flavors, perfect for the veggie enthusiasts!
-
Extra Spicy: Add diced jalapeños or crushed red pepper for a zesty kick that balances beautifully with the creaminess of the cheese. It’s a spooky surprise for those who love heat!
-
Gluten-Free: Opt for gluten-free mini crusts or try using polenta or cauliflower crust as a delicious alternative. These swaps keep everyone satisfied at the table.
-
Sweet Surprise: Introduce toppings like pineapple or figs with goat cheese for a sweet-savory twist. Your trick-or-treaters will love the unexpected sweet bite amidst the spooky fun!
-
Herb Infusion: Mix chopped fresh herbs like rosemary or oregano into your pizza sauce for an aromatic flavor boost that takes these mini pizzas to another level. It’s a great way to enhance the festive feel!
-
Fun Shapes: Instead of traditional rounds, use Halloween-shaped cookie cutters on tortilla bases for a unique twist. Think pumpkins, bats, or ghosts—making each pizza a spooky delight!
Every bite of these Mini Halloween Pizzas can be a unique adventure. Whatever you choose, it’s sure to be a delicious family experience, just like serving them with a side of crispy veggies for a festive feast!
What to Serve with Halloween Mini Pizzas
Create a Halloween-themed feast that excites the taste buds and sparks joy all around the table!
- Crispy Veggie Platter: A colorful array of fresh vegetables adds a crunchy contrast to the mini pizzas. Pair with a zesty dip for a refreshing touch.
- Spooky Fruit Skewers: Thread seasonal fruits like grapes and orange slices onto sticks for a fun treat. These sweet bites can balance out the savory flavors beautifully.
- Monster Juice: Whip up a fruity punch with orange juice, pineapple, and a splash of sparkling water. It’s a festive drink that’s sure to delight!
- Ghoulish Garlic Bread: Serve alongside some garlic breadsticks for a comforting complement filled with aromatic flavors, perfect for dipping into marinara or enjoying as a side.
- Witch’s Brew Soup: A light pumpkin soup drizzled with cream can add warmth and a cozy element, setting a seasonal tone for the meal.
- Halloween-themed Desserts: Finish your feast with spooky cupcakes or ghostly marshmallows. Delightful sweets will round out your Halloween with treats that charm both kids and adults!
Make Ahead Options
These Mini Halloween Pizzas are a fantastic option for meal prep, saving you precious time on busy days! You can prepare the pizza sauce, cheese, and toppings up to 24 hours in advance. Simply chop the vegetables and store them in airtight containers in the refrigerator, ensuring they stay fresh and ready to go. For the crusts, assemble the mini pizzas with sauce and cheese, then wrap tightly in plastic wrap and refrigerate. When you’re ready to bake, just pop them in a preheated oven for about 10-12 minutes until melty and golden. This way, you’ll enjoy delicious, festive pizzas with minimal stress, letting the whole family join in on the fun!
Tips for the Best Mini Halloween Pizzas
• Prepare Ahead: Chop and prepare your toppings in advance; keeping them chilled helps save time and makes decorating smoother with your tiny chefs.
• Avoid Sogginess: If using frozen mini pizza crusts, make sure to thaw them slightly so they bake evenly and stay crisp without becoming soggy.
• Ensure Even Baking: Rotate the baking sheet halfway through the cooking time; this helps achieve that golden, crispy crust on all sides of your mini Halloween pizzas.
• Explore Substitutions: For those with dietary restrictions, try using dairy-free cheese and loading up on extra veggies; it keeps the fun without compromising health!
• Get Creative: Encourage creativity in your family by suggesting different designs like veggie monsters or spooky faces, making each mini Halloween pizza unique and festive.
Mini Halloween Pizzas Recipe FAQs
Which mini pizza crusts are best to use?
Absolutely! You can use store-bought mini pizza crusts for convenience, which are usually found in the frozen section. If you’re feeling adventurous, homemade crusts made from scratch can add a personal touch! Just ensure they’re thin and sturdy to hold all your spooky toppings.
How should I store leftovers?
Leftover mini Halloween pizzas should be stored in an airtight container for up to 3 days in the refrigerator. I recommend layering parchment paper between the pizzas to avoid them sticking together—this way, you can enjoy your treats without any hassle!
Can I freeze mini Halloween pizzas?
Yes, you can! For longer storage, freeze unbaked mini Halloween pizzas for up to two months. Wrap each pizza tightly in plastic wrap, then cover with aluminum foil. When you’re ready to enjoy, bake them straight from the freezer at 425°F (220°C) for about 15-20 minutes, allowing them to become crispy and delicious once more.
What if my mini pizzas don’t bake evenly?
Very common! To achieve that perfect golden crust, rotate the baking sheet halfway through the cooking time. This helps all the pizzas cook evenly, avoiding any undercooked sections. Keep an eye on them, and don’t hesitate to give them a little shuffle!
Are there any dietary considerations I should keep in mind?
Definitely! For those with dietary restrictions or allergies, consider using gluten-free mini pizza crusts and dairy-free cheese alternatives. You can also load up on extra veggies for added flavor and nutrition, ensuring everyone at your table can enjoy these fun mini Halloween pizzas.
How can I make these pizzas more festive?
Getting creative is half the fun! Encourage your little chefs to use toppings in a way that forms spooky designs—think veggie monsters, pepperoni bats, or string cheese mummies. The more the merrier! Making it a fun decorating experience ties in perfectly with the Halloween theme.
Mini Halloween Pizzas: Fun Family Treats for Spooky Nights
Ingredients
Equipment
Method
- Preheat your oven to 425°F (220°C) and mist a baking sheet with olive oil spray.
- Spread 1-2 tablespoons of pizza sauce evenly across each crust.
- Sprinkle shredded mozzarella over half of the pizzas, and use string cheese for mummy decorations.
- Decorate with sliced black olives, bell pepper strips, and optional mini pepperoni.
- Bake for 10-12 minutes until crust is golden-brown and cheese is bubbling.
- Cool for 2 minutes, then top with chiffonaded basil before serving.