

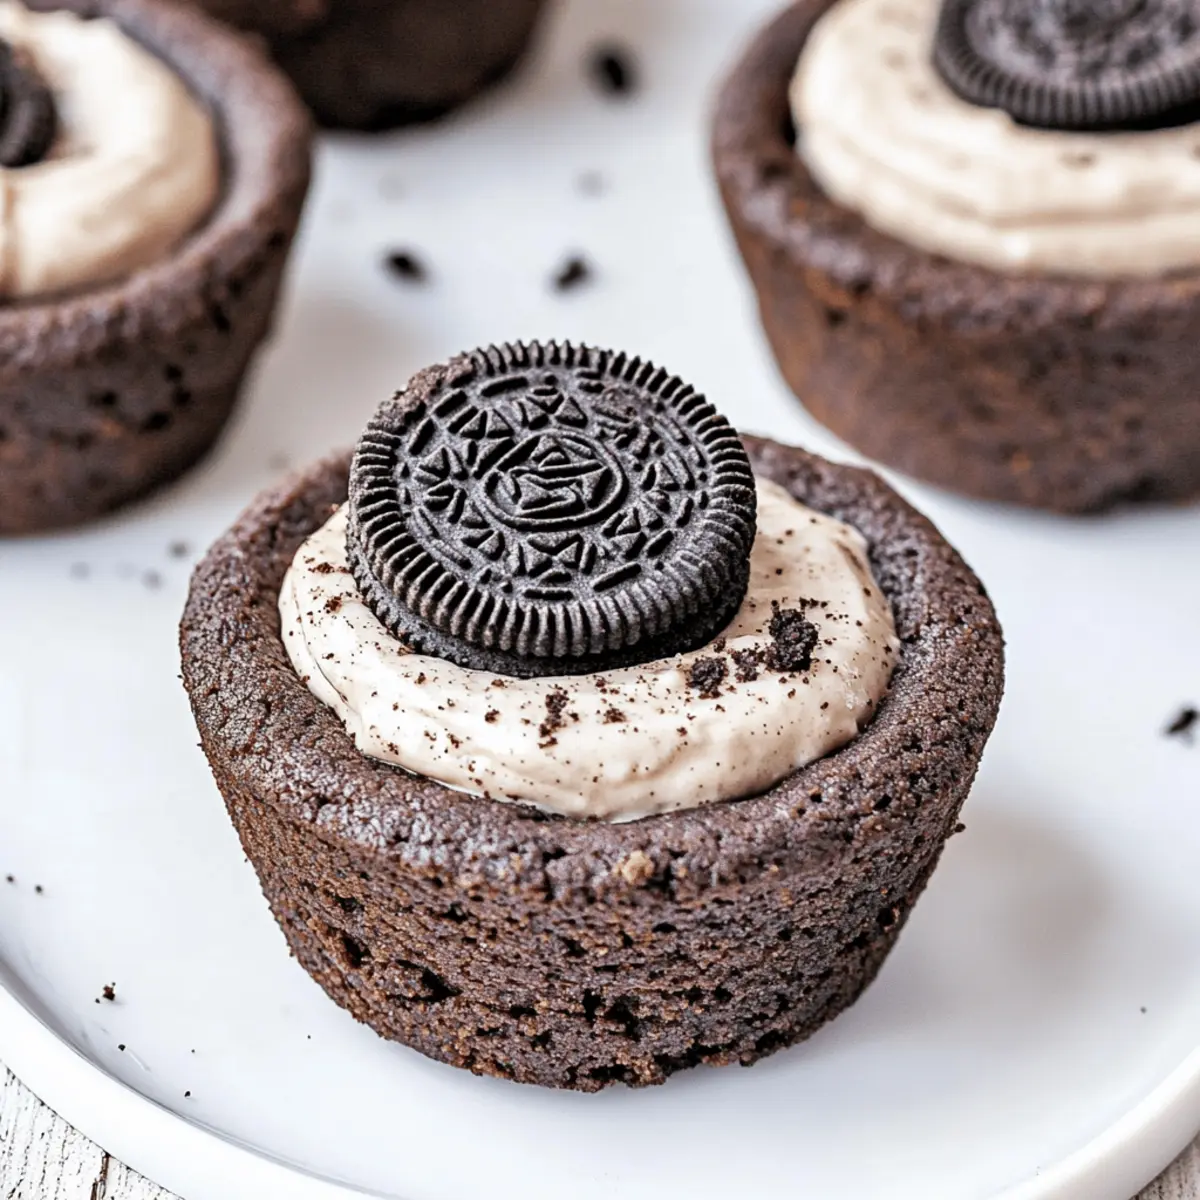
During a recent baking spree, I stumbled upon a delightful combination that sent my taste buds into overdrive: Oreo Cheesecake Cookie Cups. These little wonders are a sweet, creamy hug for your palate, featuring a soft chocolate cookie base and a luscious cheesecake filling that embodies the beloved Oreo flavor. The best part? They come together in no time, making them the perfect dessert for busy weeknights or last-minute gatherings. Whether you’re hosting a party or just craving something special, these easy treats are ideal for anyone who loves homemade desserts. Ready to unlock the secrets of these irresistible cookie cups? Let’s dive in!
Why are Oreo Cheesecake Cookie Cups irresistible?
Decadent Flavor Combination: These cookie cups blend rich, creamy cheesecake with the iconic taste of Oreos, creating a flavor explosion in every bite.
Quick and Easy: With simple ingredients and straightforward steps, you can whip up this dessert in no time, making it perfect for busy weeknights.
Versatile Delight: Feel free to customize by using different flavored Oreos, like the seasonal Pumpkin Spice or Mint for a fun twist.
Crowd-Pleasing Treat: Whether at a party or family gathering, these cookie cups are sure to impress and satisfy both kids and adults alike.
Perfectly Portable: Easy to store and take along, they make a fantastic dessert option for potlucks or picnics, just like Pecan Pie Cheesecake might!
No-Fuss Cleanup: Baking in muffin tins means minimal dishwashing, letting you focus on enjoying this scrumptious treat instead!
Oreo Cheesecake Cookie Cups Ingredients
Get ready to make these delightful treats with this easy-to-follow ingredient list!
For the Cookie Base
- All-Purpose Flour – Provides structure to the cookie cups; no substitutions necessary.
- Dutch-Processed Cocoa Powder – Adds deep chocolate flavor; can be substituted with regular cocoa powder, but flavor may be milder.
- Black Cocoa Powder – Enhances color and intense Oreo flavor; can be replaced with Dutch-processed cocoa, but it will be less pronounced.
- Baking Soda – Helps the cookies rise; essential for the recipe.
- Salt – Enhances overall flavor; do not omit.
- Unsalted Butter – Creates a rich flavor and texture; should be at room temperature for best results.
- Granulated Sugar – Adds sweetness and aids in cookie texture; no substitutions recommended.
- Light Brown Sugar – Contributes moisture and a hint of caramel flavor; can be replaced with dark brown sugar for a deeper flavor.
- Eggs – Provide structure and moisture; must be at room temperature for even mixing.
- Vanilla Extract – Adds aromatic flavor; use pure vanilla for the best taste.
For the Cheesecake Filling
- Heavy Whipping Cream – Whipped to create a light, airy filling; must be chilled before use.
- Cream Cheese – Offers a rich, creamy texture to the filling; use full-fat cream cheese for optimal flavor and texture.
- Granulated Sugar (for filling) – Sweetens the cheesecake filling; no substitutions necessary.
- Oreo Cookie Crumbs – Key to the filling’s flavor; can substitute with crushed Oreo cookies if pre-made crumbs aren’t available.
These Oreo Cheesecake Cookie Cups will be the star of your sweet treats, making them perfect for anyone who loves homemade desserts!
Step‑by‑Step Instructions for Oreo Cheesecake Cookie Cups
Step 1: Prepare the Oven and Muffin Tins
Preheat your oven to 350°F (175°C) and prepare two regular-sized muffin tins by spraying them lightly with cooking spray. This ensures that your Oreo Cheesecake Cookie Cups release easily after baking, maintaining their shape and structure for the best presentation.
Step 2: Mix Cookie Ingredients
In a medium bowl, whisk together the all-purpose flour, Dutch-processed cocoa, black cocoa, baking soda, and salt until well combined. In a separate large bowl, beat the room temperature butter along with granulated and brown sugars using an electric mixer until light and fluffy. Add in the eggs and vanilla extract, mixing well, then slowly incorporate the dry ingredients until just combined.
Step 3: Bake Cookie Cups
Scoop the cookie dough into the prepared muffin tins, pressing down gently to flatten each scoop into a cup shape. Bake in the preheated oven for 10 to 13 minutes, until the edges are set but the centers are still soft. When they’re done, quickly press a small container (like a shot glass) into the center of each cookie to form a well for the cheesecake filling.
Step 4: Cool the Cookie Cups
Allow the cookie cups to cool in the muffin tins for about 10 minutes. This resting period helps them firm up slightly. Once cool enough to handle, gently remove them from the tins and transfer them to a wire rack to cool completely. Ensure they’re completely cooled before adding the cheesecake filling for the best results.
Step 5: Prepare Cheesecake Filling
While the cookie cups cool, prepare the cheesecake filling. In a chilled bowl, whip the heavy cream using an electric mixer until stiff peaks form, creating a light and airy texture. In a separate bowl, beat the cream cheese with granulated sugar until the mixture is smooth and creamy. Gradually fold in the prepared Oreo cookie crumbs, then gently incorporate the whipped cream until just combined.
Step 6: Assemble Cookie Cups
Once the cookie cups are completely cool, pipe or spoon the cheesecake filling into each well until it’s generously heaped. The rich, creamy filling will complement the soft chocolate cookie base, creating a delightful Oreo Cheesecake Cookie Cup. To enhance their appearance, consider sprinkling a few additional Oreo crumbs on top.
Step 7: Chill to Set
After assembling your Oreo Cheesecake Cookie Cups, refrigerate them for 1 to 2 hours, allowing the filling to set and the flavors to meld beautifully. This chilling step also ensures a perfect texture, making your cookie cups even more enjoyable when it’s time to serve.
Step 8: Serve and Enjoy
Once set, your Oreo Cheesecake Cookie Cups are ready to be enjoyed! Serve them chilled as a delectable dessert at parties, family gatherings, or simply as a delightful treat any day of the week. The combination of creamy cheesecake and chocolatey cookie will surely wow every taste bud!
Oreo Cheesecake Cookie Cups Variations
Feel free to personalize your Oreo Cheesecake Cookie Cups with these creative twists that will elevate your dessert game!
- Peanut Butter Twist: Mix in some creamy peanut butter with the cheesecake filling for a delightful nutty flavor that pairs perfectly with Oreos.
- Minty Fresh: Swap in Mint Oreos for a refreshing twist that brings a burst of cool mint flavor to each decadent bite. It’s like a dessert version of your favorite minty treat!
- Chocolate Overload: Amplify the chocolate goodness by adding mini chocolate chips to the cookie dough or the cheesecake filling for an extra-rich texture.
- Almond Extract: A splash of almond extract in the cheesecake mixture brings a delightful depth of flavor to harmonize beautifully with the Oreo base. It’s a classic twist that might surprise your taste buds!
- Lower-Calorie Option: Use reduced-fat cream cheese and a sugar substitute in the filling for a lighter version without sacrificing all the fabulous flavors.
- Caramel Drizzle: Drizzle some salted caramel on top before serving for a sweet and salty experience that will take your cookie cups over the top!
- No-Bake Variation: For a quick assembly, skip the baking step and use store-bought cookie cups instead. Fill them up with your cheesecake mixture for an even easier dessert! You can also check out my No-Bake Oreo Cheesecake recipe for more ideas!
- Rainbow Fun: Make them colorful by incorporating rainbow sprinkles into the cheesecake filling for a hit of fun and festiveness that’s perfect for parties!
Each of these variations can transform the familiar into something exciting while still preserving the fond memories connected with Oreo treats. Don’t hesitate to get creative and make these cookie cups uniquely yours!
How to Store and Freeze Oreo Cheesecake Cookie Cups
Fridge: Store the Oreo Cheesecake Cookie Cups in an airtight container in the refrigerator for up to 3 days. This helps maintain their creamy texture and delightful flavors.
Freezer: For longer storage, wrap the cookie cups tightly in plastic wrap or aluminum foil, then place them in an airtight container to prevent freezer burn. They can be frozen for up to 4 weeks.
Thawing: To enjoy frozen cookie cups, simply transfer them to the refrigerator and allow them to thaw for several hours or overnight. This keeps the textures intact and flavors fresh.
Reheating: If you’d like to enjoy them warm, place the thawed cookie cups in the microwave for a few seconds to soften slightly before indulging in these sweet treats!
What to Serve with Oreo Cheesecake Cookie Cups
These luscious little cookie cups are a perfect ending to any meal, but pairing them with the right sides can elevate your dessert experience even more!
- Fresh Berries: The tartness of strawberries or raspberries wonderfully contrasts the sweetness of the cheesecake, adding a delightful pop of freshness to each bite.
- Vanilla Ice Cream: A cool scoop complements the rich flavors, creating a classic pairing that feels indulgent and satisfying. The creaminess of the ice cream enhances the cookie cup’s texture beautifully.
- Chocolate Sauce: Drizzling a bit of chocolate sauce over the top adds extra decadence and turns an already delightful treat into a chocolate lover’s dream.
- Espresso or Coffee: The boldness of a rich coffee beautifully cuts through the sweetness, creating a perfect balance for an after-dinner treat.
- Whipped Cream: A dollop of lightly sweetened whipped cream adds a light touch to the cookie cups, enhancing their creamy filling while presenting a gorgeous aesthetic.
- Chocolate-Covered Pretzels: Their salty crunch provides a fun texture contrast, making a playful addition that’s both sweet and salty. After a rich dessert, this combination will keep your palate intrigued.
- Milkshake: A creamy, thick milkshake is whimsical and fun, blending seamlessly with the Oreo flavor while satisfying your sweet tooth!
- Almonds or Pecans: Chopped nuts introduce a gorgeous crunch to your plate, offering a nutty flavor that pairs well with the sweetness of the cookie cups.
- Mint Tea: A warm cup of mint tea rounds out the experience with its soothing qualities, refreshing your palate after the indulgence of dessert.
Make Ahead Options
These Oreo Cheesecake Cookie Cups are perfect for busy home cooks looking to save time without sacrificing flavor! You can prepare the cookie cups up to 24 hours in advance; simply bake and cool them before storing in an airtight container. For the cheesecake filling, mix it up and refrigerate it for up to 3 days. When you’re ready to serve, just pipe the filling into the cooled cookie cups and let them chill for 1-2 hours to set. This way, you’ll have delightful, creamy treats ready to impress, all while keeping the flavors just as delicious as when freshly made!
Expert Tips for Oreo Cheesecake Cookie Cups
-
Room Temperature Ingredients: Always ensure your butter and eggs are at room temperature; this helps achieve that perfect, fluffy consistency for your cookie base.
-
Avoid Overbaking: Keep an eye on your cookie cups while baking; they should remain soft in the center for the best texture. Overbaking leads to dry cookie cups!
-
Chill the Filling: Make sure to chill your heavy cream before whipping; this results in a light and airy cheesecake filling that pairs beautifully with the Oreo base.
-
Cool Completely: Allow your cookie cups to cool completely before adding the cheesecake filling. This step ensures the filling stays intact and doesn’t melt into the cookie.
-
Variations Galore: Don’t hesitate to explore different Oreo flavors! Double-Stuf, Mint, or even seasonal varieties can instantly elevate your Oreo Cheesecake Cookie Cups.
-
Presentation Matters: Add extra cookie crumbs on top of the filled cups for a beautiful presentation, making your treats not just delicious but visually appealing too!
Oreo Cheesecake Cookie Cups Recipe FAQs
What type of Oreos should I use for the cookie cups?
I recommend using regular Oreo cookies for the best flavor in your Oreo Cheesecake Cookie Cups. However, feel free to experiment with Double-Stuf or different flavors like Mint or Peanut Butter for a unique twist!
How should I store my leftover cookie cups?
Store the Oreo Cheesecake Cookie Cups in an airtight container in the refrigerator for up to 3 days. Make sure they’re well-sealed to keep them fresh and maintain their creamy filling. You can enjoy them chilled or let them sit at room temperature for a few minutes before serving.
Can I freeze the Oreo Cheesecake Cookie Cups?
Absolutely! To freeze, wrap each cookie cup in plastic wrap and place them in an airtight container. They can be stored in the freezer for up to 4 weeks. When you’re ready to enjoy them, transfer them to the fridge to thaw for several hours or overnight before serving.
What if my cookie cups are too crumbly after baking?
If your cookie cups turn out crumbly, it could be due to overbaking or not incorporating the butter and sugars enough. To fix this, make sure to watch them closely while they bake, aiming to remove them while they’re still soft in the center. If they do crumble, serve them as a parfait with some cheesecake filling drizzled on top!
Can I make these cookie cups gluten-free?
Certainly! You can substitute all-purpose flour with a 1:1 gluten-free flour blend. Be sure to check that the Oreo cookies you choose are also gluten-free, as some varieties may contain gluten. This way, everyone can enjoy these delicious Oreo Cheesecake Cookie Cups!
What dietary considerations should I be aware of when serving?
These cookie cups contain common allergens such as dairy, eggs, and gluten due to the ingredients. If you’re serving guests with allergies, consider using lactose-free cream cheese and egg substitutes to accommodate their needs. Always check labels and ask your guests for any dietary restrictions!
Indulge in Oreo Cheesecake Cookie Cups That Wow Every Bite
Ingredients
Equipment
Method
- Preheat your oven to 350°F (175°C) and prepare two regular-sized muffin tins by spraying them lightly with cooking spray.
- In a medium bowl, whisk together the all-purpose flour, Dutch-processed cocoa, black cocoa, baking soda, and salt until well combined.
- In a separate large bowl, beat the room temperature butter along with granulated and brown sugars using an electric mixer until light and fluffy. Add in the eggs and vanilla extract, mixing well, then slowly incorporate the dry ingredients until just combined.
- Scoop the cookie dough into the prepared muffin tins, pressing down gently to flatten each scoop into a cup shape. Bake in the preheated oven for 10 to 13 minutes, until the edges are set but the centers are still soft.
- Allow the cookie cups to cool in the muffin tins for about 10 minutes. Once cool enough to handle, gently remove them from the tins and transfer them to a wire rack to cool completely.
- In a chilled bowl, whip the heavy cream using an electric mixer until stiff peaks form. In a separate bowl, beat the cream cheese with granulated sugar until smooth and creamy. Gradually fold in the Oreo cookie crumbs, then gently incorporate the whipped cream until just combined.
- Once the cookie cups are completely cool, pipe or spoon the cheesecake filling into each well until it’s generously heaped.
- After assembling, refrigerate them for 1 to 2 hours, allowing the filling to set.
- Serve your Oreo Cheesecake Cookie Cups chilled at parties or gatherings.